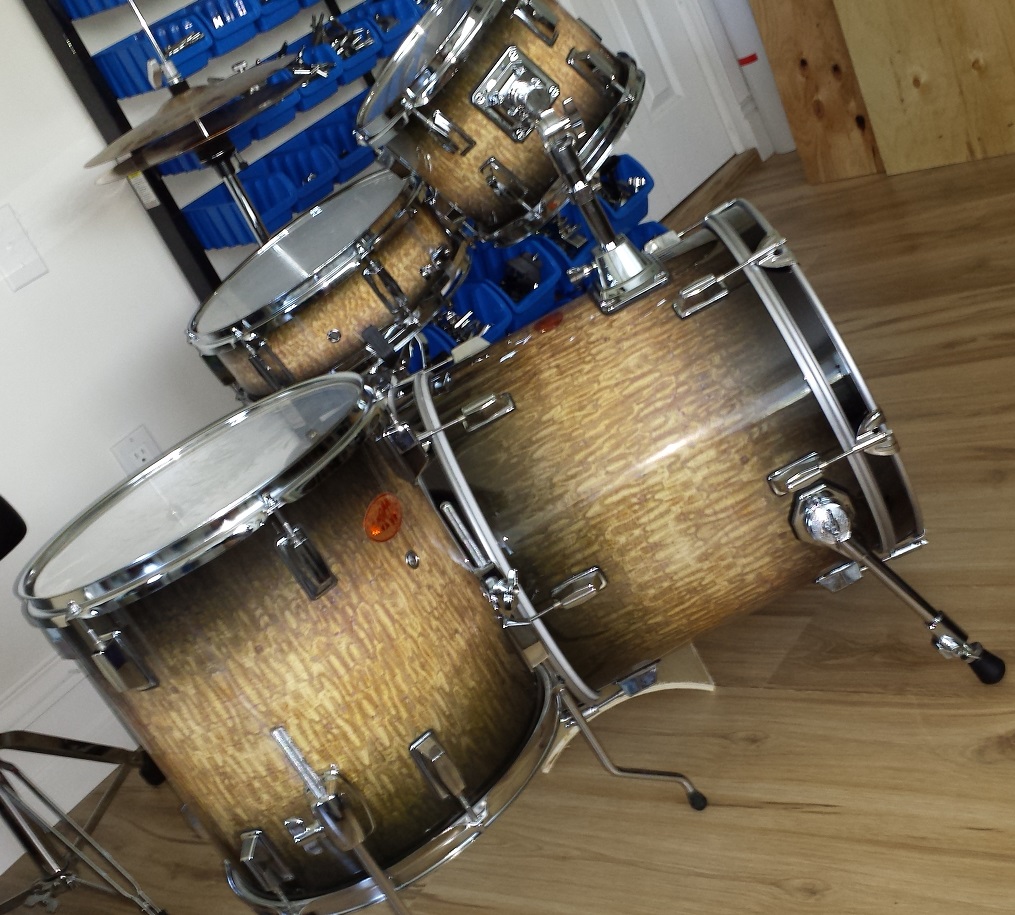
Introduction

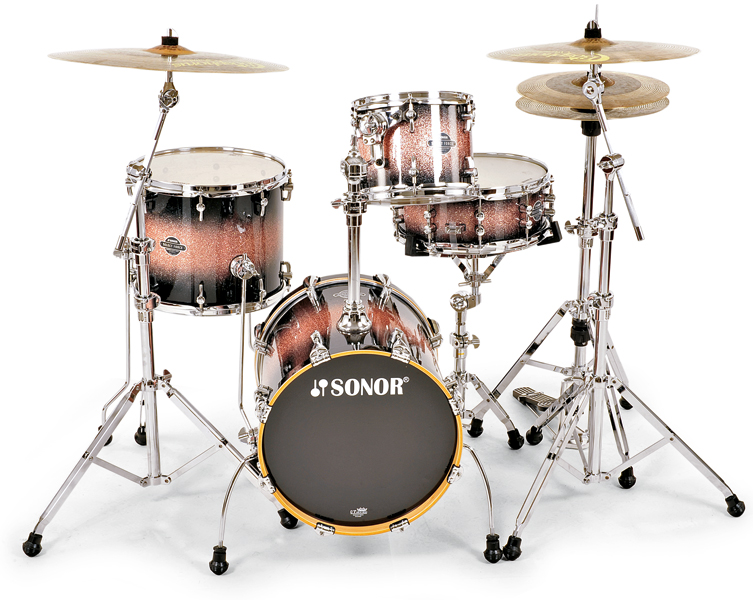
Last time we made a bop kit with a 16″ bass drum, it was largely inspired by Yamaha’s HipGig. The DIY Mini Bop Drum Kit shared the HipGig’s characteristic of mounting the snare drum and both toms to the bass drum. This time we’re staying a bit closer to the beaten path and making a kit that more resembles Ludwig’s Breakbeats and Sonor’s Safari/Jungle kits. The notable exception being a 13″ snare drum rather than a full size 14″. Reason being that a 13″ should be just a tad easier to tame so as to not overpower the rest of the kit.
Aforementioned snare drum is already in progress in a separate article entitled; “DIY Snare Drum Restomization“.
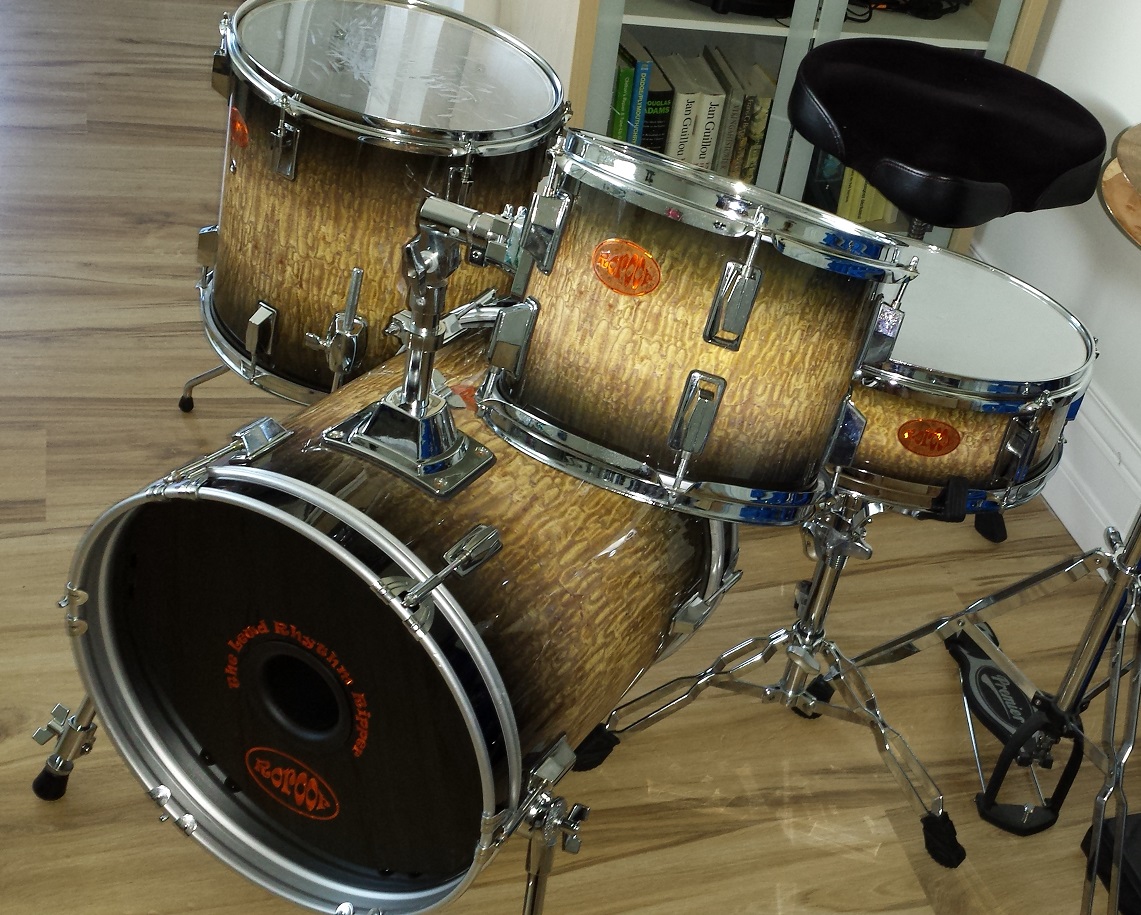
Our DIY Jungle Kit, “The Lewd Rhythm Ripper” will feature a 15″ deep bass drum. Right in between Ludwig’s 14″ depth and Sonor’s 16″. The floor tom follows Ludwig’s lead at 13″ X 13″ and the tom tom is yet to be decided whether it will be 10″ X 7″ like Ludwig’s or 10″ X 8″ like Sonor’s. Maybe we’ll go with 10″ X 7.5″.
Further we plan on installing regular telescoping ratchet spurs from Drumfactorydirect.com on the bass drum, like in the Breakbeats example. The bass drum will also have a standard single 7/8″ receiving mount seen on both the “model” kits. Tom-tom mount is yet to be decided. All the shell interiors will have “Gretsch-style” silver coloured sealer. The exterior finish chosen is a real eye-catching wrap from Bum Wrap Drum Company, titled “Tamo Fade 2”.
-Click any image for a full size view –
Prepping the Bass Drum Shell
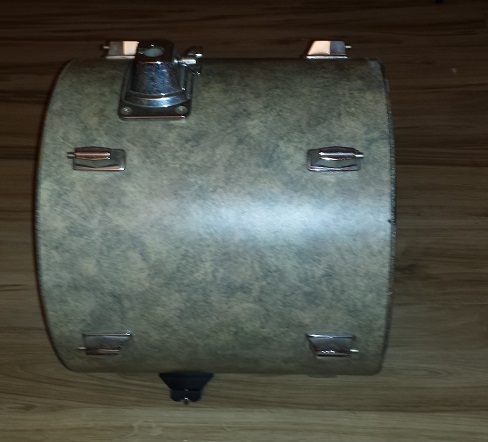
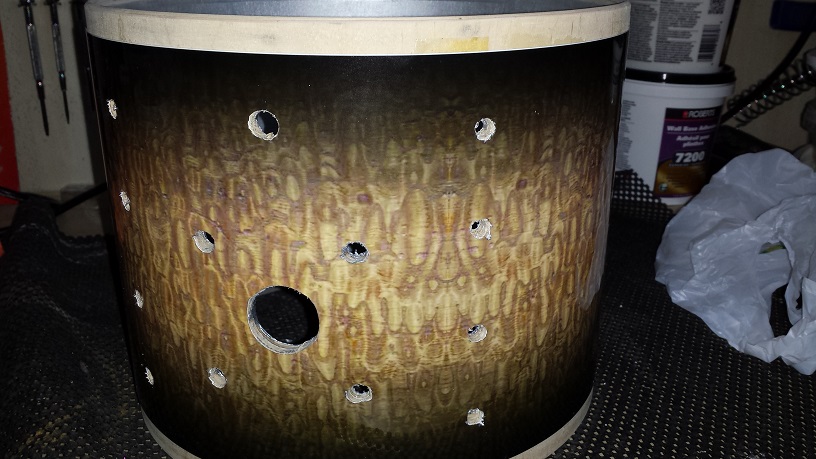
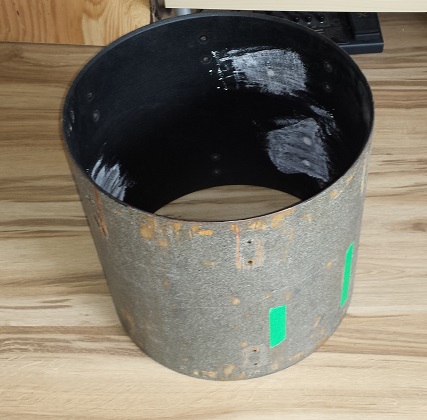
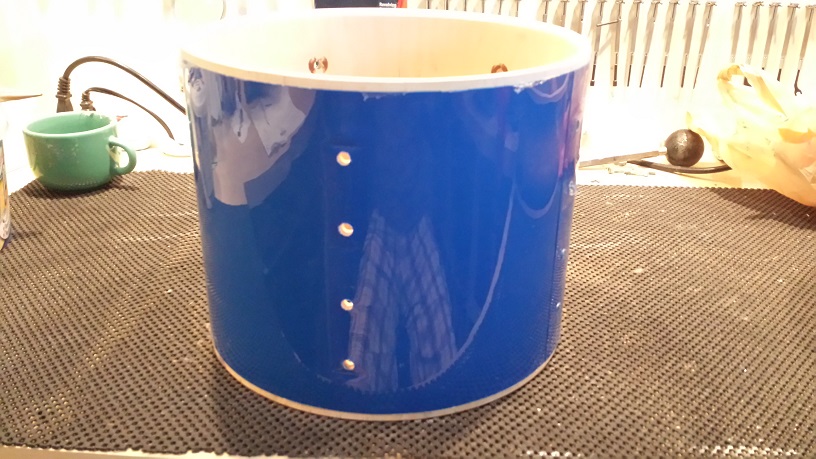
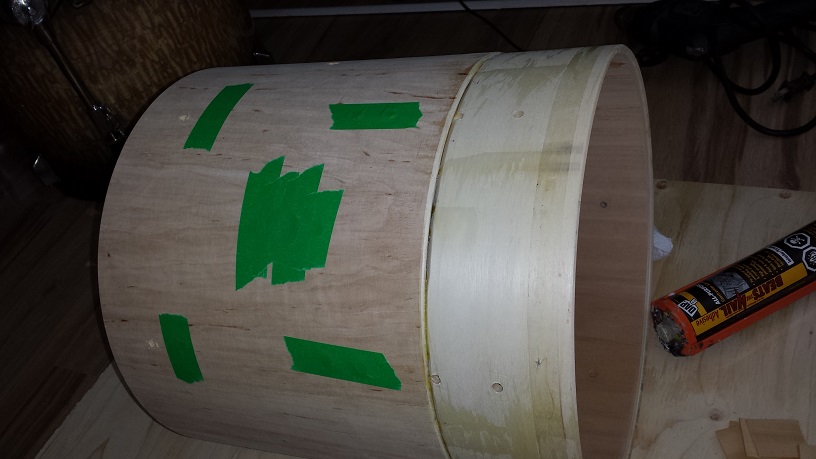
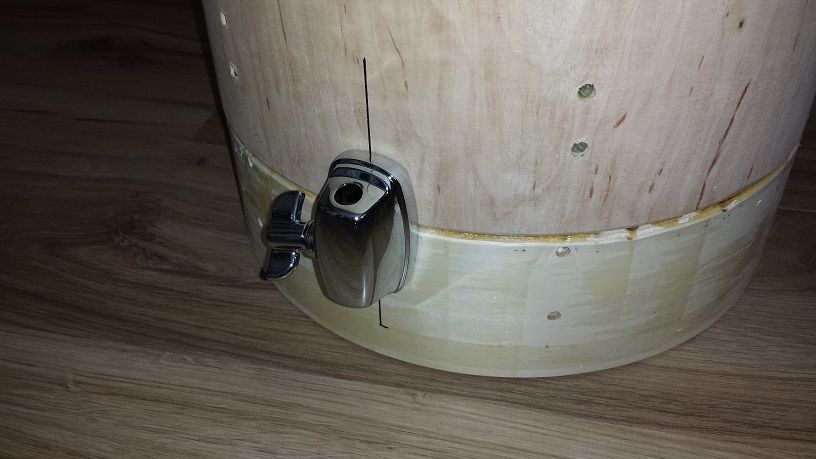
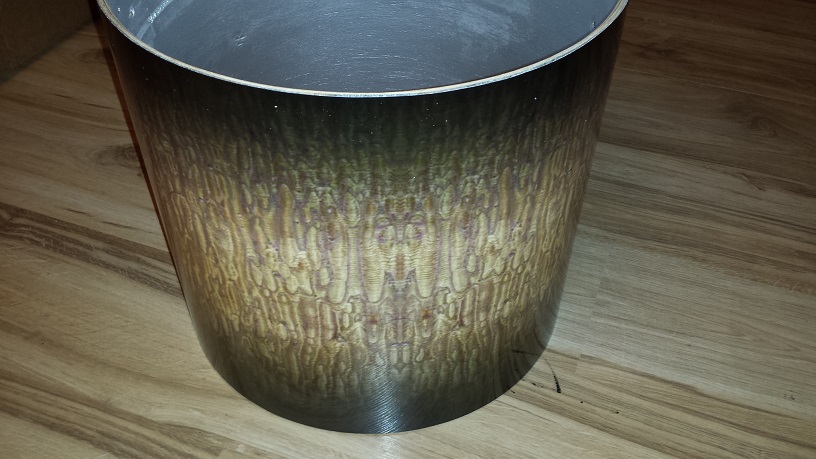
Some time ago I acquired this already converted floor tom. It’s painted flat black inside and wrapped with furniture laminate on the outside. The top mount will get re-used in our DIY Jungle Kit. The rest of the hardware is destined for the treasure box. I’m hoping the laminate wrap won’t be too much of a bear to remove.
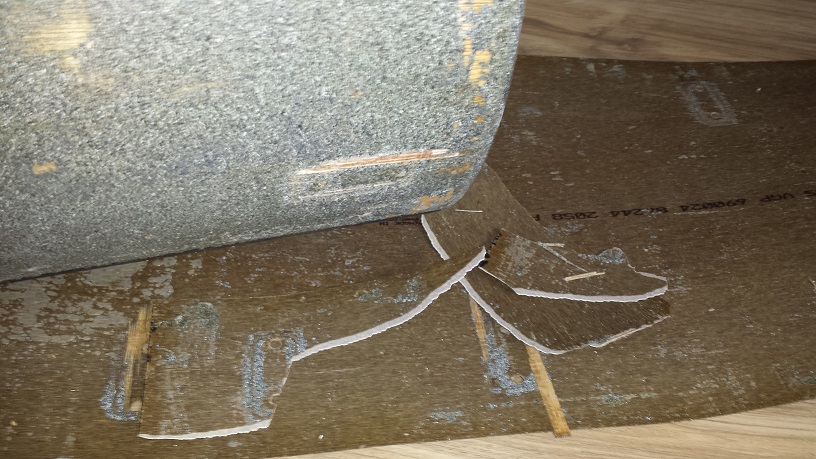
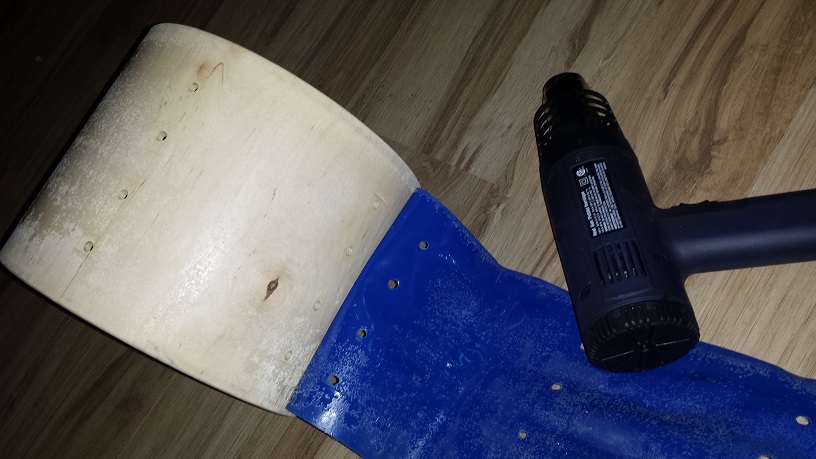
With the hardware gone and aided by a heat gun and a fair bit of patience the Formica “wrap” came off without too much hassle. Next step is to patch any un-needed holes. For this I use a mix of drywall compound and PSA (Fortified white glue). First I cover the holes on the outside with masking tape and then patch from the inside. Let dry for a few hours. It will shrink. Then remove the masking tape and patch again from both sides. This formula dries very hard and surprisingly strong.
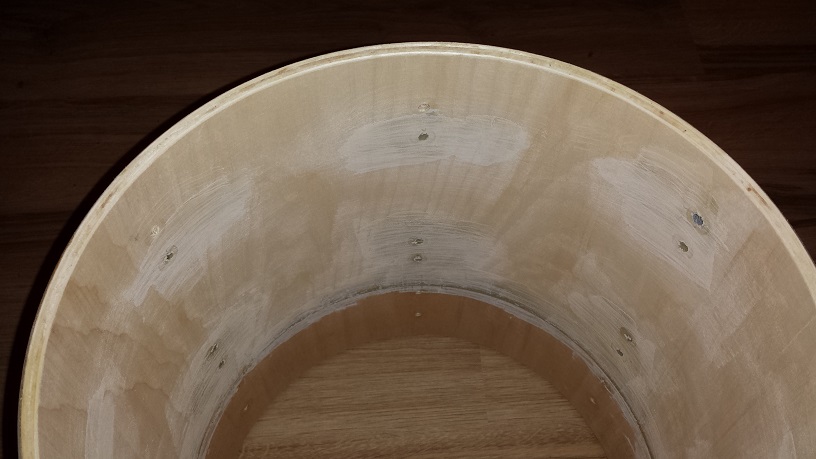
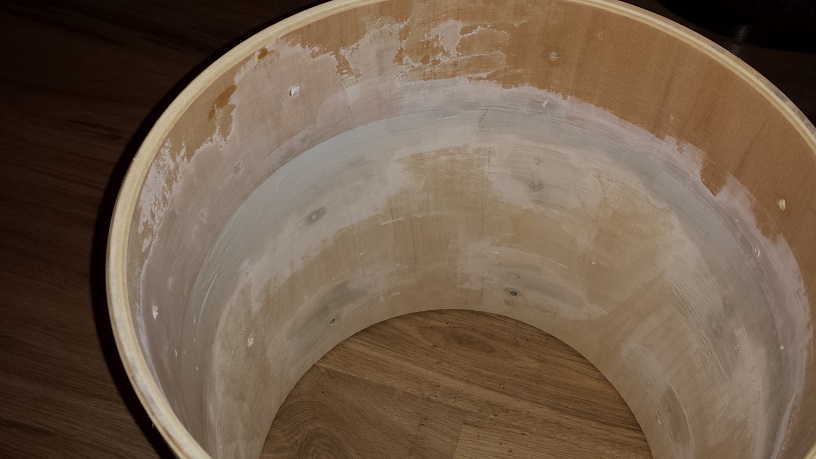
Once fully dried the patches get a quick sanding. The existing black finish on the inside of the bass drum has a slight texture to it. A little bit like “Zola coat” or “Accousti-coat”. Therefore we sand it very lightly with coarse paper in an attempt to keep the texture somewhat uniform.
The shell appears to be mahogany or perhaps lauan. If it had eight lugs per side I would have guessed it to be an early eighties Export with “Accousti-coat”, but since it’s a six-lugger, I have no clue. Regardless I do like the mahogany with texture combo for a smaller size bass drum.
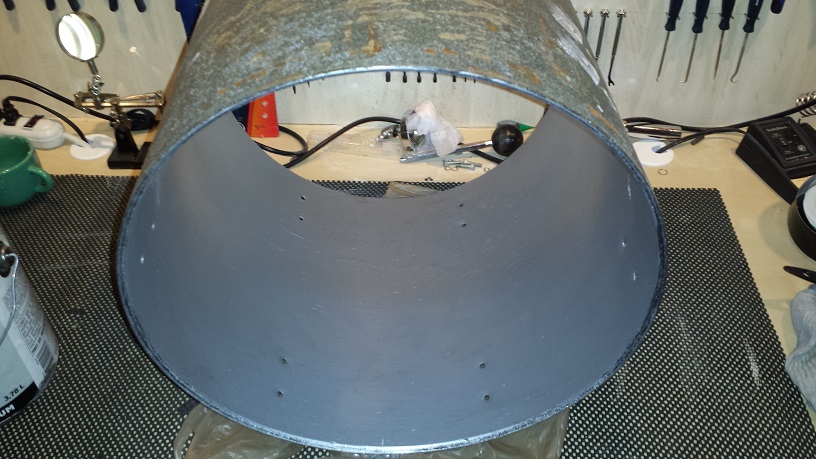
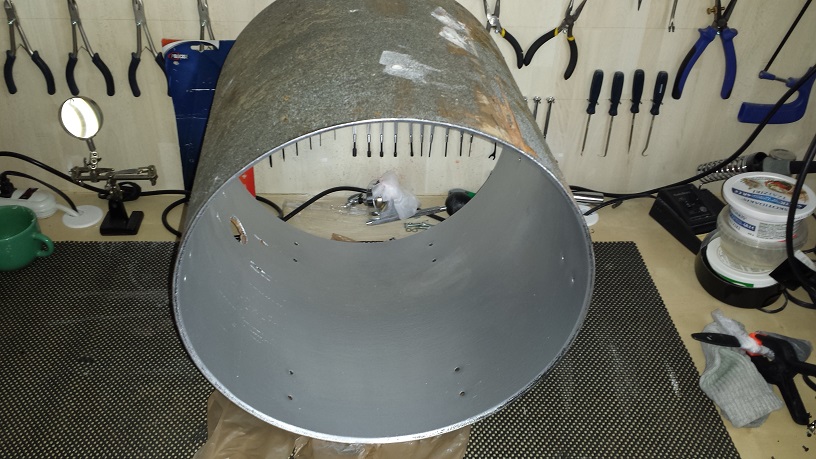
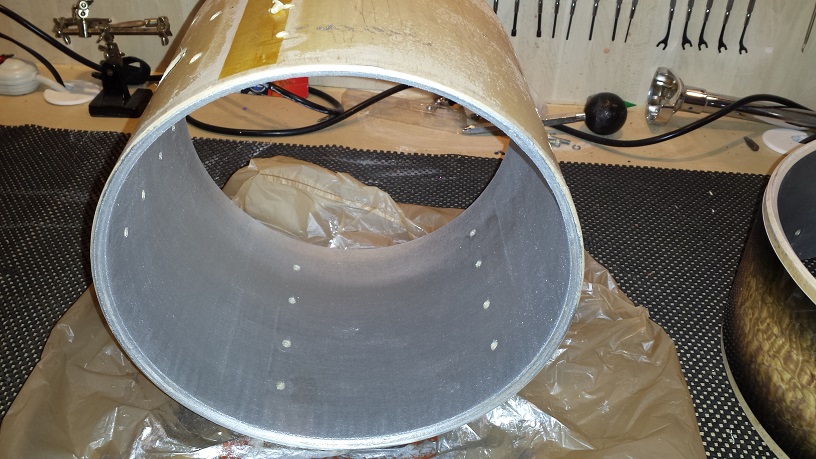
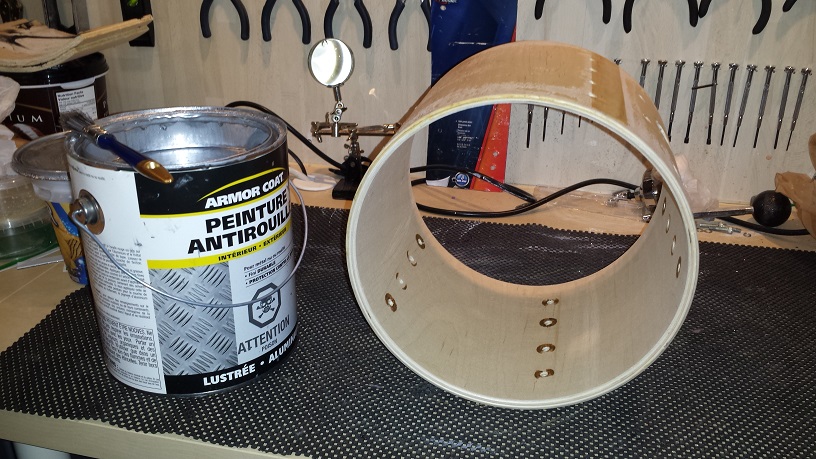
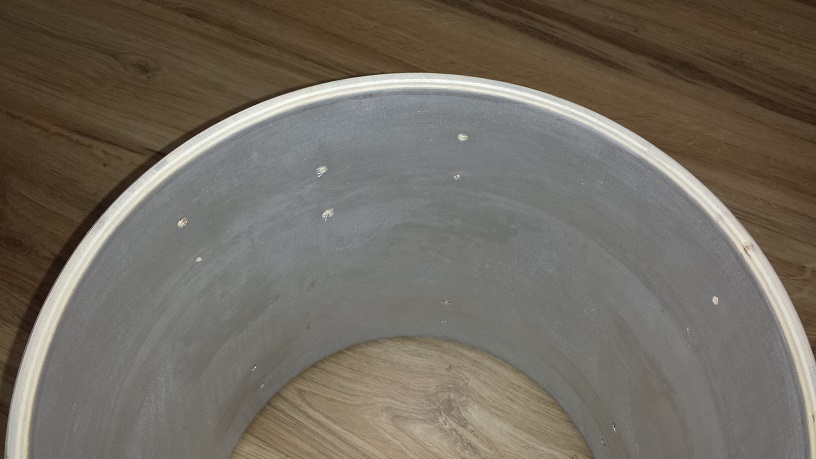
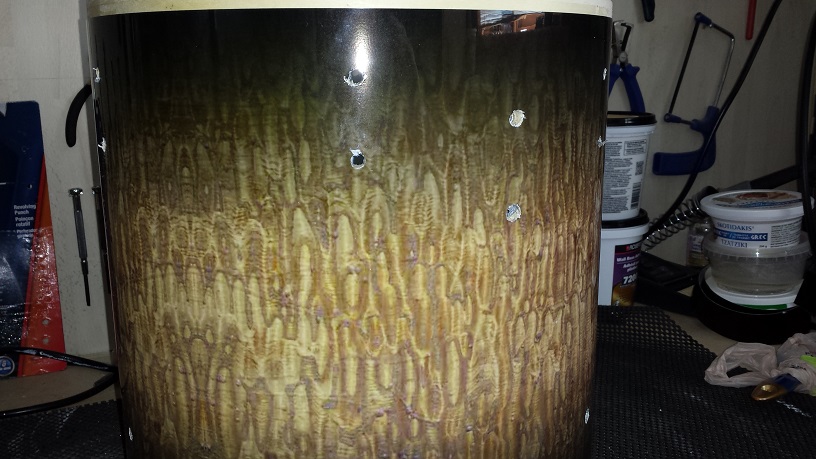
Shake up some gloss aluminum rust paint and apply an initial coat to the inside of the shell. Once dry, add another coat and leave to dry for a couple of days.
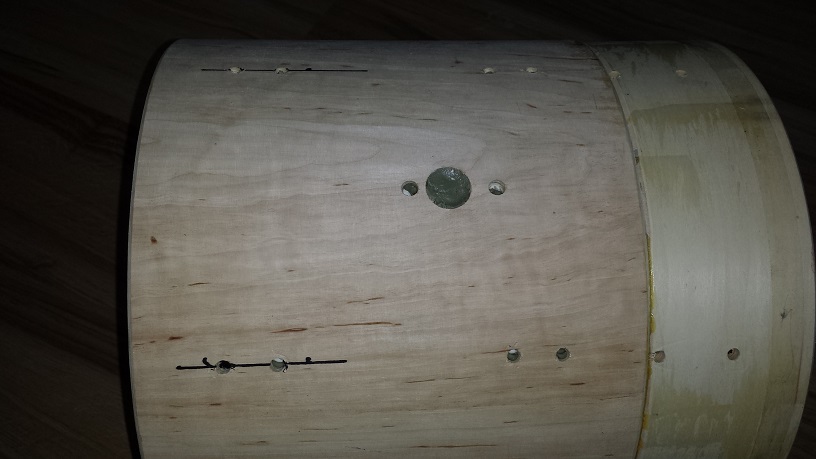
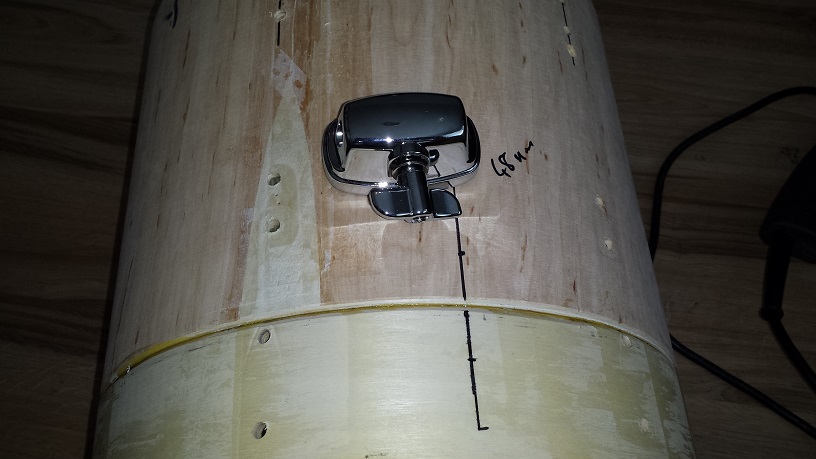
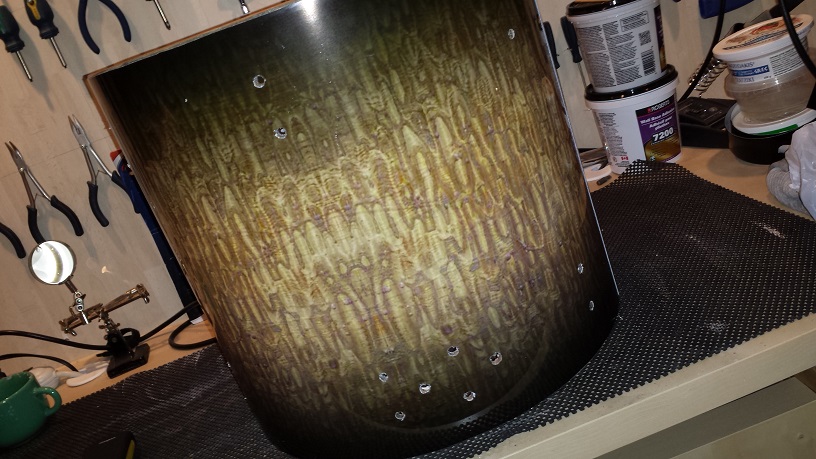
Once the paint is dry we can start drilling holes. Whatever riser arrangement we decide on will likely require some cavities as will the bass drum spurs. Depending on lug selection we may also need some additional holes for them too. Spurs will be the first order of business.

This time around, neither the treasure box, parts closet, or basement turned up any spurs that suited this project. Also I was not able to scrummage three matching tom leg brackets. As much as I’m cheap, it was time to shop for some new parts. Being cheap I tend to take my time shopping around. Besides there are worse ways to spend an hour or two than surfing around for drum parts. After much comparison I decided to get the parts from Drumfactorydirect.com. Not only do they have a great site to browse, their pricing structure suited my frugal personality and they’re super nice to deal with as well.
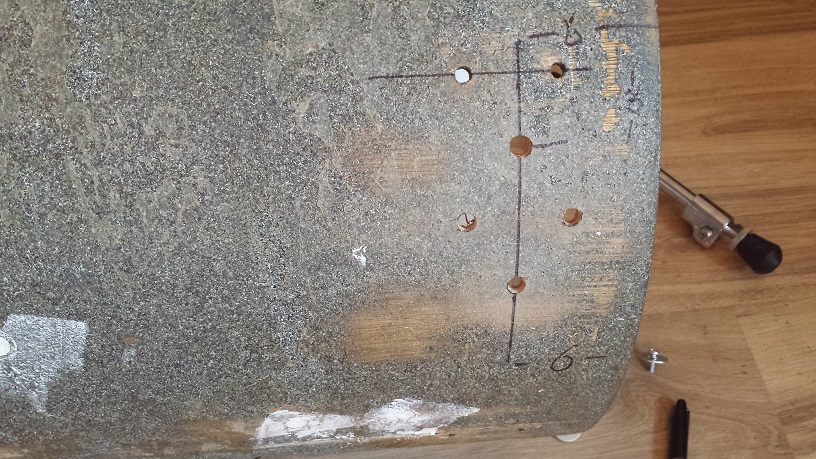
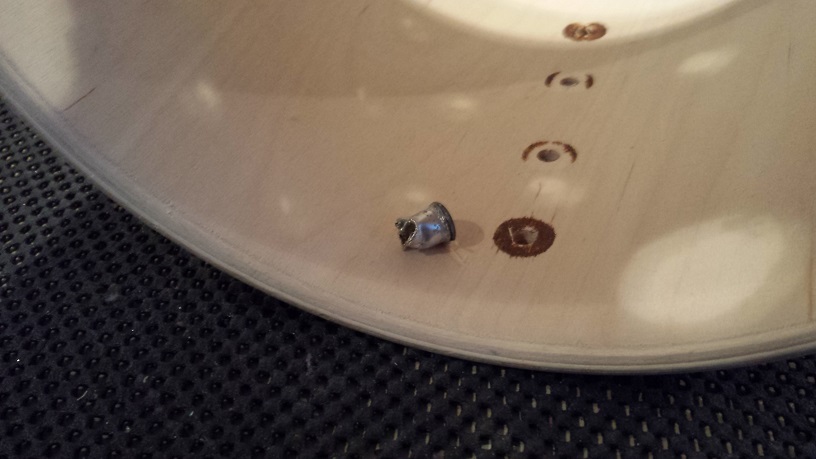
Like most, I’m not a huge fan of endless measuring and marking. However, I’m even less a fan of patching and re-drilling, so I do practice “measure twice – drill once”. After laying out a grid of lines, load a corded drill with a brad point bit. Why corded? Most cordless drills don’t spin fast enough to make a neat hole in hard woods. Drill from the outside, at full speed with very little pressure. Once the point pokes through to the inside, drill the rest of the hole from the inside. This way you’ll never break through the last ply, thus avoiding splintering.
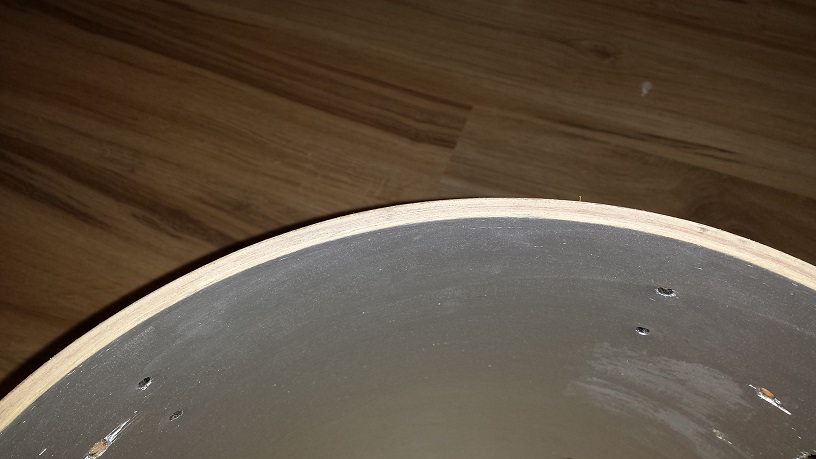
While the bearing edges were already standard 45/45 and not in really bad shape I still re-cut them just to clean them up a bit. Set the bit height to just shave off a millimetre or so. Then a light sanding to smooth the entire edge surface and soften the top of the peak just a smidgeon.
DIY Jungle Kit

Prepping the Tom Tom Shell
Some digging around in the various areas of the house containing drums turned up a 7.5″ deep 10″ tom. Remember I mentioned earlier that maybe we’ll split the difference between Ludwig’s 7″ and Sonor’s 8″? Coincidentally this may have originated from the same kit as the snare drum. It has the same stubborn vent grommet and similar blue wrap adhered across the entire surface of the shell.
After removing all the hardware, the vent grommet gets pried out from the outside, then mutilated enough to push it through to the inside and remove it. Since the wrap is adhered across the entire surface, we heat it up with a heat gun, a section at a time and pull each section off the shell. Repeat until removed.
Shake up the paint can with our gloss aluminum rust paint and apply an initial coat of sealer. This little tom was quite thirsty so it actually took longer to paint on the first coat than the bass drum. Leave to dry overnight. After following up with an additional coat and 24 hour dry time, we can move on to the bearing edges.
This tom tom came with overly rounded bearing edges, so we need to re-cut them closer to standard 45/45 degree edges. using the same setting as with the bass drum, cut the inside edge only as the outside round over is just about right. Finish with sanding them smooth and taking the sharpness out of the peak.

Prepping the Floor Tom Shell
OK, Mr Cheap who makes drum kits out of orphans… What are the chances of obtaining an orphan 13″ X 13″ tom, at a decent price?
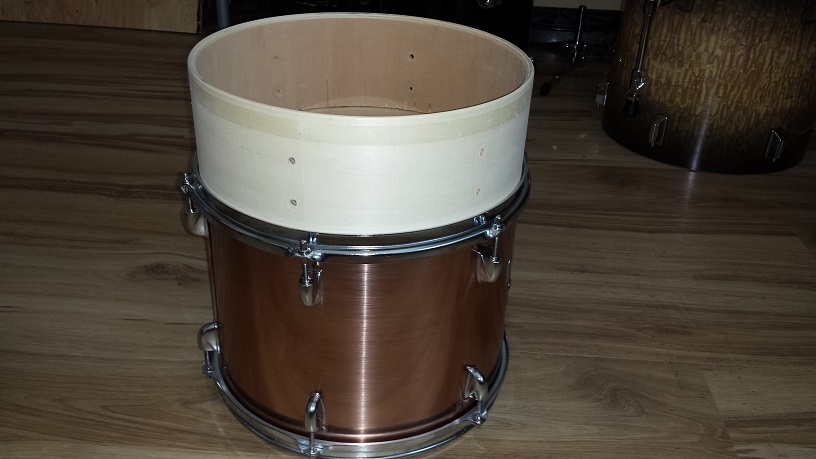
-Probably slim to none. In fact I won’t even bother attempting to find one. Instead we’ll adopt a trick from another article on this site; DIY Joining/Fusing drum shells. In that article we joined two 22″ Bass drum shells to end up with a 32″ deep kick. For this DIY Jungle kit, we’re going to fuse a portion of a 13″ rack tom to a complete 13″ rack tom and thus end up with 13″ depth.

After disassembling the tom, stack the tom portion on top of the complete tom shell. Measure and mark at desired depth. I cut the shell portion down by rotating it in the table saw with the fence as a guide.
Next we cut a “reverse” bearing edge on the freshly cut side of the partial tom shell. This way the partial shell fits in the tom shell with a larger surface for adhesion than if we had simply cut both straight. Stack and check that the depth is as desired.
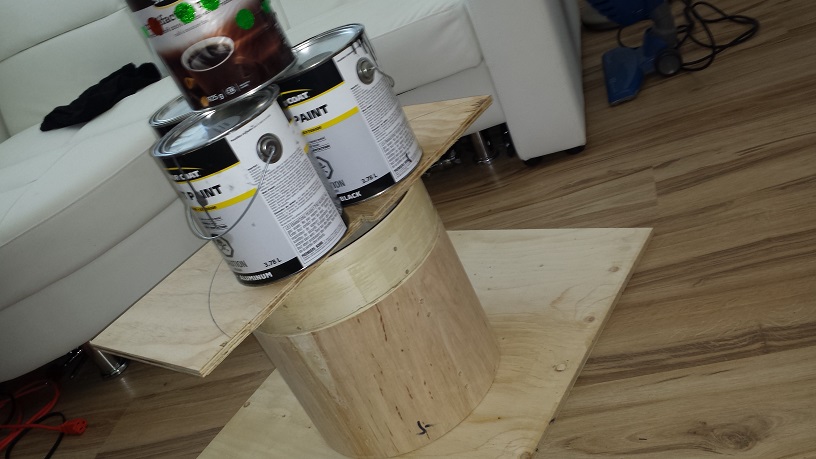
Slop carpenter’s glue on one of the edges, line up the holes for the lugs, and place one on top of the other. Ensure that they are straight. Wipe off excess glue that comes oozing out. Place a board on top and add various somewhat heavy items to weigh down on the glue joint. Allow to dry over night.
Once the Carpenter’s glue is dry we can proceed with the interior “body work” and reinforcement . First cover the holes that won’t be required with masking tape from the outside. This is just to prevent our filler from oozing out. For filler and reinforcement we use construction adhesive, which is just a fancy word for “bondo” in a squeeze tube. This will be very familiar to anyone that’s done auto-body work.
Squeeze out a bit at a time and use a putty knife or scrap piece of wood to spread and scrape even. Try to scrape it down as flat as possible since it dries very hard and is quite resistant to sanding. Cosmetically this doesn’t need to be perfect. After sanding we’ll patch again with wood filler.
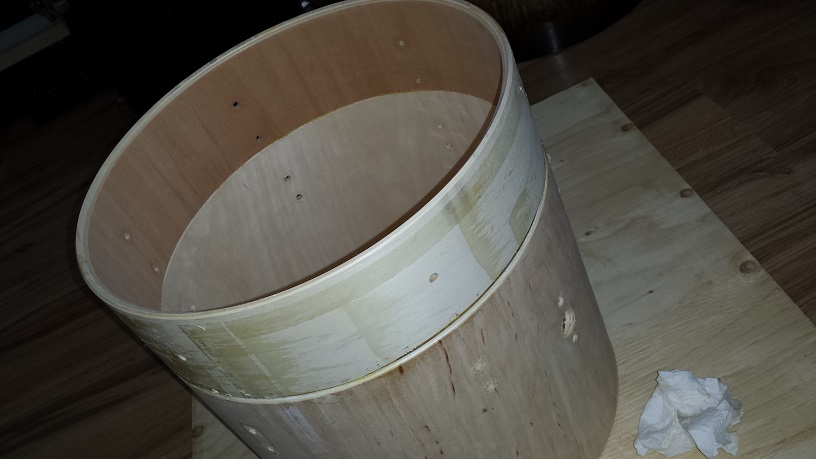
Construction adhesive forms a very strong and hard bond providing all the strength needed for our seam and should allow for resonance to pass freely across the seam and filled holes. Remove the masking tape after an hour or so to allow air access to our fills. Leave to dry overnight, maybe longer if necessary.
Once the construction adhesive is dry, sand it smooth. With a mix of drywall compound and “Weldbond” (A Canadian brand of fortified white glue) we patch the irregularities to attain as uniform as possible a surface inside the shell. Once again, leave to dry over night.
Next the shell gets marked for some new holes. the Pearl style lugs already fit the holes on the added partial shell, but the other end will require new holes. We also mark the holes for our new floor tom leg brackets. These are some pretty cool, chunky vintage style brackets I found at a price that appeals to my frugal personality, also at Drumfactorydirect.com. As usual we use a corded drill with a brad-point bit. Drill from the outside, at the highest sped but with very little force, until the point just pokes through to the inside. Drill the remainder of the hole from the inside to avoid any breaking through of the last ply. Test fit the lugs and brackets before putting all the drilling stuff away.
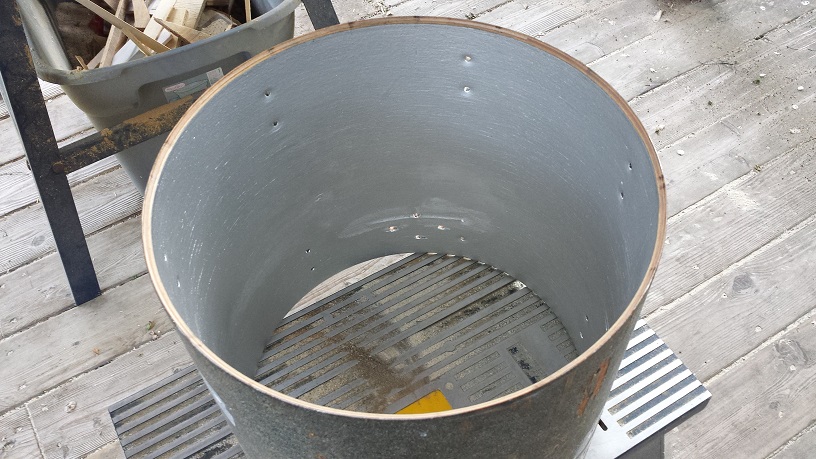
Once drilled we proceed with sanding the inside of the shell smooth, giving it a wipe down and applying a first coat of what may now be referred to as our standard silver sealer.
Before moving on to wrapping, the tom gets a quick snazzing-up of the bearing edges. I just take a couple of mil off in the router and then sand smooth with 200 grit.
I believe the floor tom is ready for wrapping.


Wrapping them up
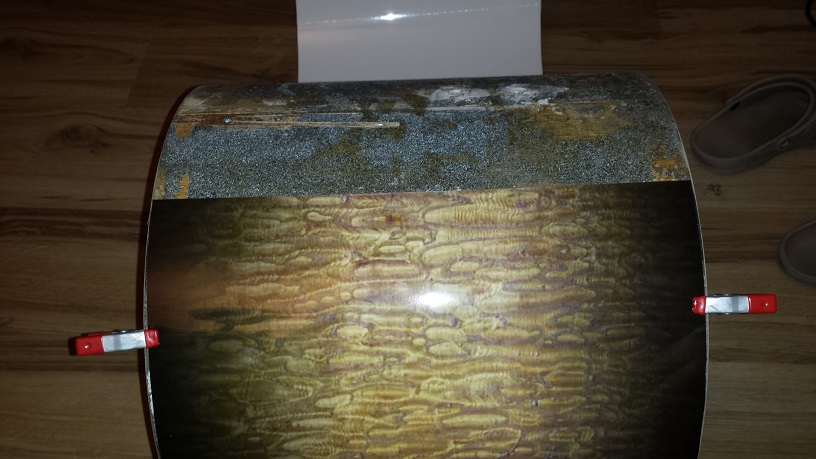
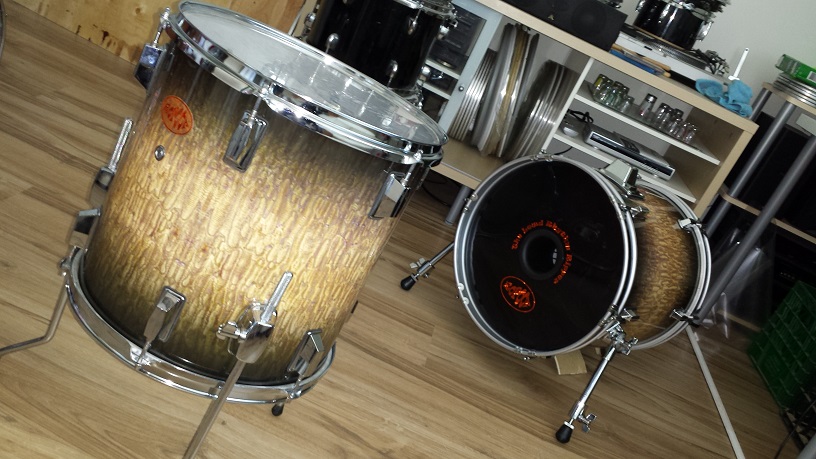
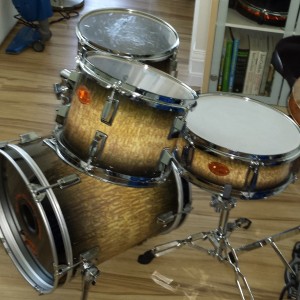
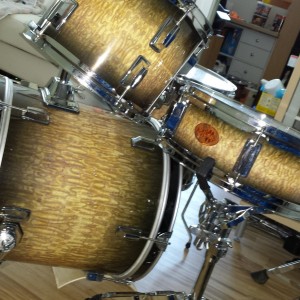
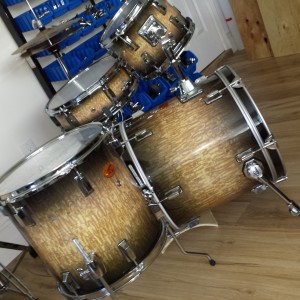
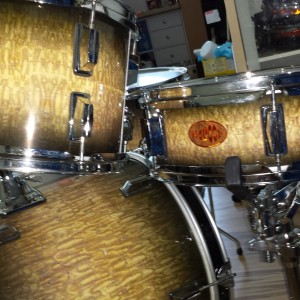
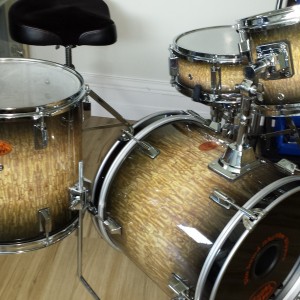
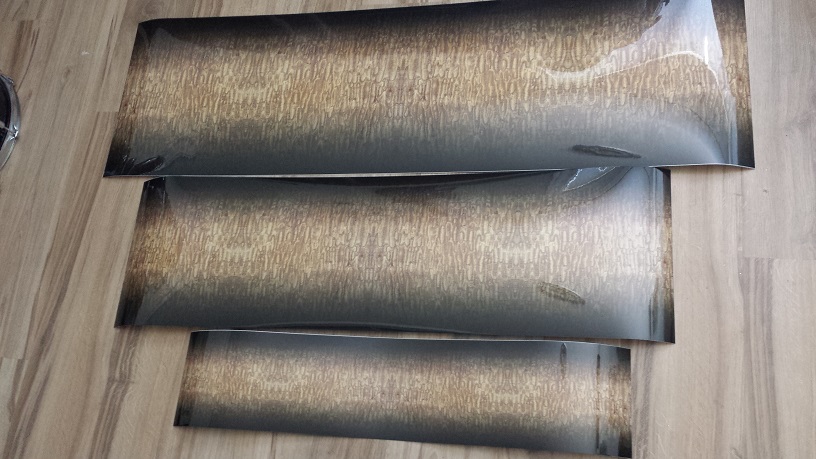
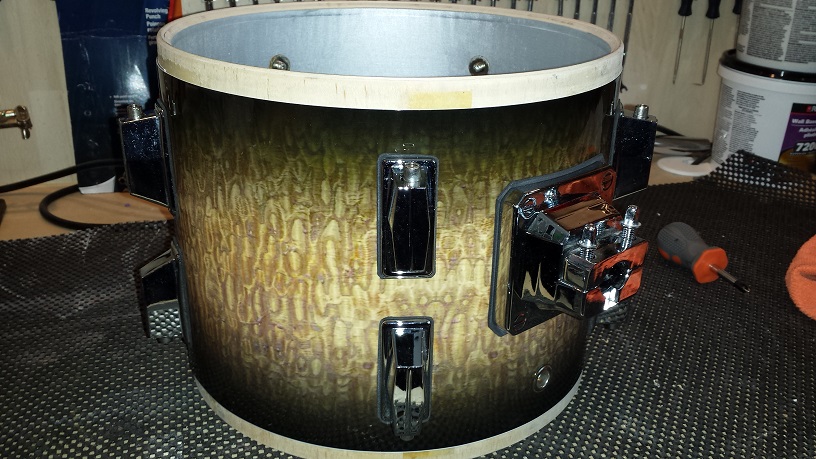
Once again we’re using wrap from Bum Wrap Drum Co. As usual it was a tough choice deciding which of their designs to go with. There’s certainly no lacking in the selection available. We decided on this surreal wood grain fade finish called “tamo fade 2”.
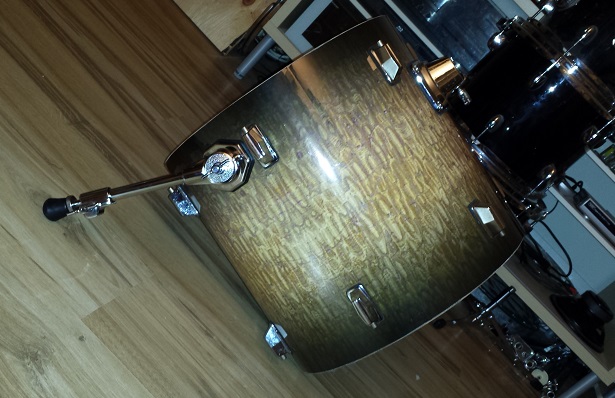
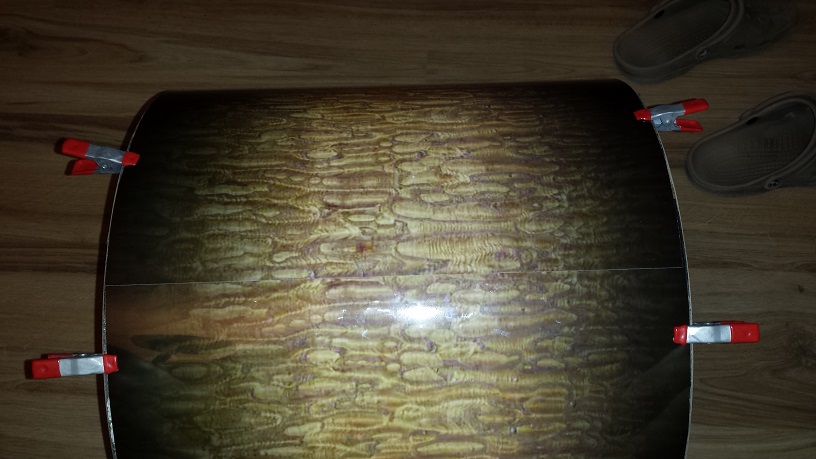
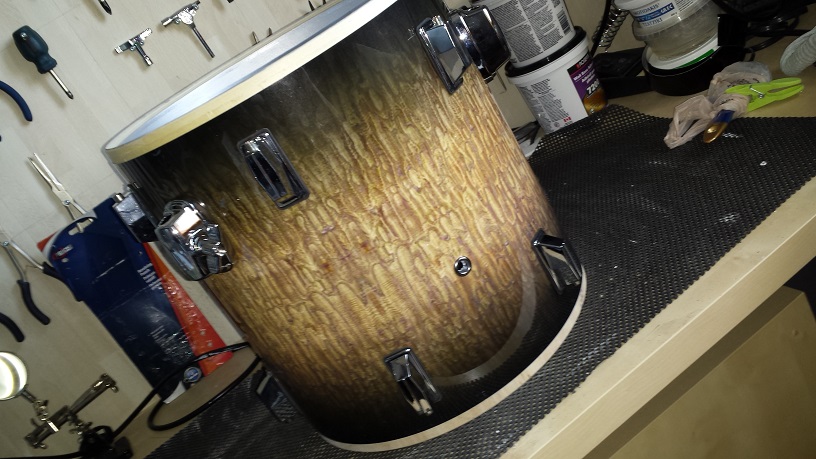
For the bass I’ll forgo glueing and simply follow Bum Wrap’s instructions. They have more extensive instructions on this page. Start with lining up the wrap with the shell, leading edge at the bottom of the shell. Secure in place with a couple of clamps. Stretch the wrap around the shell and check if the trailing edge lines up with the leading edge. If not, re-adjust until it does and re-clamp.
Once aligned stretch the wrap all the way around the shell again and clamp the trailing edge, a few inches from the end as pictured. Next lift the trailing edge, remove the backing on the adhesive strip and while holding the wrap taught, push down and apply pressure along the entire seam to ensure good adhesion. That’s it! It’s wrapped!
The tom tom gets wrapped following the identical process as the bass drum, although a smaller shell is substantially easier and quicker.

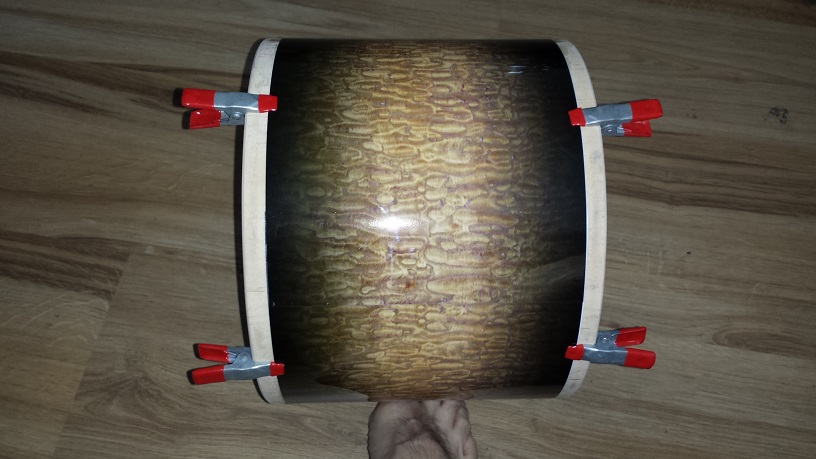
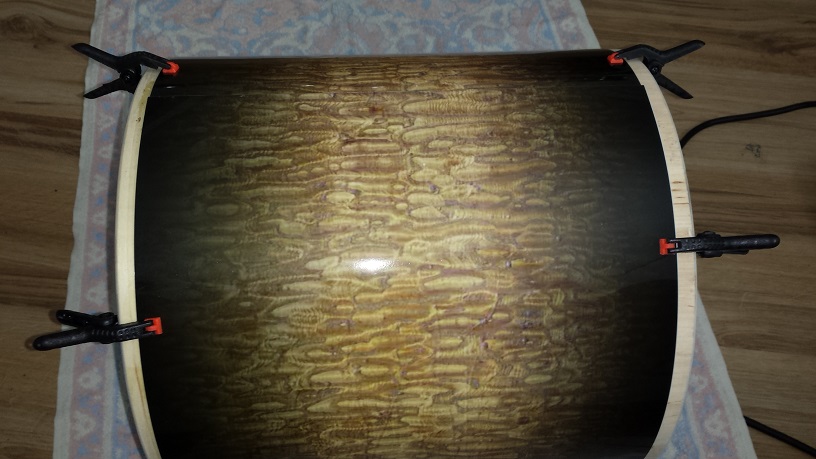
Last up for wrapping is our fused shell floor tom. Like before, I spend some time laying the wrap on the shell and ensuring it is straight before clamping in place. Like before two clamps get placed a few inches from the beginning, and once it’s perfectly stretched around the shell, another two clamps get placed a few inches from the end. Make sure to use clamps with plastic or rubber grippers so as to not scratch the wrap.
Lift up the end and remove the backing paper. While holding the wrap taught, pulling backwards, gently apply the end of the wrap over the beginning and push down along the seam to aid the adhesive strip in grabbing together. It sounds more difficult than it is. After doing few it’s starting to go pretty quick.


Assembling the Drums
Starting with the bass drum, we use an Exacto knife to cut the holes out of the wrap. Shine a flash-light from the inside of the shell to determine the hole’s position then insert the knife from the outside and using the hole’s edge as a guide, trim the knife around the edge of each hole. Be careful! Exacto knives are sharp and can very easily cut a scratch in that brand new wrap job. Make sure the holes in the wrap are at least as large as the holes in the wood, even if the lug posts are smaller. We don’t want the posts pushing against the wrap as that would cause the wrap to bulge.
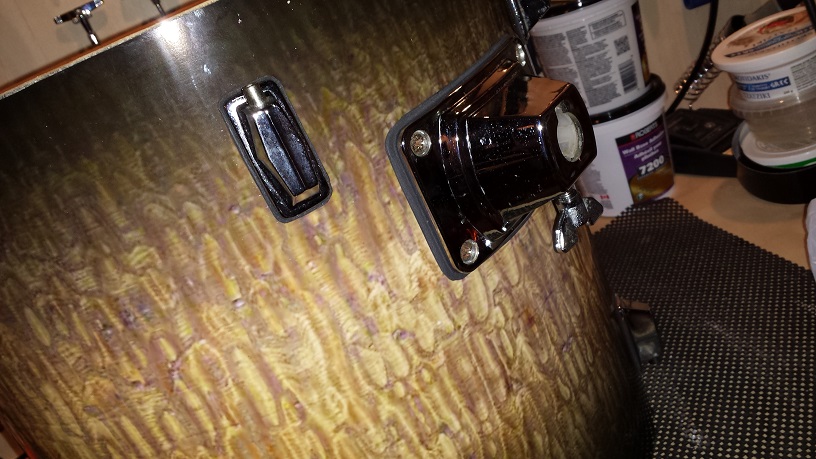
Isolation gaskets are easily made by pressing a lug down on a piece of craft foam, making an impression at the posts. Punch holes at the posts, stuff your lug with a cotton ball if your lugs have springs. (Pink cotton balls are well know to have additional mojo compared to the white ones.) Position the lug with the posts through the holes in the craft foam and cut around the outline of the lug.
Don’t torque the lug screws too hard. Somewhere between snug and a little tight is just right. (I will endeavour to find an actual recommended torque value.)
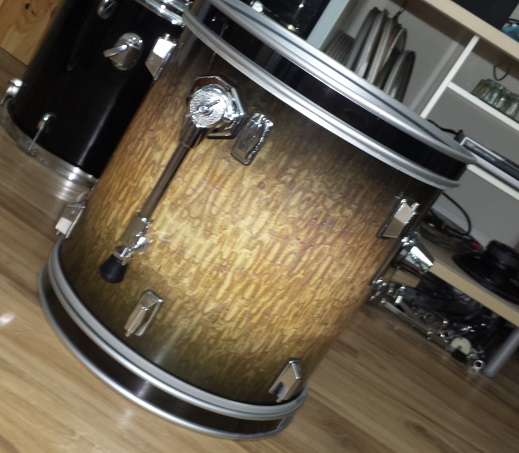
Next we continue in the same manner with the tom mount platform and the spurs. Note that I didn’t end up making holes for a riser this time. Rather I will attempt to come up with a similar riser assembly to the one used on the Breakbeats. Not for any other reason than variety and an excuse to come up with yet another riser design for the DIY Bass Drum Risers page.
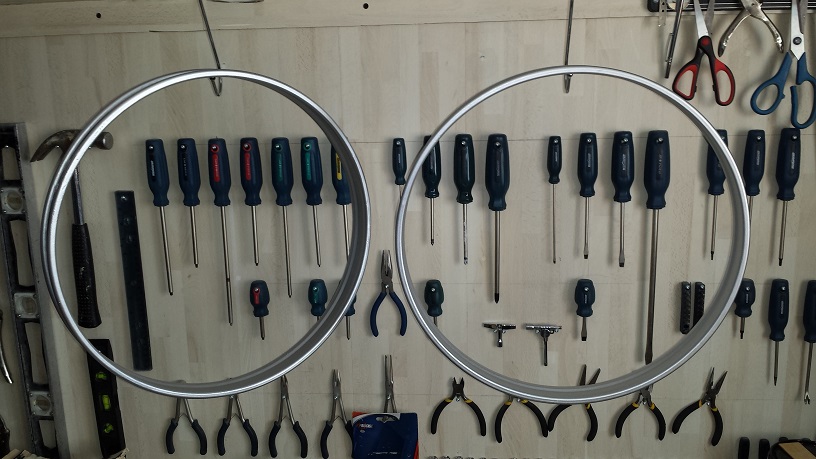
For hoops, I found a pair of 16″ aluminum hoops in black. Since the inlay strip that came with the wrap is a continuation of the fade and thus almost black, I decided to paint the hoops. The same gloss aluminum rust paint that is used inside the shells is a good a choice as any. Two coats applied with a brush results in a pleasant enough finish. After ample drying time the hoops get the inlay strips applied. Simply wrap them around, remove the backing on the adhesive strip, pull tight and press down.
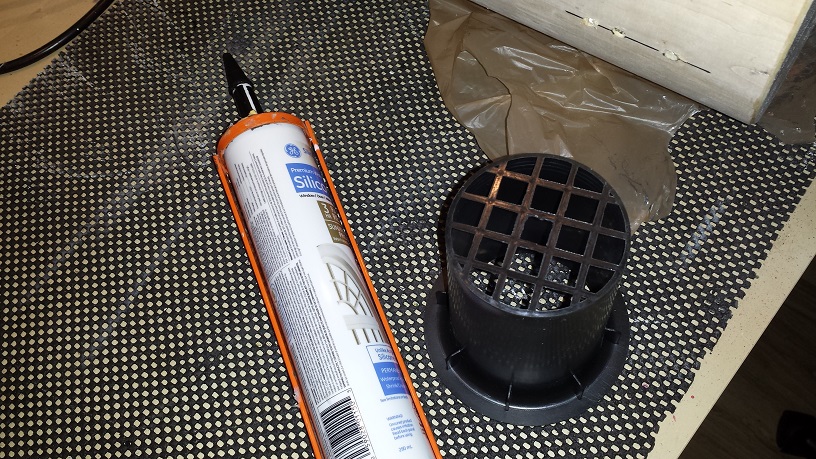
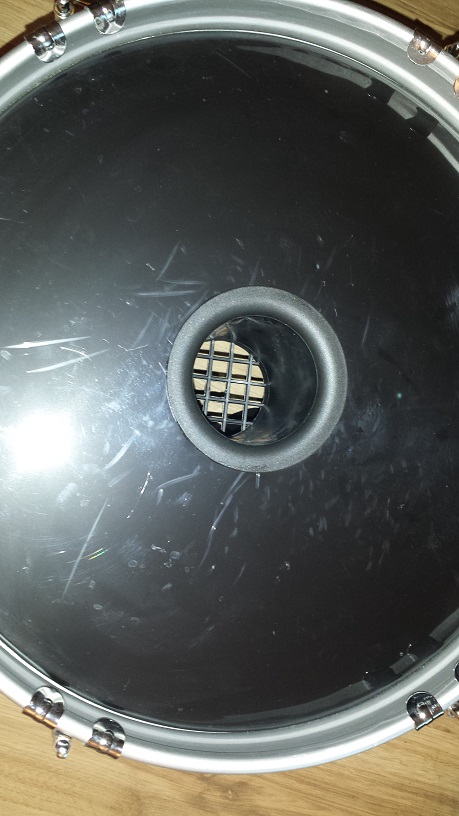
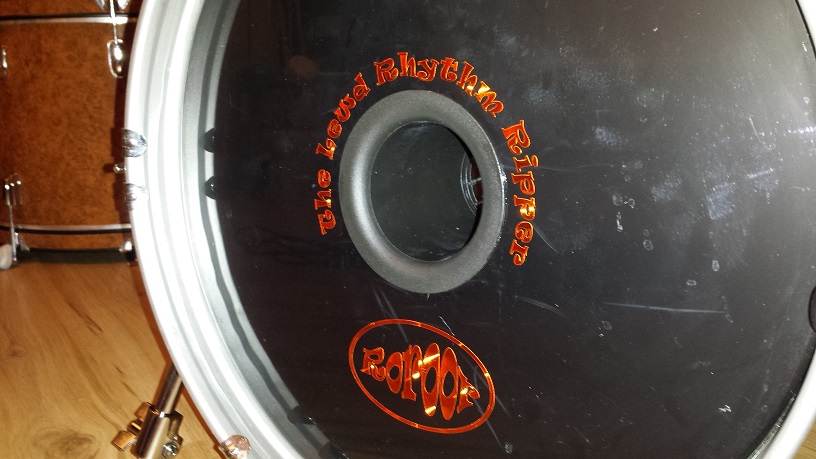
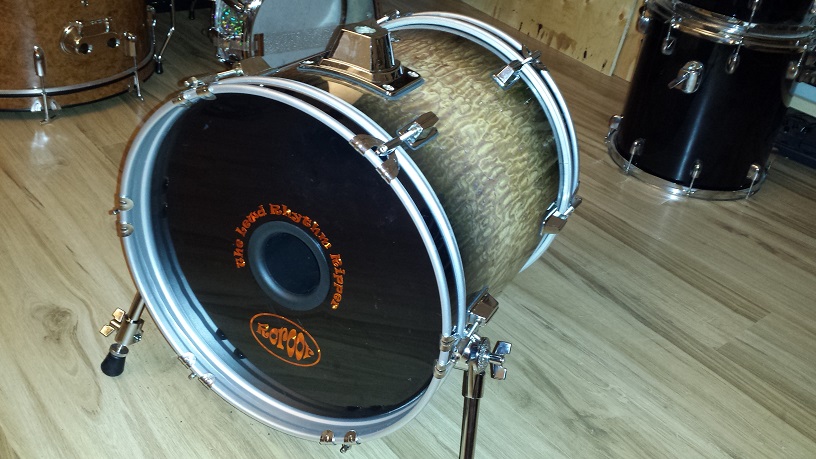
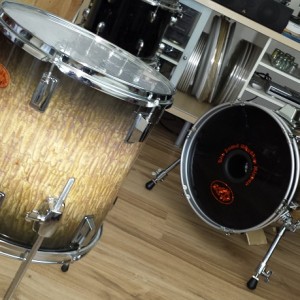
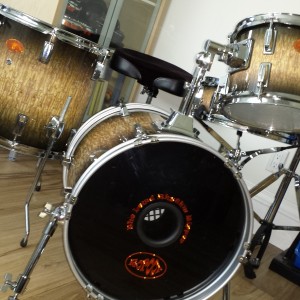
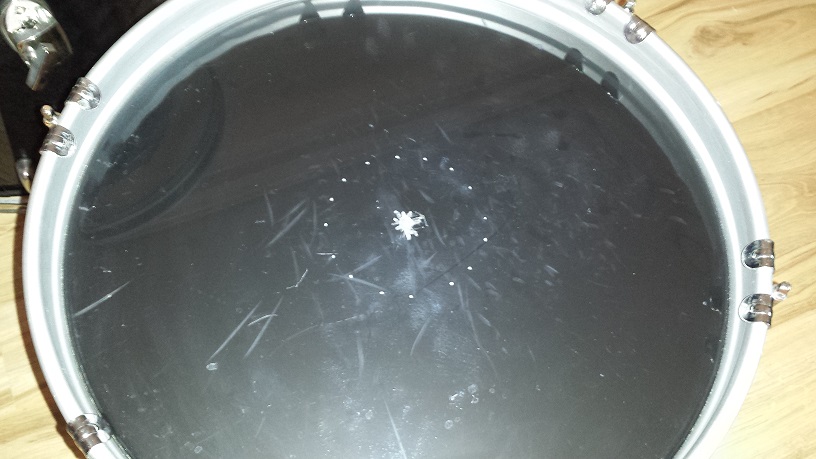
Now that the heads and hoops are installed, lets pop a port from a sub-woofer into the resonant side head. Since I want it in the middle, I make some marks to determine the center of the head and then additional marks to outline a circle the right size for the port. With an Exacto knife play “connect-the-dots” and cut out the circle. smear some black silicone on the inside of the port flange and pop in place.
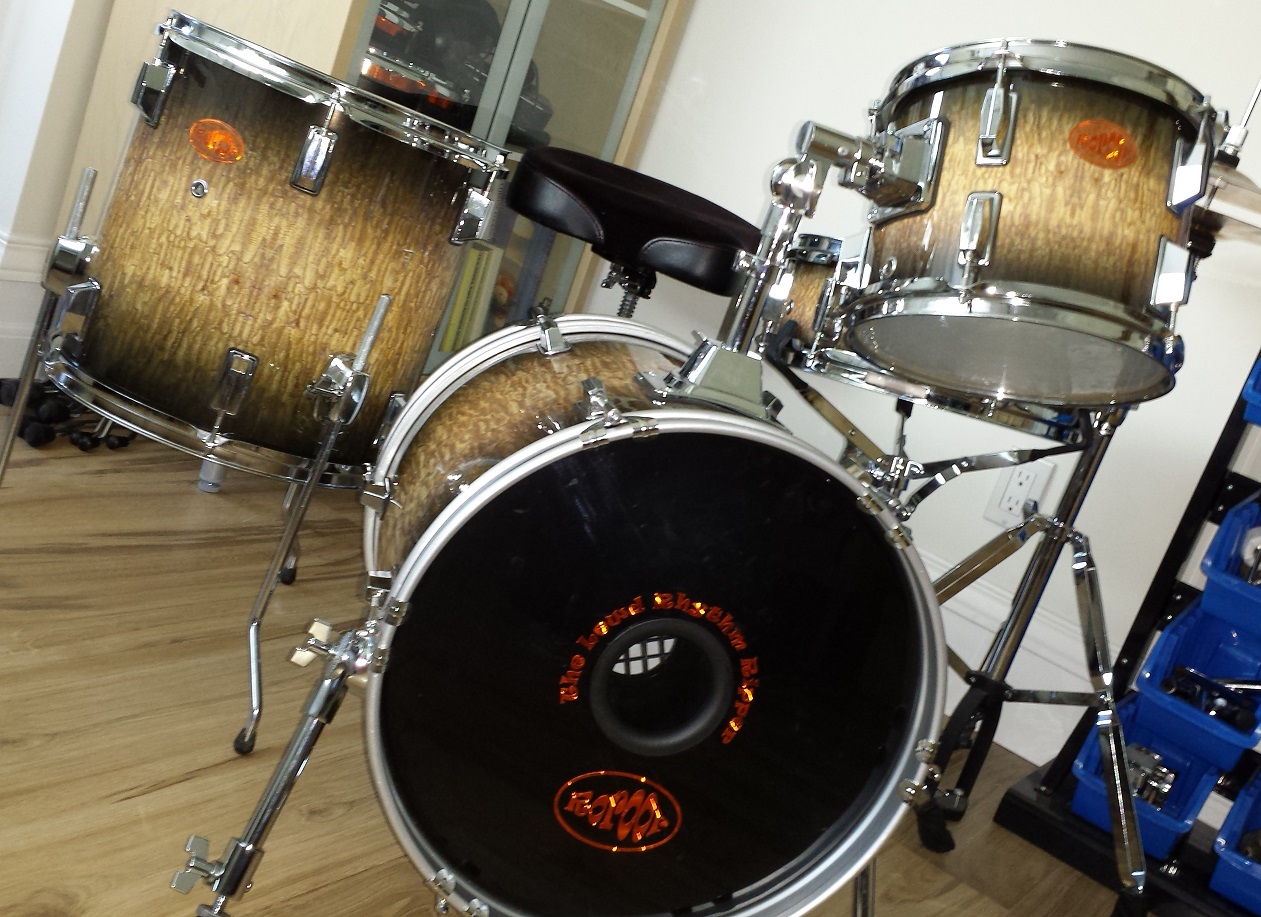
let’s have some fun and add some graphics to the audience facing side as well. A “Roroor” logo is always groovy and of course “The Lewd Rhythm Ripper” should have it’s name on there too.

Apart from finding a new air vent grommet to replace the mutilated one, the tom tom assembly is straightforward and quick. We make the same style DIY isolation gaskets as with the bass drum. the only challenge was digging through the supplies to find heads that were in somewhat decent condition.
Next up for assembly is the floor tom. Back on the work bench we poke holes through the wrap using an Exacto knife and a flash light. A couple of the holes had some residual filler which was easiest to remove by rotating a drill bit by hand through the hole. I settled in for 30 minutes of ISO-gasket manufacturing while listening to some 70’s Swedish punk rock.
Cotton balls get stuffed in the lugs and all the lugs installed. Again, not too tight, just a bit past “snug”. Next are the new chunky and quite cool leg brackets from Drumfactorydirect.com and then the air vent grommet, heads and rims.
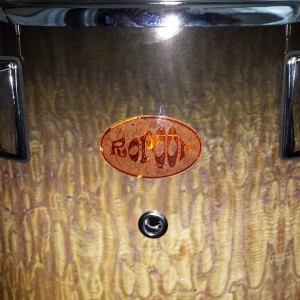
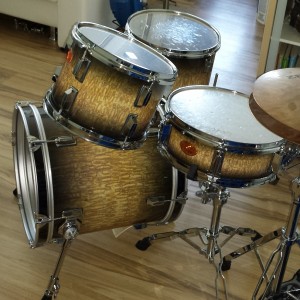
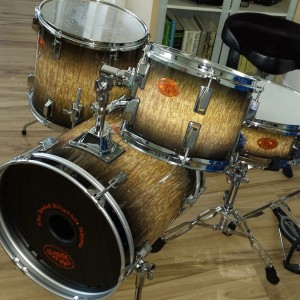
With all the assembly completed we also install a groovy “Roroor” badge on both the floor tom and the bass drum. The rack tom and snare will both be getting badges too, once the kit is set up so I can determine the best placement.
The only major step still remaining is making a bass drum riser.