

Introduction
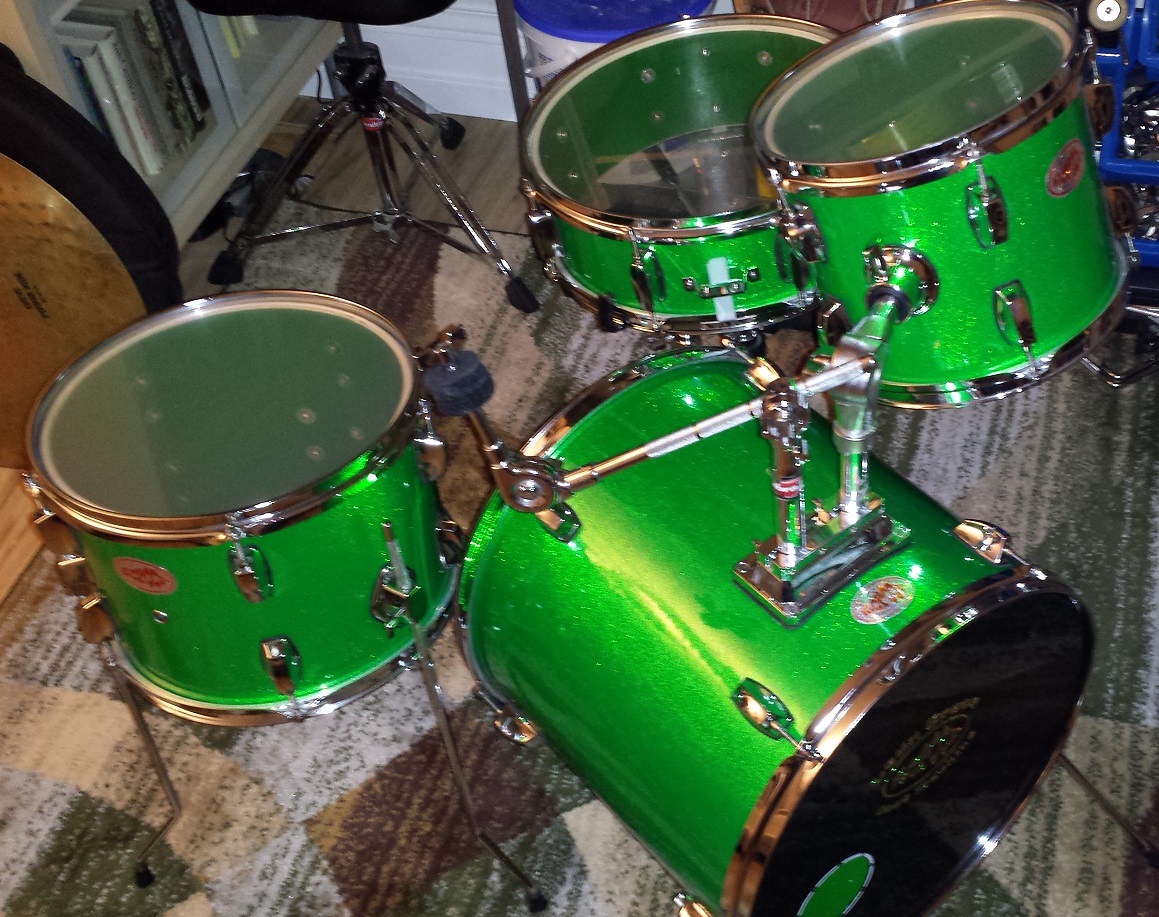
It’s all about the Green! Think Green! This project is 100% Energy Star compliant, environmentally friendly and packed with green goodness. A few years back I made an orange sparkle drum kit with the shell interiors stained orange as well. the end result with clear heads was an illusion of transparency. Kind of as if it was acrylic.

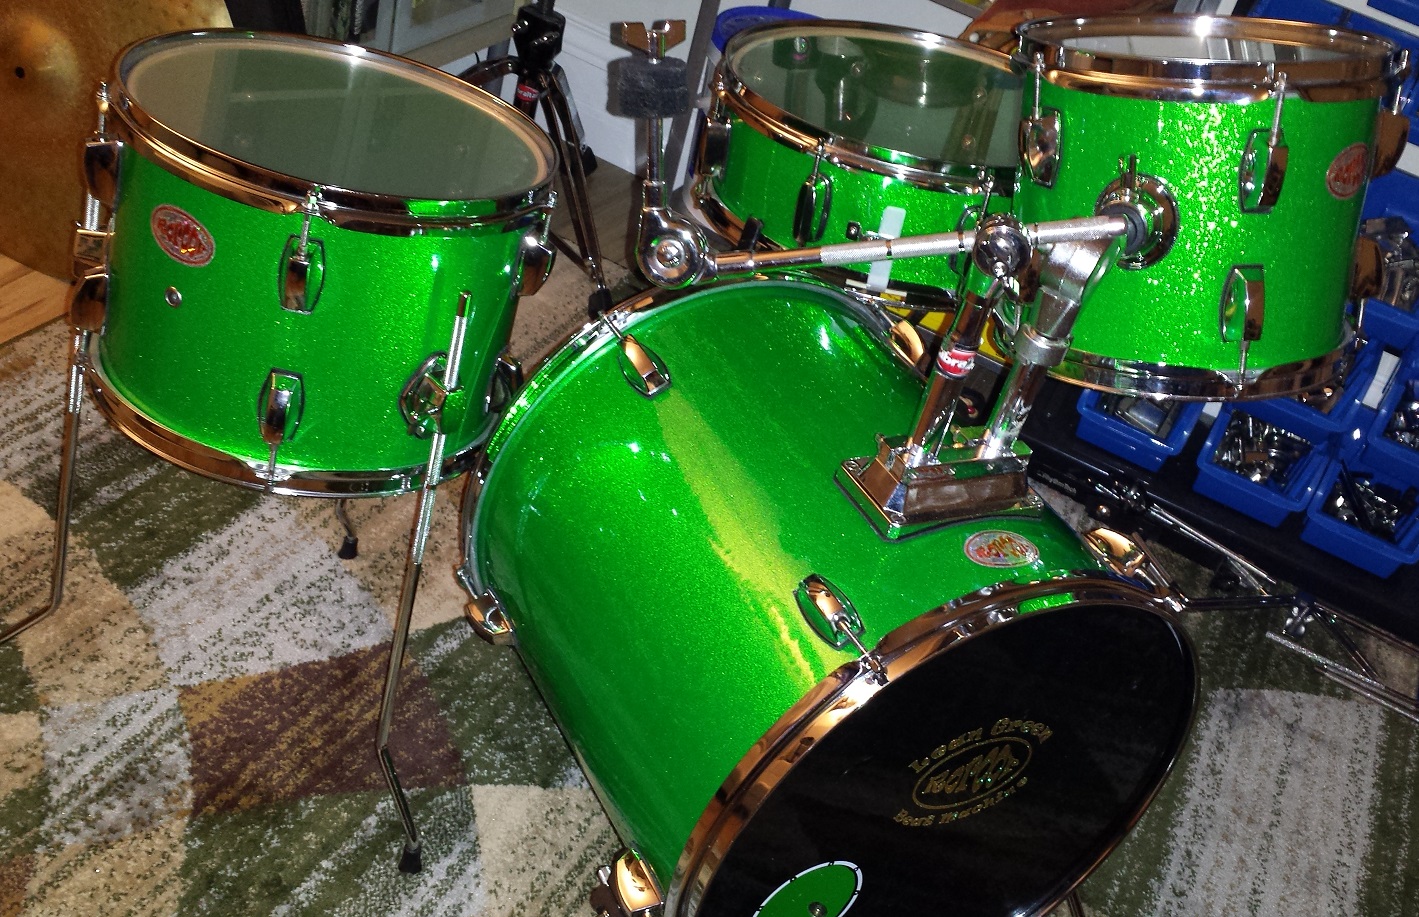
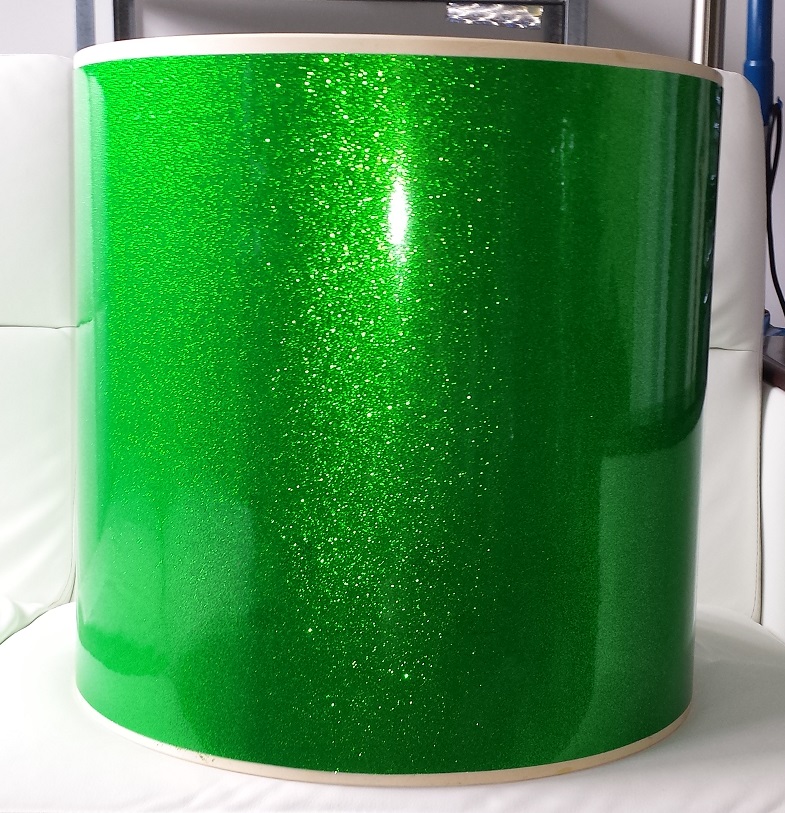
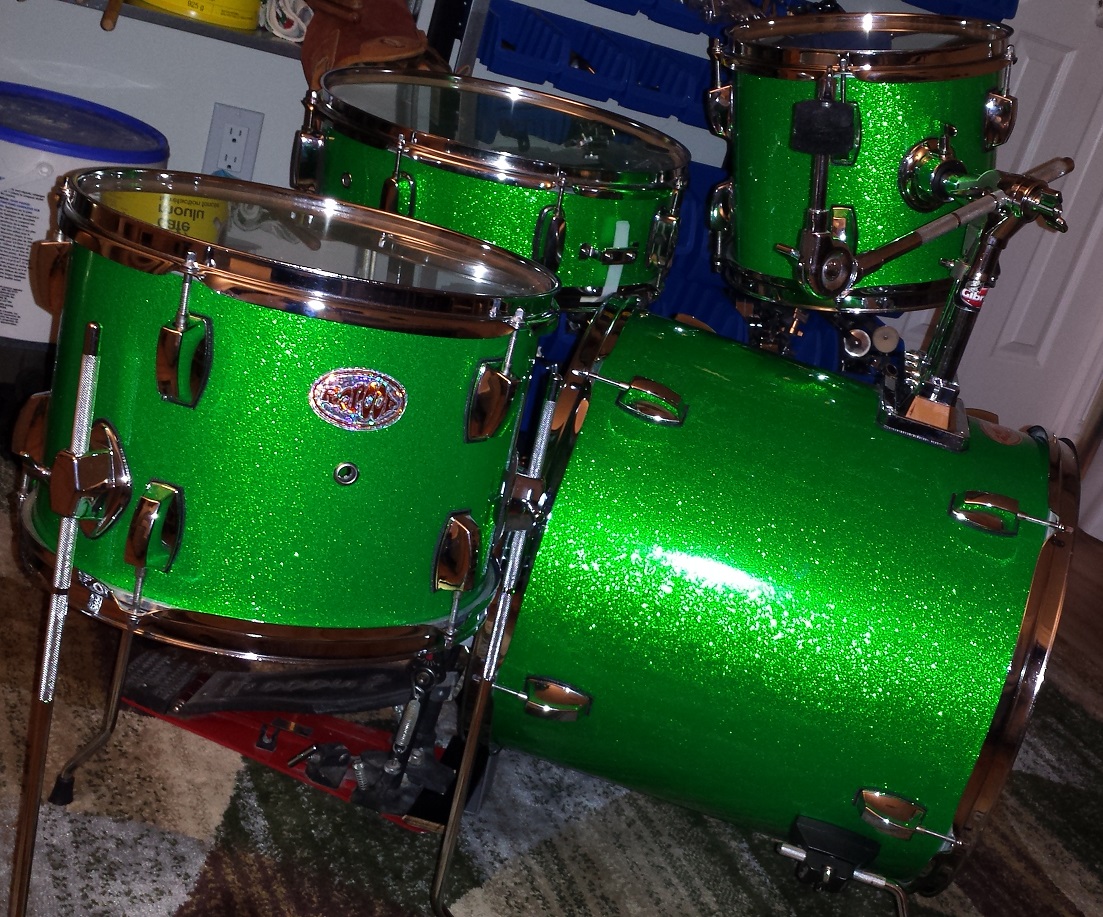
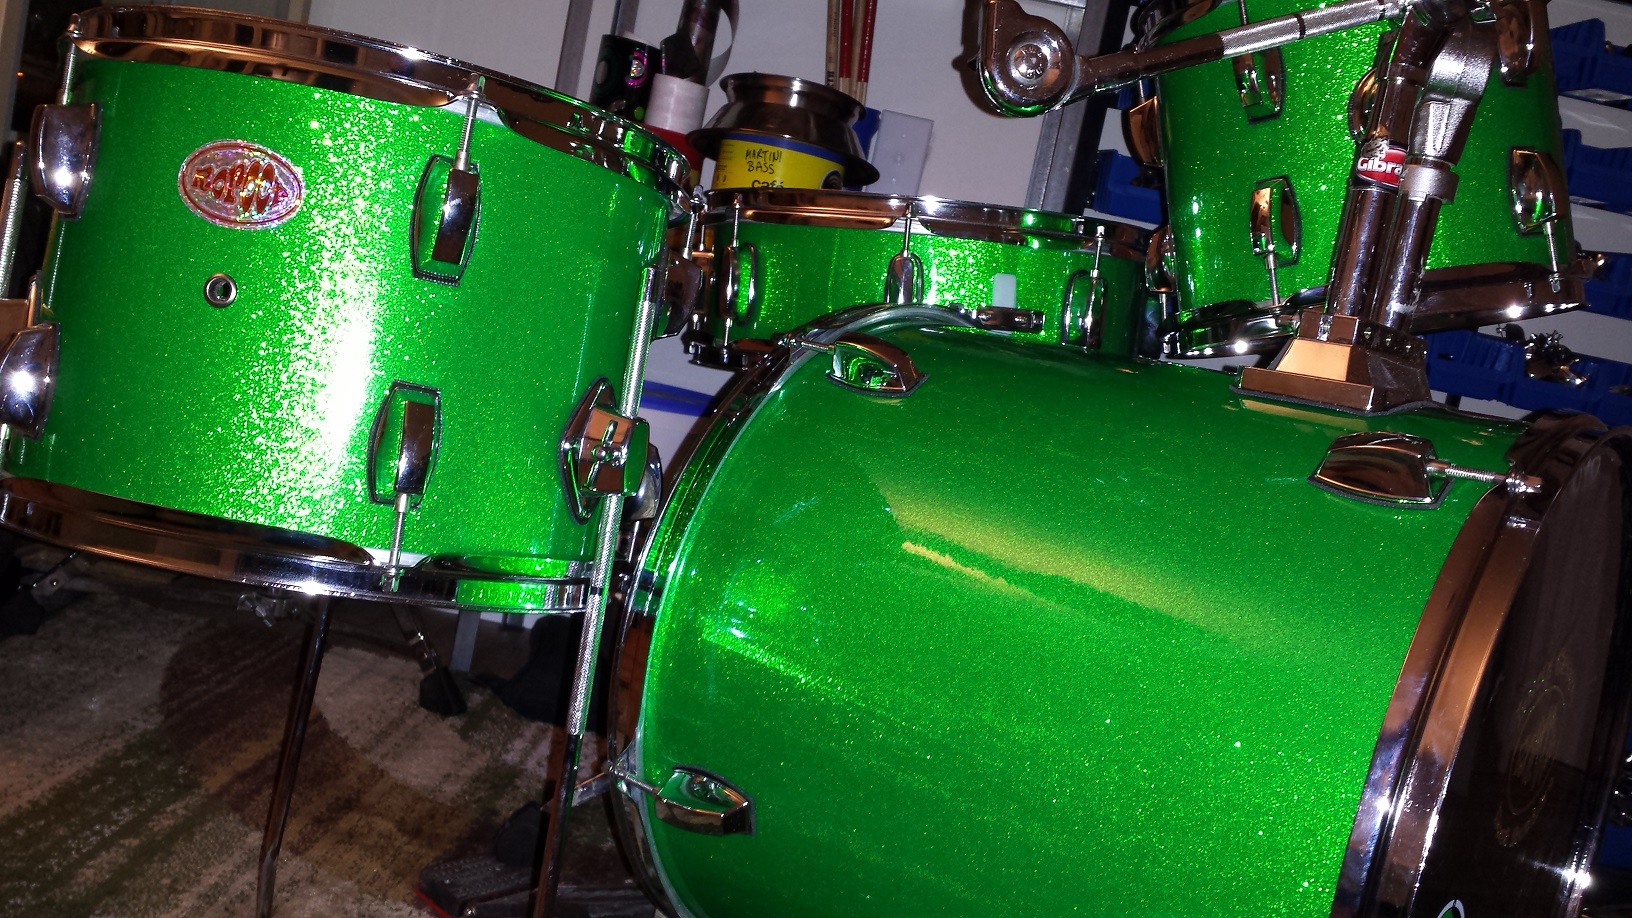
This DIY Compact Drum Kit, “The Lean Green Beat Machine” will follow in the same footsteps. Green Sparkle Walopus drum wrap on the outside, coupled with a green sealer on the inside. Size-wise, we’ll be targeting “standard Jungle-Bop” dimensions. 16″ Bass drum, 14″ snare drum, 10″ tom tom and for the floor tom, I found a 13″ shell with a mere 4 mm thickness. This should allow for quite low tunings with a warm and mellow ‘tude.
The orphan drums are already gathered, but hardware and mounting details are to be determined. Often the small details start to gel on their own once the project is under way. In an environmentally friendly manner we’re recycling a five-lug floor tom for the bass drum, a five-lug tom tom and an eight-lug Mapex snare drum. The floor tom will be fashioned out of the above mentioned thin-shell 13″ rack tom.
Let’s get started on the DIY Compact Drum Kit. This “Lean Green Beat Machine” is loosely modelled after the Ludwig Breakbeats and Sonor Safari.
DIY Compact Drum Kit
DIY Compact Drum Kit
![]()
Space
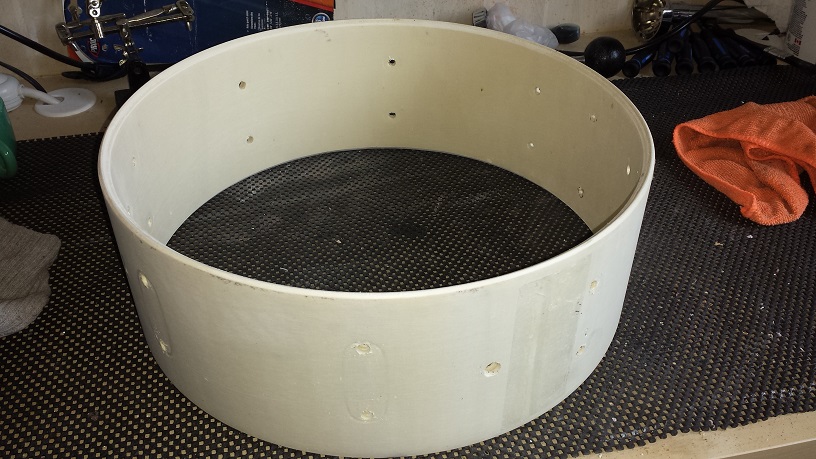
DIY Compact Drum Kit – The Snare Drum
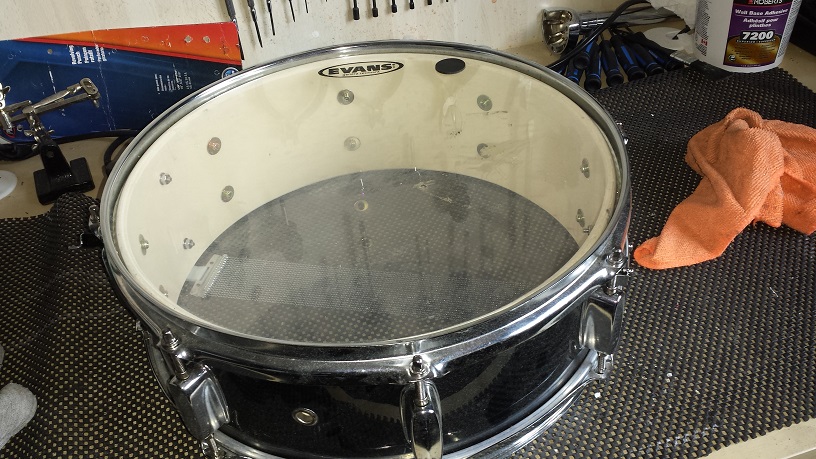
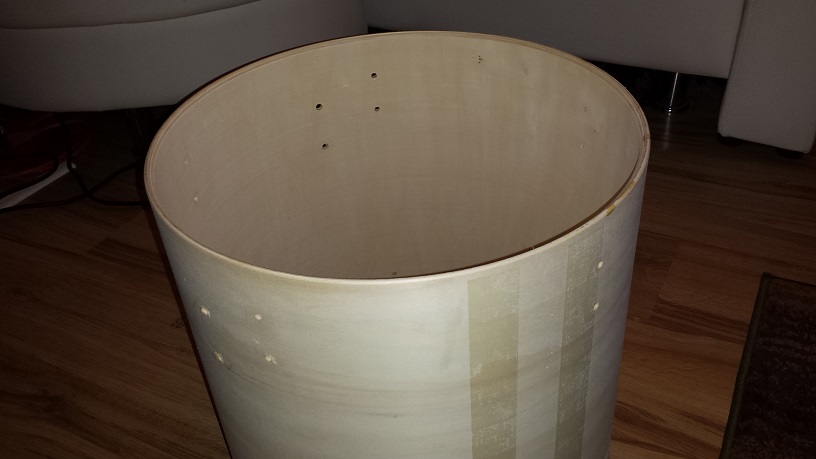
First up on the work bench is the snare drum. After disassembly of all the metal parts, it gets unwrapped following the instructions on this page. Initial disassembly reveals a rather smooth and nicely finished shell interior. Better yet, with the wrap removed, the exterior of the shell is just about flawless too. If I didn’t already have a green sparkle plan, this could have been a nice candidate for a stain. Well, except that poplar isn’t that exciting a wood grain.
The bearing edges are regular 45 degree with a 45 degree bevel. A good starting point but they will need some final shaping and smooth sanding.
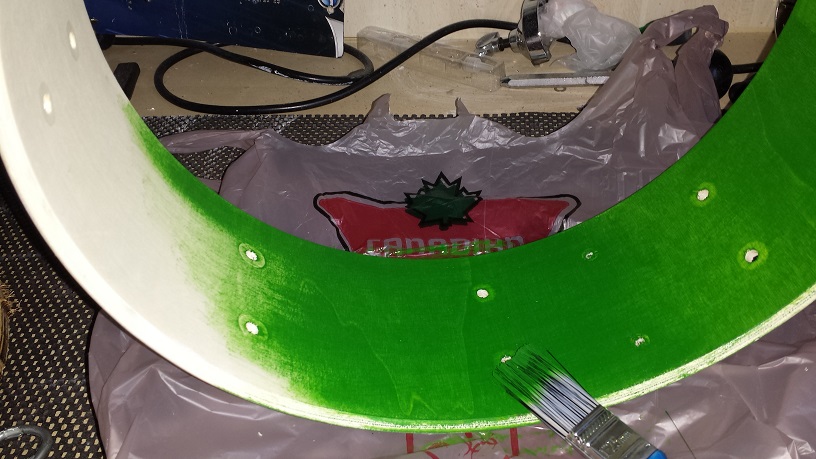
Time for some green paint! As mentioned, our snare drum will get the bearing edges sanded. For that reason we don’t need to mask them prior to painting. Unless you plan on sanding or re-cutting the bearing edges, make sure to mask them before painting.
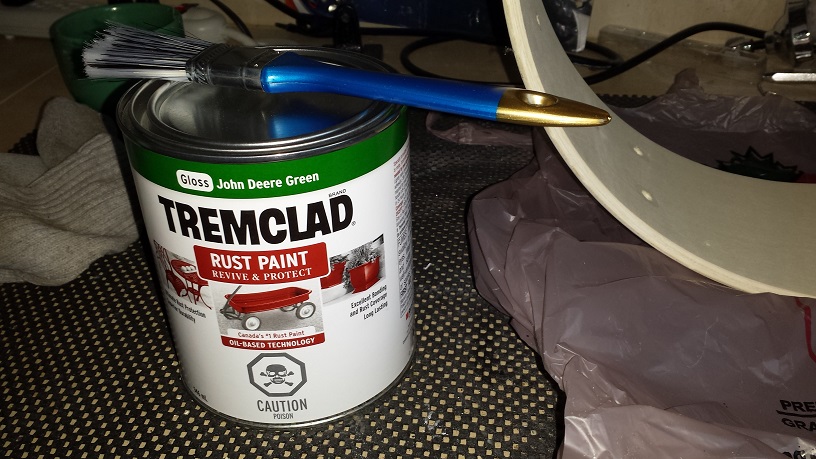
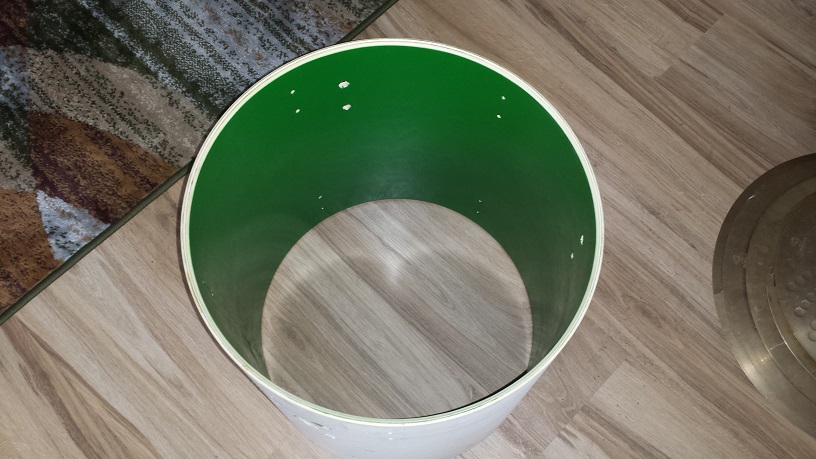
Tremclad John Deere Green is chosen as our interior paint. A lovely shade of revolting green is just right! I apply it with a regular paint brush, taking care to apply it in thin coats so as to get a smooth, even surface. Three coats should do the trick. make sure to allow ample drying time between coats.
After 48 hours of watching the paint dry it’s time to sand the bearing edges. In the next section; DIY Compact Drum Kit – The Tom Tom, sanding of the bearing edges is described in detail. In this section we’ll focus a bit more on the snare bed.
Especially on entry level snared drums, the beds are quite narrow and often with steep slopes on the sides. This is easily rectified. After sanding the green paint off with 100 or so grit, I switch to somewhere around 150 grit to shape the edges. This is also the time to shape the snare bed. Usually I avoid making the bed deeper, unless it’s really shallow, let’s say, less than 2 mm. This is best checked by placing the shell on a flat surface with the bed down. I use a granite tile. Ideally I like the bottom of the bed to be flat and about three inches wide, then gradually slope up for about two inches on each side.
Once the bed is shaped we can proceed to sand the entire bearing edge silky smooth with 200 or so grit paper. As mentioned there is more detail on the bearing edge sanding in the next section.
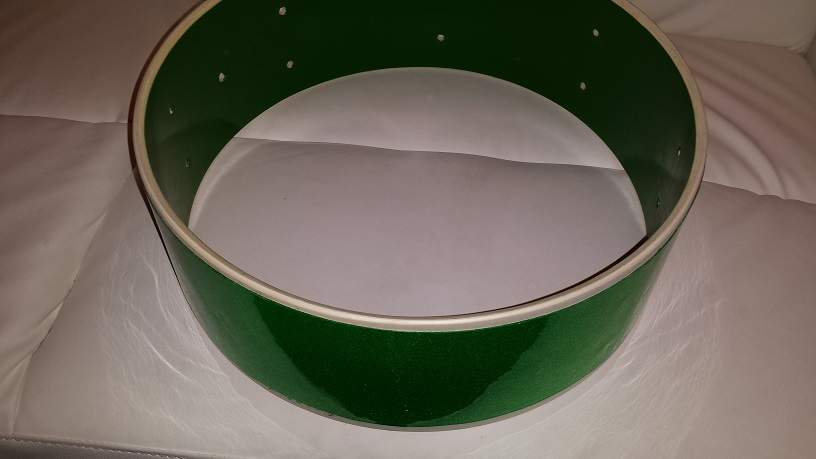
Moving on to the wrapping stage. CompactDrums.com is co-developing a new line of drum wrap with Walopus. This snare serves as a test for one of the many prototype wraps along the way. At this point we can’t reveal the installation method used as this is one of the secret tricks of this next generation drum wrap. More on this in a separate article coming soon. Meanwhile the snare is wrapped. This particular prototype goes in the “Not Successful” file. While we’ve had success with most of the lines, Tru-Sparkle is proving difficult to adapt to our next generation drum wrap installation method. The end result is barely acceptable but not the installation process.
Next is assembly. Remember not to over-tighten the lug screws. They should be tighter than “snug” but not all the way to “tight”. If that makes sense?
The clear batter head is just for taking the kit pictures. After it’s all done I’ll be replacing it with a regular coated head.


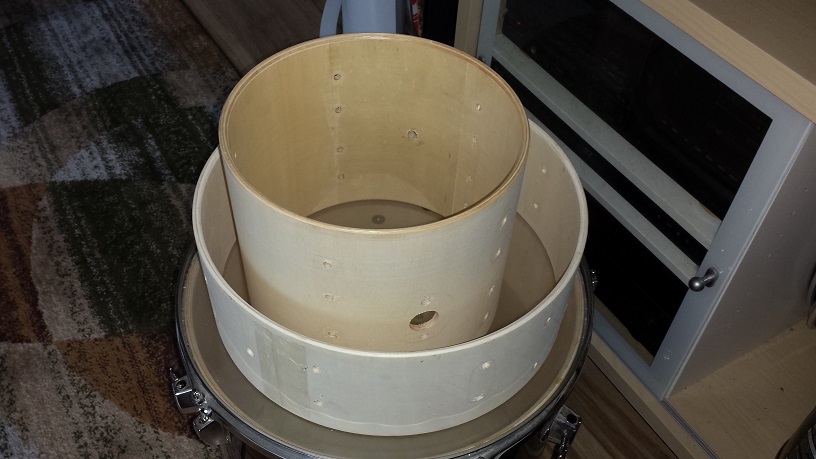
DIY Compact Drum Kit – The Tom Tom
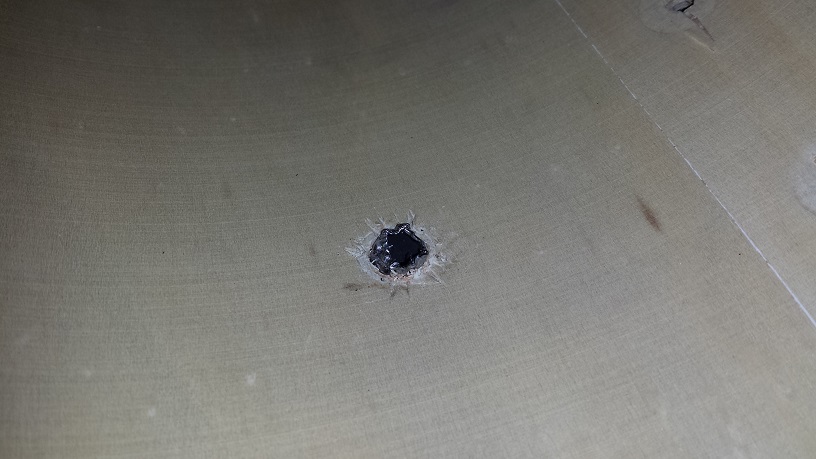
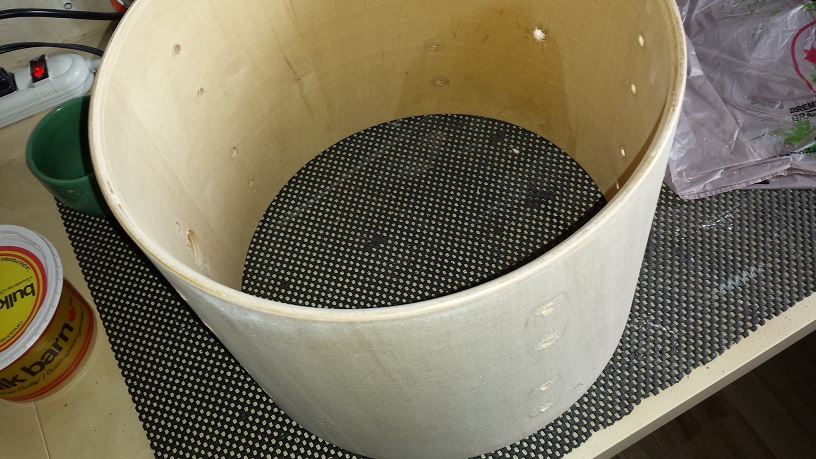
Following the same process as with the snare drum, the Tom tom is disassembled too. The only difference being that this one has one of those pesky air vent grommets that has a flange on the inside. Usually I take the time to grind the flange off, (like in these instructions.) but in this case I just mutilate it with the pliers. If you choose this method just take care to limit the mutilation to the grommet and not the wood shell. Once properly deformed, it can be tapped out and discarded.
As with the snare drum, the poplar tom shell is smooth and without imperfections. Not that it matters with this project but it gives an extra level of satisfaction anyway. The bearing edges are also quite nice and of a shape that I like, so at least we don’t need to cut new ones. However we will be giving them a sanding to get that butter-soft surface.
The first coat of paint goes on significantly easier than it did on the snare drum. Either the wood is denser, or more likely, this shell was already sealed. Leave to dry over night.
Painting on the second coat is leading me to believe that two layers will be adequate. Let’s just leave it to dry overnight again and see how it looks in the morning.
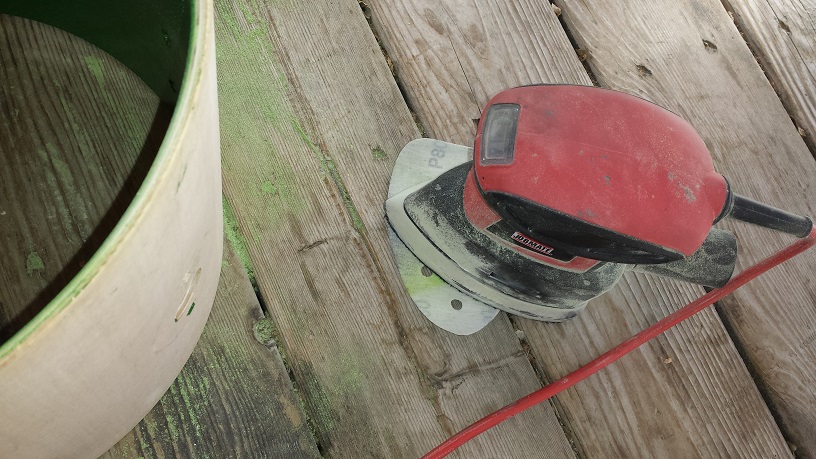
After leaving the second coat to dry for 48 hours it’s time for the bearing edges. Somewhere in the neighbourhood of 100 grit is suitable for taking the green paint off. Then I switch to around 150 grit to smooth and shape the edge. My preferred edges are modelled after Taye’s bearing edges. Starting with a regular 45 degree with a 45 degree outside bevel I gradually smooth over the outside bevel so the top part rounds over a bit up to the peak. Not so much that it’s a complete round-over but enough to increase the head-to-shell contact surface. I also check that it’s flat on a granite tile and adjust as necessary until it sits flat with zero wobble in any direction. This process can take some time and often even requires re-cutting the edge on the router table. My sander of choice is one of those mouse-shaped doo-hickeys. I often reposition the paper on the velcro surface to spread the wear a little bit.

Once satisfied with the shape of the edge I switch to 200+ grit paper to make the entire bearing edge surface smooth as silk.
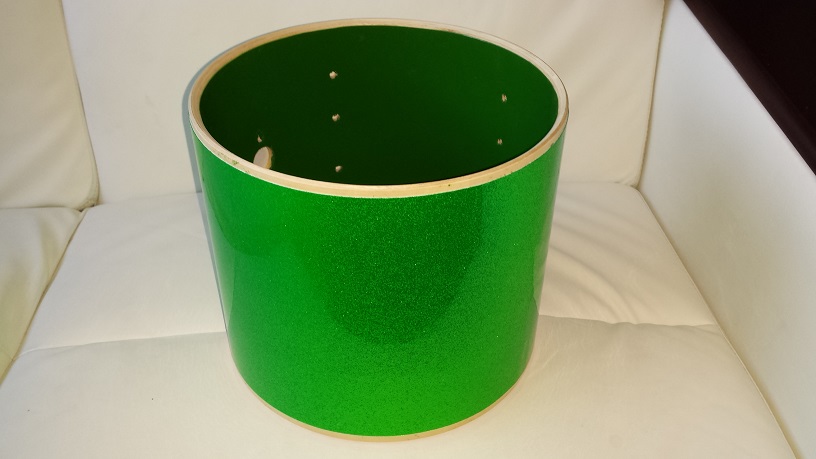
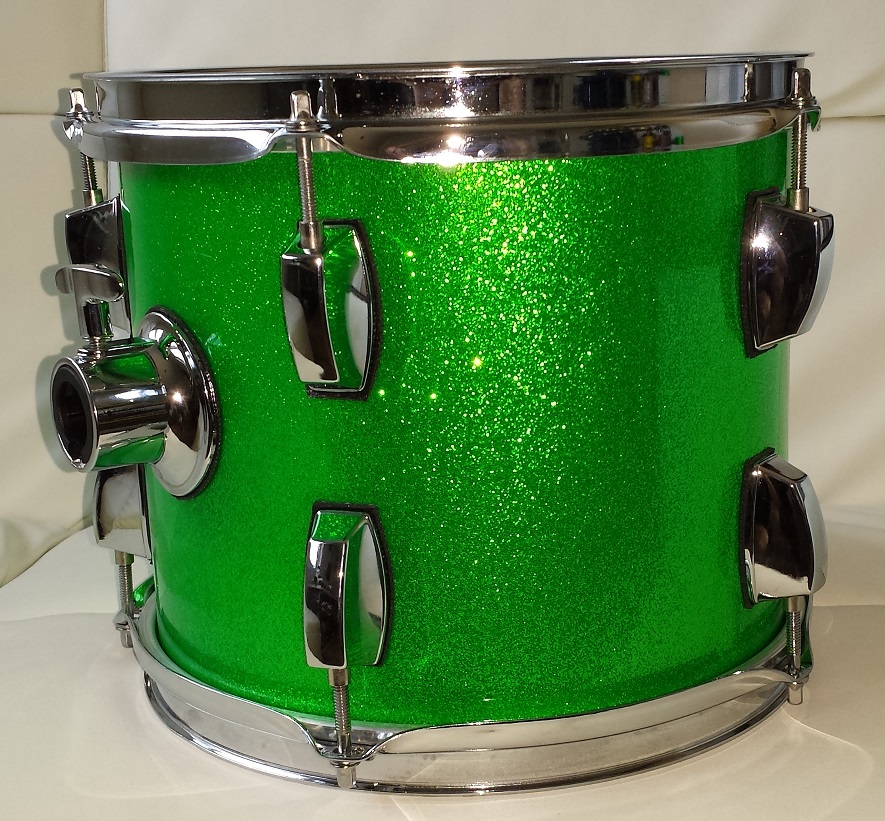
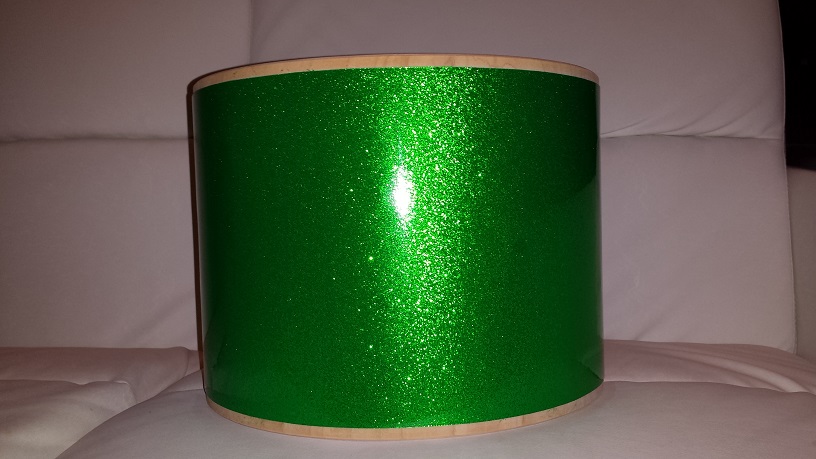
Wipe down the shell from saw dust and prepare to wrap. This is exciting as the Walopus Tru-Sparkle wrap in Emerald Green is pretty awesome looking in person. This kinda’ sparkle just can’t be captured in pictures.
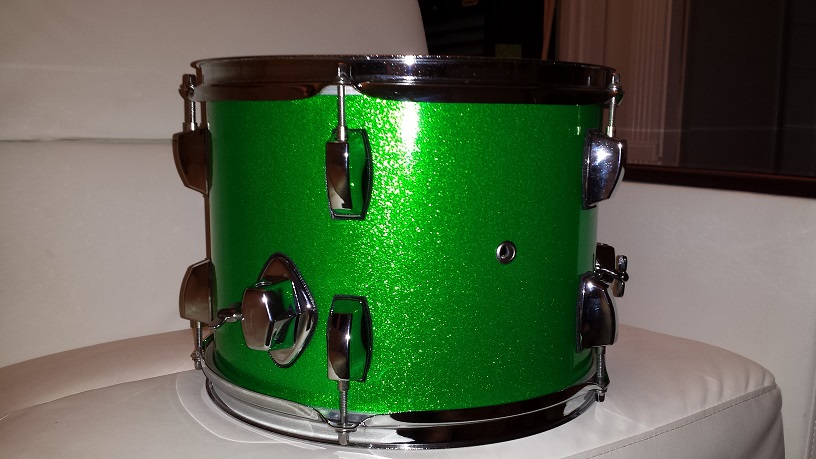
The shell gets wrapped according to “Method 4” in the Drum Wrap Instructions page. Then I bore out the holes using the exacto-knife method described on the same page. Drilling from the inside is slightly easier and faster but my drill is a tight fit in the 10″ tom.
Before re-installing the hardware I take the time to make isolation gaskets for each metal part. Check out our DIY Isolation Gaskets article for instructions.
Keep in mind not to over-tighten the lug screws when re-installing the lugs.


DIY Compact Drum Kit – The Floor Tom
The plan was to use an orphan 13″ rack tom with a 4 mm thin shell for the floor tom. However, as is often the case, things don’t always turn out according to plan. Once disassembled the thin shell revealed some serious ply separation. While this can be fixed, it would take weeks to repair it properly. Thus we’ll have to start sourcing a replacement. Current option on hand are another regular 13″ rack tom, although with smaller hole spacing for the lugs, or a 12″ rack tom with the correct lugs and spacing. (From the same kit as the 10″ tom tom.)
After forming a committee, completing the appropriate forms and filing the motion, we sit down to moisten our dry palates with a brewed beverage whilst discussing the matter. After a few hours of pondering the options while ensuring no brewed beverages are left feeling neglected, we decide on combining the two shells. As such we’d not only made a decision but would also be making a mark in the book of innovation by conjuring up a tom with a 13″ batter side and a 12″ resonant side.
Once the effect of the brewed beverages wore off, we trashed the whole idea and instead settled on just making a 12″ floor tom. That makes a whole lot more sense.
Since the 12″ comes from the same kit as the tom tom, we’re dealing with the same stubborn air vent grommet. Apart from this, the shell gave up it’s dressing without fuss.
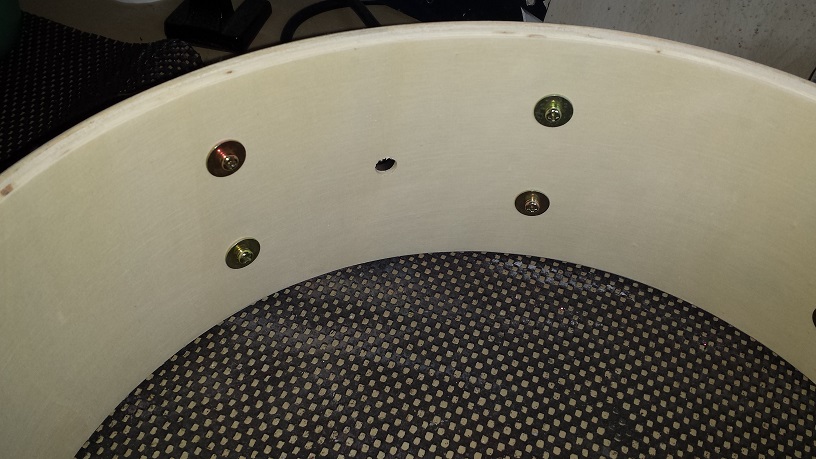
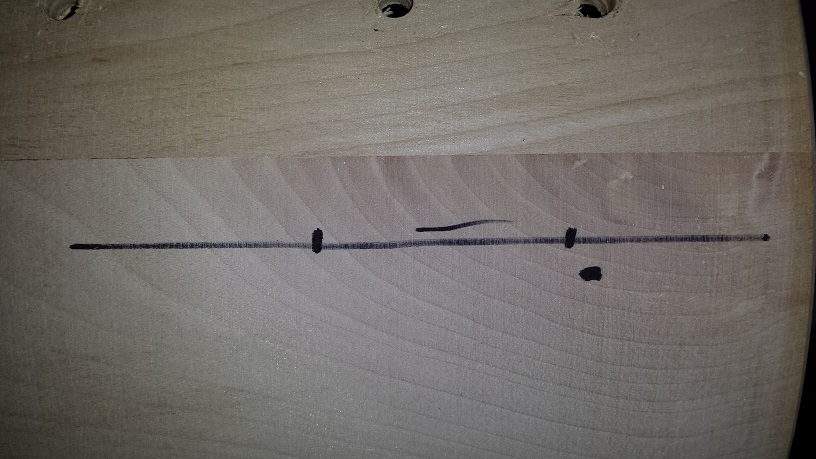
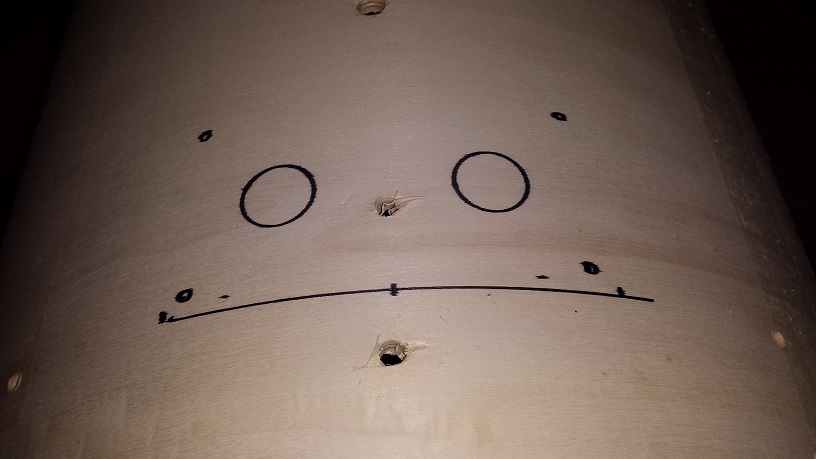
Before painting the interior we need to drill holes for the leg brackets. Start with spacing them out evenly around the shell and mark the positions. Then draw a straight line at each position perpendicular to the bearing edge. Decide on a distance from the bottom of the shell to the lower hole and mark. (5 cm in this case.) Then add another mark for the top hole according to the distance between the screw posts.
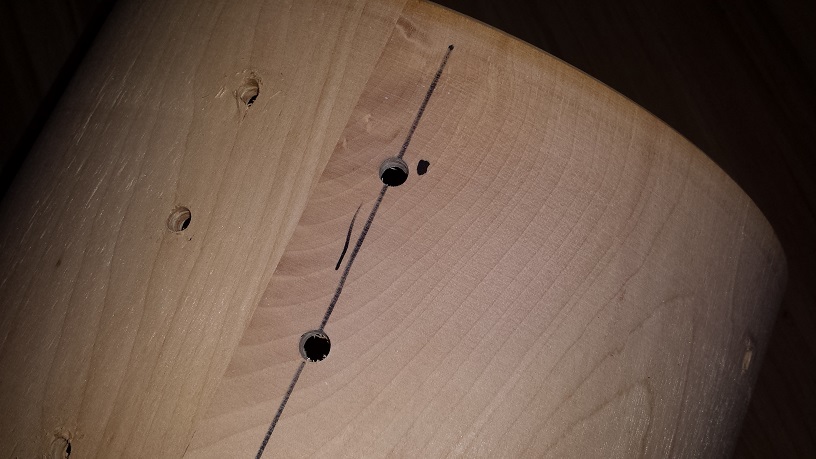
Use a corded drill. Most cordless drills spin too slowly to yield a clean hole edge. Load the drill with a brad point bit of the appropriate size. Drill from the outside of the shell until the point pokes through. Drill the remainder of the hole from the inside. This way we avoid breaking through the last ply which could cause splintering.
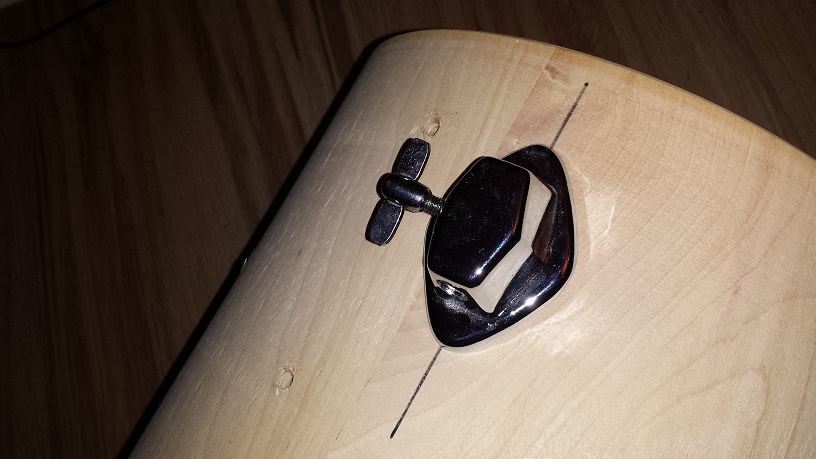
Test fit the brackets to ensure a good fit before putting the drill away. If you’re drilling in the family room like me, make sure to vacuum right away. This simple step greatly increases the rest of the family’s patience with activities like this in the house.
Time to add some green goodness. Paint on the first coat and leave to dry overnight. Don’t forget to mask the bearing edges first, unless you plan on sanding or cutting them.
Following the same procedure as with the tom tom, the floor tom bearing edges get sanded as well. I spend a lot of time on this step to ensure the edges are flat, square, of perfect profile and silky smooth. Sometimes it helps to rotate the paper on the sander so as to spread the wear evenly. If you’re as finicky about bearing edges as I am, prepare to spend a couple of hours + per drum just sanding. I know it seems like a lot of time, but when the time comes to tune, you’ll be glad you did. Not to mention every time you play them.
Time for the wrap. Just like the tom tom, the floor tom gets wrapped according to “Method 4” in our Drum Wrap Instructions Page. Of course followed by making the isolation gaskets and installing all the hardware.
I really wish I was better at photography. Every time I attempt to capture the sparkle I end up disappointed. The pictures aren’t nearly as sparkly as they are in real life. I’ll have to consult with someone that knows this stuff and see if I can learn something new.


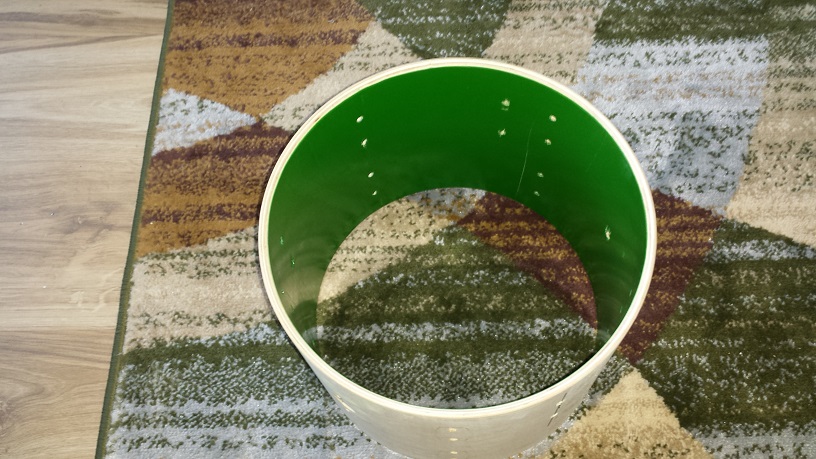
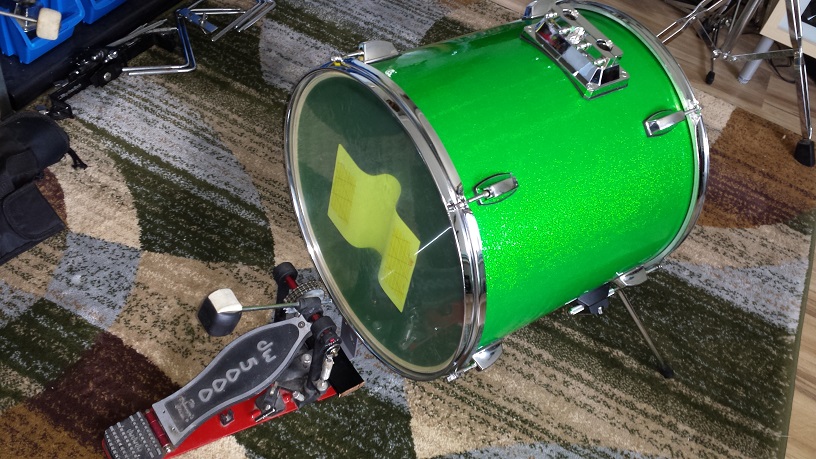
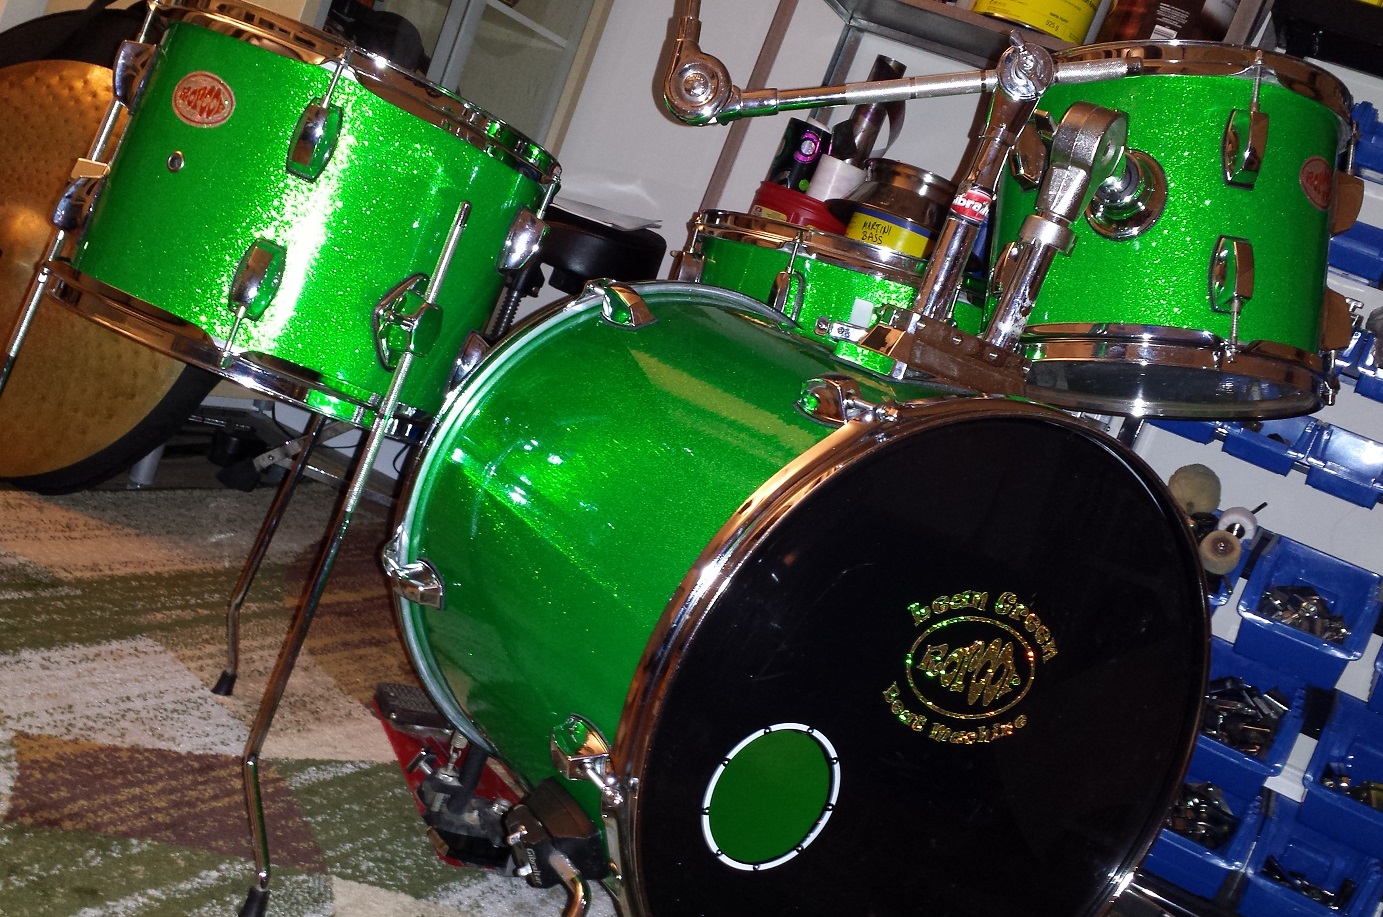
DIY Compact Drum Kit – The Bass Drum
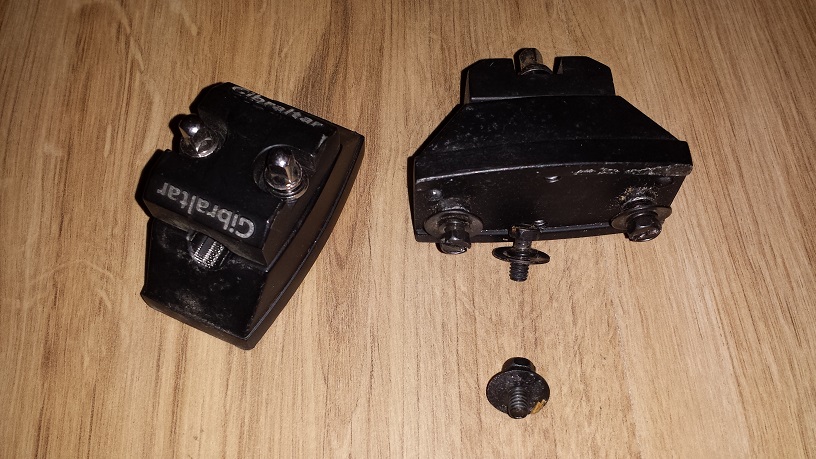
What used to be a 16″ floor tom from the same kit that donated the 10″ and 12″ will be our Lean Green Bass Drum. Once disassembled and unwrapped we can start determining how to make it functional. I had a couple of Gibraltar brackets I’ve been eyeing for a while. They’ll be perfect for the spur brackets along with a pair of spurs from a Pearl JG-16.
The existing holes for the leg brackets are of the right distance but a bit too small. After enlarging them with a larger drill, the brackets can be test-fit. Then we mock it up with the spurs too. That’ll work!
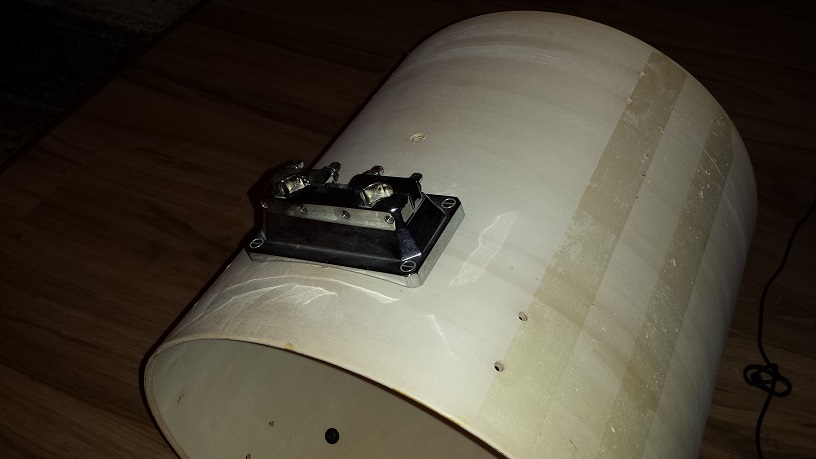
A double tom receiver platform comes in handy even on a bop kit since we can then add a cymbal post for the ride mounted to the bass drum.
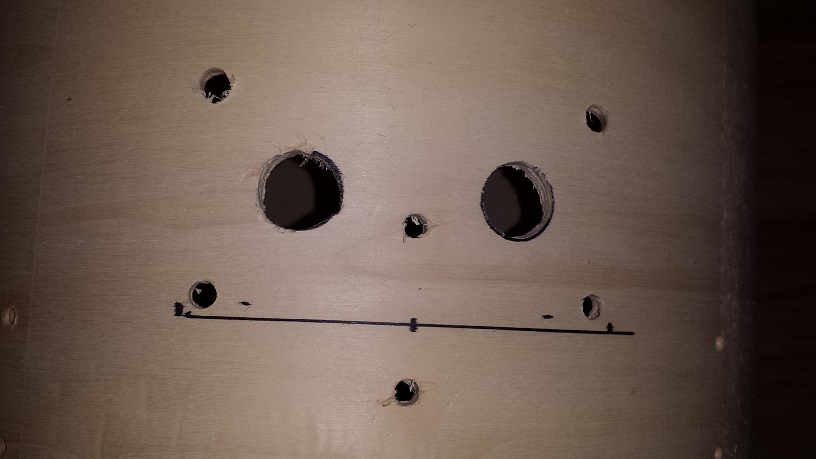
Using the adjacent lug holes and bearing edge as reference points, a series of lines and marks are gradually forming. Once the position is marked we can use the interior plate as a template to mark where the holes for the mounting platform need to go.
Drill the holes as per the same method outlined in the floor tom section. We used a 7/8″ spade bit for the pass-through holes.
Test fit to ensure that the platform drops in place. Then on to the mandatory vacuuming.
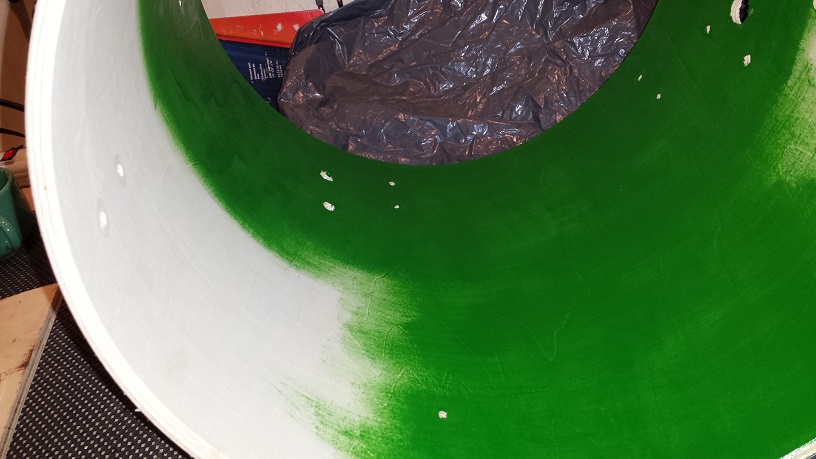
Time for paint. These are the times that I’m grateful to be focused on compact drums. Painting a first coat of gooey enamel on the inside of a 16″ is a lot of work, but not nearly as much as the same task on a 22″ bass drum.
Once the paint is dry we move on to sanding the bearing edges and wrapping the shell. These tasks are performed in the identical manner as the toms above.
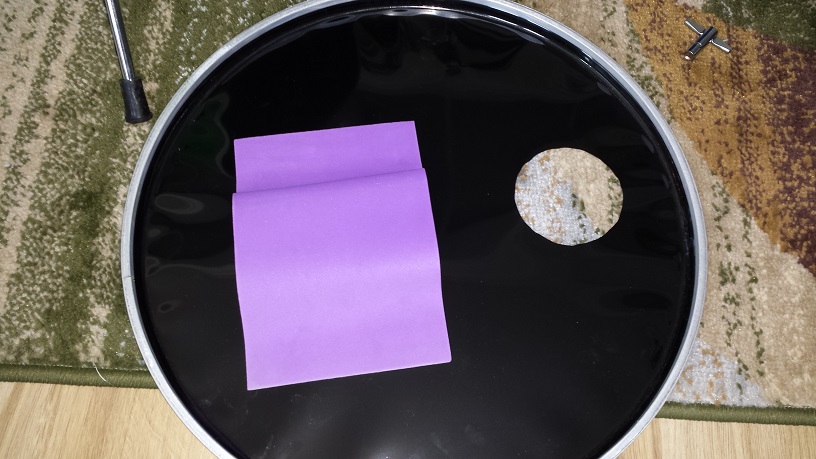
As usual, we fabricate DIY Isolation Gaskets prior to assembly. Before adding the heads I stick a craft-foam “bridge” on the inside of both heads. These bridges really help get a bass drum sound with standard tom heads. A hole is also cut in the resonant side head.
We fabricated a riser specifically for this bass drum since we have one lug oriented straight south. See bass Drum Riser #7 on our DIY Bass Drum Risers Page.
All that remains now is kit assembly, Roroor badges and a nifty graphic for the audience facing bass drum head.


DIY Compact Drum Kit