

Introduction to our DIY Bass Drum Risers

For a drum kit with a smaller bass drum than 18 inches, a riser is necessary for a couple of reasons. Most importantly to attach the pedal and facilitate centering the beater on the batter head. Raising a smaller bass drum a few inches off the floor also aids in projecting it’s sound. From a visual perspective, raising it a few inches makes it look more proportionate and lessens the distance between the top of the bass drum and the high tom(s). The smaller the bass drum, the more height is required.
There are many ways to go about making a riser. On this page we will cover a few, ranging from easy and low-cost projects to more difficult and a bit costlier. Some are designed to raise just an inch or two, others are provide higher elevations for 14″ and smaller bass drums. Let’s get started on some DIY Bass Drum Risers! We’re sure you will find one that suits your tom-to-bass conversion.
DIY Bass Drum Riser #1, Featuring a simple design coupled with ultra low cost
Materials needed: A couple feet (50 cm) of 2X4 lumber, a foot (25 cm) of 7/8″ hardwood dowel, L-shaped metal bracket. Paint, screws, carpenter’s glue or PVA (white) glue, drawer liner, inner tube or other rubbery material, double-adhesive tape.
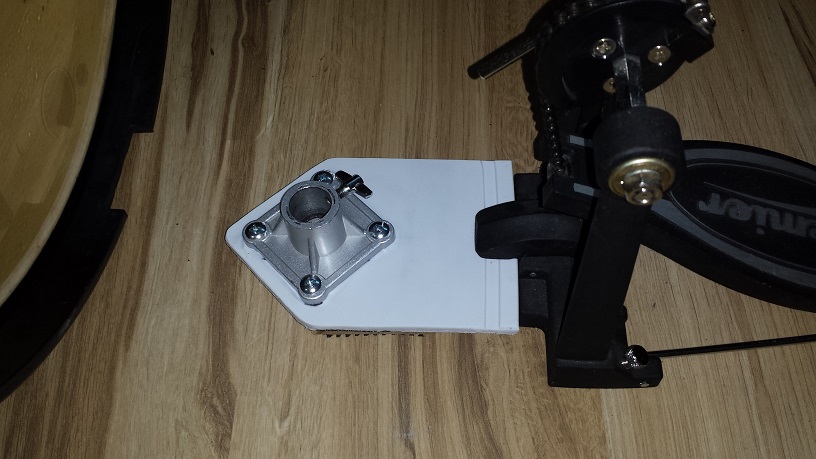
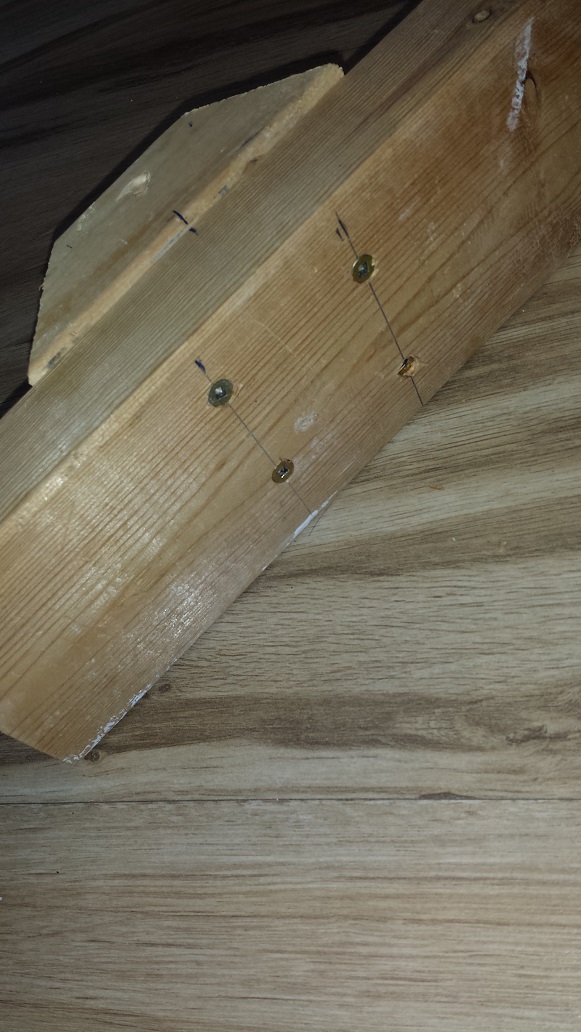
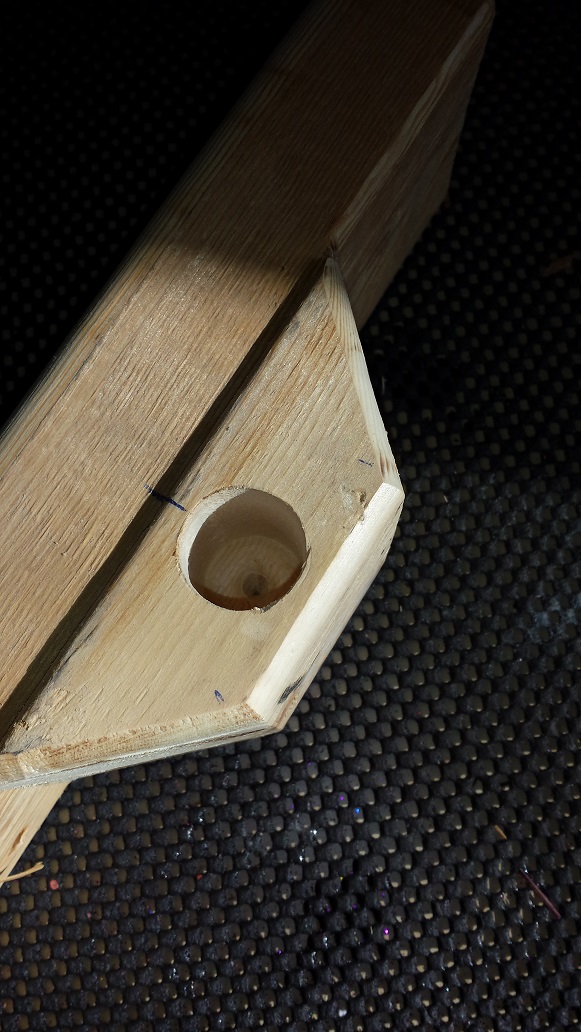
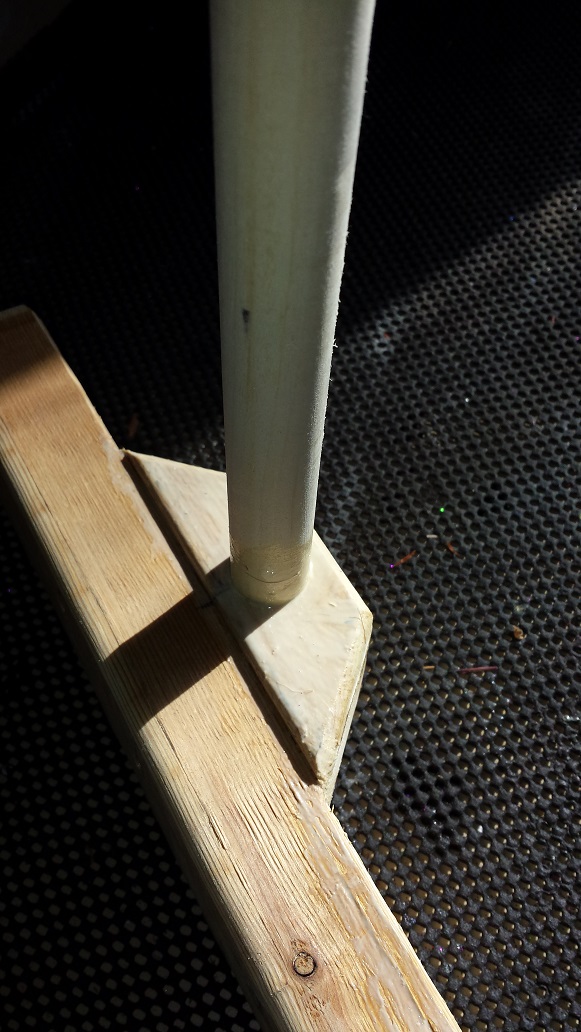
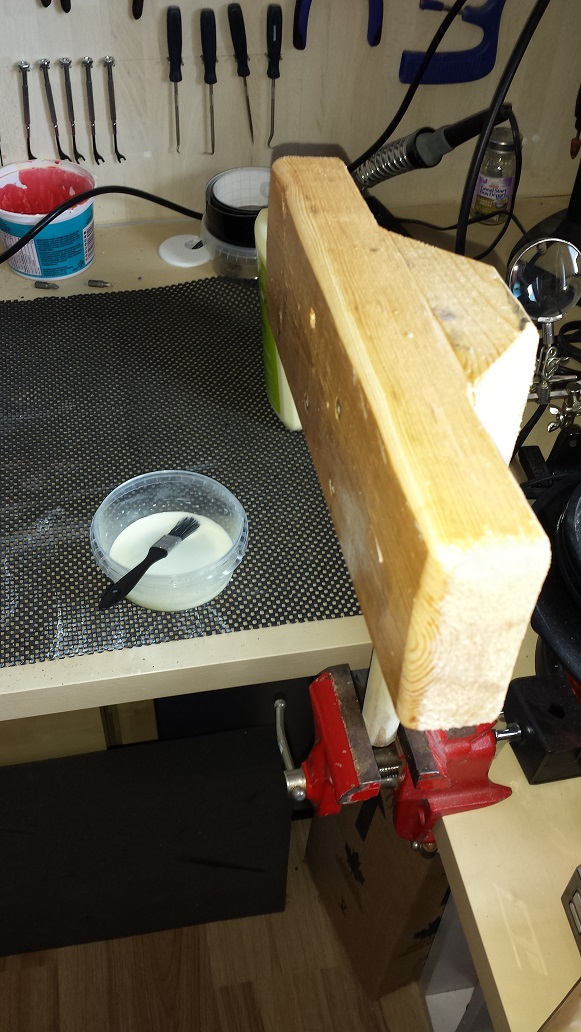
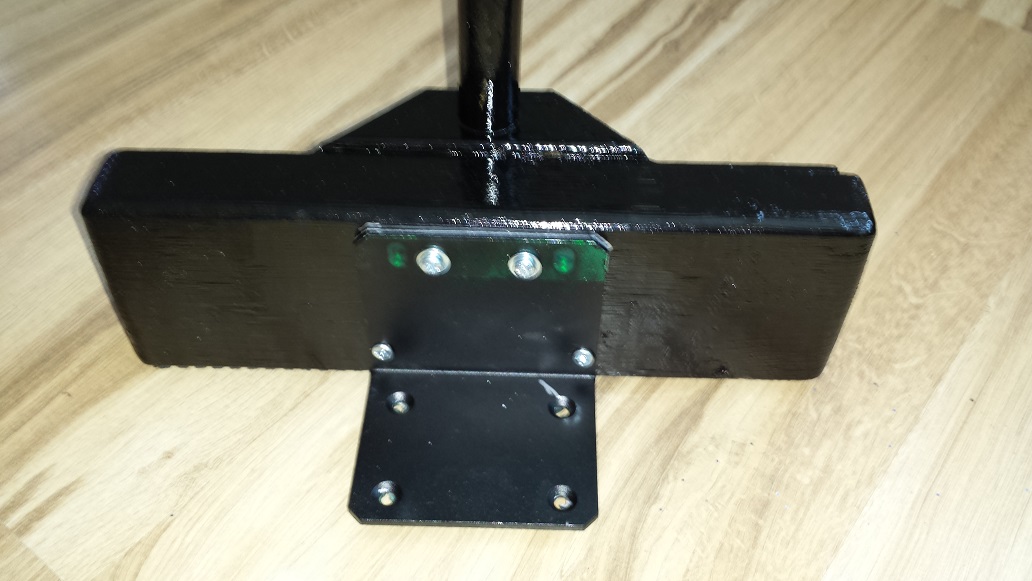
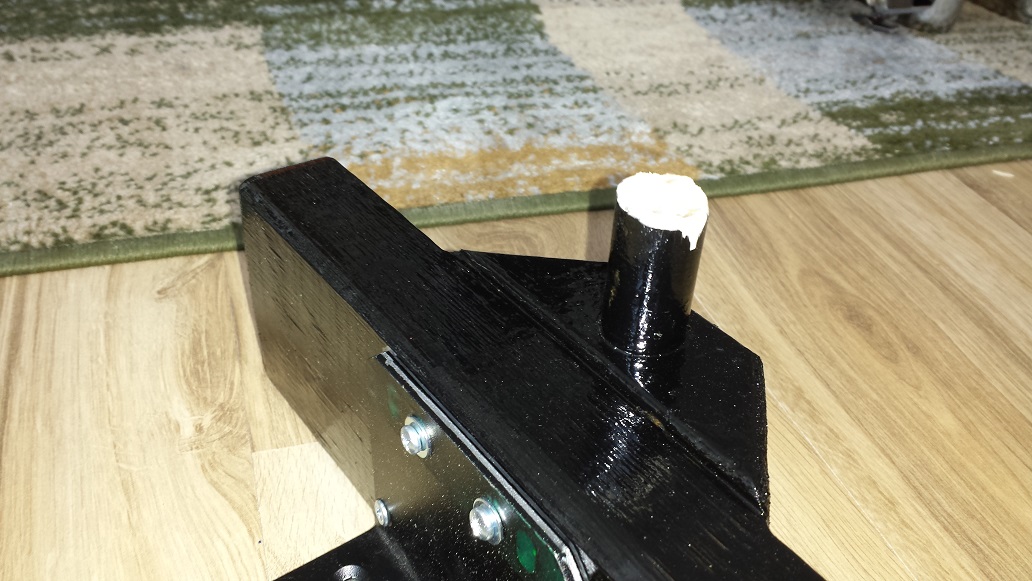
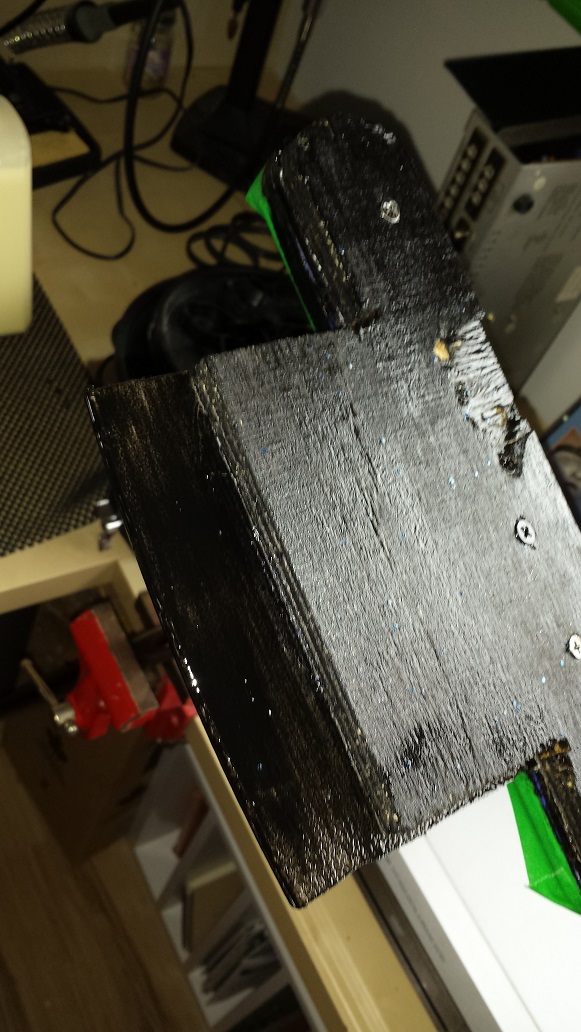
Cut the 2X4 into two pieces, one shorter than the other. (See pics) We also cut a 45 degree angle on the smaller piece, but this is not necessary. Join the two pieces with screws as pictured. Drill a 7/8″ hole about 1-1/2 inches (6 cm) deep in the smaller piece as pictured. smear excessive amounts of glue in the cavity and insert the dowel.

Leave to dry overnight. We then sealed the entire contraption with a mix of above mentioned glue and water. This is necessary if you intend to paint the riser with enamel as the enamel will crack and peel off if applied directly to wood. Let dry overnight again and cover with two coats enamel following the manufacturers directions for re-coating and drying times. Cut the drawer liner or inner tube to fit the shape of the base and attach with double adhesive tape.
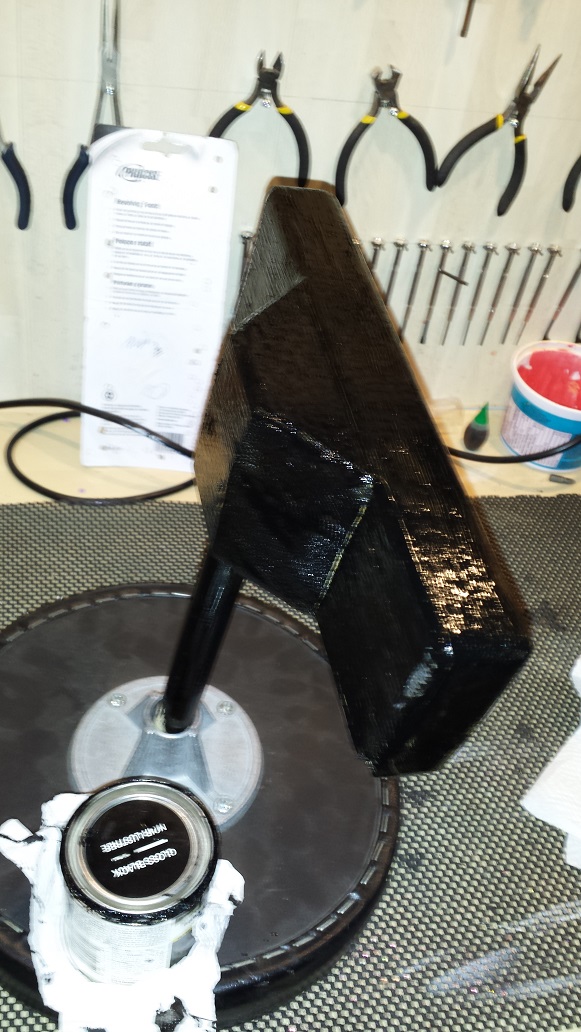
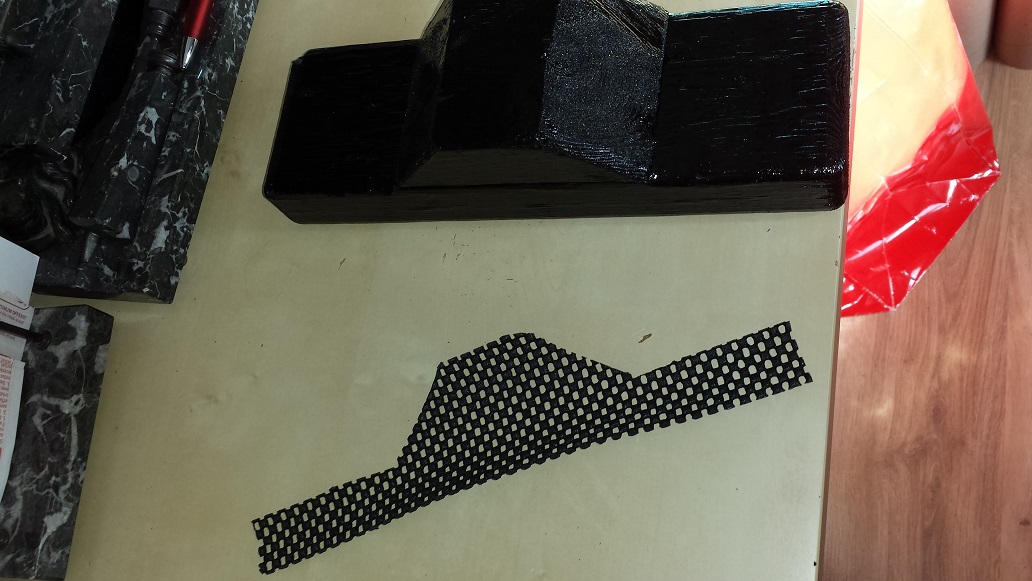
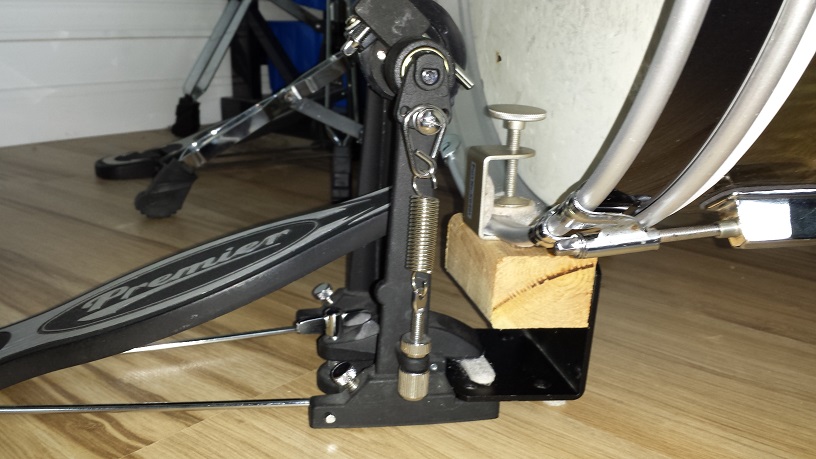
Using four wood screws we proceed with attaching our L-bracket which will serve as the pedal mount. In this example we used a bracket intended for rack mounting a server, but any L-shaped bracket wide enough for your pedal will do. (Readily available at home improvement stores.) We generally avoid cutting a holes in the bass drum for posts and such to insert through, so for our version it is necessary to cut down the dowel to the required length.

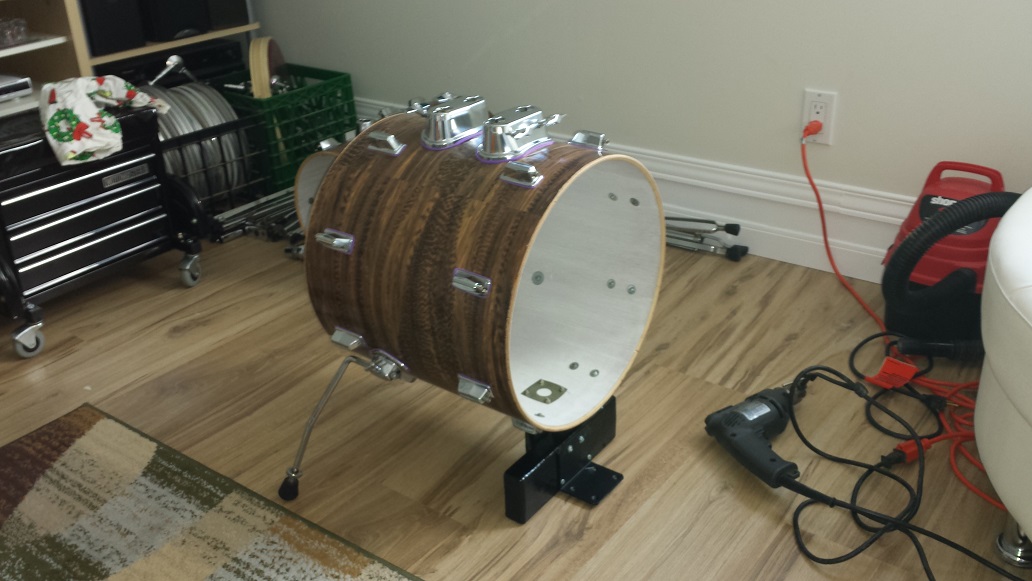
This particular riser is for our DIY Mini Bop Kit. We used the finished riser as a guide to install the mounting bracket on the bass drum and then rigged it up. It’s not the prettiest bass drum riser we’ve seen but likely the cheapest at a cost under $2. It is also very sturdy thanks to the wider than usual design. Something we chose to do since our DIY Mini Bop Kit will have the snare and floor tom attached to the bass drum.
DIY Bass Drum Riser # 2, Another low cost, simple design
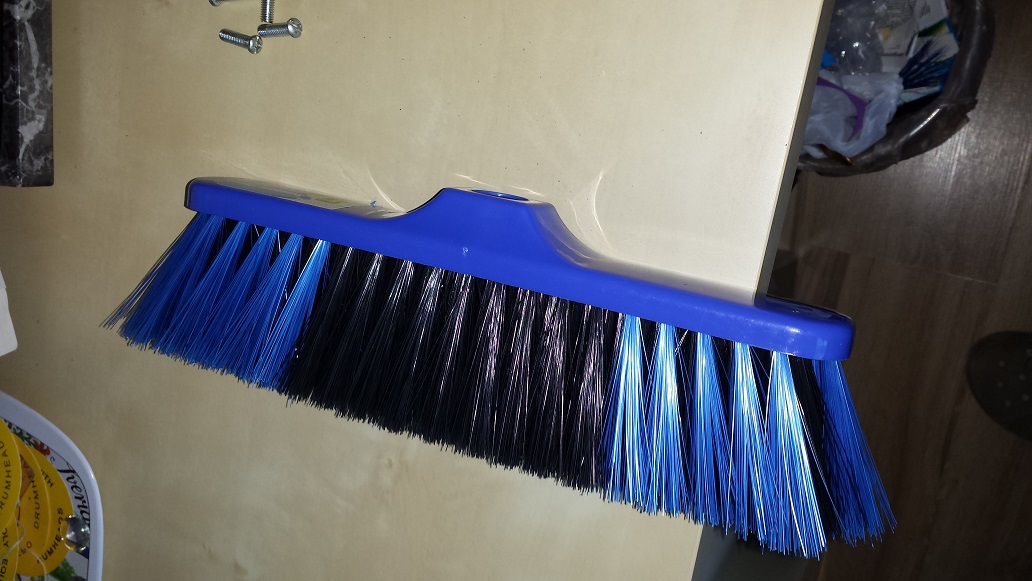
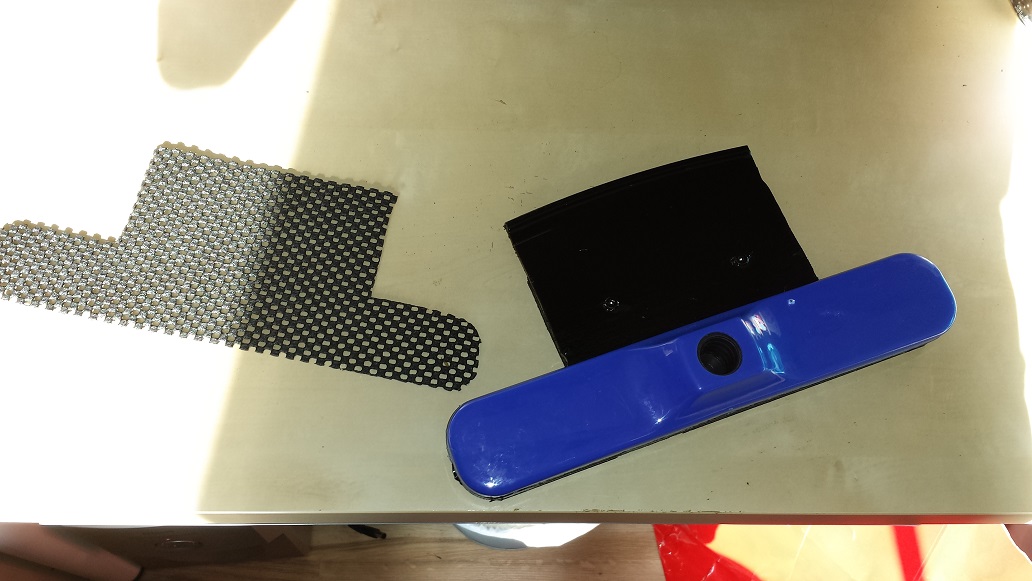
This simple project requires the following materials; A broom with a 90 degree angled shaft, 1/2″ or 3/8″ plywood, 3/4″ dowel, Contact cement, Tapping screws, Glue, Non-slip drawer liner and a cutting board (optional).
Start with plucking the bristles out of the broom base. On ours they came out easily with pliers. Measure the distance required from the center of the shaft receiver to the lip of the pedal mount, depending on your bass drum. Mark the cutting board (Or plywood) to have a 4 – 5 inch wide protrusion to the pedal. Our cutting board was on the small side so we had to make this layer in three pieces. Adhere the cutting board layer to the broom base with contact cement and clamp tightly.
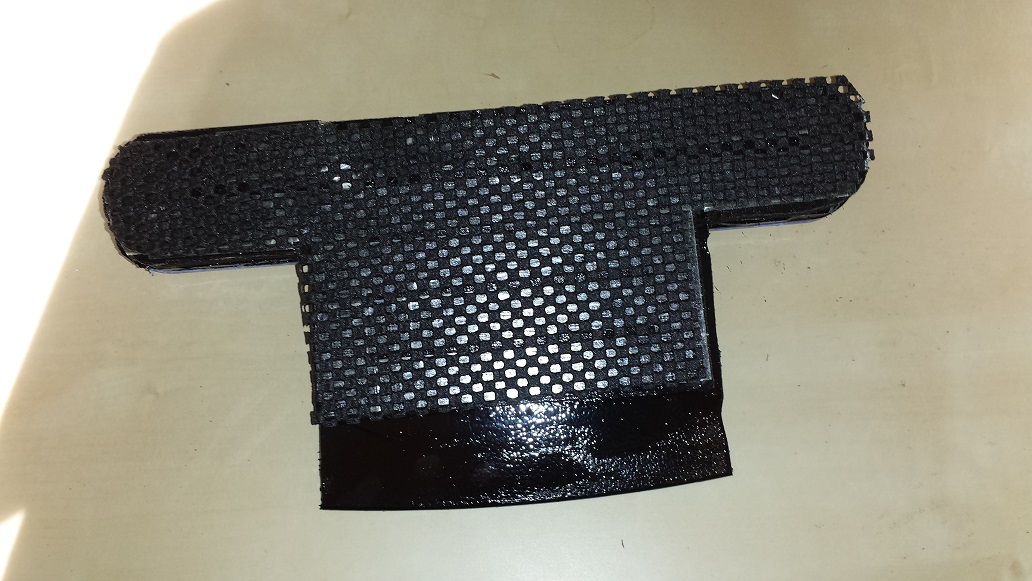
Next we make a similar shape out of plywood, only with a shorter protrusion to alow for the pedal to clamp to the cutting board layer. Adhere the plywood to the cutting board and clamp tightly. Once the contact cement is fully cured insert two short self-tapping screws from the top of the cutting board protrusion into the plywood, and a few from the bottom, through all three layers. Seal the plywood with a mixture of carpenter’s glue or pva (white glue) and water. Mask the broom base and apply two coats of enamel. Cut a piece of the drawer liner to fit the bottom layer. This non-slip drawer liner grips great to both carpet and bare floors.

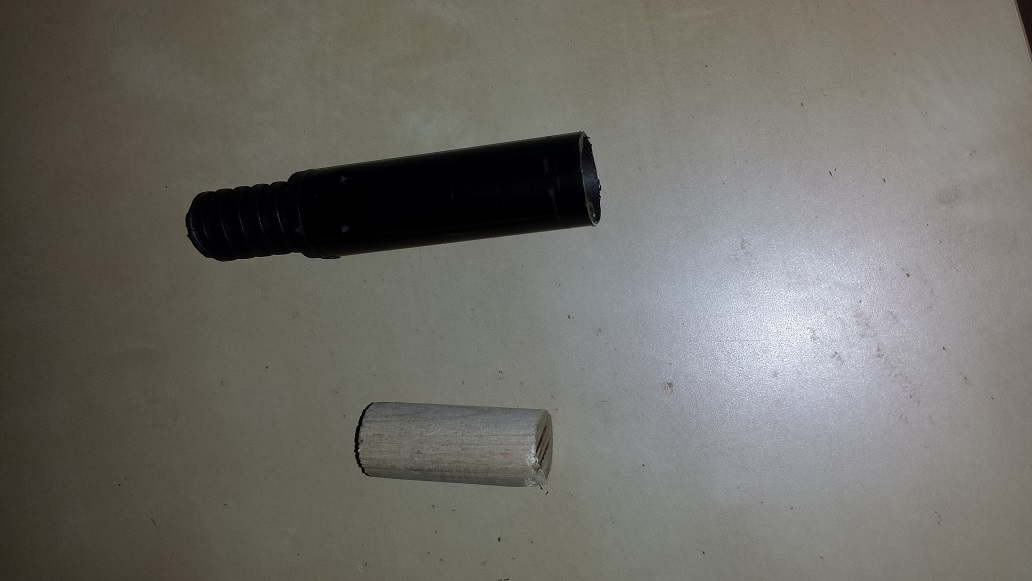
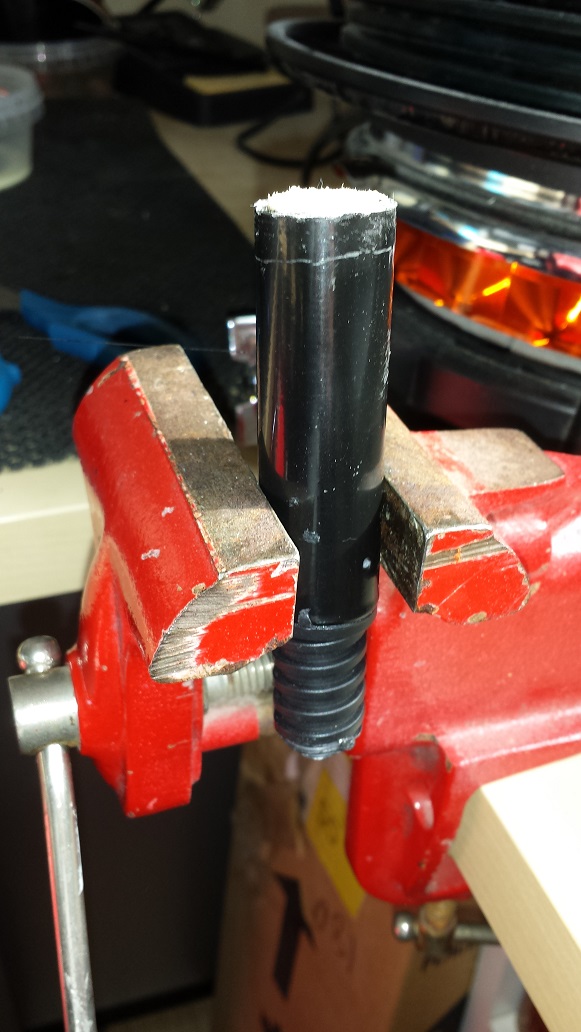
Attach the drawer liner to the base with double sided tape, or glue. Next, mark and cut the broom shaft to desired length. In our case we cut if fairly short since we avoid drilling through the bass drum shell for the shaft, but rather let the shell rest on the top of the post. We cut cut it a smidgeon short to allow for our dowel to protrude ever so slightly. The purpose of the dowel is two-fold. Since these broom shafts are smaller gauge than drum hardware, we insert it to add strength. The other purpose is to provide a wood resting spot for the shell, rather than the shell resting on the rough metal edge. Cut the dowel two length, pour excessive amounts of carpenter’s glue, construction adhesive or super-glue into the threaded cavity in the broom base and insert the dowel. Wipe off the excess glues that oozes out. Let dry over night.
DIY Bass Drum Riser #3: Ultra Stable Construction for Supporting the Snare, Toms and Cymbals
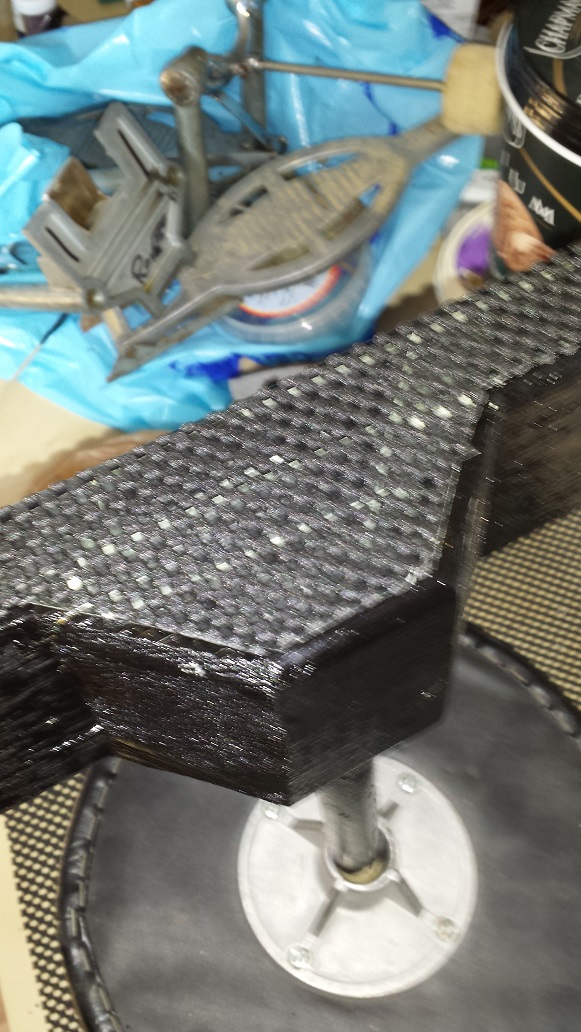
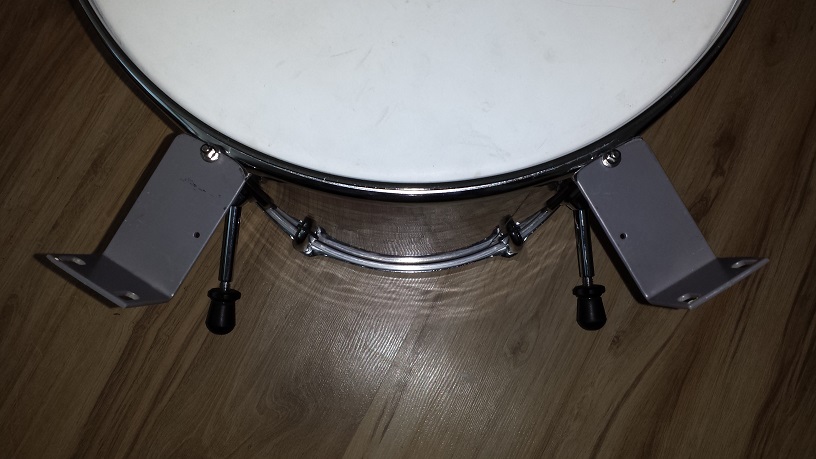
The DIY Mini Bop Drum Kit project necessitated the construction of yet another riser. In order to support the added weight of the snare and floor tom additional stability was required. Start with cutting a regular 2″ X 4″ to about 20″ or half a metre. In our case we wrapped it with the same vinyl as our project Kit. Measure and mark the position corresponding to the tom bracket on the bass drum. Attach the receiver bracket from the underside of a throne seat with wood screws.
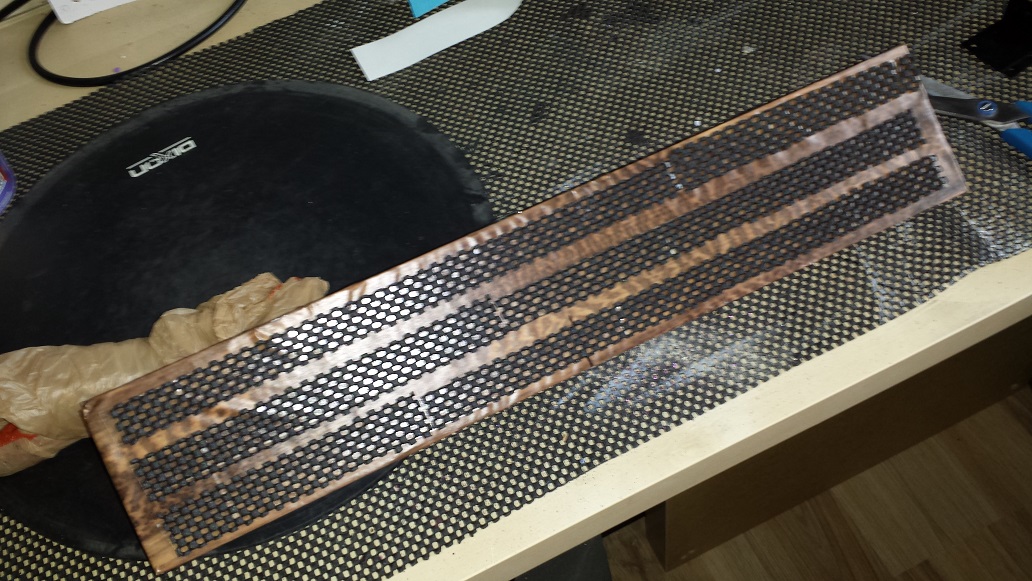
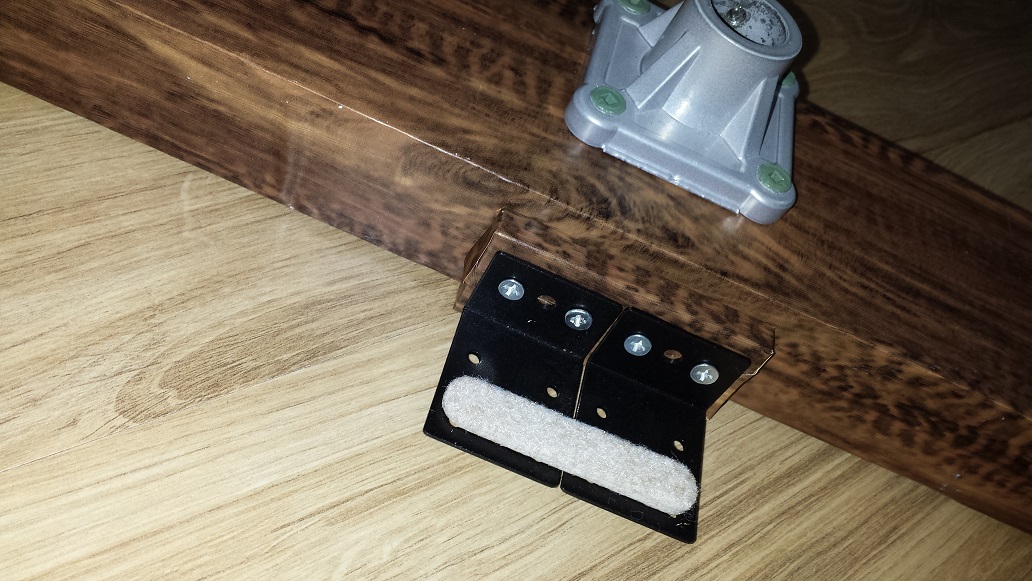
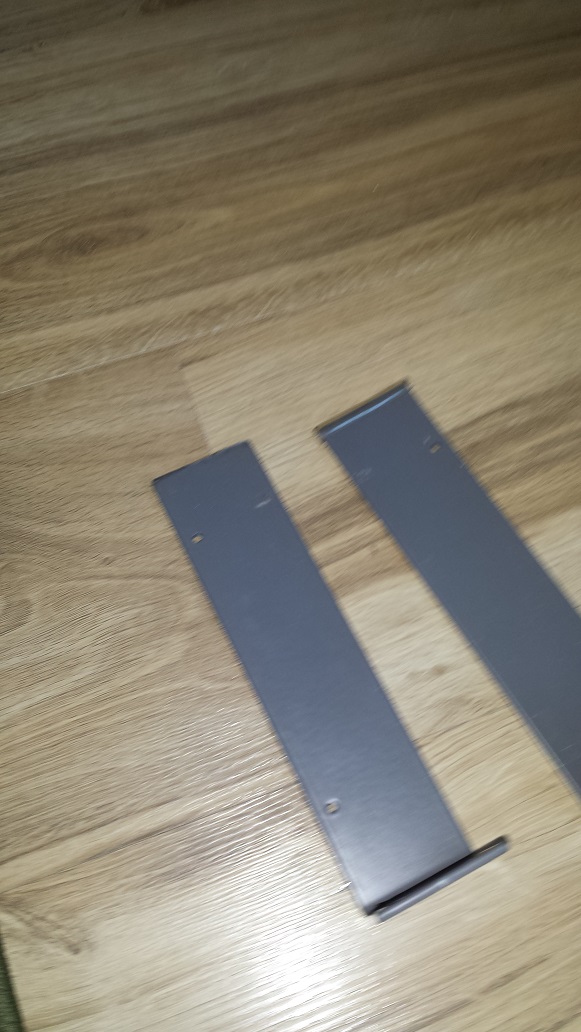
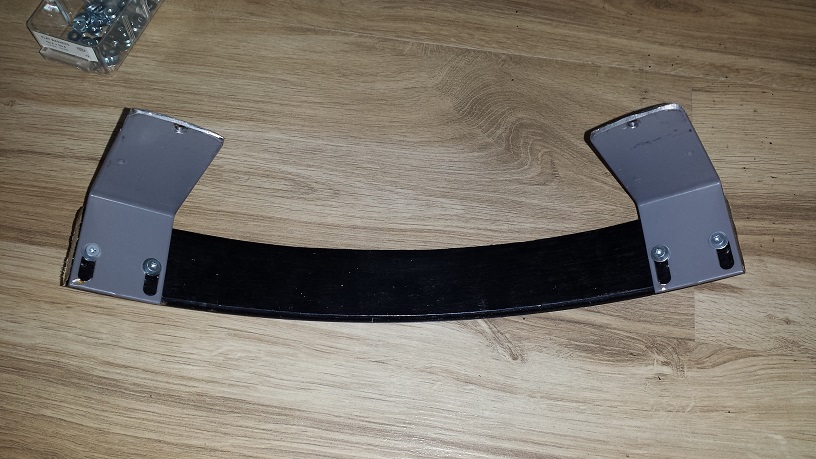
For traction we use the same All-Terrain tires as always, Non-slip drawer liner attached with double sided tape. The L-brackets we had handy required a small additional piece of wood as a shim to get the right distance to the pedal. At this point the stability is adequate, but our concern that the strain on the shell at the single tom bracket would be too much led us to add support posts as well. These could just as easily have been made with 2X4 as well, but we had a pile of these long L-brackets handy. Cut to desired length with an angle grinder and added a piece of split tubing to the top edge.

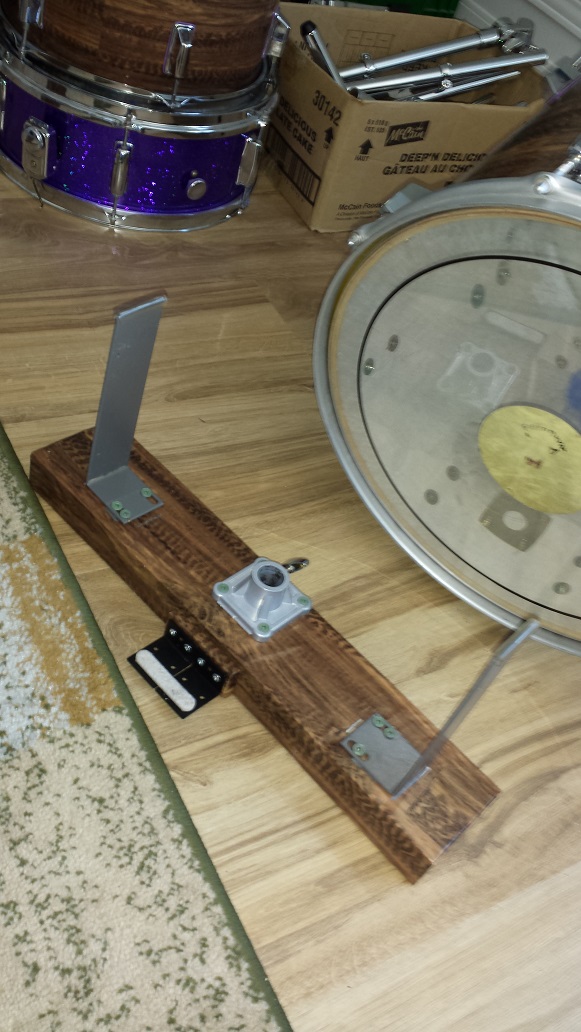
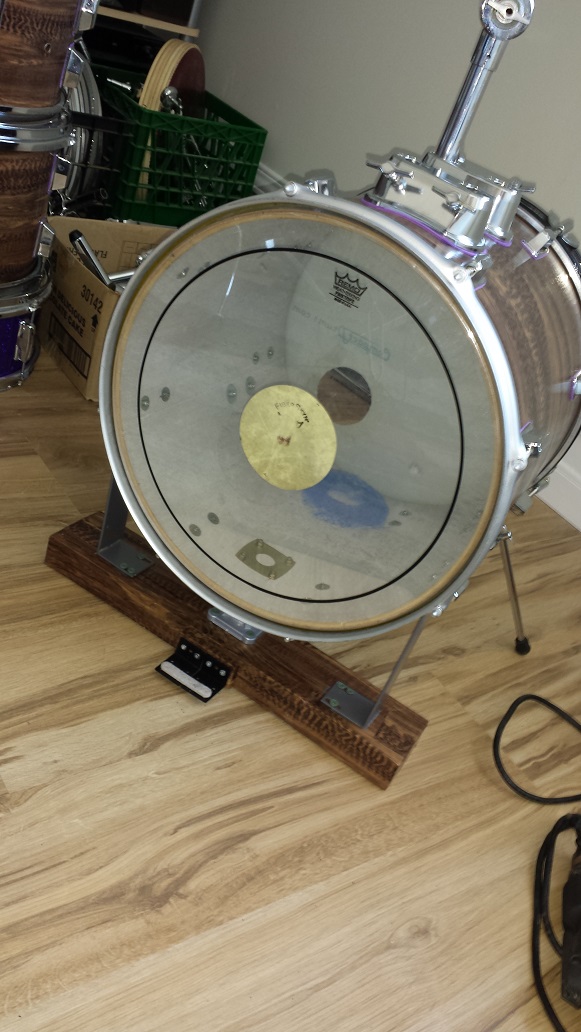
Measure, mark and attach the Posts to the base. As hoped it’s rock solid and should provide ample support for all the added weight.
Bass Drum Riser #4 – The simplest and most stylish so far
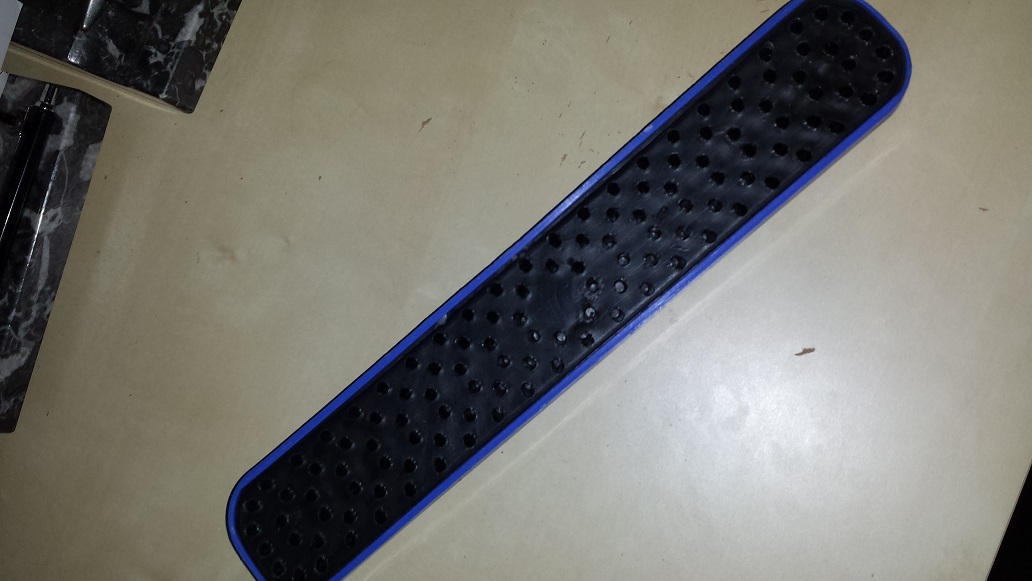
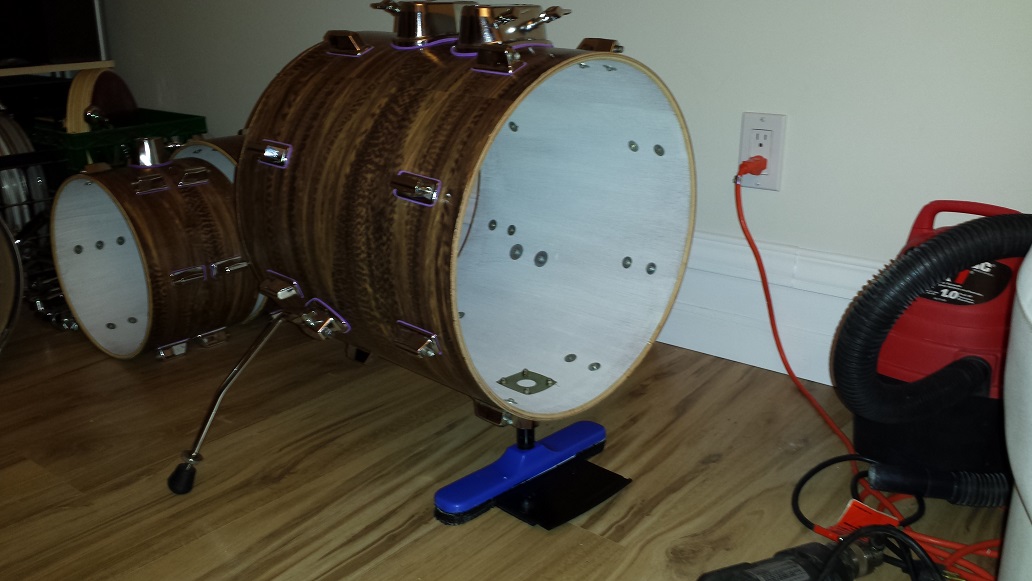
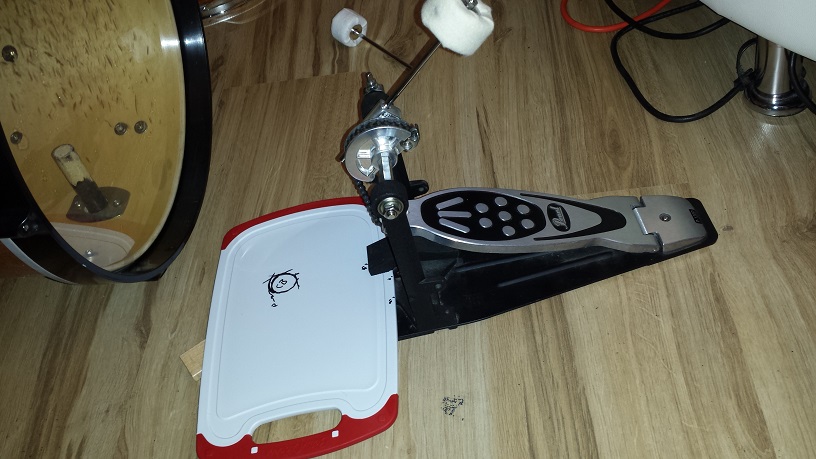
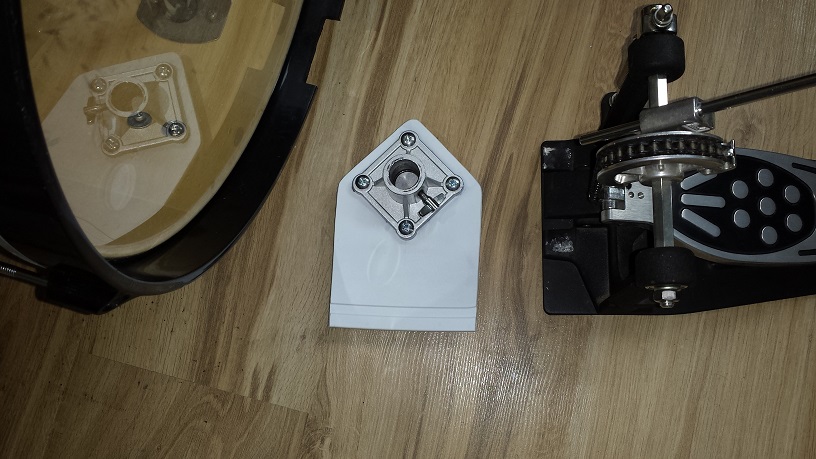
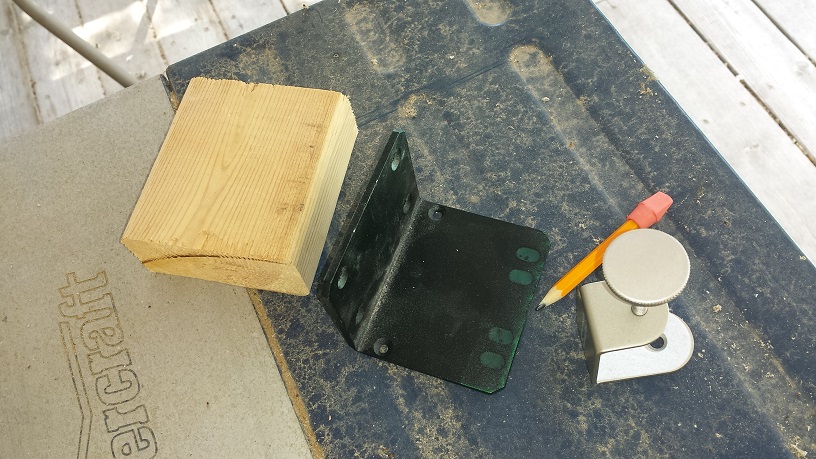
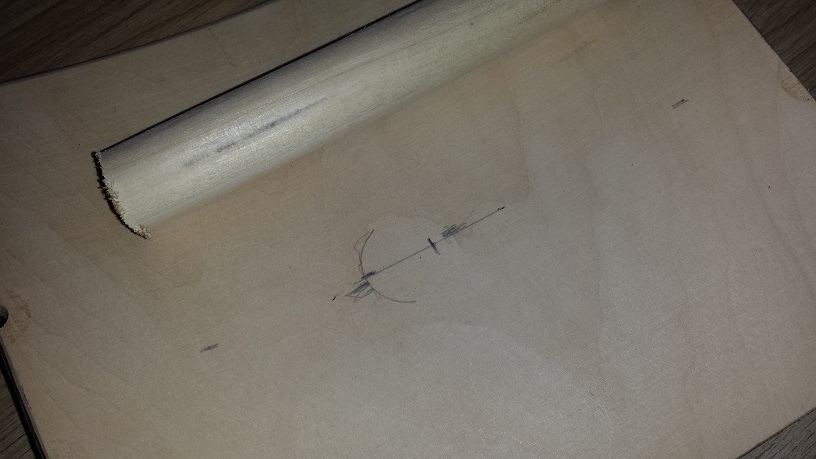
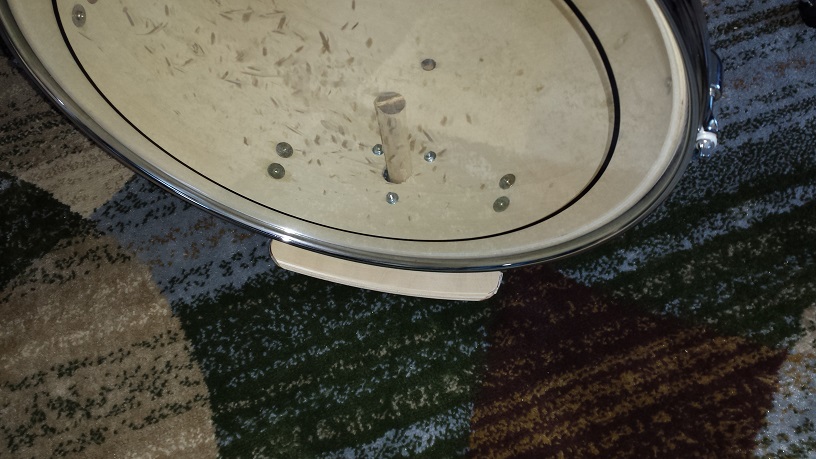
This one is quite professional looking and very simple to put together. Start with inserting a post in the mount on the bass drum. Grab a suitable thickness plastic cutting board. (Or other piece of suitable material.) Clamp the bass pedal to the cutting board. Place something for support under the cutting board, of similar thickness as the pedal’s base. Place the bass drum at the appropriate position relative to the pedal, with the riser post on to of the cutting board. Adjust the position until perfect and mark the position of the post on the board. Test a couple of pedals. They do tend to have slight discrepancies.

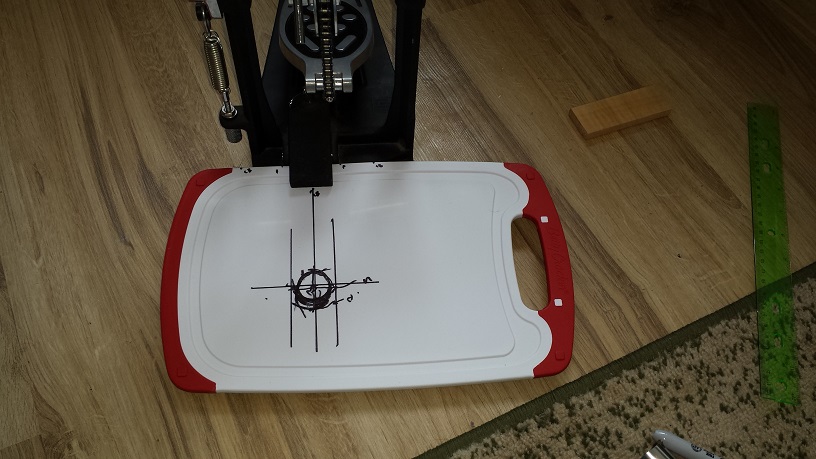

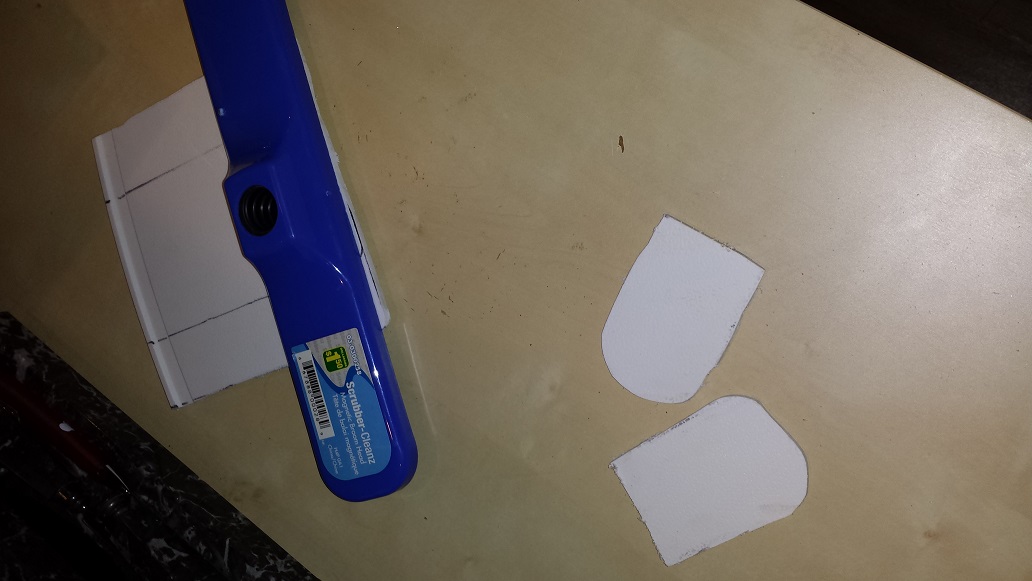
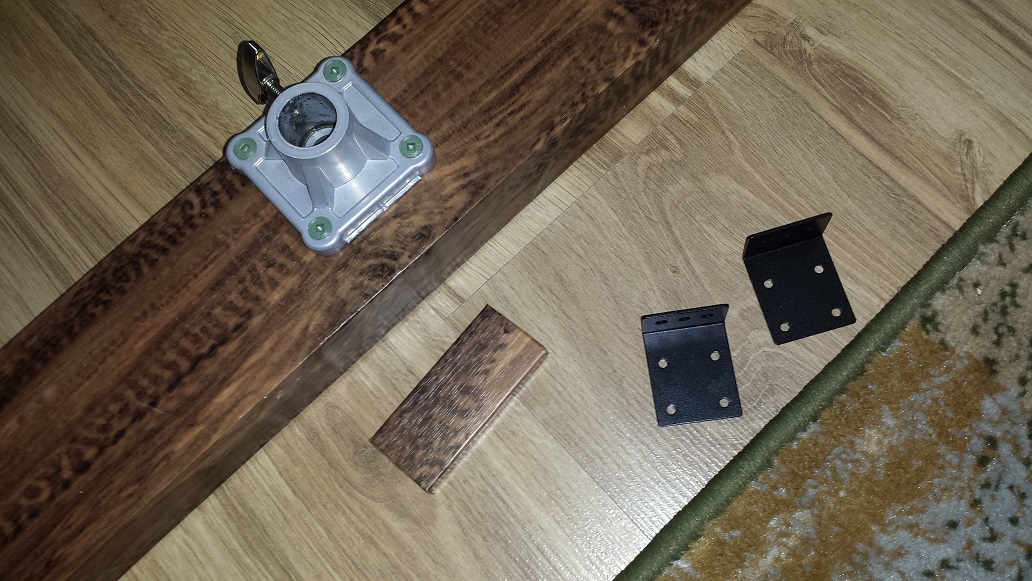
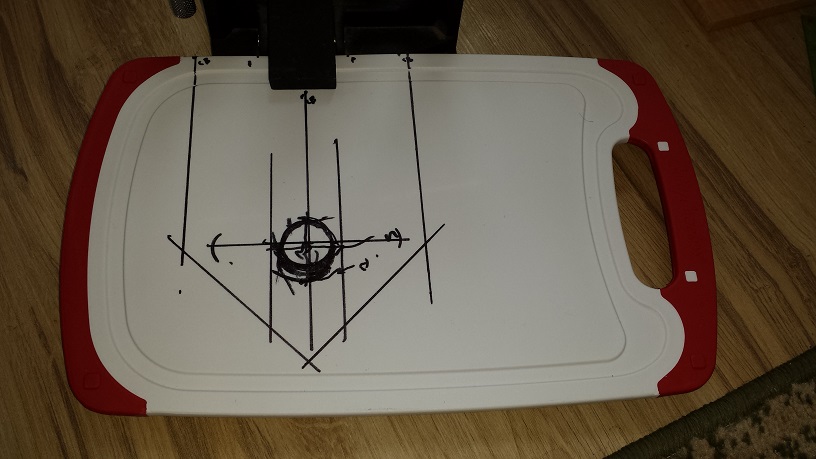
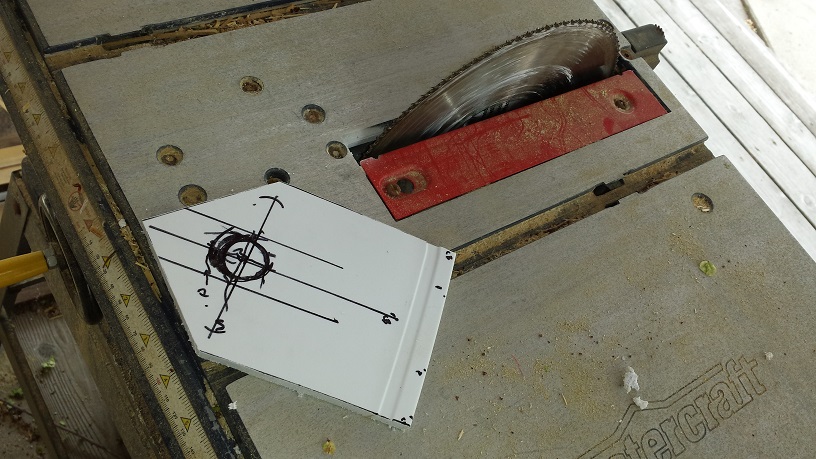
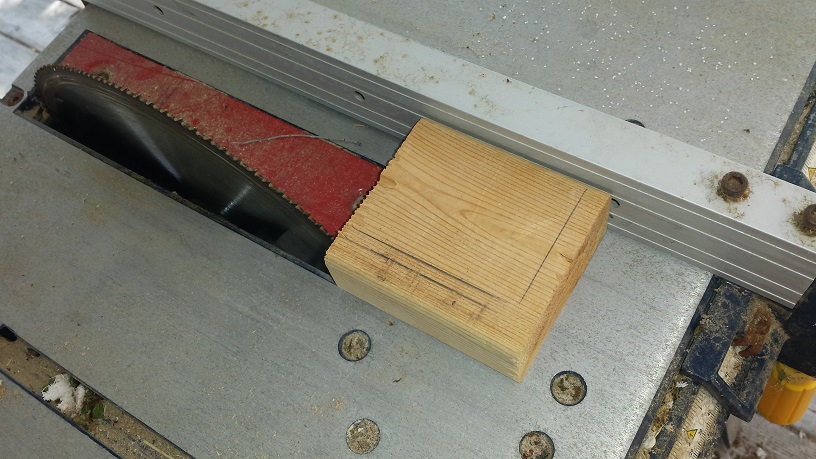
Next we mark the centre line from the pedal through the centre of the post mark. Add another line perpendicular to the centre line through the middle of the post hole mark. I added some more lines, but they didn’t turn out to be required. Next we grab a post mount from the bottom of a throne seat and mark it’s perimeter. Finally we draw an outline for the riser base plate and cut it out in the table saw. Follow up with some smoothing of the corners and edges with a bench grinder.
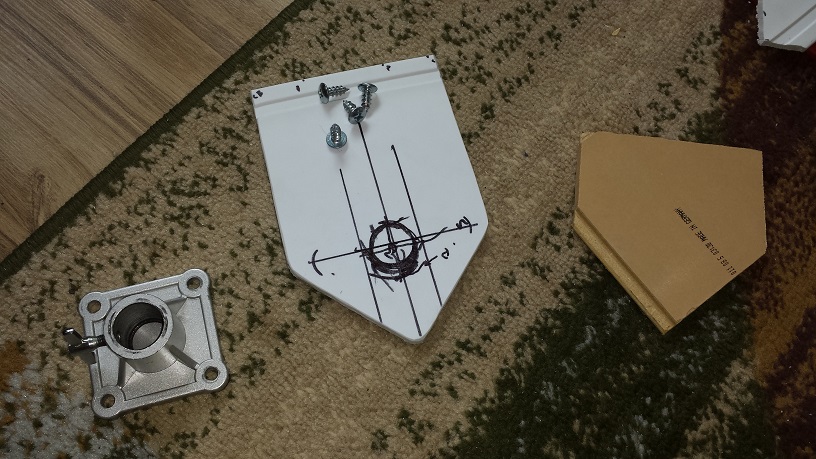
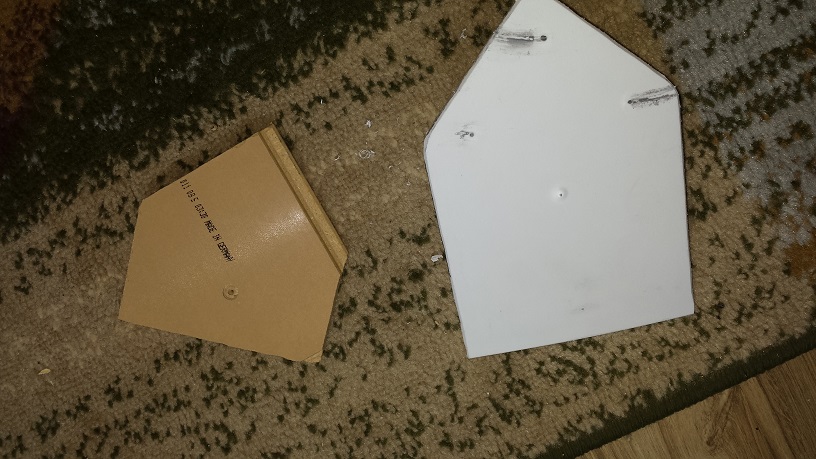
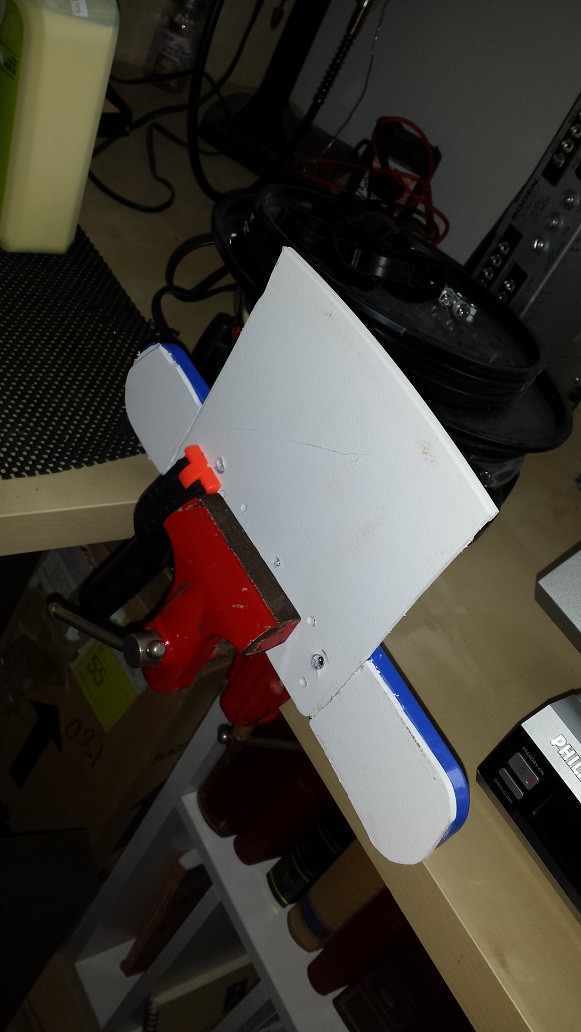
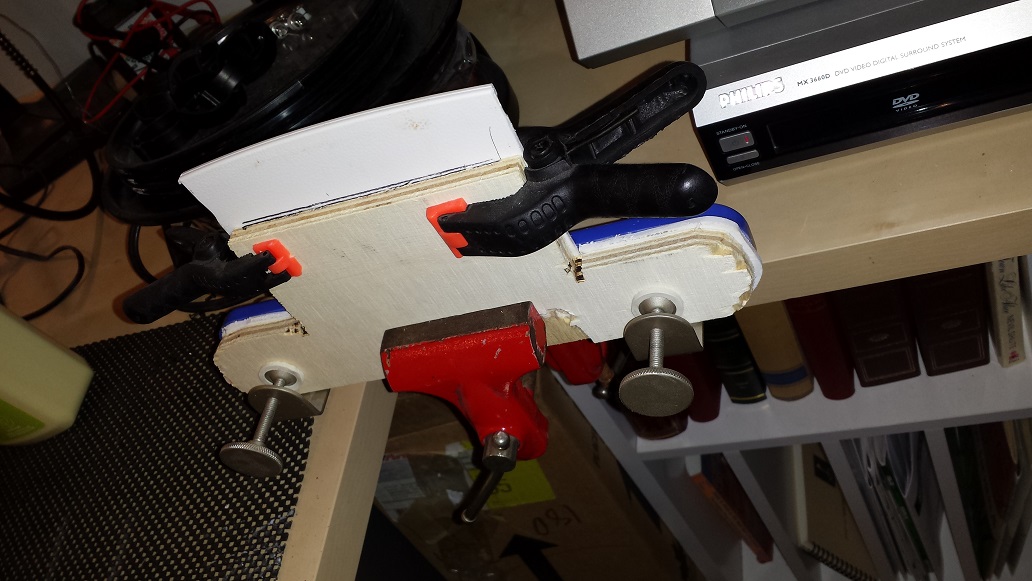
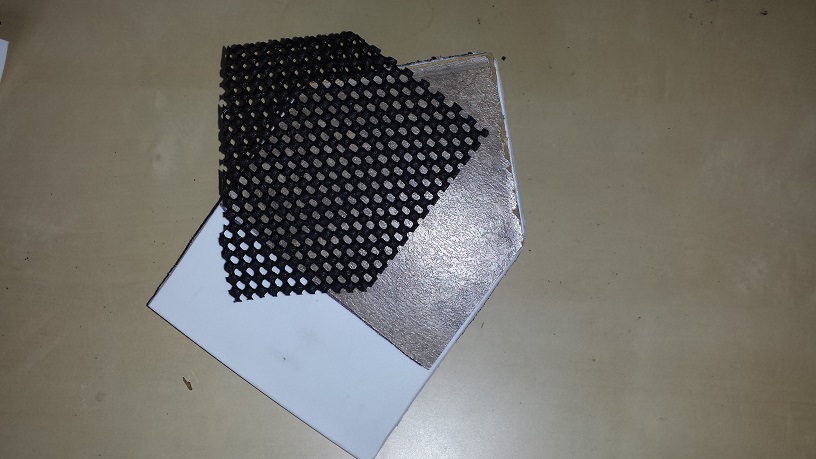
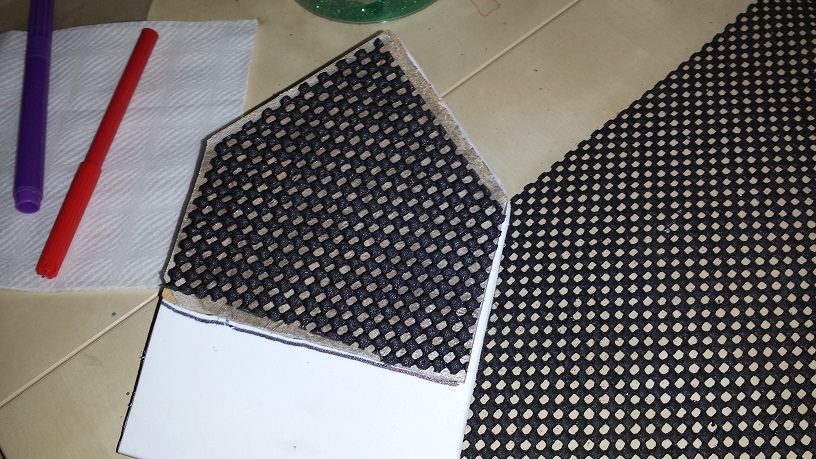
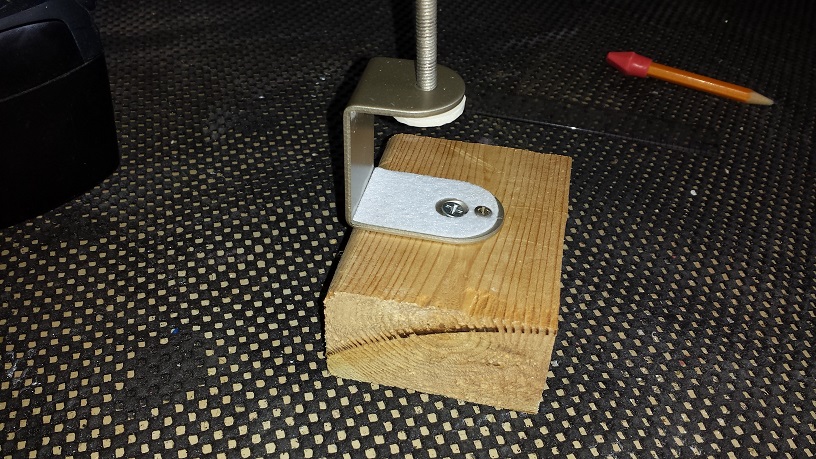
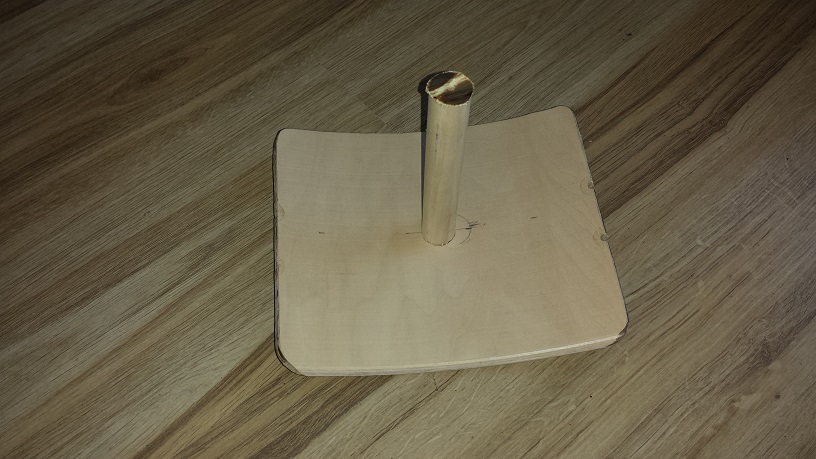
We also need to raise the baseplate a smidge to accommodate for the height of the pedal clamp. We found a suitable piece of laminate floor and cut to size. Screw the post mount to the cutting board with wood screws. Our screws poked through just a tad, so we ground those down in the bench grinder. The centre one couldn’t be reached by the grinding wheel so instead we made a corresponding hole in the laminate floor. Slap the two pieces together with contact cement, clamp and let dry for a couple of hours. Once dry we glue on some non-slip drawer liner for traction and wipe off the excessive marks with rubbing alcohol.

DIY Bass Drum Riser #5, Clamp-on-Hoop Style
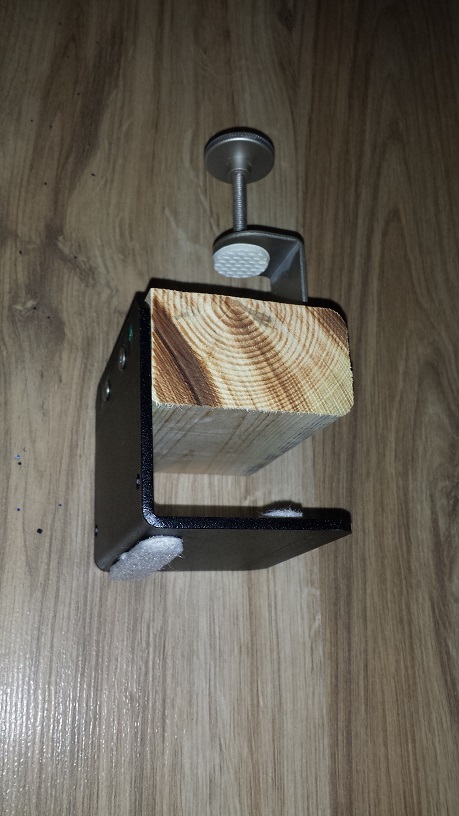
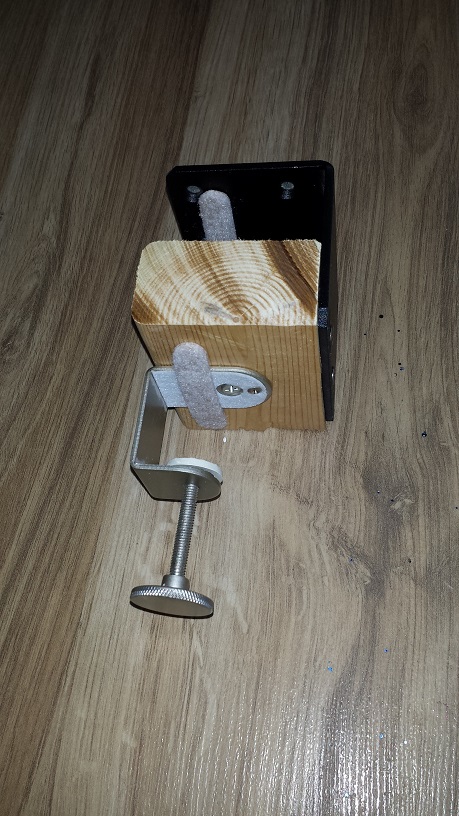
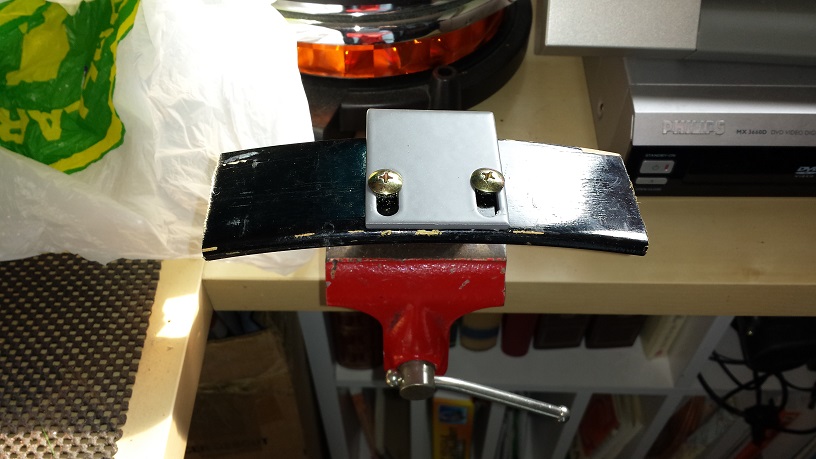
With a clamp I believe once belonged to a goose-neck desk lamp, a piece of 2X4 and an L-bracket for mounting a server in a rack, we put together yet another simple DIY Bass Drum Riser. Start with marking and cutting the piece of 2X4 to match the foot print of the L-bracket. (We ended up having to disassemble and cut an additional 1/2″ off for the pedal to clear the hoop and riser.)
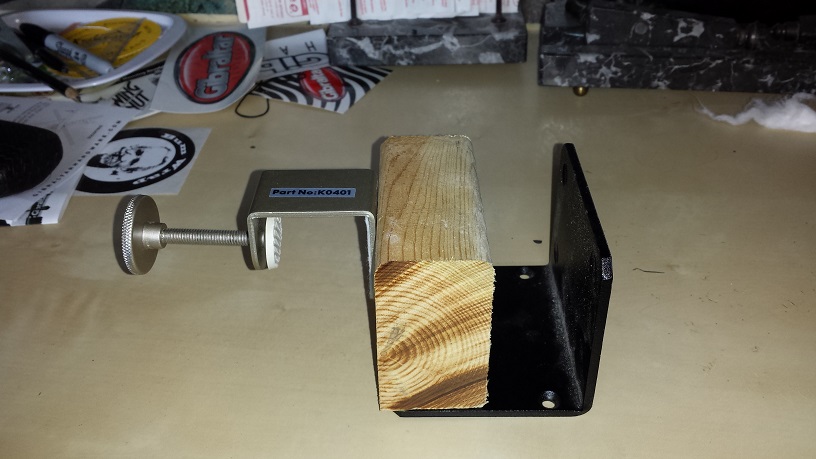
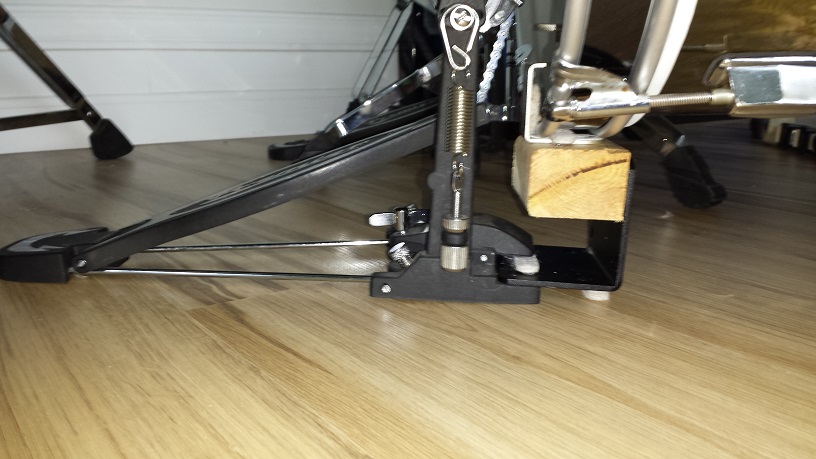
Next we attach the clamp to the wood with two screws and the bracket to the other side of the wood with another two screws. Add a few pieces of felt pads and that’s it!. Well almost. When we test fitted the pedal wouldn’t swing clear of the riser and hoop, so we removed another 1/2″ of the wood, re-assembled and voilà!
DIY Bass Drum Risers #6 – Piece of Cake Hoop
A while back I received an email from Leo in the Los Angeles area. Leo is a fellow DIY drum maker who designs and makes some really slick compact drum kits for numerous drummers in California under the name “Drum Monger’s“. Our bass drum riser #6 is based on a contributed design from “Drum Monger’s”.


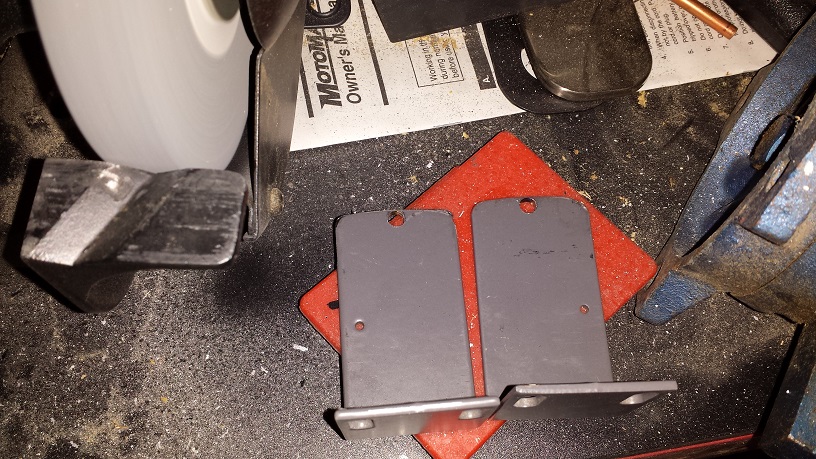
You’ll need a couple of L-brackets at least 4″ or so. Suitable brackets are available at most home-improvement centres. I had some brackets laying around that I’m using. Check Drum Monger’s site for pictures of the regular “Home-Depot” brackets. Start with making a drill mark 3″ from the angle and drill holes suitable for tension rods to pass through. Next cut the bracket down to length (If needed) using an angle grinder or other suitable destructive equipment. Smooth and shape the cut in a bench grinder.


Mount the brackets to the drum in order to mark an old hoop for cutting. I cut it down in the table saw. Screw the brackets to the piece of hoop. That’s it! Bass Drum Riser #6 completed!
DIY Bass Drum Risers #7 – Another Piece of Cake Hoop
Maybe the simplest to make yet, but only works if your bass drum has one lug centred straight down. Essentially the same design as #6, but with a single bracket.
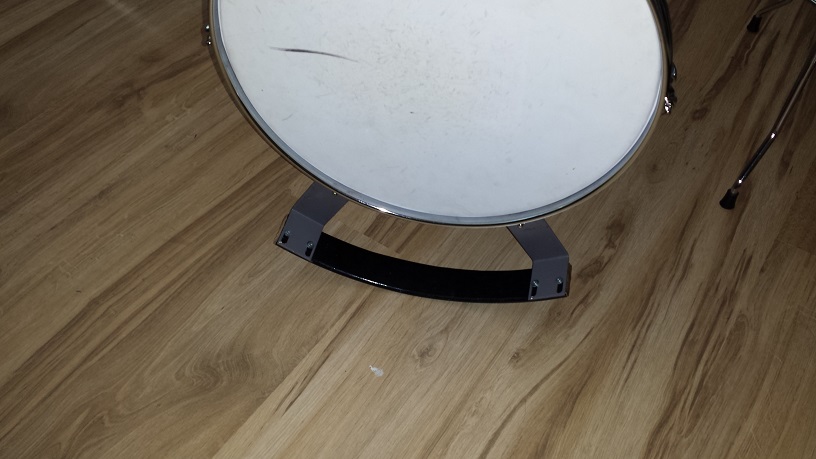
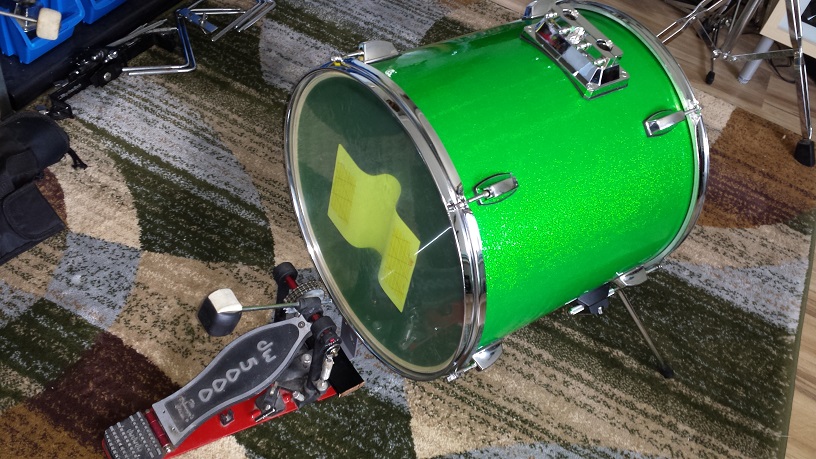
We’re making this one specifically for the “Lean Green Beat Machine“. This DIY project has a five-lug bass drum, so it becomes natural to align the lugs with one facing straight down.
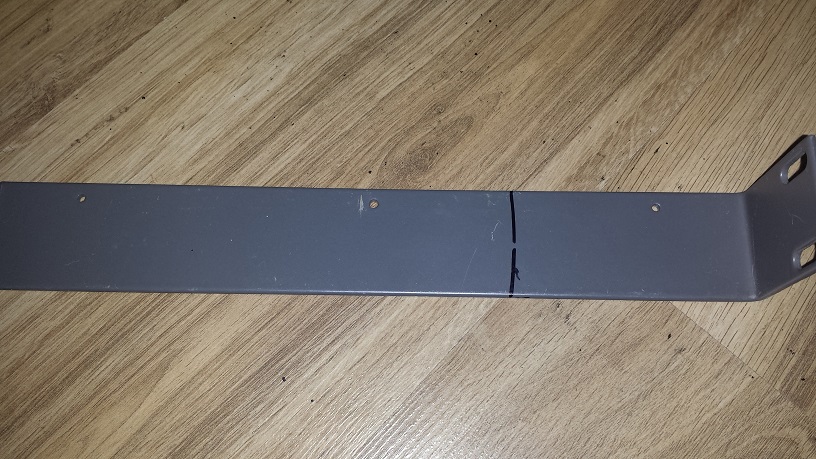
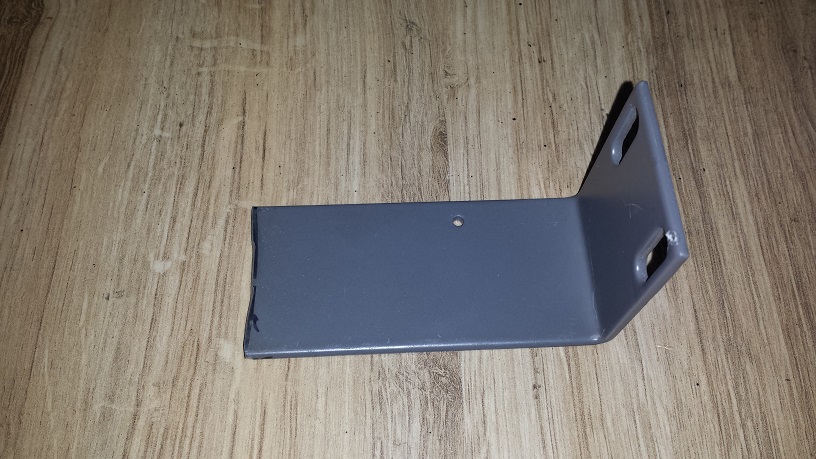
Start with marking the length (Height) on the bracket. Using the rim of the drum as a template it’s also useful to mark the arc shape. I lopped off the bracket in the angle grinder and then shaped the arc while smoothing the cut in the bench-grinder. Drill a hole and test fit to the drum.
Next cut a piece of hoop and attach to the bracket with wood screws.
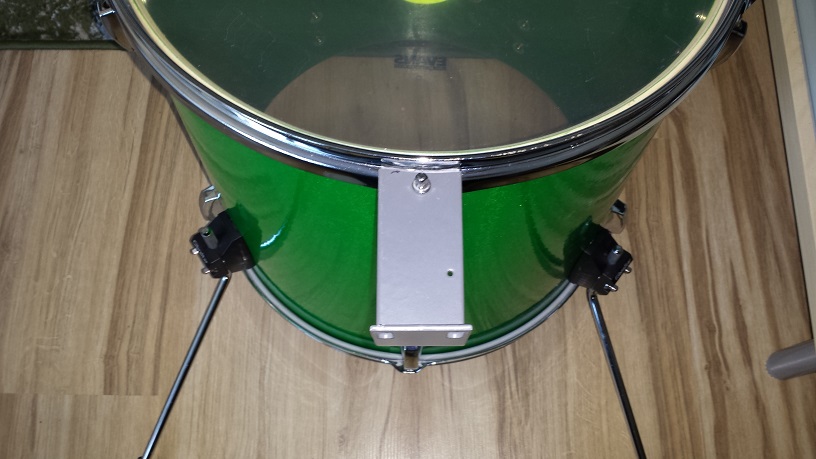
That’s it! The riser is fabricated!
DIY Bass Drum Risers #8 – Piece of Cake Drum
When you convert a lot of regular drum kits into smaller drum kits you end up with a surplus of bass drum shells. I use them for lumber to make curved walls, firewood, some get sold and now I just figured out another use. Check out this super simple DIY Bass Drum Risers!
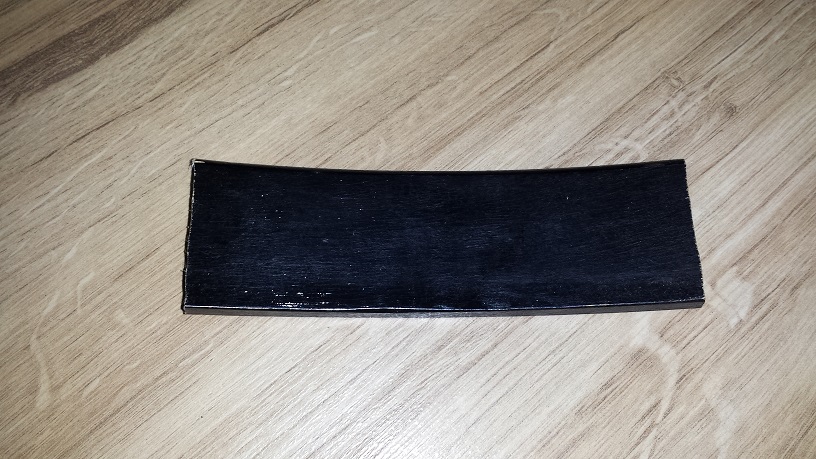
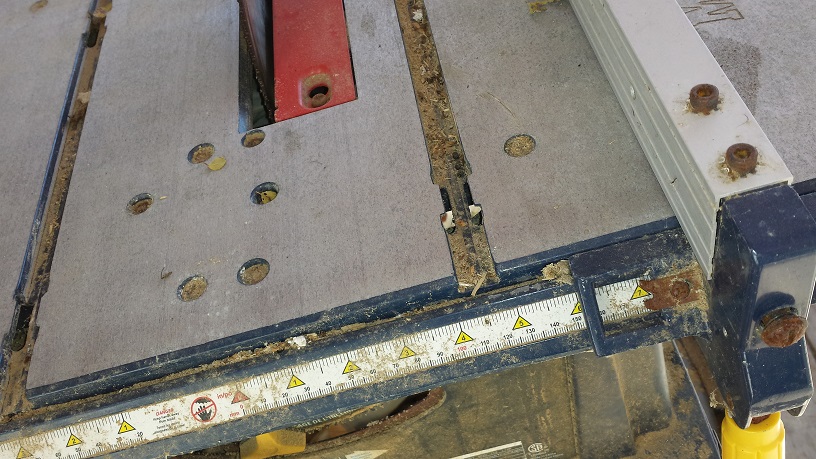
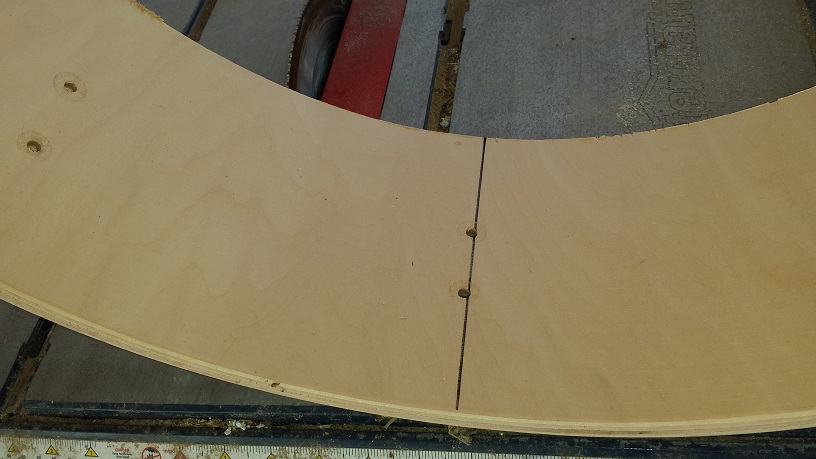
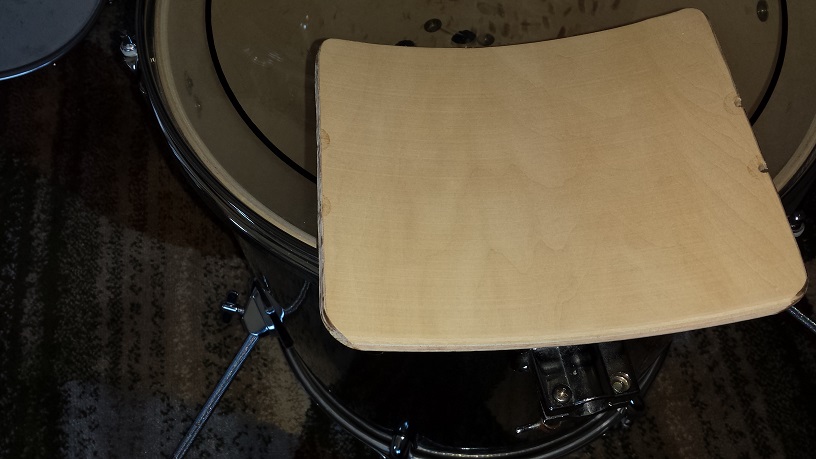
Start with cutting a 7″ slice of a 22″ bass drum. If it’s a 22″ X 14″ this will cut it in half. The easiest way is to set the fence on the table saw to 7″ and slice it through. Next draw a straight line through two adjacent pairs of lug holes and cut along these lines. After smoothing the edges in the bench grinder, you’ll have something that resembles a sushi-plate from a fancy Japanese steakhouse.
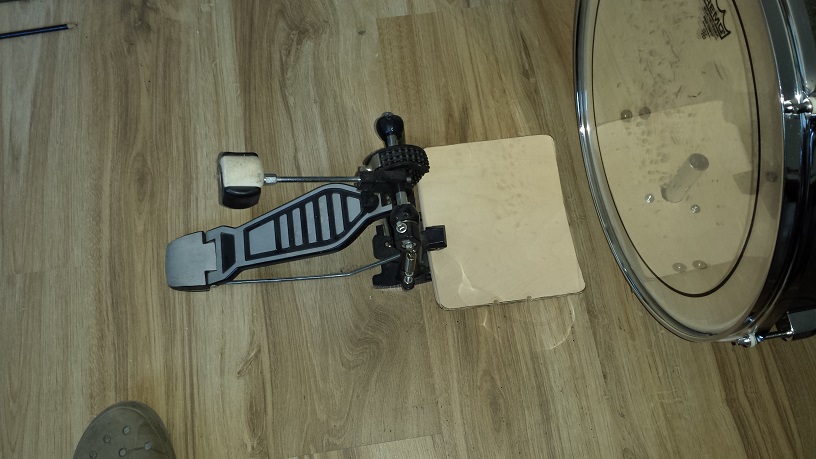
Next, stick a piece of 7/8″ post into the riser bracket on the drum. Slide the sushi-plate in under the drum until the beater shaft is parallel with the drum head, at impact and mark the position of the post on the sushi plate. Make a mark at the center of the post position and drill a hole. Cut a piece of 7/8″ hardwood dowel and fasten to sushi-plate with a screw through the hole.
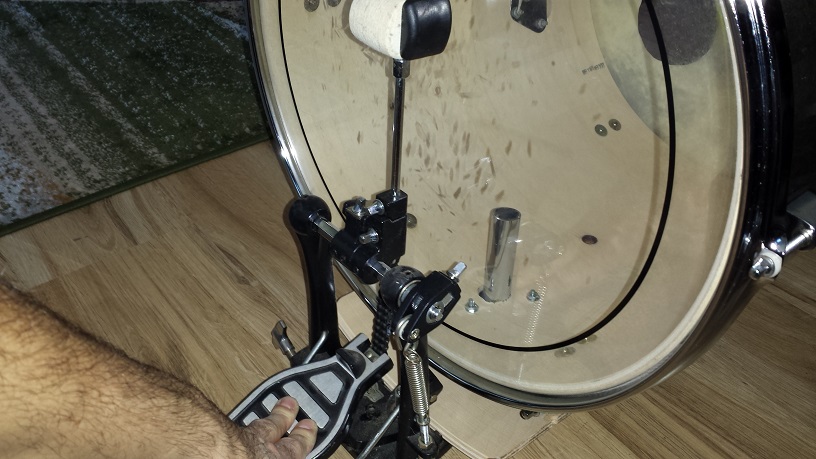
Remarkably simple and I finally found a use for all those bass drum shells.
Stay tuned for more DIY Bass Drum Riser designs!
Links to other DIY Bass Drum Risers projects:
http://www.instructables.com/id/Floor-tom-to-Kick-drum-metamorphasis-on-a-tight-bu/
https://www.youtube.com/watch?v=_dB48s7n-BQ