Although recommendations usually state that cymbals are best stored flat in a case or bag, this doesn’t offer much convenience if you like to switch them up a lot. Ideally we’d like our cymbals easily accessible while out of the way and preferably in a manner that they can be tapped for a quick sound check. Here’s a simple project to get your cymbals organized and displayed, conveniently and practically.
Materials Required: 1″ X 4″ Wood, Screws, Shelf support brackets, Dowel, tubing or pens/markers, Pipe insulation or cymbal felts, Washers
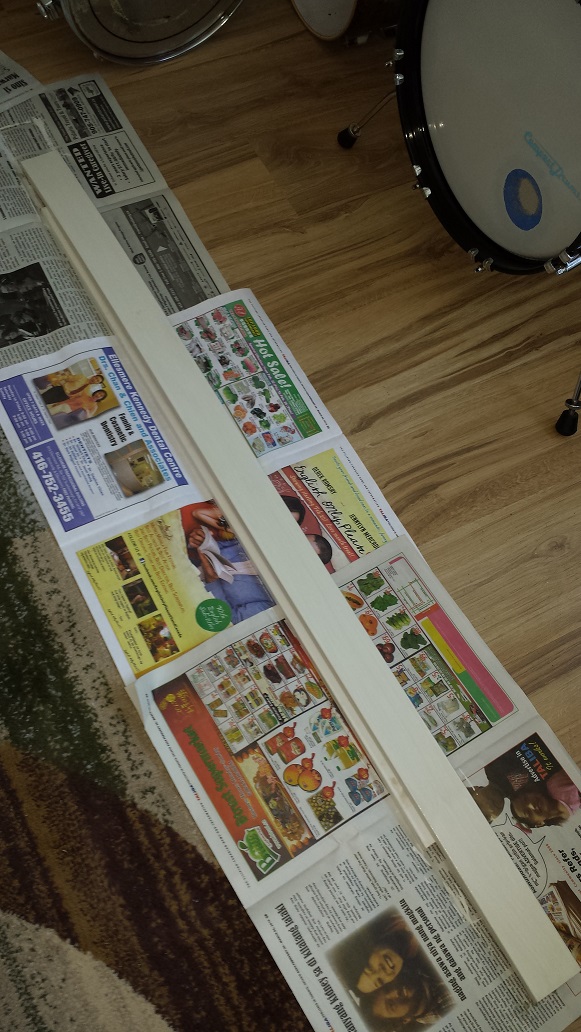
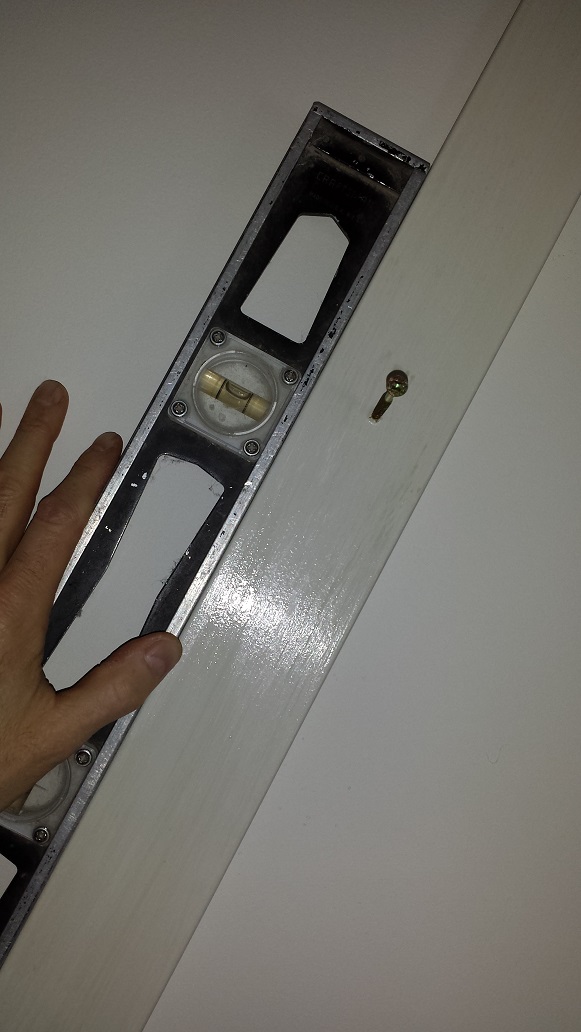
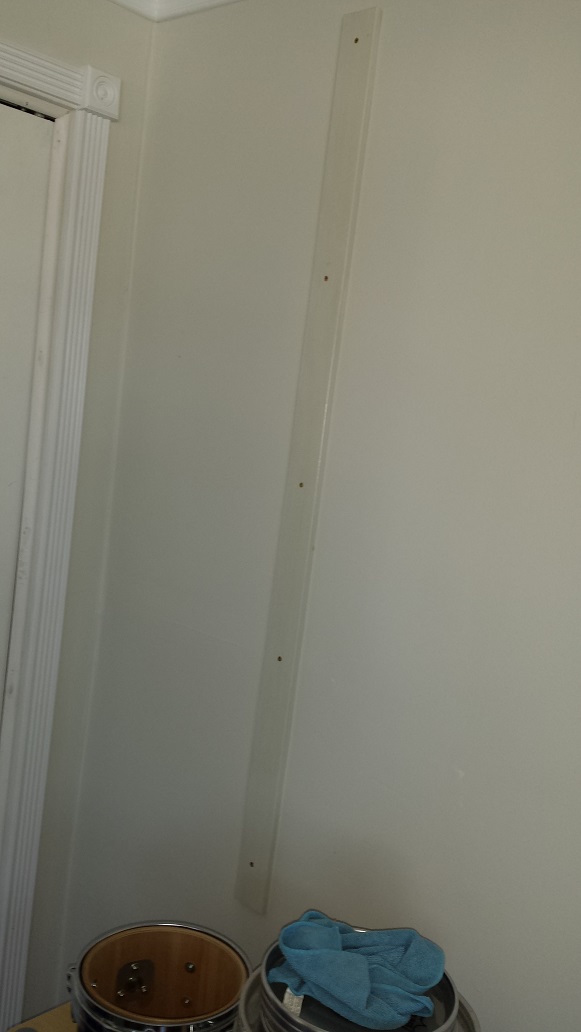
Start with a piece of wood as a back-board. We use 1″ X 4″ MDF moulding intended for baseboards. Cut to desired length depending on available height at your chosen spot. Keep in mind that cymbals are heavy. If you’ve ever carried a few at once you’ll have an appreciation for how the weight adds up. It’s best to choose a spot where you have a stud behind the drywall. I would not trust drywall anchors to hold up more than a few cymbals. If you have masonry or concrete walls, this is not an issue. In our case we painted the moulding the same colour as the wall but added a coat of clear over. Use a stud finder to find a stud in a suitable location and mark the wall. Centre your back board over the stud and screw in at the top. Use a level to ensure that it hangs straight and fasten to the stud with a few more screws.
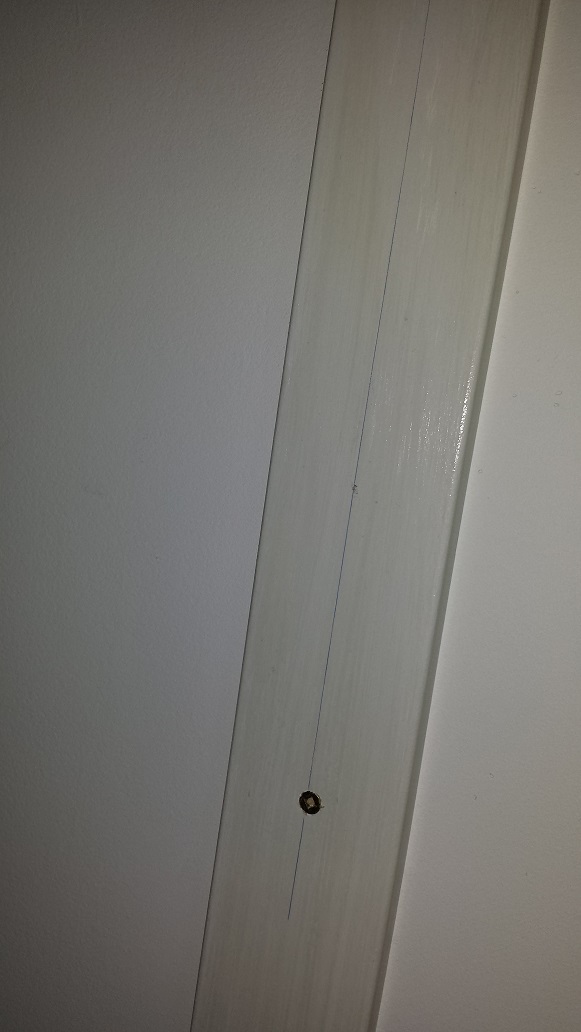
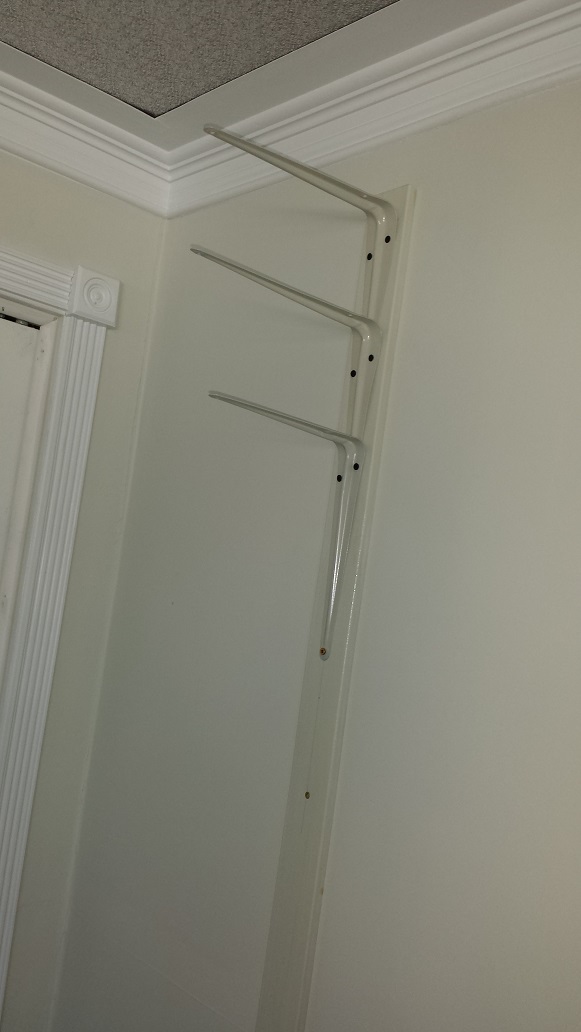
Next we mark a centre line on our back board and fasten our first shelf bracket near the top. Fasten bottom screw only. Our brackets are 8″ on one side and 10″ on the other. In our case we use the 10″ side as the depth for the top two brackets and 8″ depth for the rest. Shim between the top portion of the bracket and the back board with a folded business card, slice of cheese, (Not really), or anything else you have handy and run the top screws in. This is necessary since the rest of the brackets will overlap the bracket above. The shim in the top bracket keeps the angle the same as the rest. Make sure to use long enough screws for the brackets, that they reach right through to the stud. Proceed with fastening additional brackets in the same manner ensuring that the distance between them allows for a cymbal with a resting pad.


Finishing our DIY Cymbal Display & Storage Rack
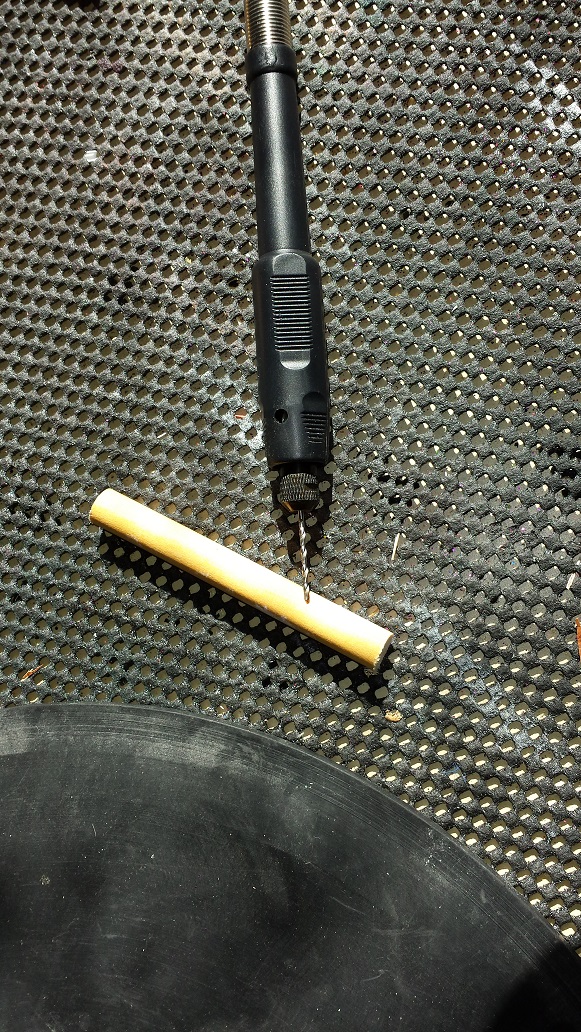
Next we attach small posts in the mounting hole at the outer edge of the brackets. Dowel would be a suitable candidate, as would tubing. We had neither handy so we used felt tip markers. The ones we had are quite brittle. We cut them with plumber’s tube cutters. In the future we’ll likely upgrade these with some sort of tubing, (Automotive gas line perhaps?) but this will do for now. Simply run a suitable size screw up through the hole and into your chosen post material. Cut a short length of pipe insulation and insert over the tubing. Rinse, Repeat.


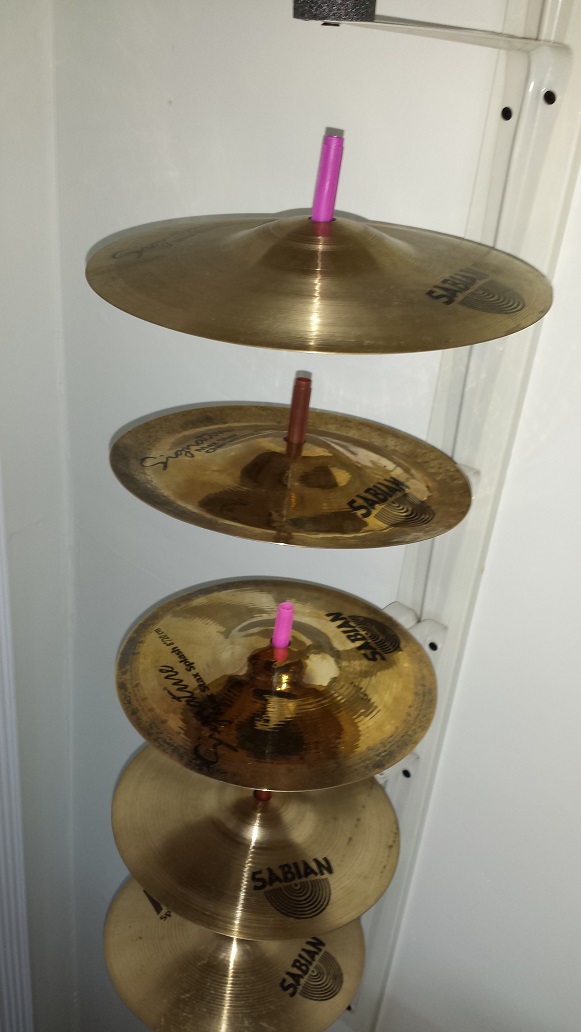
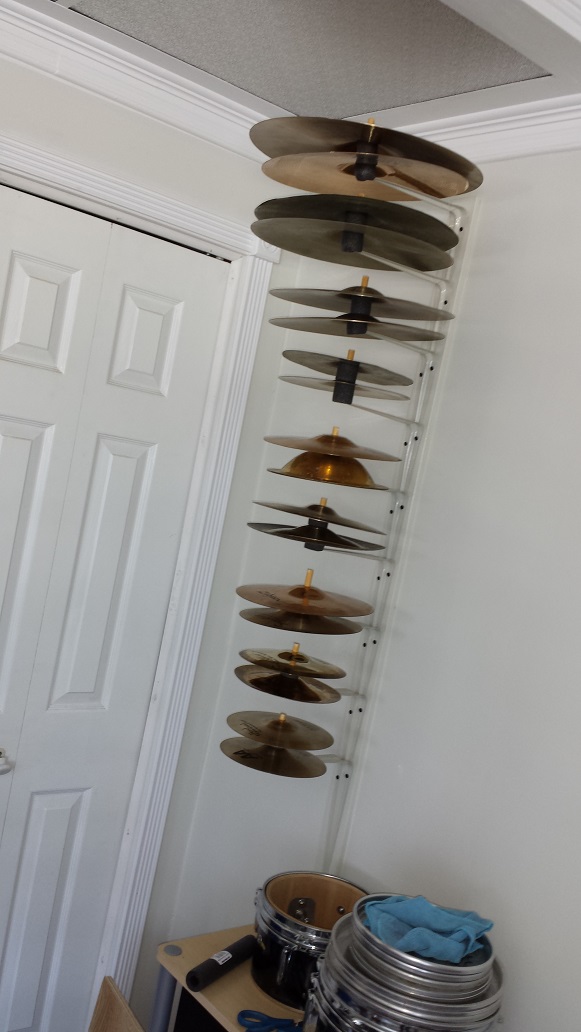
That’s all there is to it. A quick and simple way to produce a functional DIY Cymbal Display & Storage Rack. With an additional piece of insulation you can stack two cymbals on each bracket for double the capacity.
Update: The felt marker tubes have been replaced with dowel and cymbals are double stacked. Note that heavier cymbals also require a washer before the insulation or felts for added support. It is a good idea to drill a pilot hole in the dowel to avoid splitting