Introduction
We’ve played around with multiple methods of applying a lacquer DIY sparkle finish on various drums and kits. In this article we’ll share with you the method that not only works the best, it’s also incredibly simple. No particular skills are required to get a stunning, glossy, gleaming, sparkling and mind blowing finish. For a glass-like end result a bit of elbow grease will be needed though. If you don’t care about a perfectly smooth glass-like finish and you’re OK with a bit of surface texture you can skip the last step. In this case no elbow grease is even required.
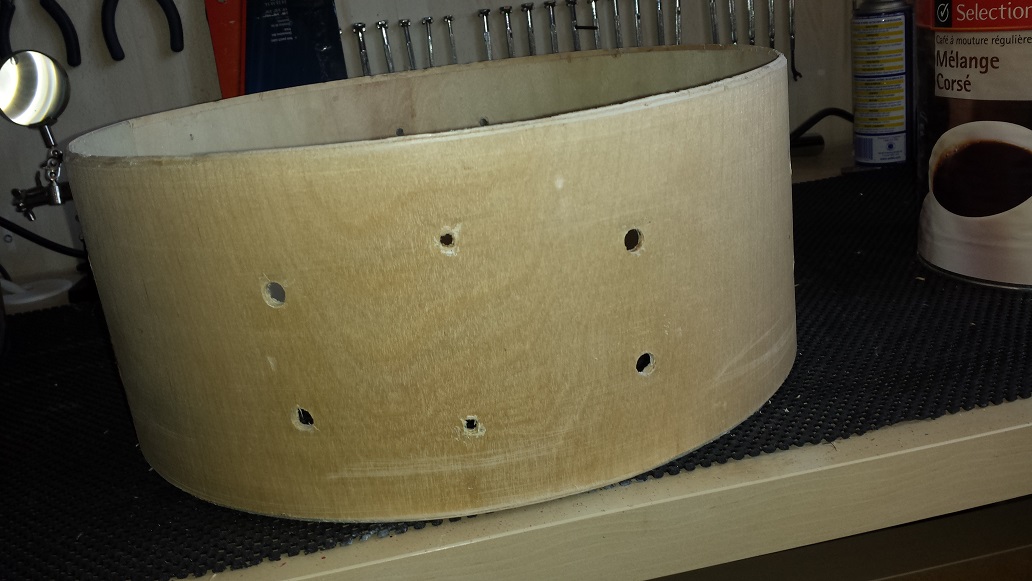
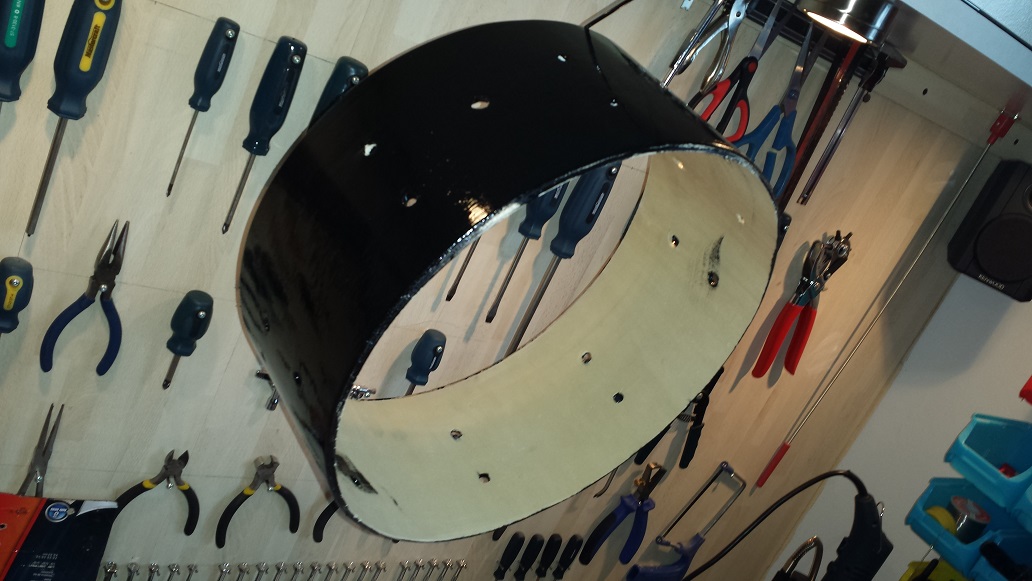
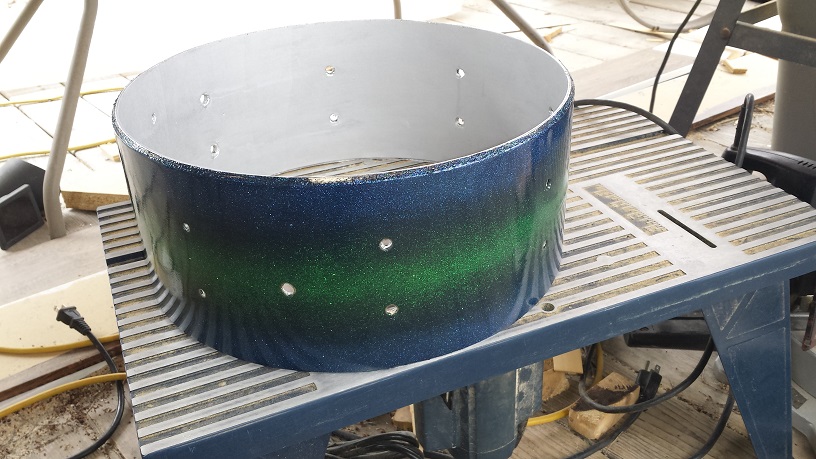
The victim selected for this project is a generic snare drum from our collection of odds and ends. It’s a standard 14″ X 5.5″ with a thin 4-ply shell. The bearing edges are a disaster so we son’t bother masking them. If your intention is to keep your bearing edges intact you will need to mask them.
Click any image for a full size view
Step 1 – Preparation
Start with removing all the parts from the shell. A coffee can is a great place to store them in while the shell goes through it’s metamorphosis and recovery. A suitable size socket is the perfect tool for pressing out grommet style air vents. A 7 mm socket seems to be the most common perfect fit. Once all the parts are removed proceed with the wrap. For tips on wrap removal, check out this article.
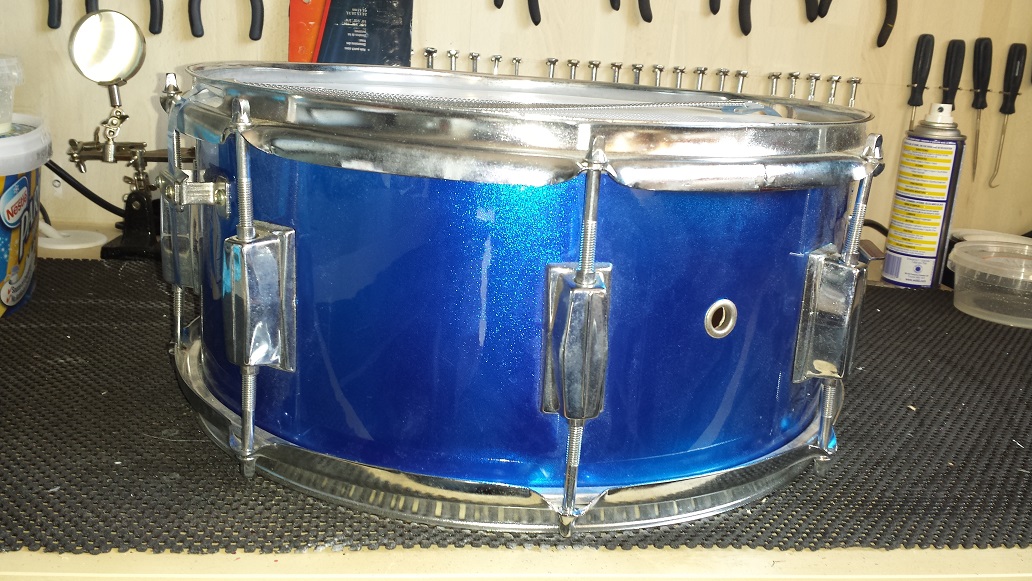
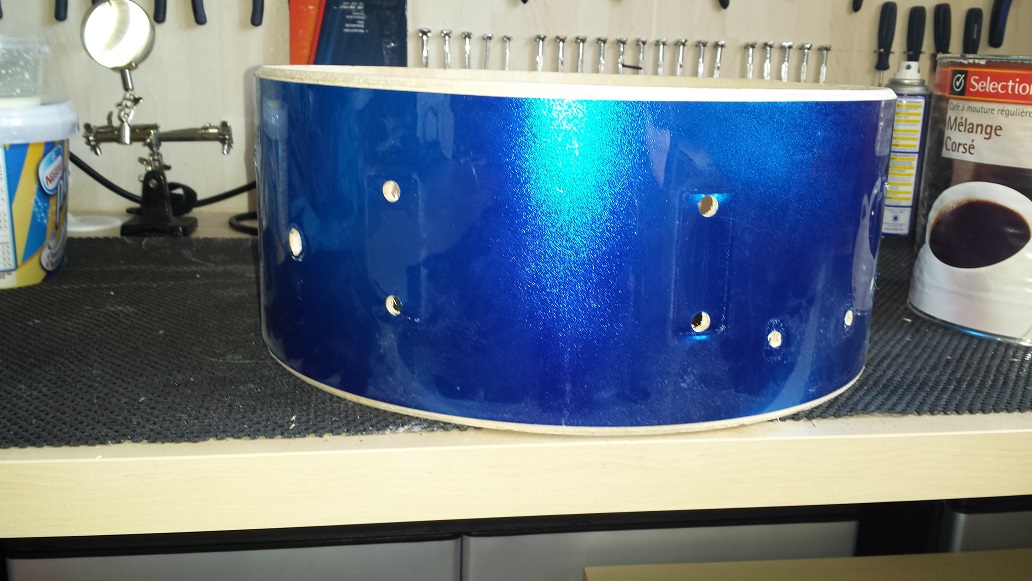

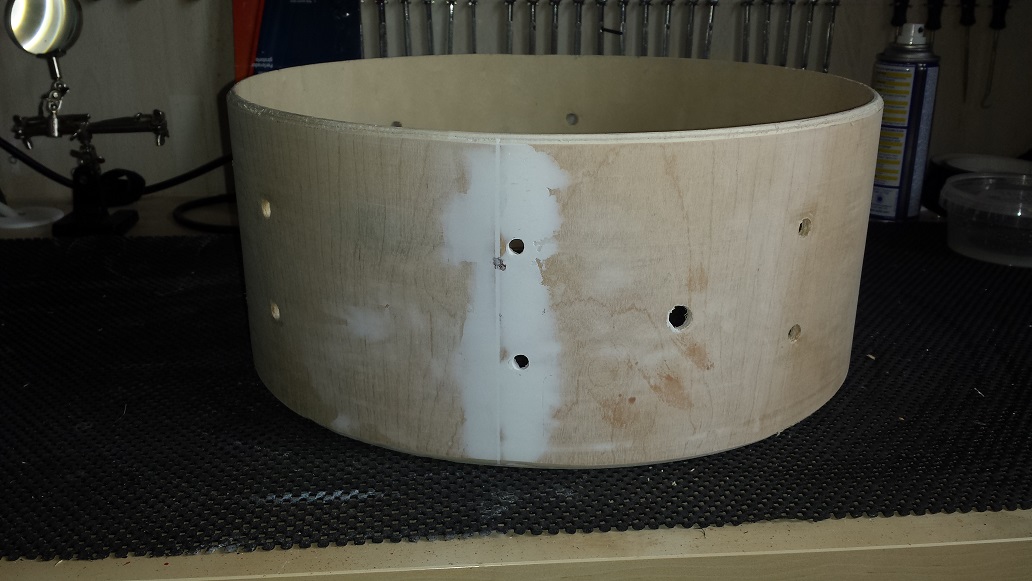
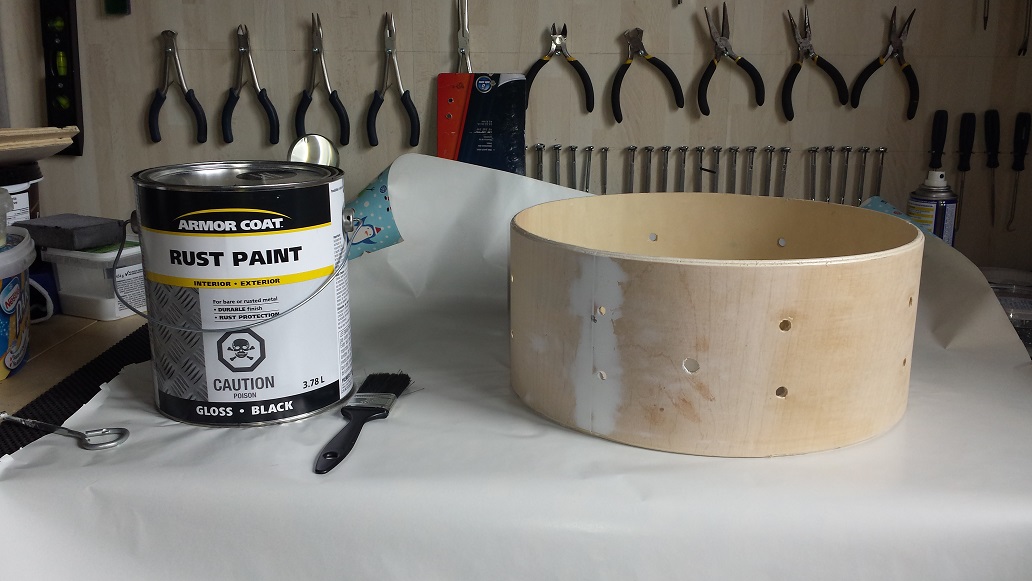
It’s quite rare to find a perfect surface under a wrap. In this case the shell was mostly smooth except for a canyon in the outer ply seam. We use our usual concoction of drywall compound and carpenter’s glue or PVA to fill it. (3 parts compound to 1 part glue.) Leave to dry for at least a couple of hours. Our canyon is large enough that we’ll likely have to fill it twice due to shrinkage. On a not so smooth shell you can use the same mixture as grain filler on the entire shell to cut down on sanding later. With the second coat of filler dry, we gave it a quick sanding. Next we paint a base coat. For a uniform DIY sparkle finish, select a paint colour similar to the sparkle colour you will be using. Rust paint works great, but as long as you seal the shell first any oil-based lacquer will work. If you can find it, a metallic paint would be the best choice. We’re going to attempt a sparkle burst, hence the black base. Allow the base coat to fully dry before moving on to step 2.
Step 2 – Applying the DIY Sparkle Finish
Please read through this entire section before starting. First we apply another coat of lacquer. Here comes the secret to success: We need to allow the lacquer to dry until it’s no longer gooey and sticky, but still tacky. This can take from 20 minutes to two hours depending on the paint used, how much the base coat soaked in to the wood, the temperature and humidity. Check by touching the paint ever so lightly. So lightly that you’re barely making contact with the paint surface at all. If any paint sticks to your finger, it still needs to dry longer. It’s perfect when you feel your finger sticking to the paint, but no paint gets stuck on your finger.
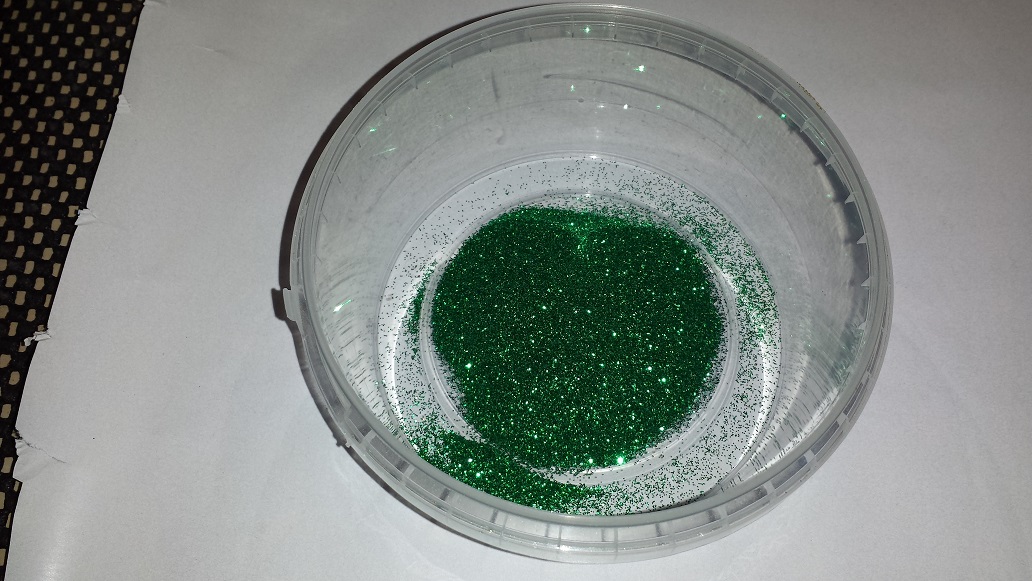
When you reach that point; Start sprinkling glitter on the drum! We use craft glitter from the dollar store. If you browse the glitter selection at a decent craft store, you’ll notice that there are finer and coarser grain varieties. The coarser the grain, the sparklier the end result, BUT, also the more clear coat will be required. With coarser grain and more clear, more wet sanding will be needed as well, if you are going for a sleek, glass-like surface.
Spread a clean sheet of paper on your work surface and rotate the drum, holding it up from the inside while sprinkling on glitter with the other hand. Give the drum a little shake now and then so that the excess falls off onto the paper sheet. Keep reusing the glitter from the paper sheet and rotating while sprinkling until you are satisfied with the coverage. It helps to have a hook nearby to hang the shell on now and then so you have both hands free to gather glitter from the paper. Don’t get concerned if some spots are left uncovered or the glitter just won’t stick in some areas. We can apply more glitter on the first couple of clear coats as well. Actually, it is an advantage to do so, as this produces a more three dimensional effect.
Should you give in to impatience and start sprinkling while the lacquer is still gooey, some of the lacquer “wicks” up around the glitter and the grains are more prone to standing up, causing added texture. While not a disaster, and sometimes cool, it does require more clear and more wet sanding.
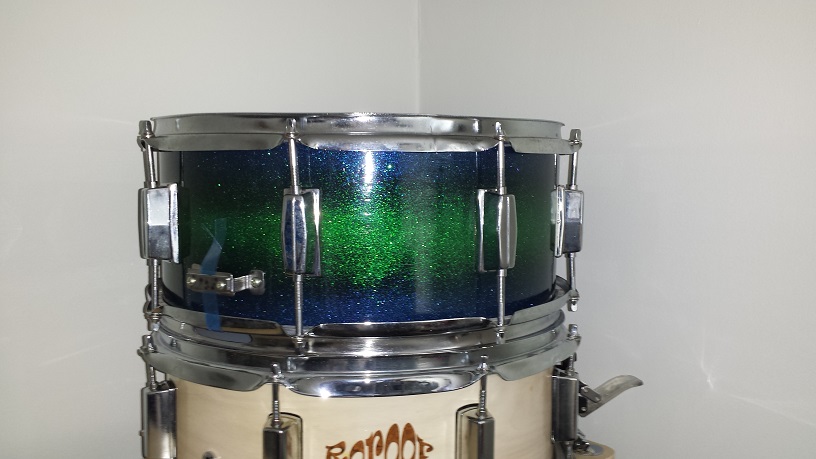
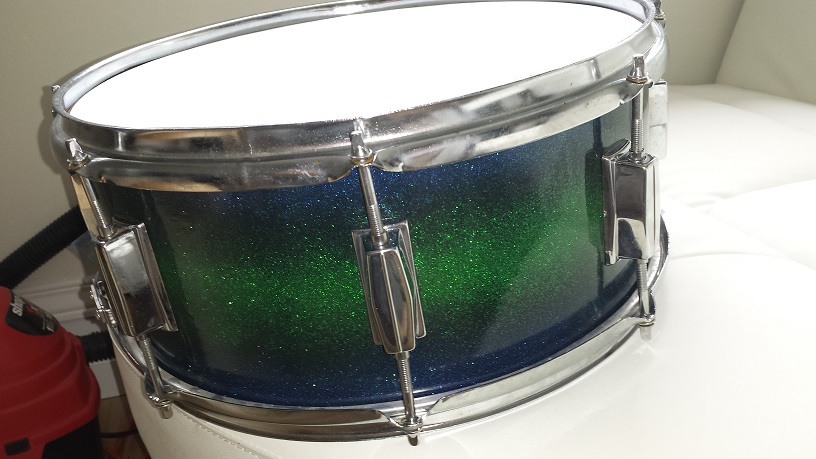
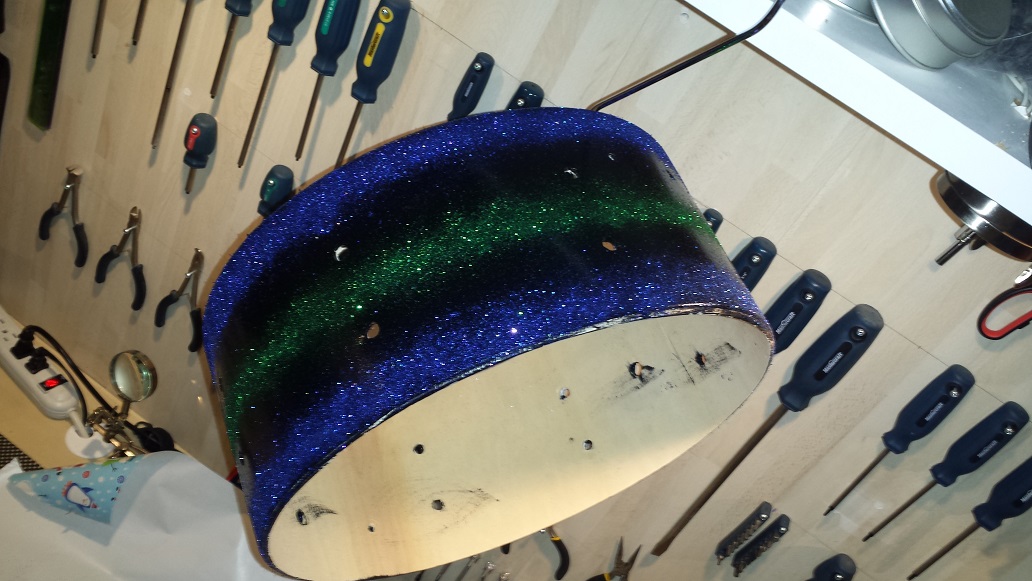
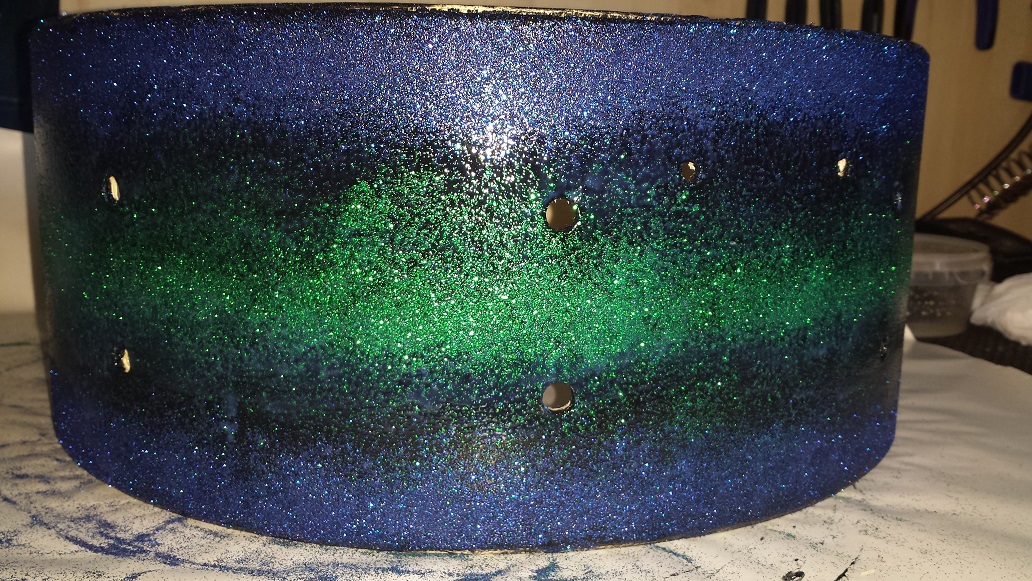
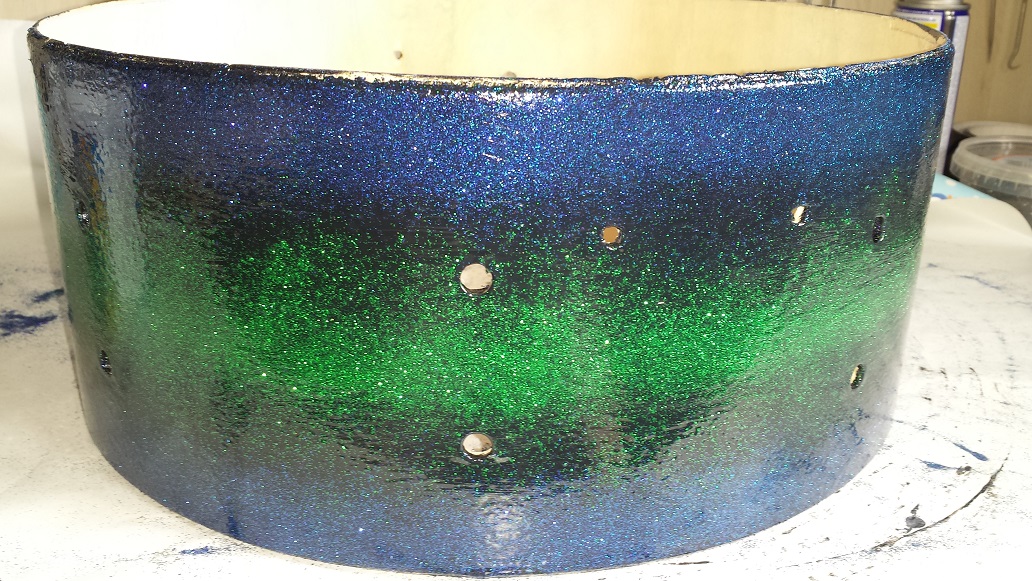
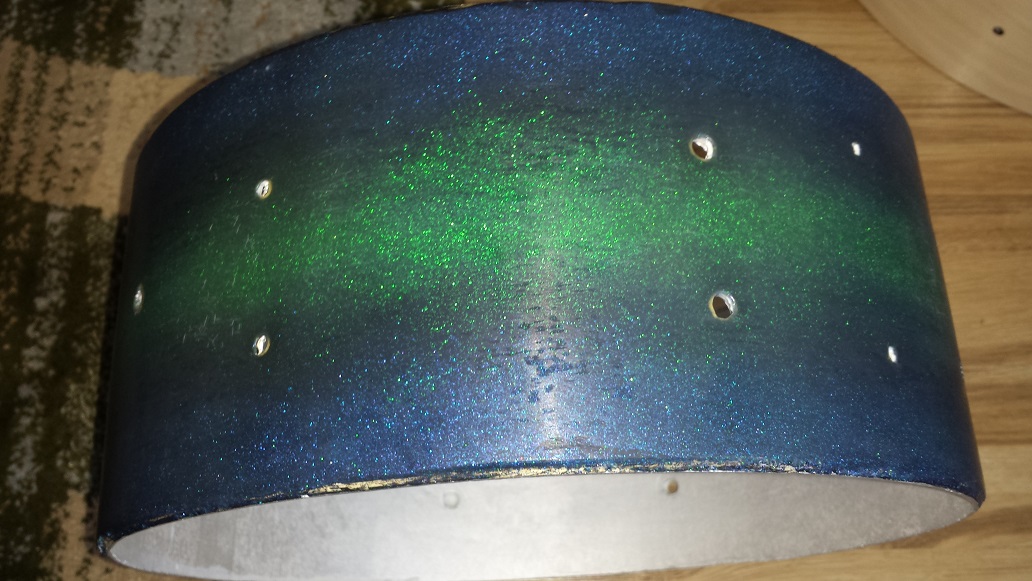
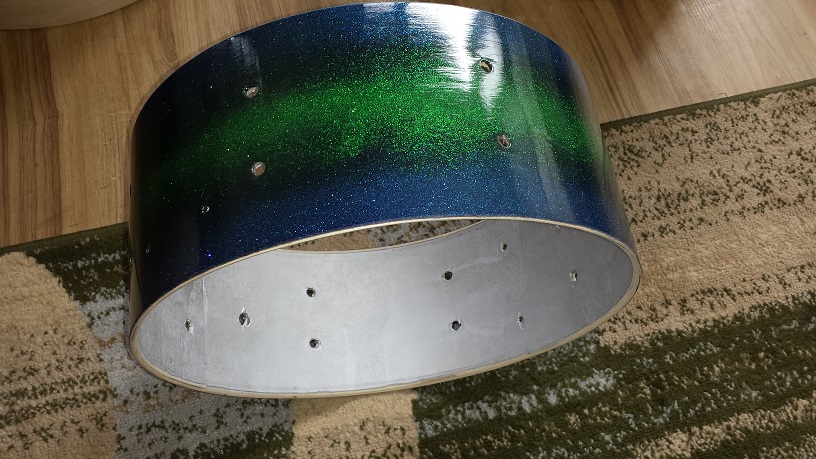
The glitter used in our example is not the finest and not the coarsest. Somewhere in the middle. I have to admit, when I started the green strip down the middle, I wasn’t sure where I was going with it. In my mind I thought there was a good chance that just the green stripe would be adequate. Once completed it looked kinda’ naked still, so I added the blue along the edges. I held the snare by the inside with my left hand and grabbed a pinch of glitter between my right hand thumb and index finger. with my right hand about 4″ above the top surface of the drum, I sprinkled by rubbing the thumb against the index finger while rotating the drum in the same fashion as a pizza-baker tosses the dough.
To be perfectly honest, I don’t know how this will turn out once clear coated. Applying an even coverage of the same colour would have been safer as I know that turns out spectacular, but I wanted to try something new. Leave to dry for a couple of days before starting to clear-coat.
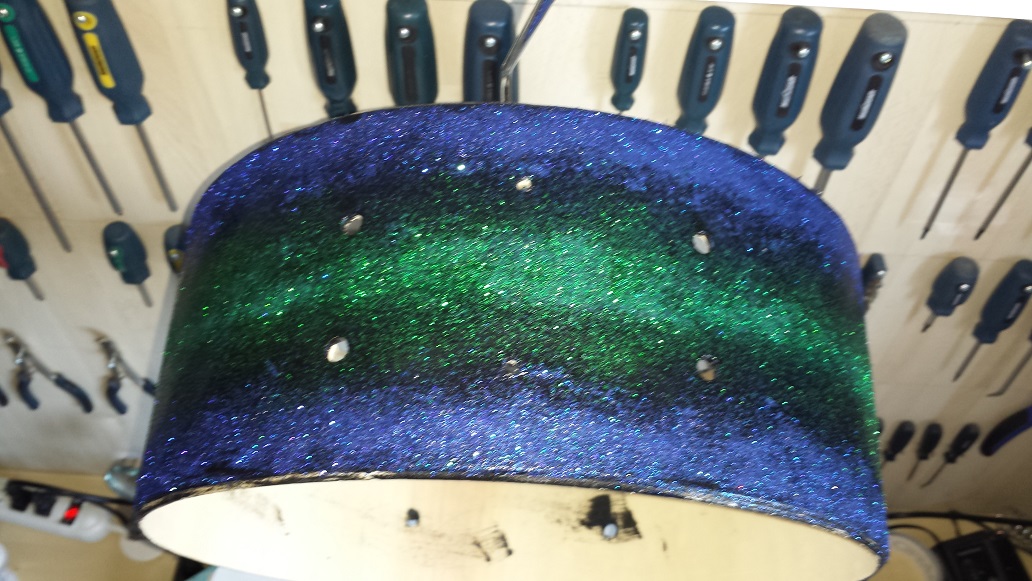
The clear coat I use most frequently is water based polyurethane. I choose this mostly due to the odour and health factor, but also that it dries fast allowing more coats in a single day. With the lacquer dry we apply a quick coat of clear with a regular paintbrush, after which I added a bit more green sparkle. This time I held my right hand about a foot above the drum and allowed the glitter to spread a bit wider around the centre line.

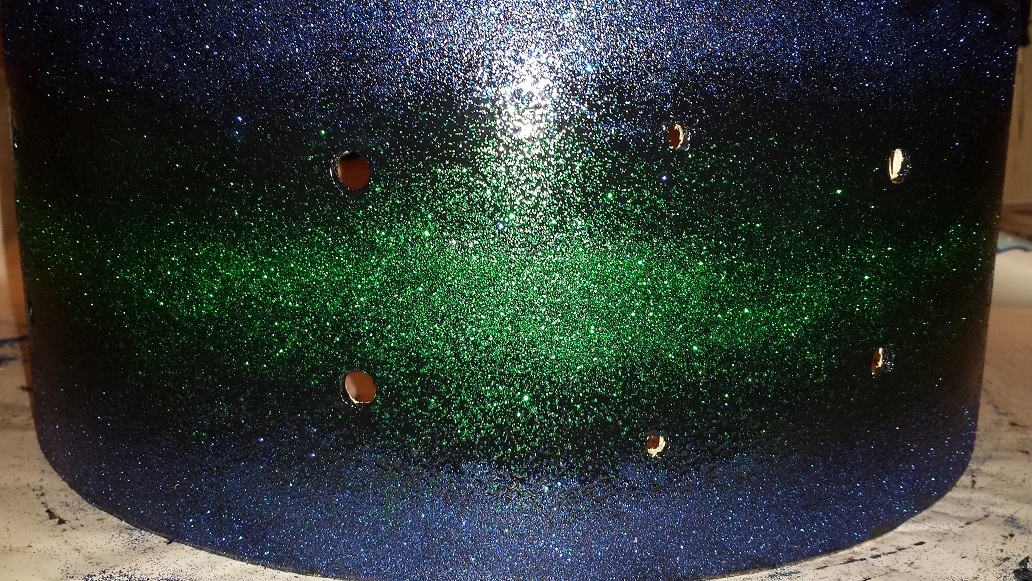
Now it’s just a matter of adding layers of clear until thick enough to smooth over the texture and a bit extra for wet sanding if you’re going for a glassy surface. We may still add some sparkle to even out the effect and add some dimension. Probably 15 or more coats will be required before it’s ready to wet sand.
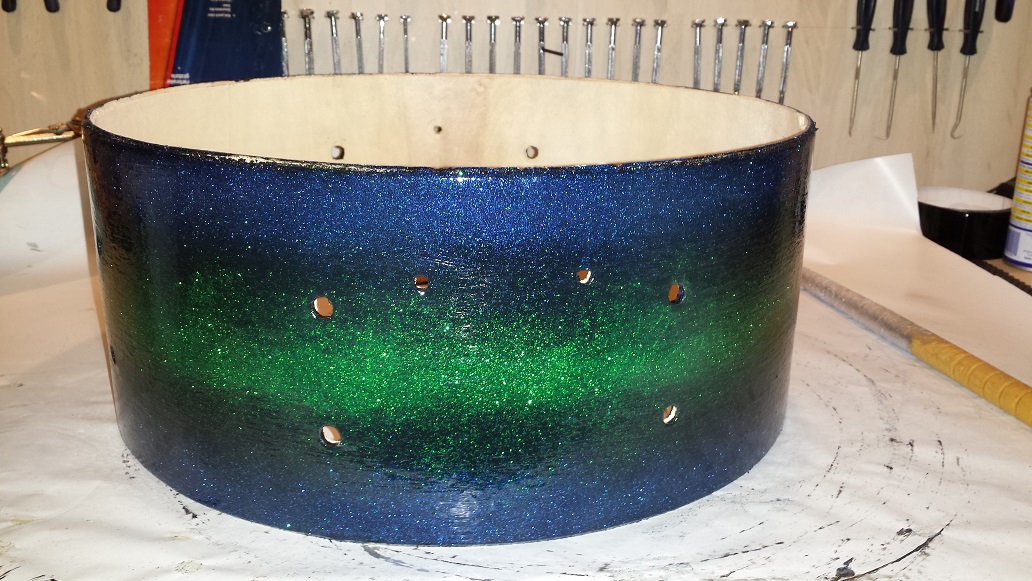
We’re up to 10 coats of clear. No longer does 15 coats seem realistic if we want enough clear to wet sand it to a glass-like finish. The new estimate is 20-25 coats. This is partially due to not waiting long enough before sprinkling the additional green on the clear.
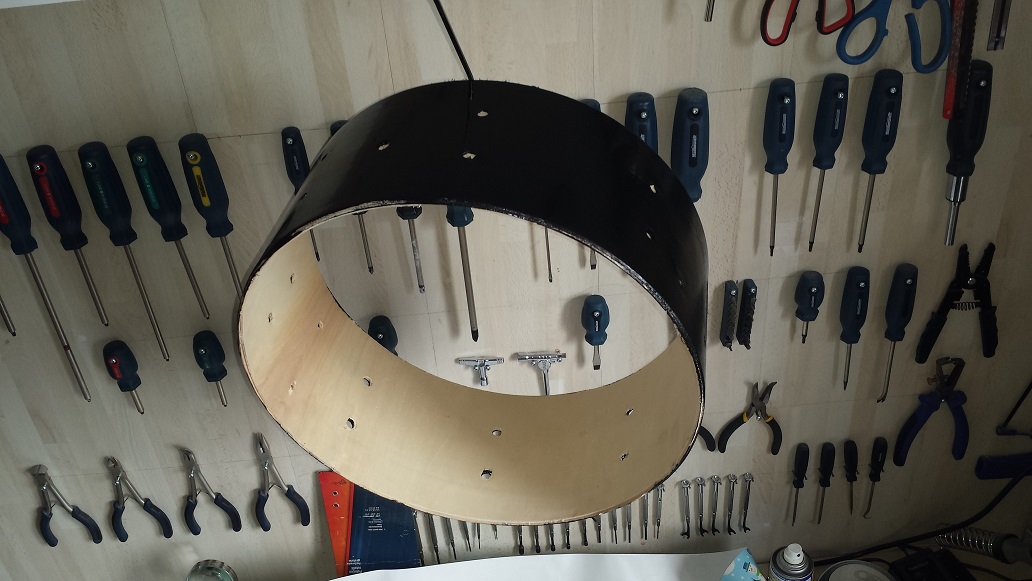
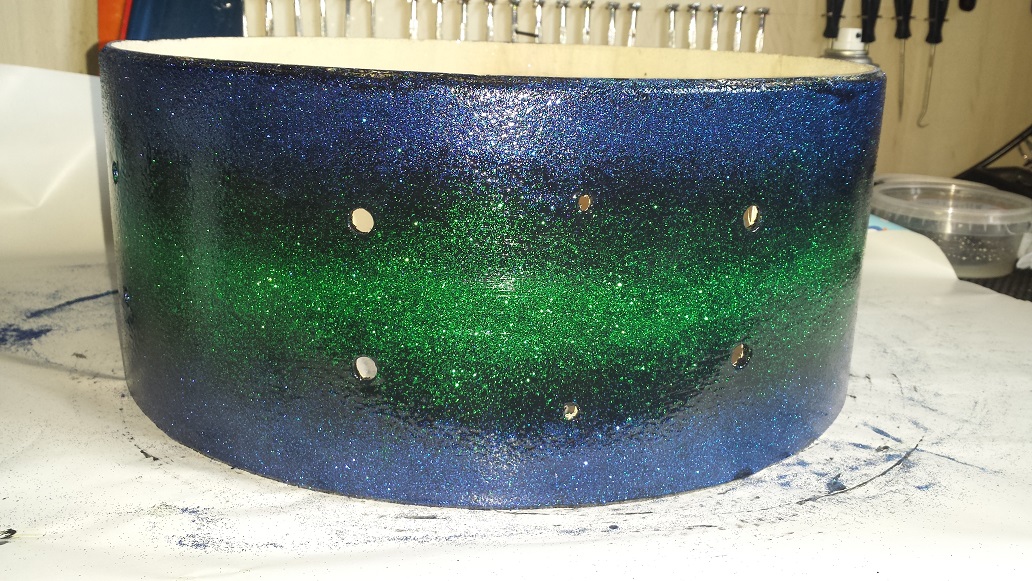
I lost count somewhere along the way but there are somewhere between 20-25 coats on there now. Leave it for a couple of days to cure before we start wet sanding. Meanwhile I put an initial coat of sealer on the inside. We used gloss aluminum rust paint in this case.

Step 3 – Finishing the DIY Sparkle Finish
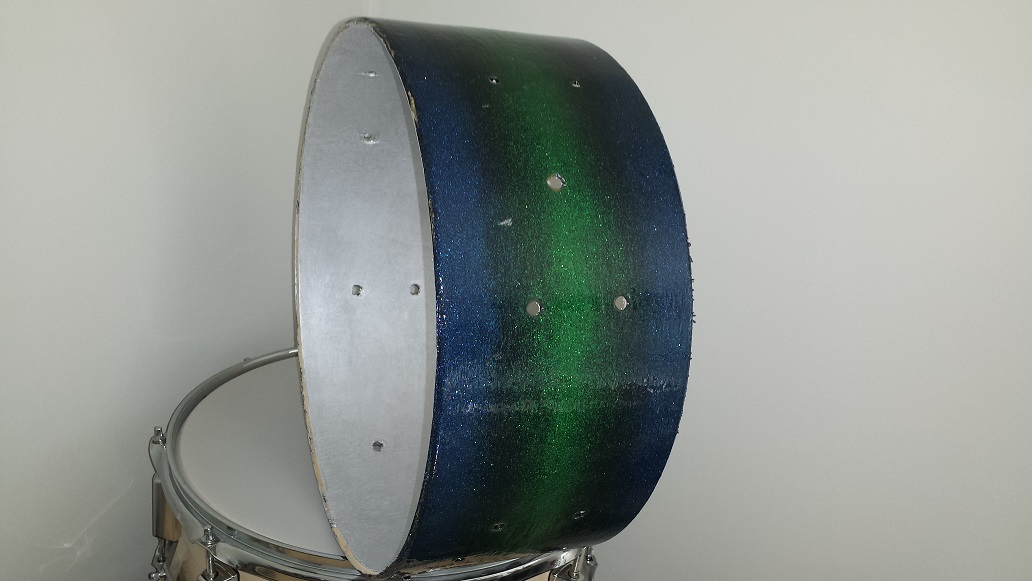
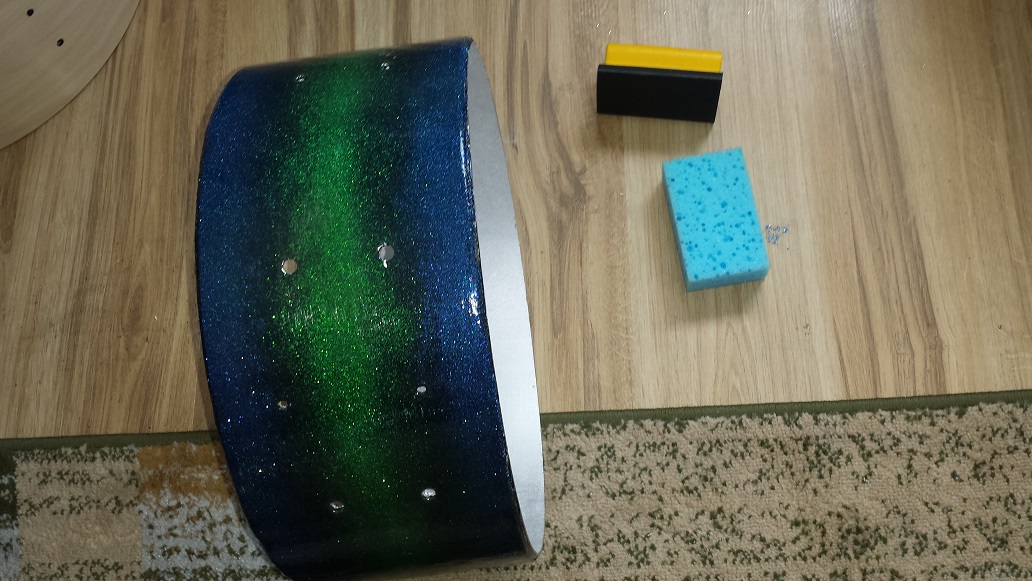
Once the clear has dried for a couple of days it’s time to wet-sand. There’s nothing to wet sanding. It’s neither difficult nor is it hard work. Just a little bit messy. Cut a piece of 400-grit to fit your sanding block and soak a sponge in water. Wet down a section of the shell with the sponge. Between two sets of lug screws is a good size section. Slide the block back and forth without using pressure. Keep adding water to ensure it stays wet and slides somewhat easy. If it starts sliding too easy, wipe down the sandpaper surface with the sponge. When the section is done, wipe it down and move on to the next. A minute or so per section is adequate. You’re finished with the 400 grit when the brush strokes are gone or almost completely gone. Repeat the process with 600-grit paper. Wipe the drum clean when finished.
Usually we would move on to 1000, 1500, 2000 and the polishing compound. However this time I’m going to try simply applying wipe-on poly right after the 600. I’ve never tried Wipe-on Poly before so I’m not sure what to expect.
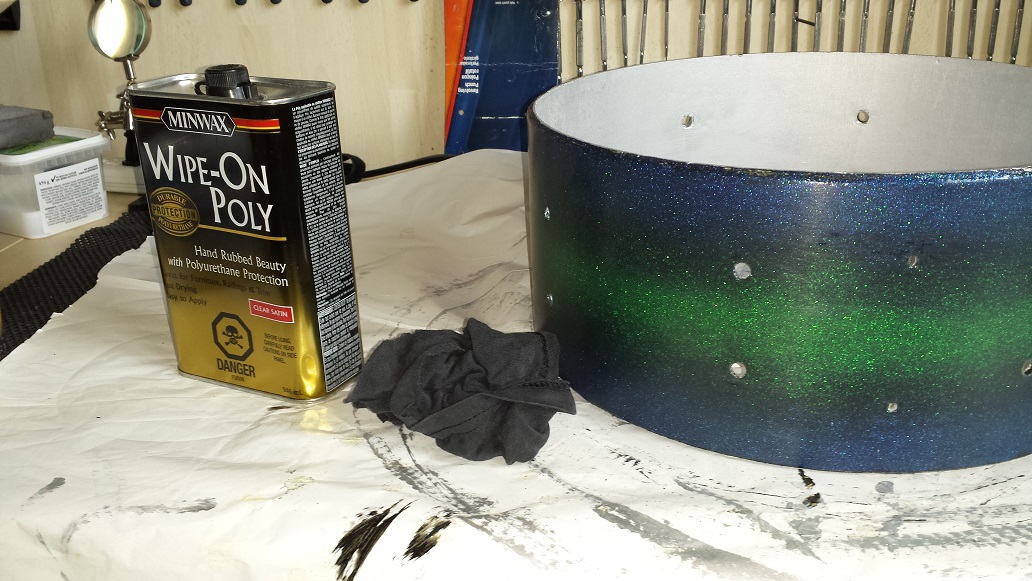

Once the wipe-on Poly dried, I was kinda’ disappointed with the lack of glossiness. Maybe I should read the instructions. That’s when I noticed the label on the bottle; Clear Satin“…. Oh man… no wonder it looks “satin”. After hitting it with 1000-grit paper I tried wiping on the regular water based polyurethane. That worked great! I’m guessing if I do a couple more coats like that it’ll be marvellous! Indeed a couple more wipe-on coats did the trick. I’ll let it cure for a couple of days and then give it a quick polish before assembling.
Step 4 – Wrap-up & Assembly
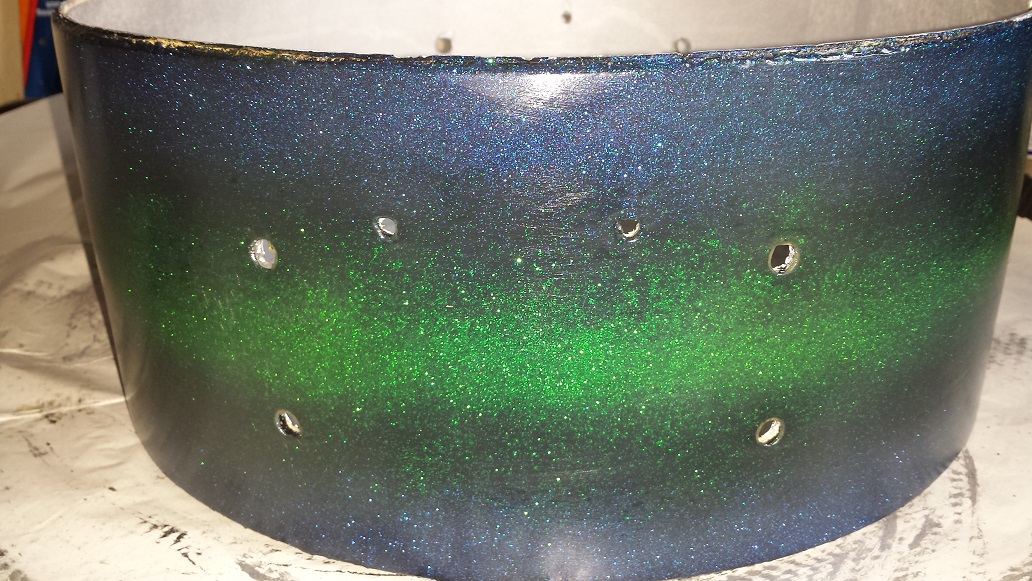
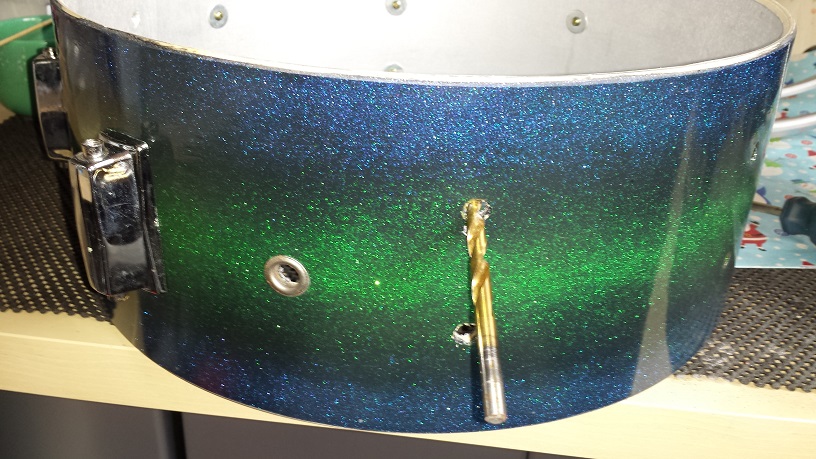
Since it looks just about perfect even without polishing, we’ll just move on to cutting new bearing edges. A thin shell like this probably wouldn’t benefit from from 45 degree edges so instead we opted for 60 degree edges with a slight round-over. After cutting the edges we sand them smooth with 120 grit and use the sander to dig a slight snare bed. Just about ready to assemble. Expect some poly to have gathered in the holes. This is easily cleaned out by rotating a drill bit by hand. Remember when assembling; Not too tight, just a bit tighter than snug.

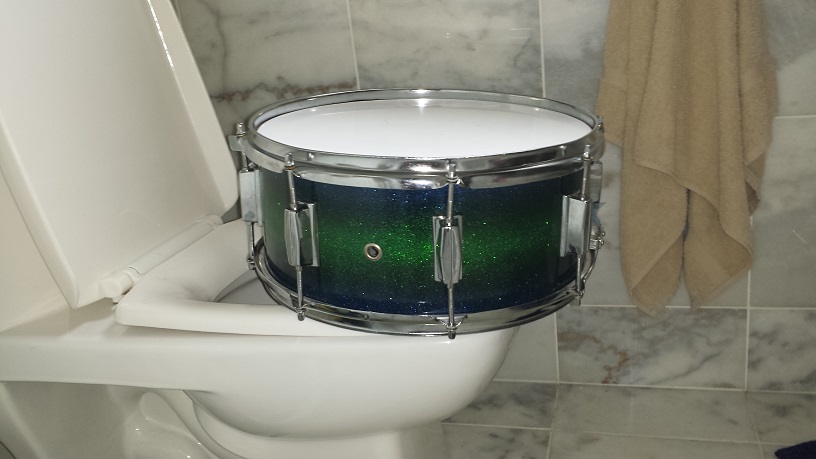
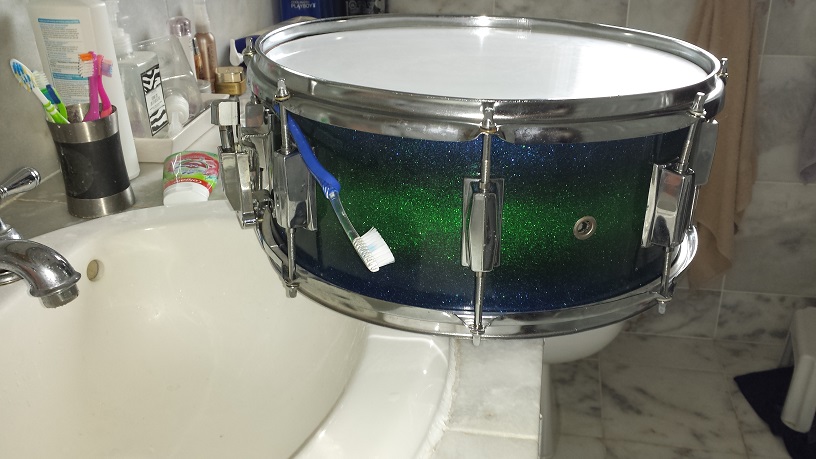
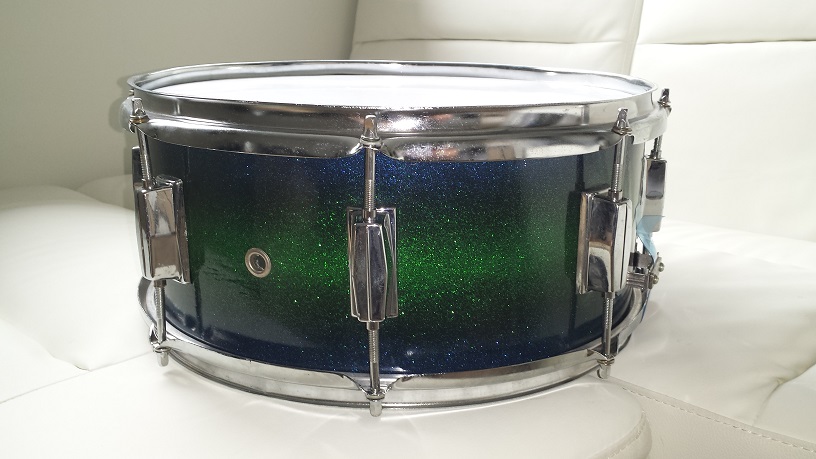
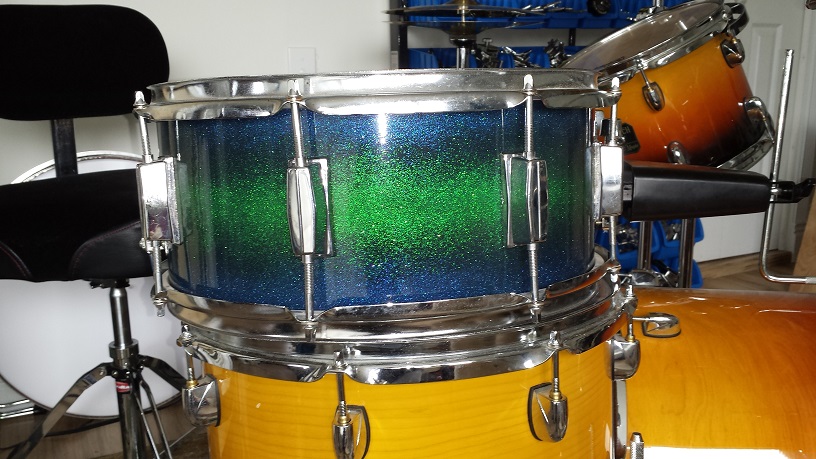
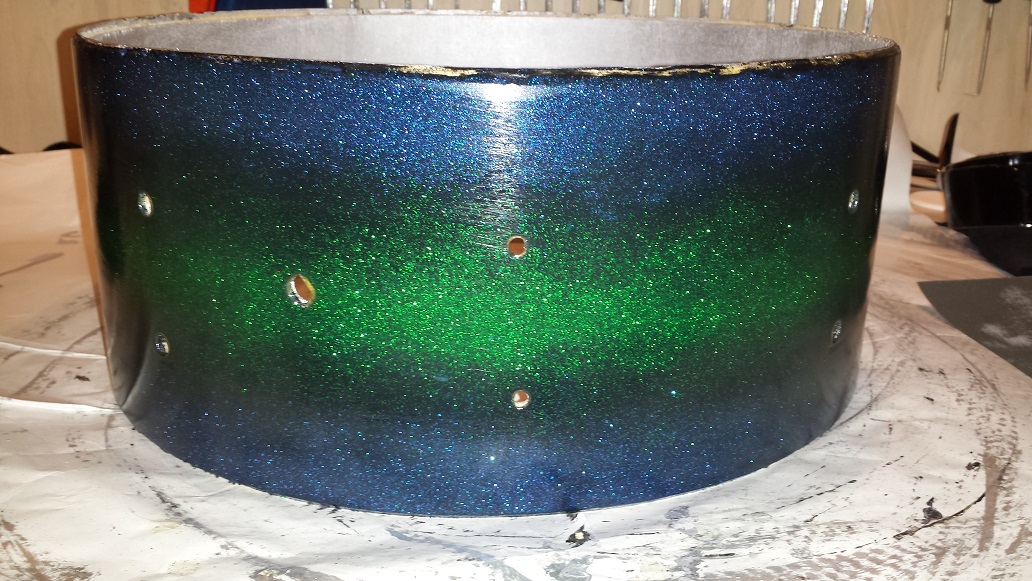
A bit more wet sanding and polishing would have been advisable for a perfect finish. I guess impatience got the better of me. In any case it turned out good and this clever little DIY Sparkle Finish Snare Drum is already learning tricks. Going to the potty and brushing his lugs all by himself. He also loves to gaze out the window.