Introduction
Resulting from a trade, I received a 70’s or 80’s fairly rough looking, Zola-coated Tama kit. The wrap was in miserable state and the badges missing, so I can’t tell if they are RockStars or SwingStars. However, the shells, lugs and other hardware pieces are in perfect condition so they make an excellent candidate for a project. The rack toms are “power-sized”, making them suitable for floor tom conversions. These drums inspire me to make a vintage-styled, DIY double down Jungle drum kit. I envision the two rack toms as hanging floor toms, an added 10″ tom tom and of course the 16″ floor tom as the bass drum. There was no snare drum with the kit and I have yet to determine or find one that will be a suitable match.

I envision a cavern-like lounge, somewhere warm and tropical, with a band playing a groovy mix of bluesy Jazz and psychedelic, smooth Rock. In the back corner of the stage the DIY Double Down Jungle Drum Kit oozing with mojo, sporting a vintage style, pearl, oyster-like or onyx-ish finish.
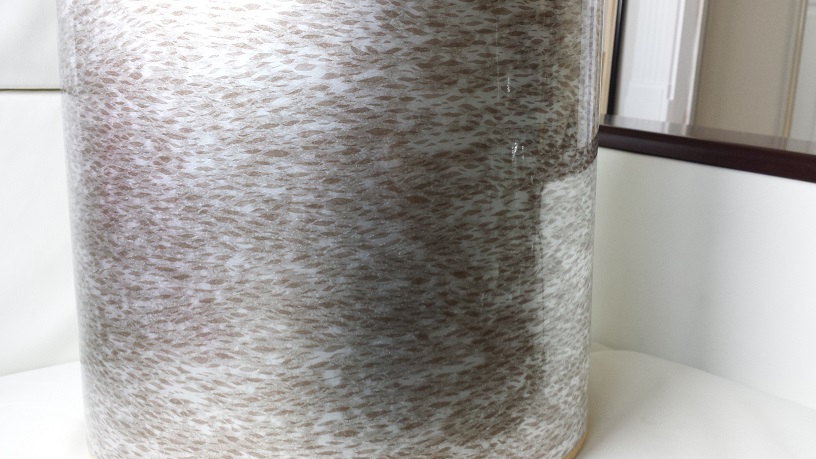
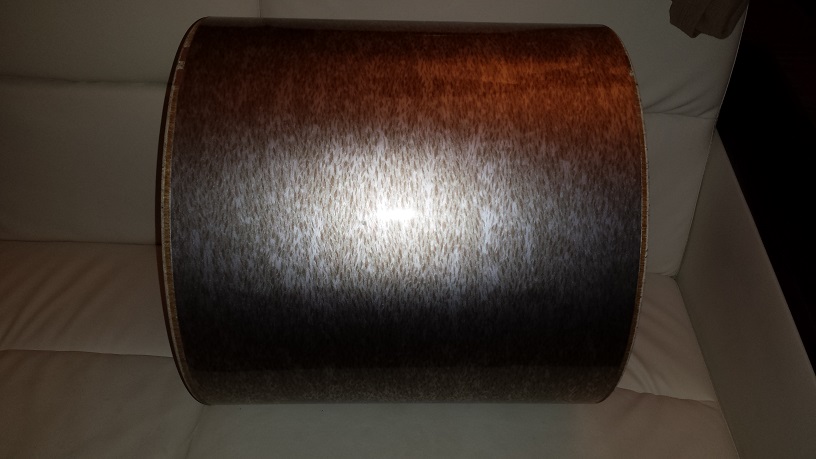
The wrap selection falls on a sleek and mellow Pearl Onyx from Walopus.com. Aptly named “Soft Sweet Kiss Onyx”, it really has a soft and smooth appearance, yet with a strong, classy presence. A perfect fit for the image described above. Like a soft, sweet kiss on the lips. Vintage vibe and Mojo to spare!
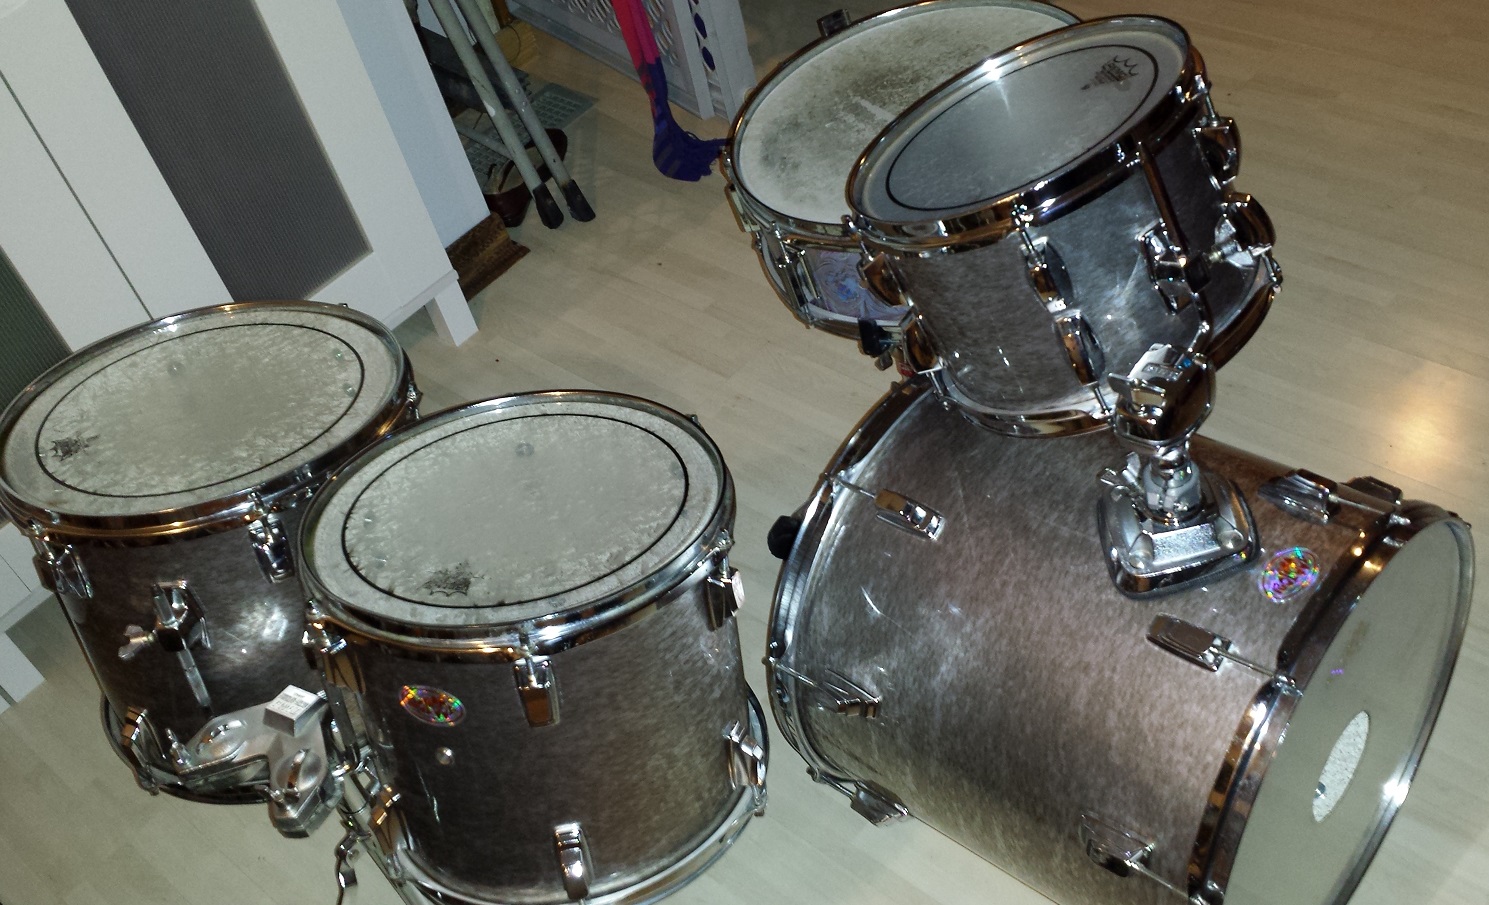
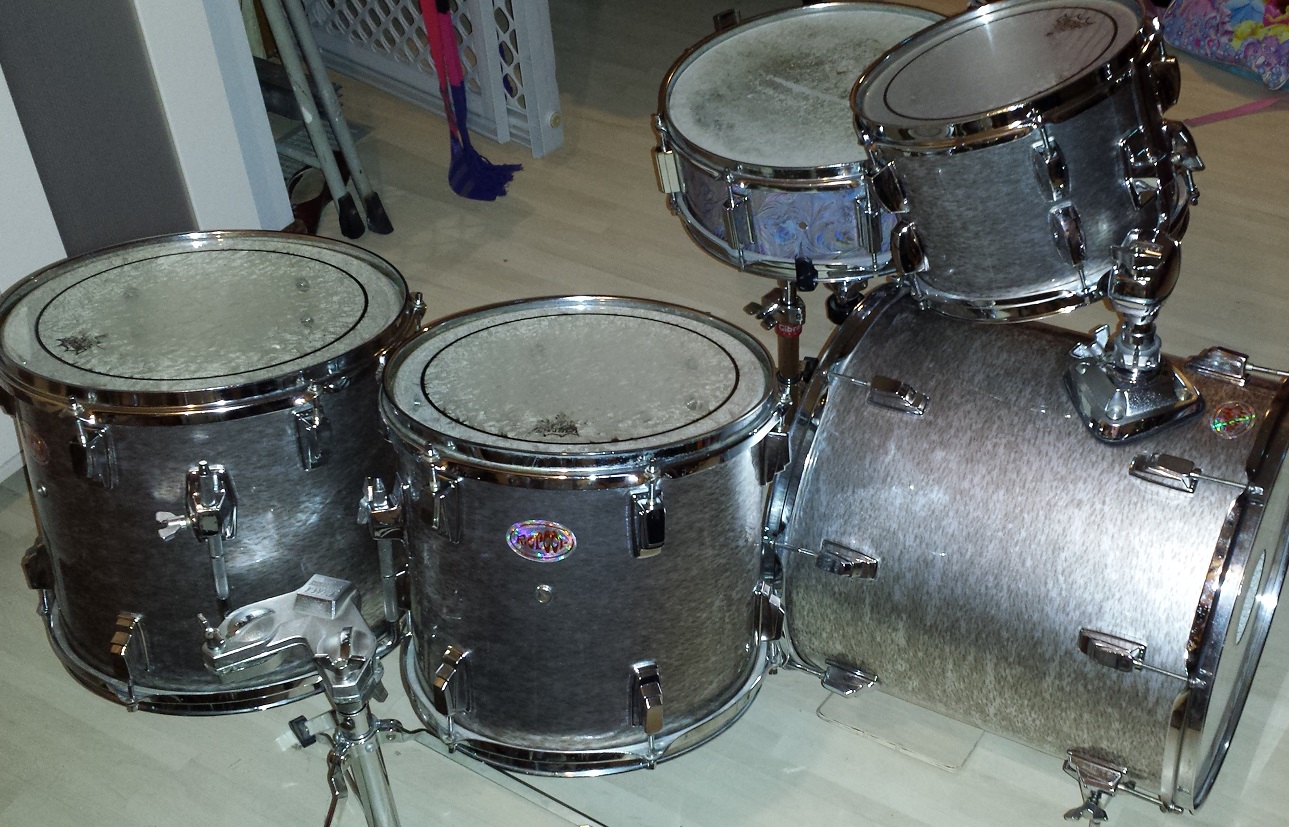
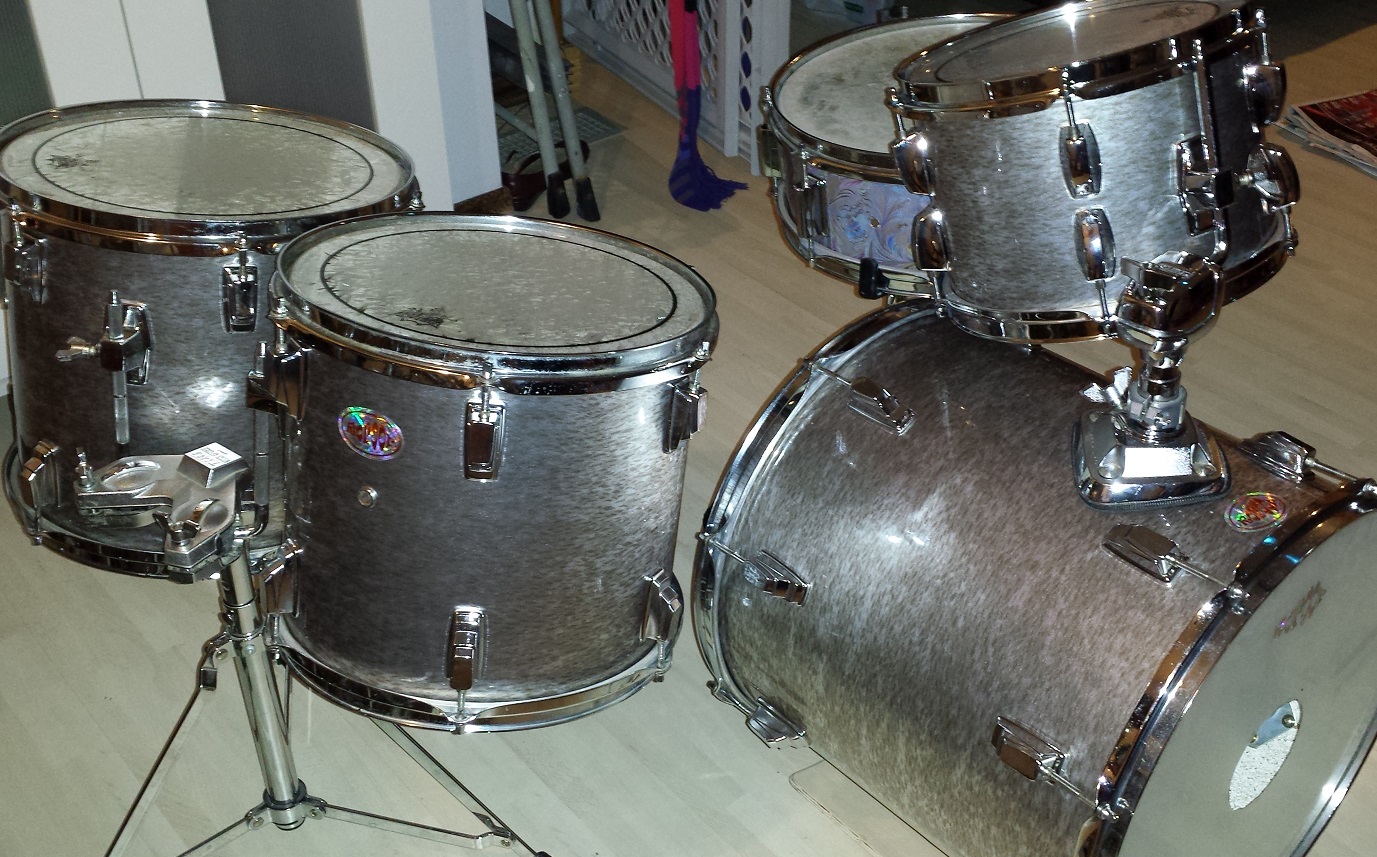
DIY Double Down Jungle Drum Kit
The Floor Toms
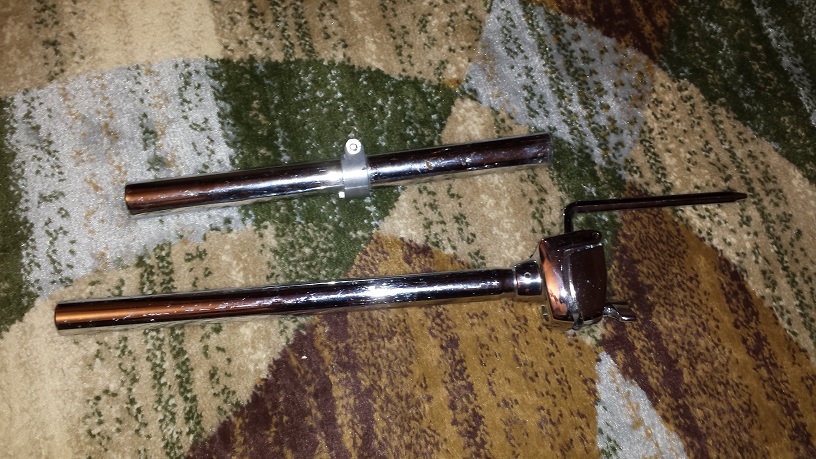
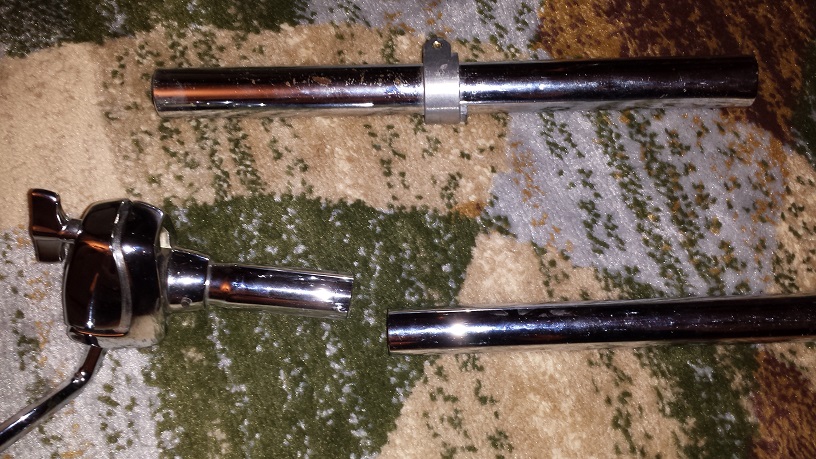
Since the intention is to make hanging floor toms, very little is demanded in regards to modifications. Rather, the 12″ and 13″ rack toms just need to be cleaned up, inspected and refinished. A stand will have to be furnished as well. I’d like to use the mounting post that came with the kit, but the post is of a freakishly large diameter, requiring a purpose-built stand, or serious modification to the Tama dual tom mount post.
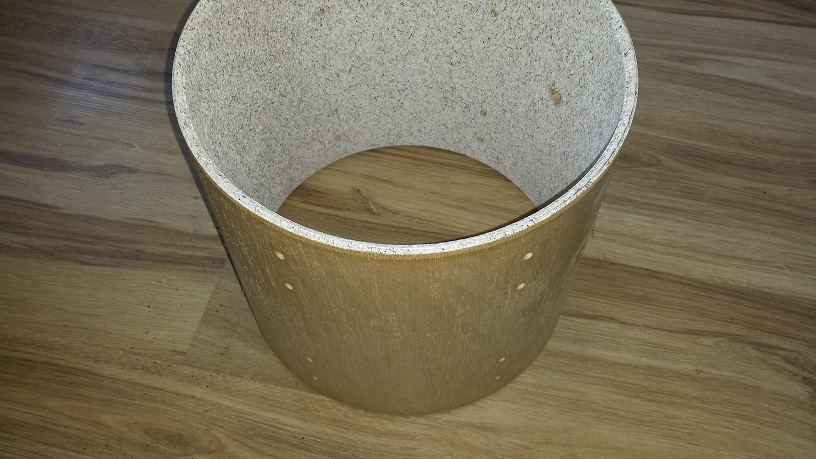
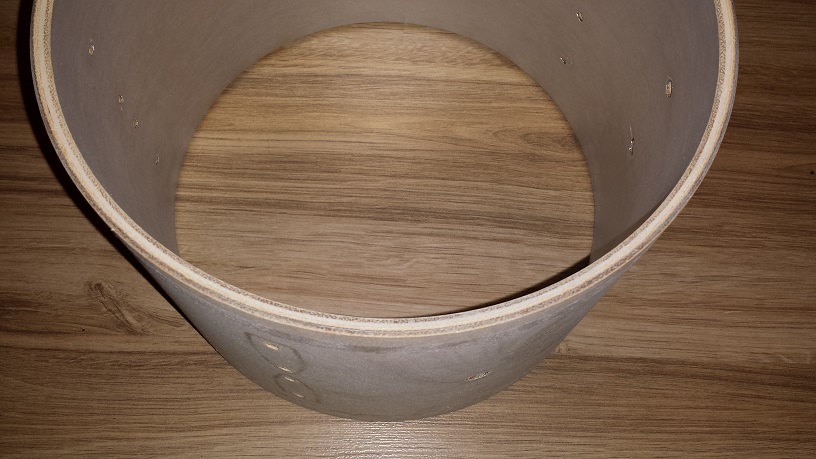
Disassembly is straight forward. The vent grommets are re-usable if you pry them out carefully. Gently lift one tang at a time and then use pliers to collect them in a circle so the vent grommet can be pushed out. Take care not to scratch the Zola-coat. Although the wrap is adhered across the entire surface, it comes off fairly easily. Luckily, despite the poor shape of the wrap, the shells are pristine.

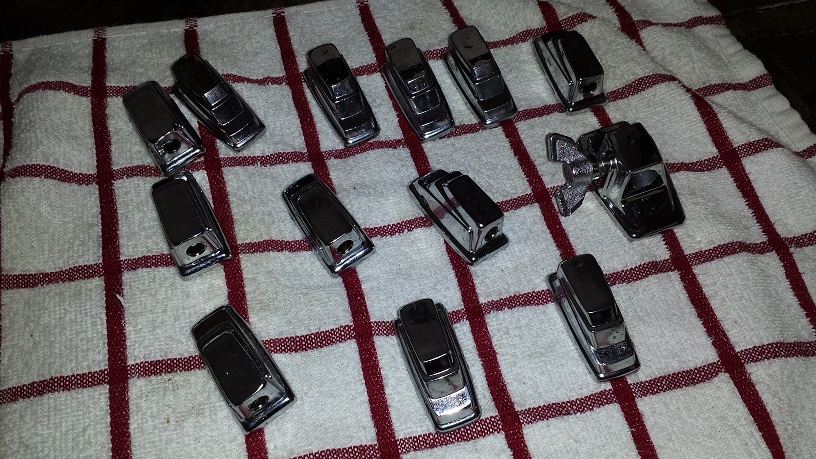
Lugs and mounting brackets all go in the kitchen sink for a good cleaning and then lined up on a towel to dry. The shells get wrapped according to the instructions for method four on our Drum Wrap Instructions Page. Re-assemble the parts and the two floor toms are finished. Time to figure out the solution for a stand.
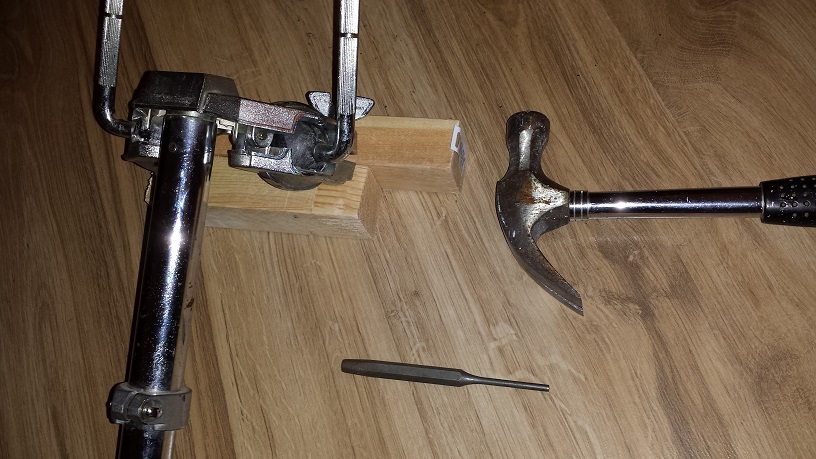
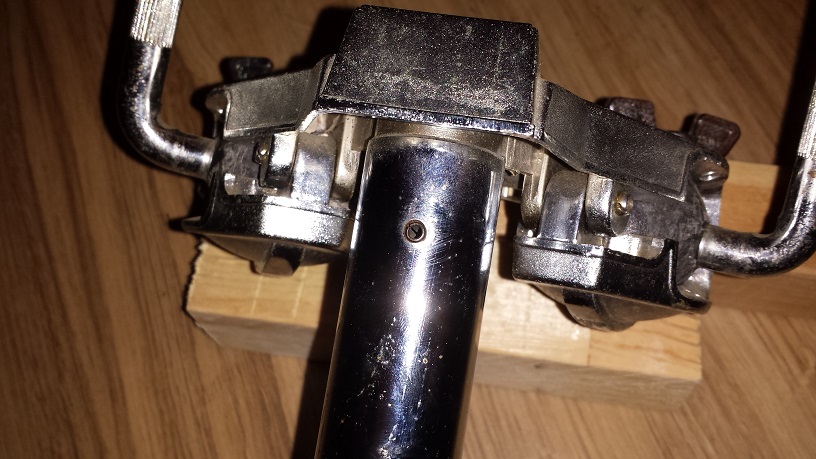
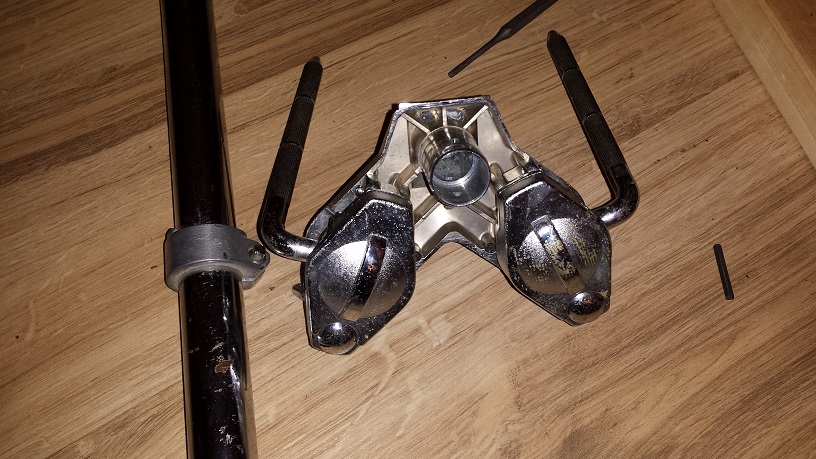
First the freakishly large-gauge post will need to be removed from the Omni-Sphere holder. Find a suitable size nail-set to fit the locking pin and knock it out with a hammer. Even with the locking pin removed the post is still firmly in place. It takes quite a few downwards blows with the hammer while rotating the assembly before it lets go.
We’ll have to put the freakishly fat post aside for later. If I intend to use the tom mount platform from the bass drum, I’ll have to somehow mate this post to a single tom holder.
The short stump of a post on the bottom of the Omni-Sphere holder is the size that will fit the bottom receiver of the biggest gauge stands. The one I have on hand is a Toca Conga stand base, but I intend to find one with a chrome tripod base before finishing this project. Before test mounting everything I disassemble the tom holder and give it a good cleaning with Naphtha. Put the parts all together and try it out to ensure that this idea will work. Bingo! Works like a charm. Looks OK, but will likely look just right with a chrome stand.


The Tom Tom
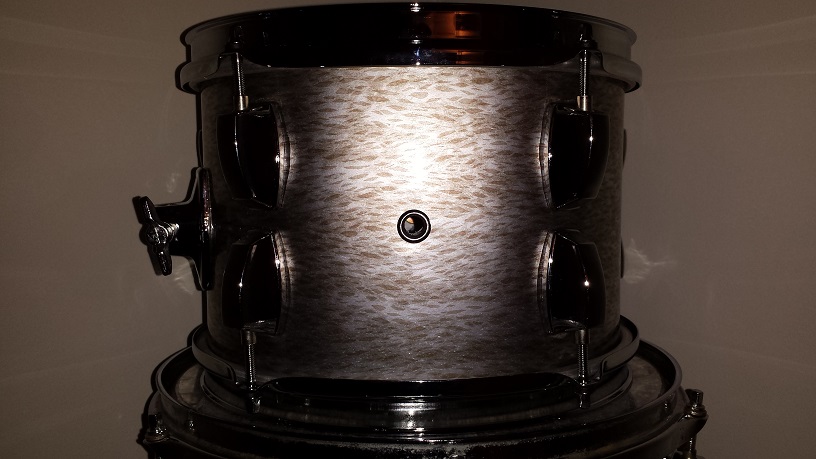
Also from a trade some time back, I have a brand spanking new Gretsch Energy 10″ tom. With a few small adjustments it will make a perfect tom tom for this DIY Double Down Jungle Drum Kit. The lug holes are already the right spacing for the Tama lugs, they just need to be enlarged a wee bit. The holes for the mounting bracket are also the right spacing. To improve the sonic match a bit it will need to be sealed inside. Since it is a Gretsch, Silver Sealer seems appropriate. Silver inside should also blend in with the Zola coated insides of the other drums.
The vent grommet is of the style that requires grinding away the inside flange before it can be popped out. Once this is done the rest of the parts come off quickly. The wrap requires a little bit of heat for the adhesive to let go.
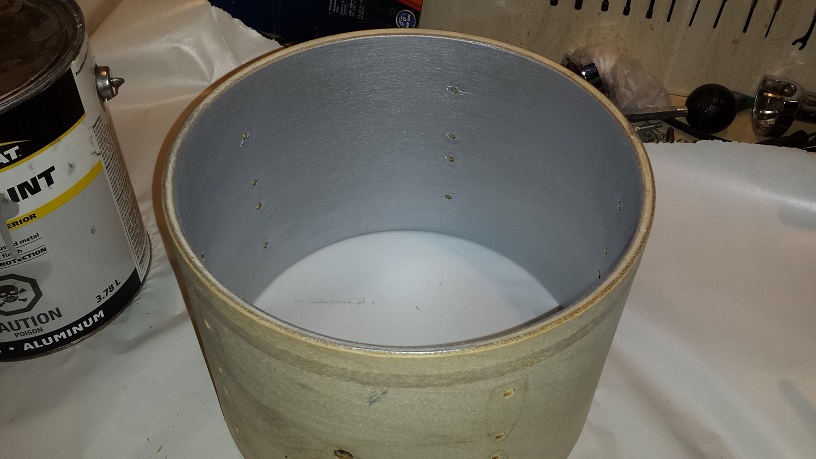
With the shell stripped naked we can proceed with sealing. Before doing this you should mask the bearing edges unless you intend to re-cut or sand them. In this case I think I’ll leave them at 30 degrees but I’ll definitely give them a sanding.
I give the inside three thin coats of silver sealer, (Aluminum coloured gloss rust enamel) with about 24 hours of drying time in between.
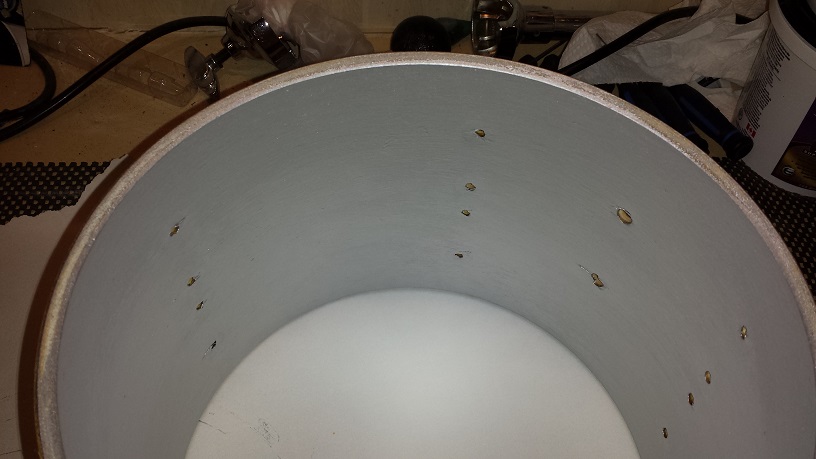
With 100 grit paper the inside 30 degree bearing edge is sanded until all the silver sealer is removed. Switch to 200 grit and sand the entire bearing edge surface smooth. I also spend some time slightly rounding the outside bevel. Not so much as to make it a full round-over, just enough to slightly increase the contact surface between the head and the shell.
Originally I intended on using the Tama lugs from the 16″ on this tom and use similar lugs on the bass drum. However, their isn’t enough space between the lugs for the Tama variety. The tails of the lugs end up pushing against each other. Instead the lugs that were intended for the bass will go here. The lug holes in the shell need to be enlarged a smidge as the Gretsch lugs has quite small screw-posts.
Next we proceed with wrapping it up as per the instructions for Method Four on our Drum Wrap Instructions page. After a quick re-assembly of all the components the 10″ tom tom for our DIY Double Down Jungle Drum Kit is completed.


The Bass Drum
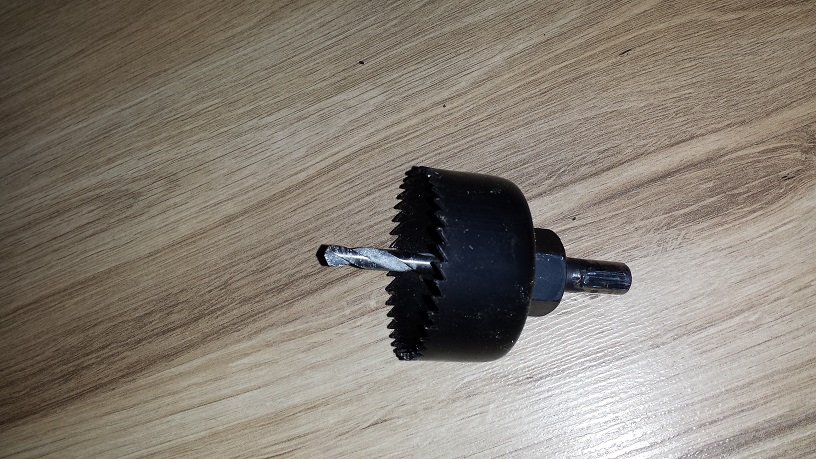
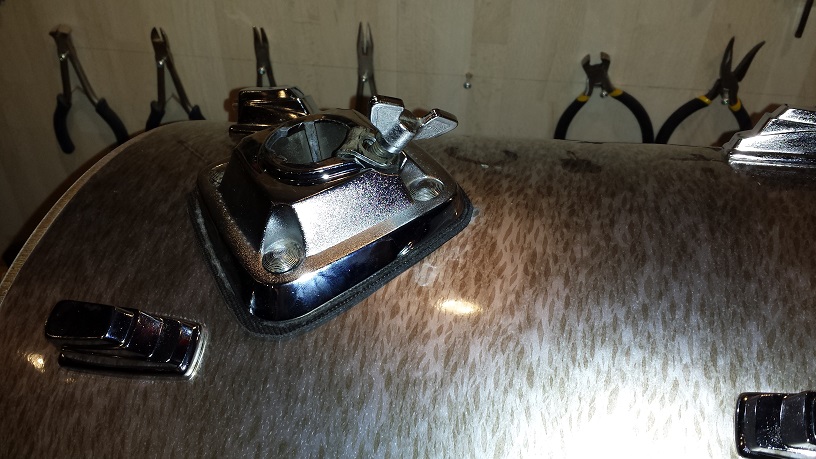
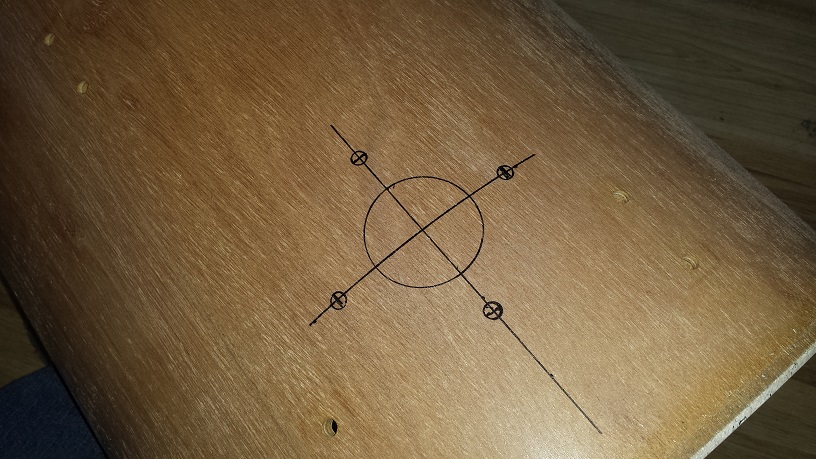
Most of the actual conversion and construction effort of this DIY Double Down Jungle Drum Kit, goes into the tom-to-bass conversion. Brackets for the spurs need to be installed as well as a tom mount platform and a bracket for the riser. The hardware that needs to be added are all installed in a similar manner. We’ll do the tom mount platform first. Start with determining a rough position. In order to get it straight we’ll need reference points to draw straight lines from. The edge of the shell and the existing lug screw holes are suitable. Find the center between two pairs of lug holes and draw a straight line. Then draw another straight line parallel with the drum shell’s edge. With this cross established it’s easy to use the platform or backing plate as a template to mark the holes for drilling. Since these Tamas have a gigantic post hole I’ll be using a hole-saw for the pass through hole.
The same process is used to mark the holes for the riser bracket and spur brackets. In the case of the spurs take measurements to the reference points in order to duplicate the exact mirrored position on the opposite side.
Drilling is done with a brad point bit in a corded drill. Drill from the outside until the point pokes through the shell and then drill the remainder of the hole from the inside. This way there is no breaking through of the last ply causing ugly edges.
Test fit all the hardware pieces before moving on to the wrapping stage.
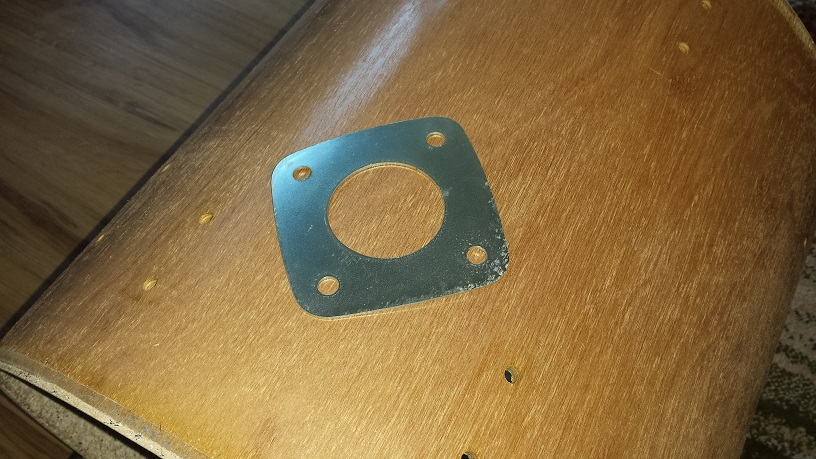
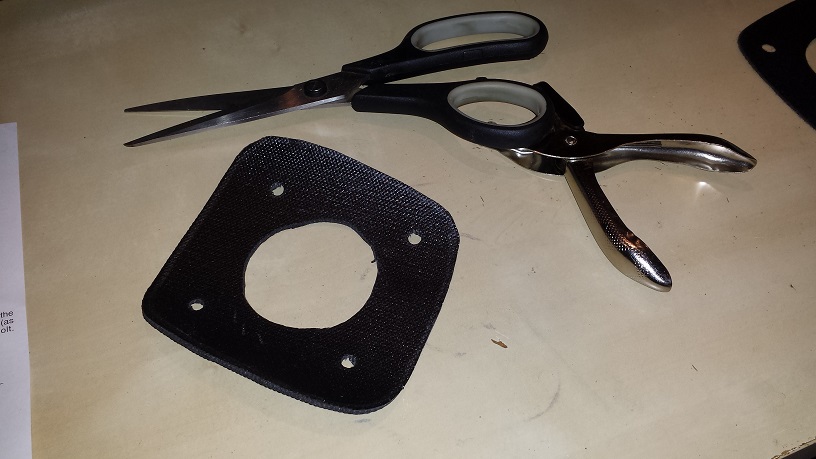
The shell gets wrapped in the same manner as the others. A thicker isolation gasket is fabricated for the tom mount platform to compensate for the discrepancy in the curvature between this 16″ shell and the 22″ shell that donated the platform. Once the drum is assembled we fabricate a riser as per the plans for Bass Drum Riser #8.


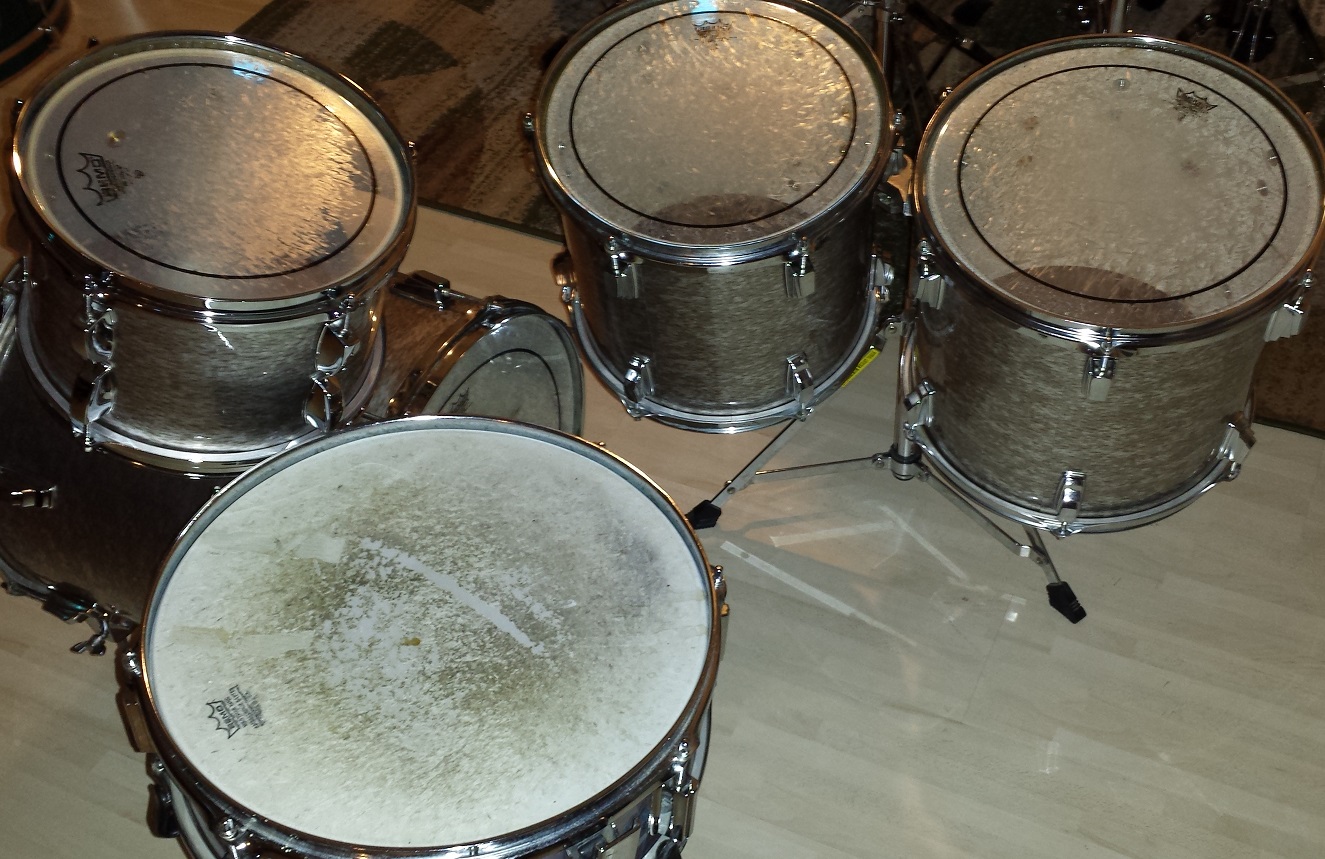
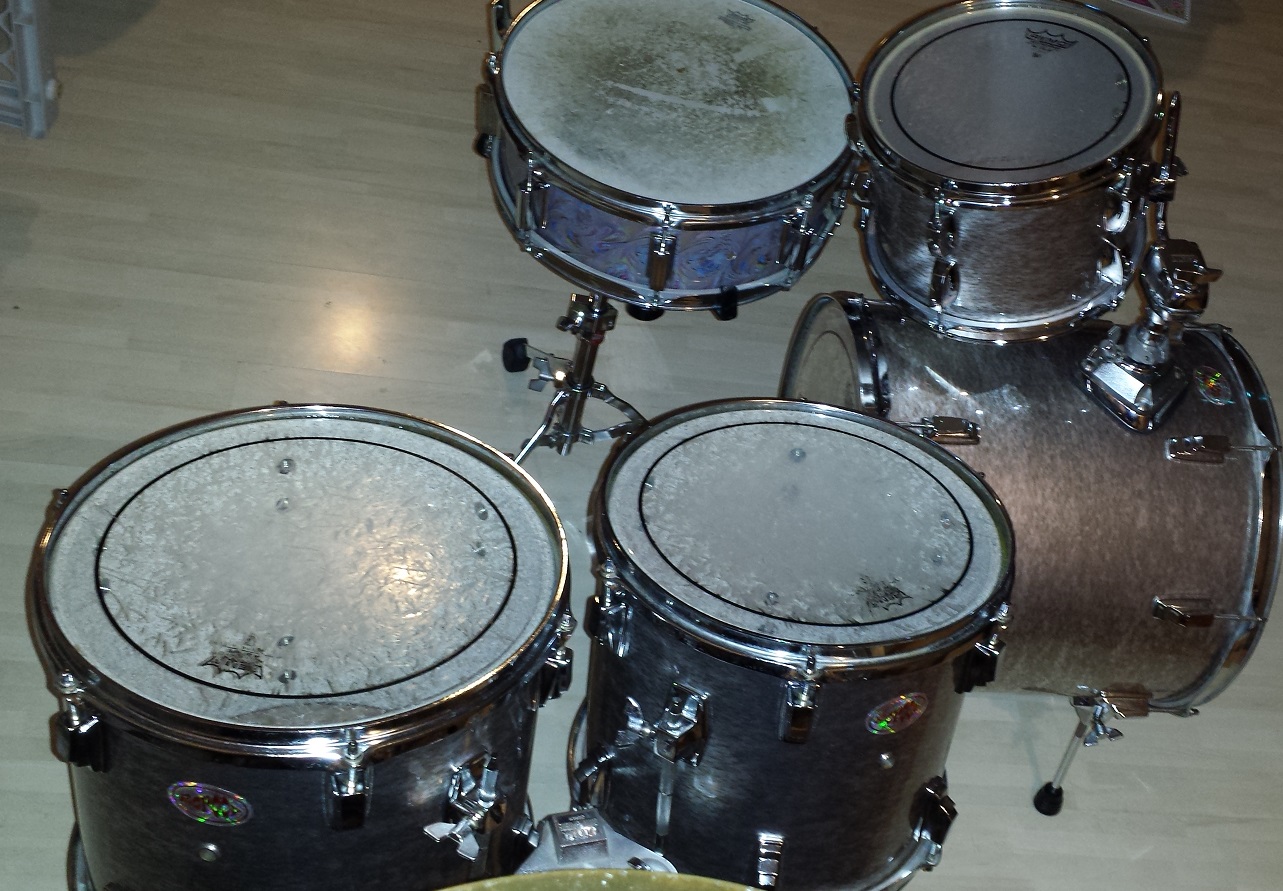
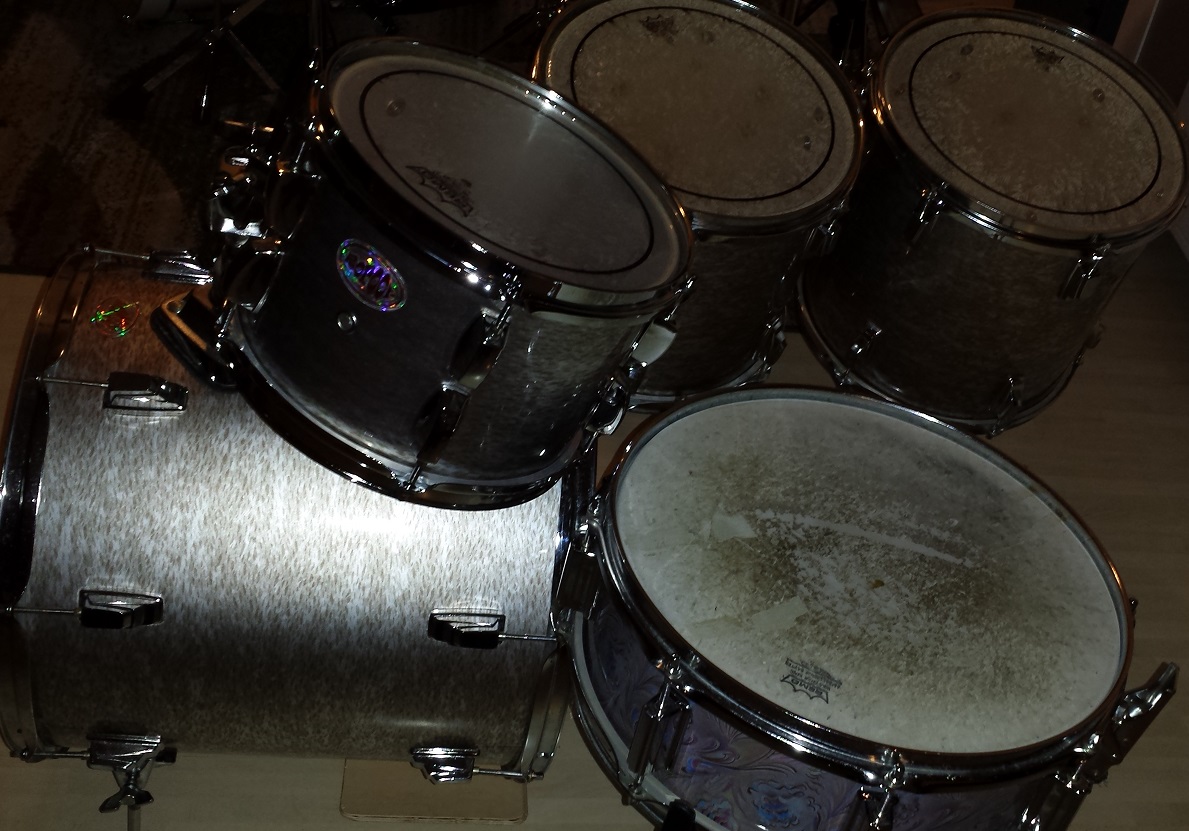
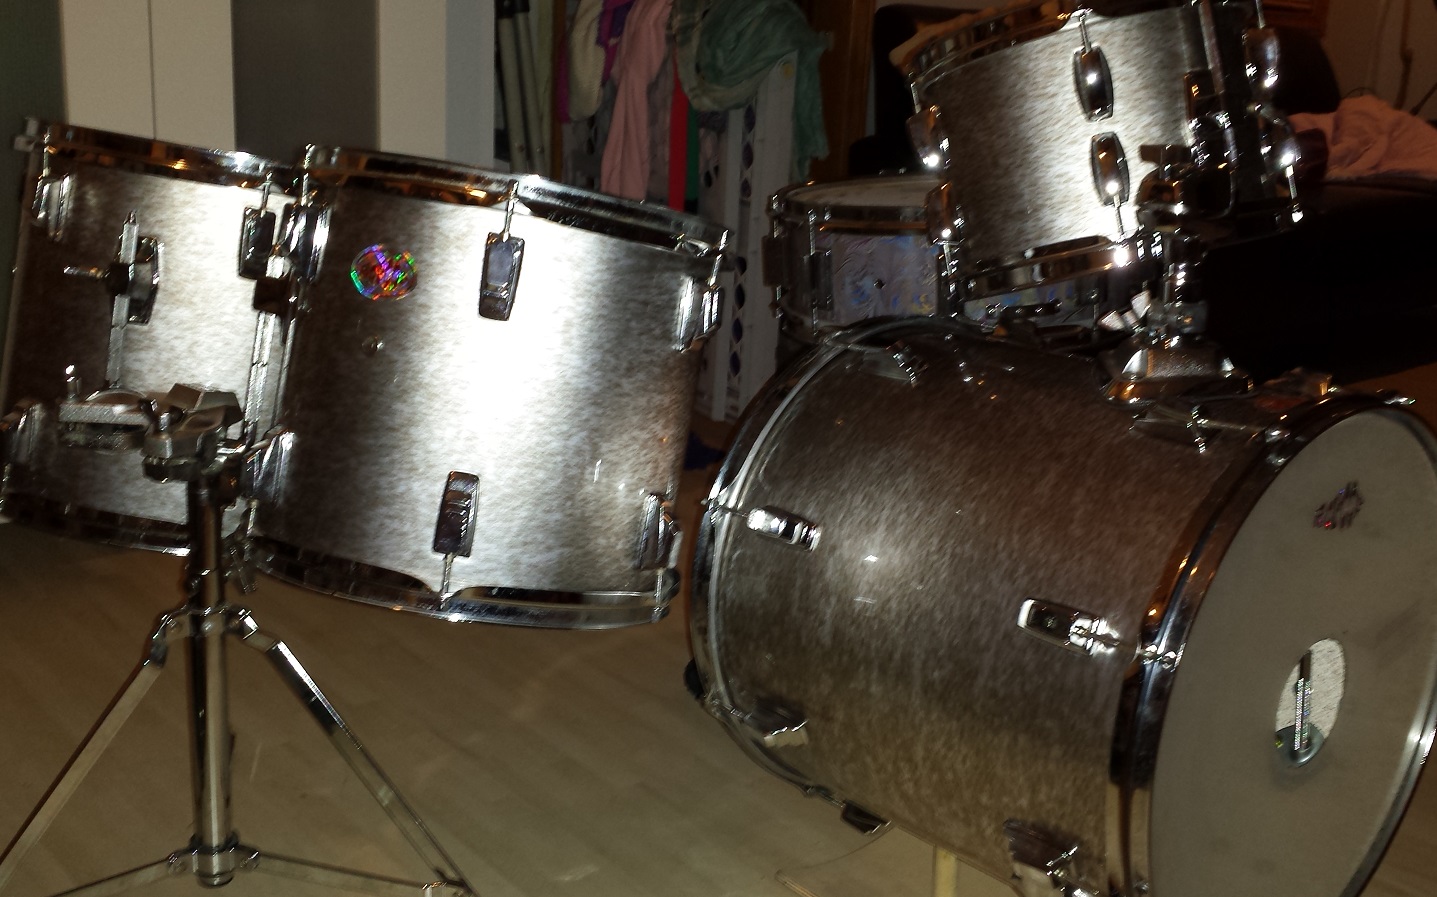
Assembly of the DIY Double Down Jungle Drum Kit
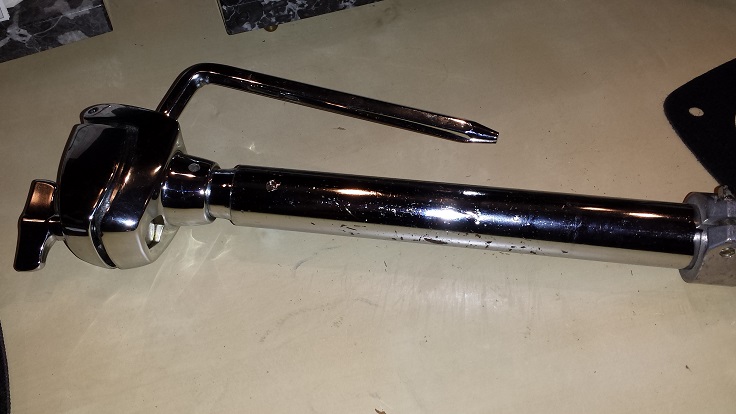
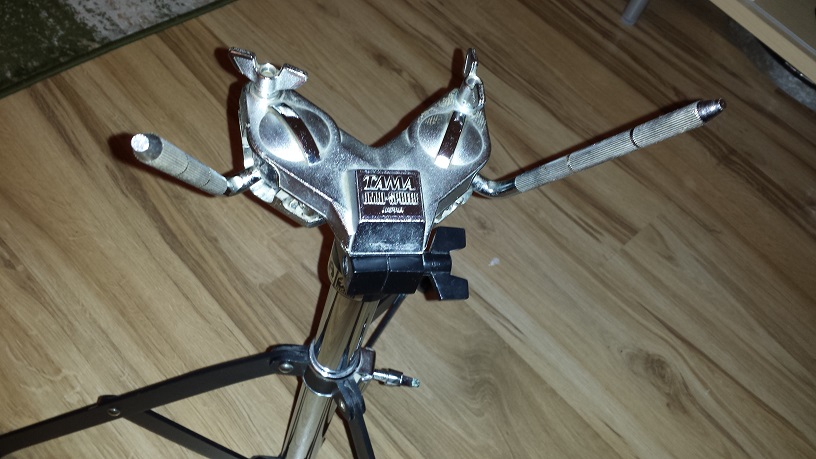
I found a Tripod base for a throne that could be mated to the dual “Omnisphere” tom holder. This makes for a more visibly balanced mounting mechanism for the two floor toms.
The post of the Mapex tom holder for the high tom is obviously too small for the ridiculously big tom mount platform.
Using the angle grinder I lop off the bulk of the post on the Mapex tom holder and mate the remainder with the Tama post. It’s a snug enough fit that the stump of the Mapex post needs to be hammered into the Tama post, but I add a bit of Super Glue just to make sure it stays locked in place.
DIY Double Down Jungle Drum Kit
The Coolest Cat in the Jungle