Introduction

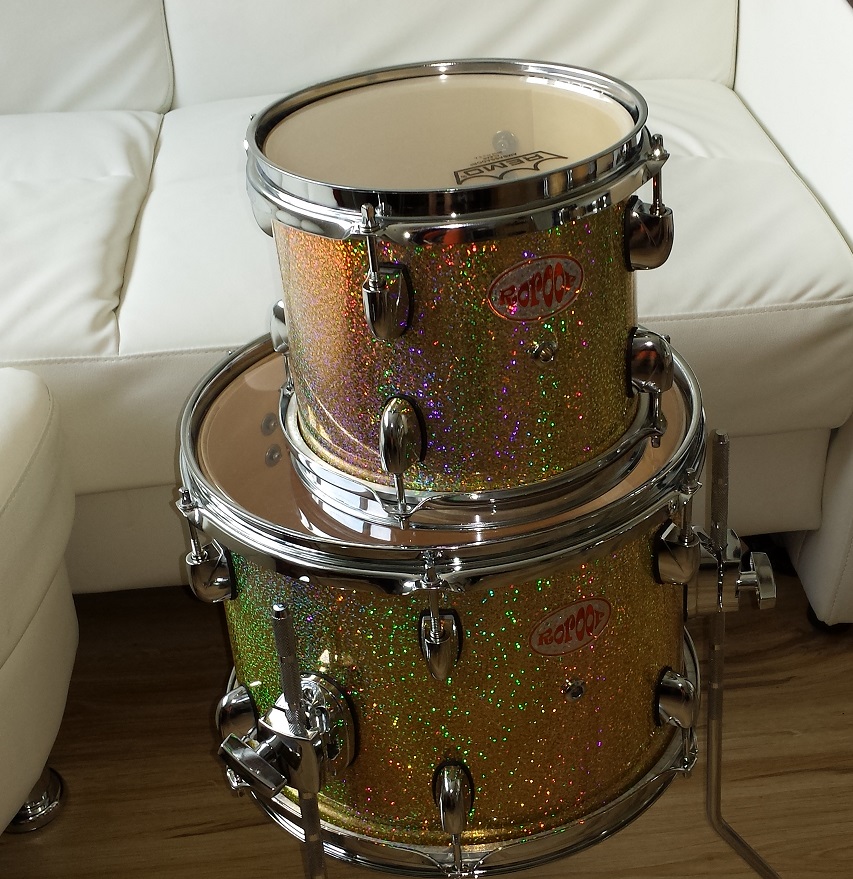
It hasn’t been that long since we made this Sonor Martini sized bop kit. While our newest version entitled “Sonny & Beer” has similarities, it also has some distinct characteristics. Our DIY Nano Bop Drum Kit, “Sonny & Beer” will have a deeper 14″ X 14″ Bass Drum with 8 lugs per side, and a smaller 12″ X 9″ Floor tom. It’s my belief that these sizes are a better match with each other. It will once again have a wood 12″ free-floating snare drum rather than the Martini’s steel snare.
As much as I really dig the wrap selection from Bum Wrap Drum Co., we’ve now featured them for two kits straight and will likely make more DIY projects with their wrap in the future. This time, however I really wanted to go with a sparkle finish, something Bum Wrap doesn’t offer. Of course we’ll be going with a Champagne Sparkle since Champagne and Beer are just about the same thing. The goal is also to equip the bass drum with Ratchet Spurs rather than the Martini’s “Gull-wing” spurs and I’d like to mount the little 8″ X 8″ tom tom with a suspension mount.
The bass drum and floor tom shells are donated from a Gretsch kit and the Gretsch lugs with accompanying gaskets from that kit will be installed throughout the kit. Floor tom leg brackets and tom tom mounting brackets with gaskets will also come from the same. The tom tom is a Pearl ELX so the lug holes will need to be re-drilled, unless I can find lugs with Pearl spacing that resemble the Gretsch lugs. The 12″ snare drum shell has been through a few experiments of various finishes with varying degrees of success.

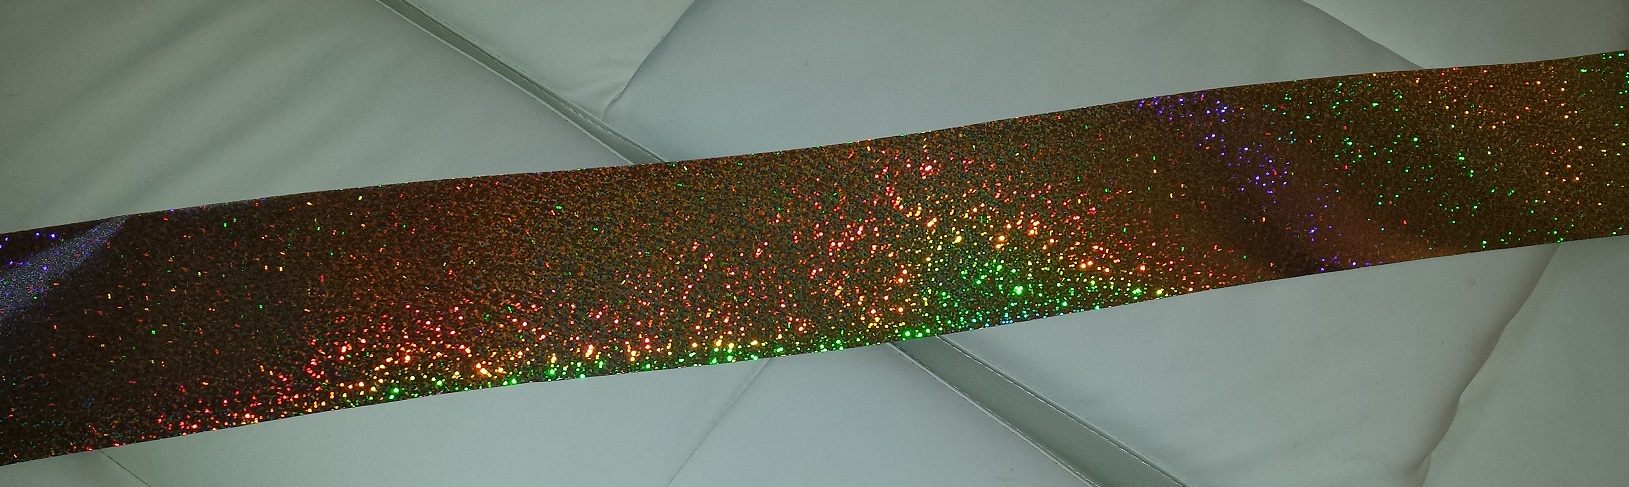
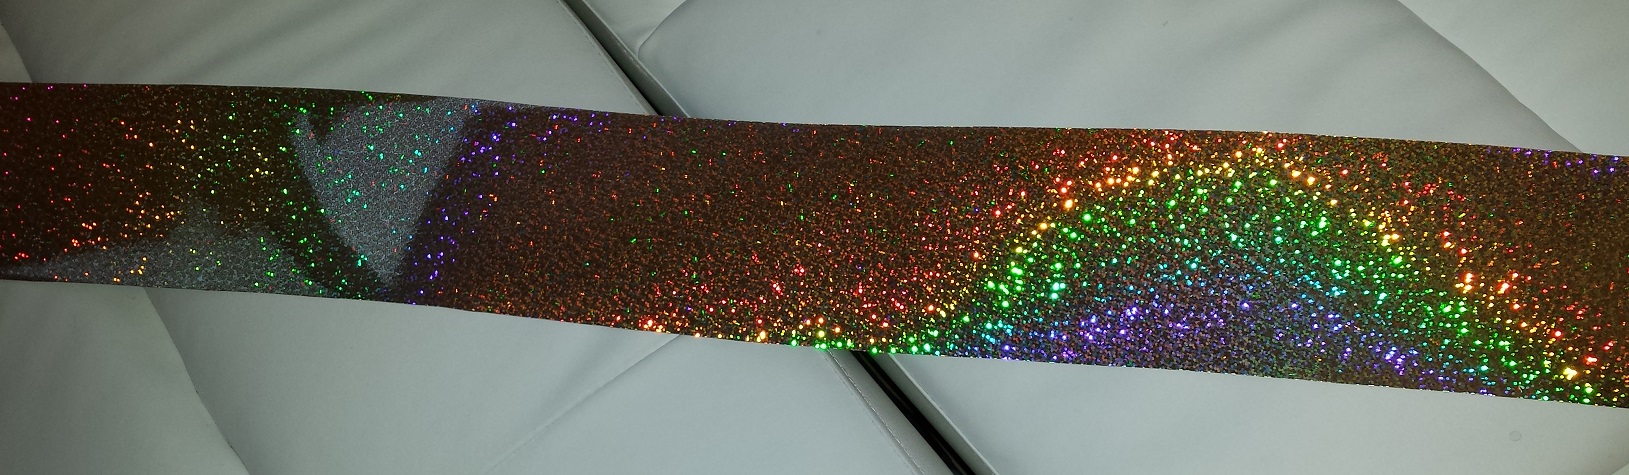
The shells are all rather nice so we’ll forgo the silver sealer in favour of a satin polyurethane interior. The snare however is so severely affected by prior experiments that it will have to have it’s interior concealed. The wrap for this project comes from a local Canadian wrap manufacturer that specialize in sparkles. Indeed Walopus Drum Wrap offers insanely sparkly sparkle wraps at prices a cheapskate like me can live with. They also have a strange company name and a funny, cute logo. Look for a review of their wrap soon here on CompactDrums.com. While they have a line of “Tru-Sparkle” wrap with actual sparkle particles, this line doesn’t come in “Champagne”. Instead I ordered the “Spectra-Sparkle” variety in Champagne which Walopus describes; “Like a chameleon, our Spectra-Sparkle drum wrap calmly and proudly displays it’s dominant colour. When the light hits it at the right angle it bursts into shimmering cascades of multi-coloured sparkles.” Walopus offers their wrap in three thickness gauges, Thick, Standard and Ultra-thin. We ordered the “Standard” variety which seems to be about the same thickness as the wrap from Bum Wrap. (Some 20 mil or so)
Prepping the Shells
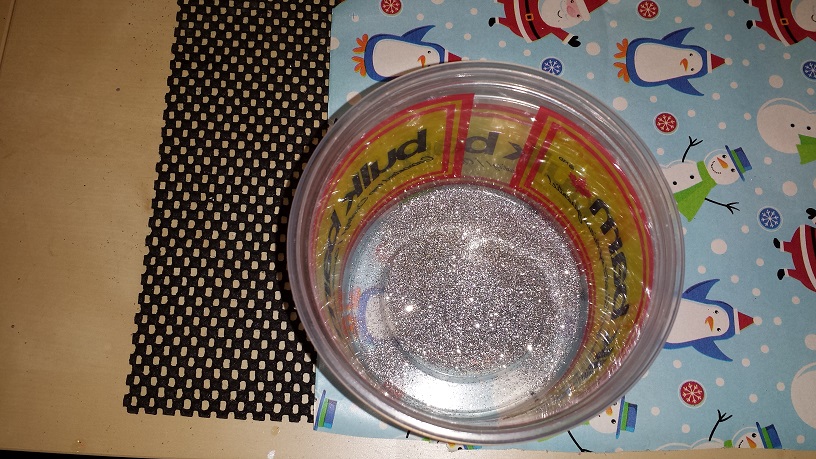
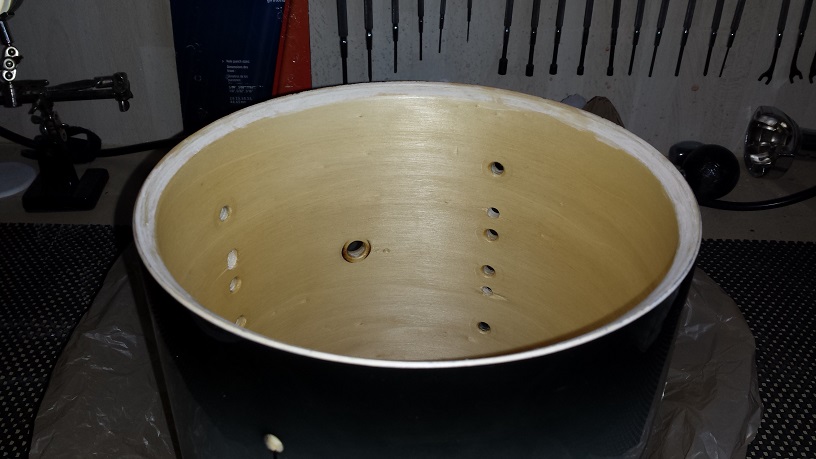
Snare Drum – As mentioned above, our snare drum has been subjected to some abusive finishes in the past and will thus be exempt from the natural wood finish interior. I gave it a quick sanding and then started painting the inside with our standard silver sealer. Then it came to me…. Why not throw some sparkle on there? Remember those textured interior finishes from the ’70s and ’80s? “Zola-coat”, “Accousti-coat” and fiberglass? Immediately after applying the silver sealer I poured on silver glitter and rolled the shell around until the glitter coated the entire interior evenly. Adding some 10 coats or so of clear coat should yield a textured and highly sparkly finish.While the sparkle sets in the silver sealer inside the shell we also throw a coat of silver sealer on the outside. Leave to dry overnight.
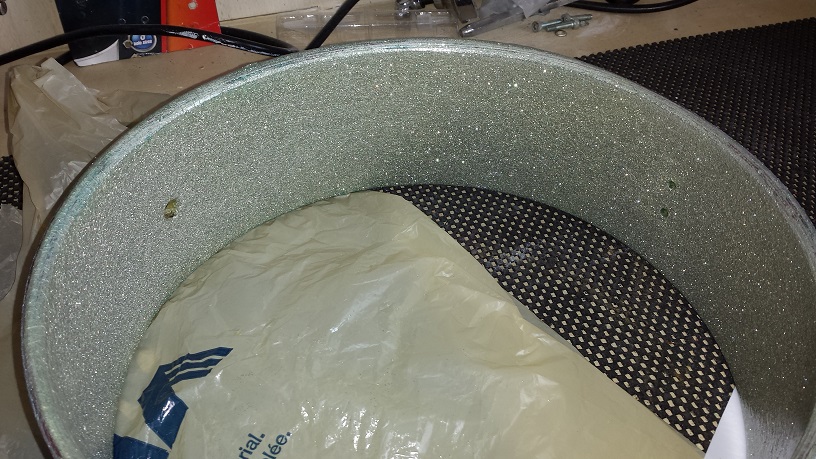
Next we start painting on water based polyurethane adding a coat every couple of hours. After 10 or so coats of polyurethane the sparkles are well embedded but still lend a noticeable surface texture. After drying overnight we’ll move on to cleaning off the mess of paint, glitter and polyurethane on the bearing edges. I believe re-cutting the edges will be necessary as I wasn’t very neat with applying any of the aforementioned finish components.
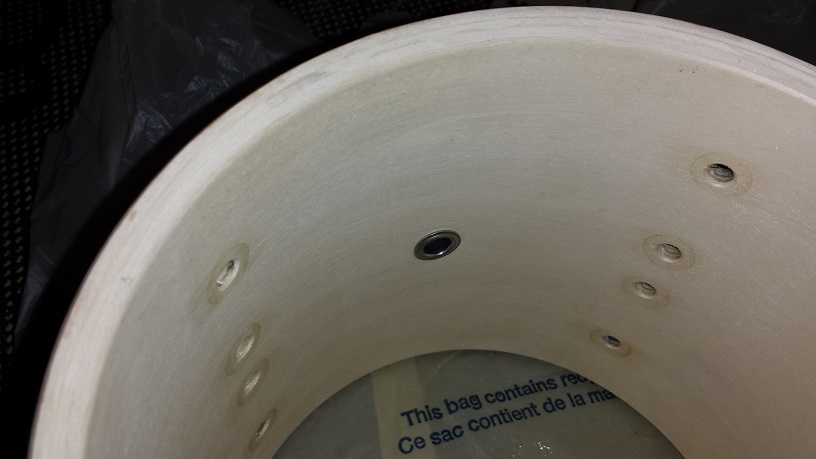
I set the router to remove the finishing mess and just about 1 mm of wood. Not enough to completely remove the snare bed, but enough that the snare bed needed to be deepened just a smidge. After routing the bearing edge I sand it smooth with 150 grit paper and then with 240 grit. I also use the 240 to re-shape and deepen the snare bed just a wee bit. Some remnants of previous stains that were hiding under previous sparkles are just barely visible still.
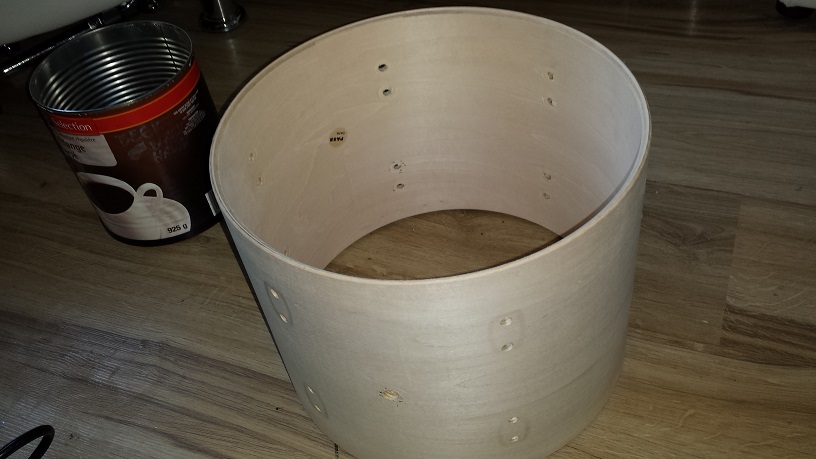
Tom Tom – The Pearl ELX 8″ tom has a really nifty lacquer finish. It’s almost a pity to be drilling holes and wrapping over it but sometimes you gotta’ do what you gotta’ do.
Disassembly is straight forward except for those pesky air grommets that are flared both inside and out. Grinding out the flare like you would do with a rivet is the only clean way of removing it. The badge is held on by a strip of double-adhesive tape in addition to the two tiny little screws. A little bit of heat helps a lot to convince the tape to let go. With all the parts removed the ELX tom is stripped of hardware but not of it’s dignity.

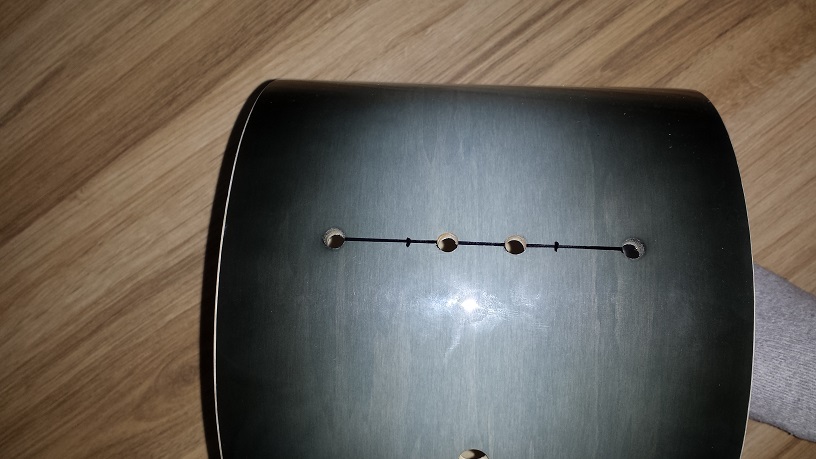
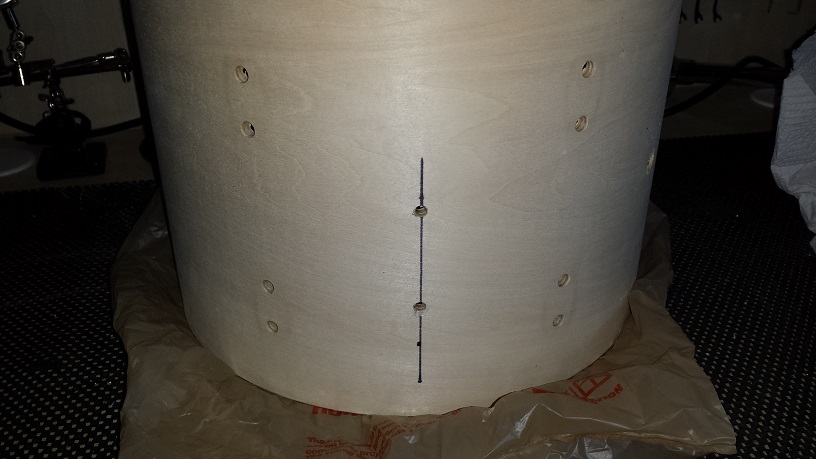
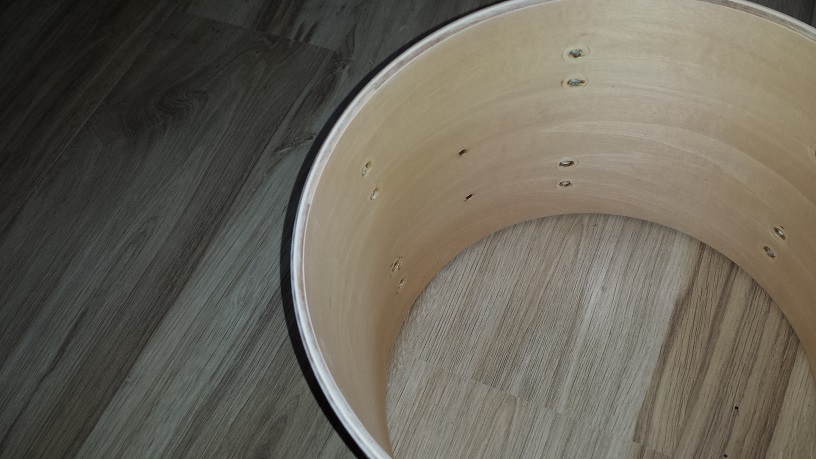
Now that the shell is naked we draw straight lines through the centres of the lug holes and mark the position of the additional hole to accommodate for the Gretsch lugs. Measure and mark twice or maybe even three times, to avoid having to patch and re-drill later. Use a corded drill with a brad-point bit. Normally I drill the last ply from the inside, but that’s just not possible with an 8″ shell. Instead we drill at the highest speed possible and with little to no pressure. Just let it take it’s sweet time. I still got a little bit of break-through at two of the holes, but luckily not big enough to be visible outside of the washer.
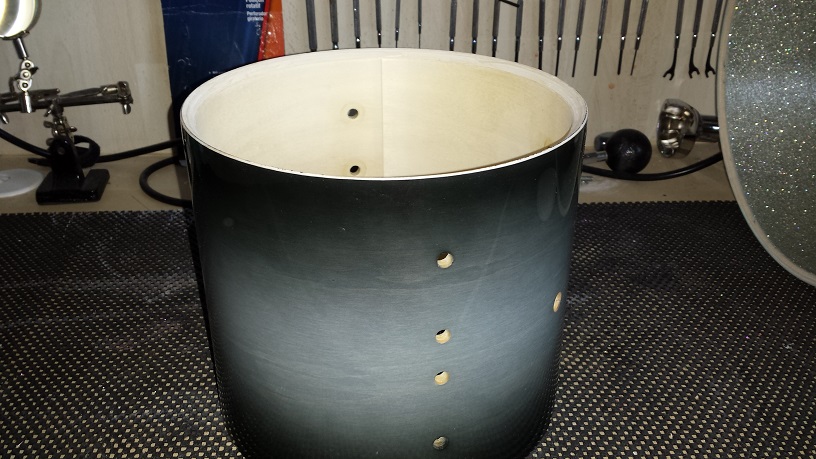
Moving on to sealing. I really like the sound of my Taye GoKit featured in this review. That kit has what looks like a clear satin finish on the inside. If a clear satin finish has any affect on the sound, then I want that same finish on this drum kit as well. I use a “wipe-on” polyurethane, although I apply it with a brush. For no other reason than that brushes have handles. A couple of coats should do the trick. Actually, three coats looks about right. All that remains is a light sanding of the bearing edges and the tom tom shell is prepped.
DIY Nano Bop Drum Kit


Floor Tom – Off come the suspension mount, rims, heads, lugs, and the threaded vent grommet. With a bit of heat from the heat gun, the badge comes off without resistance. Using the heat gun again, we heat up the seam of the wrap, insert a putty-knife, and pull up and out. Unroll and voilà – Full frontal nudity!
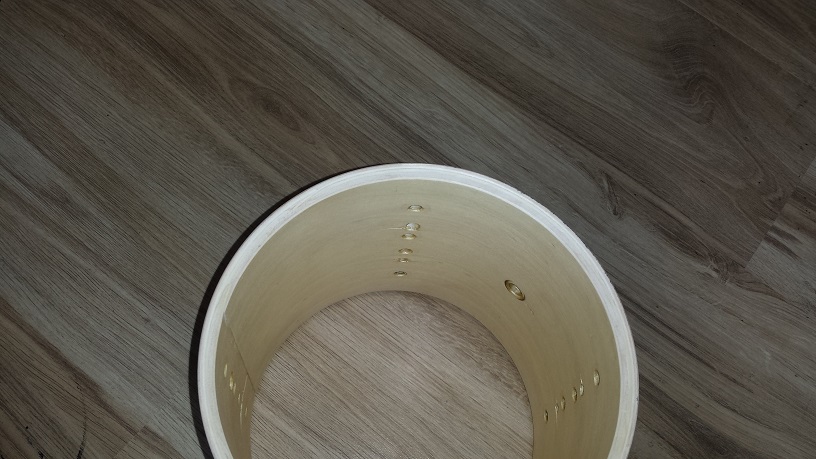
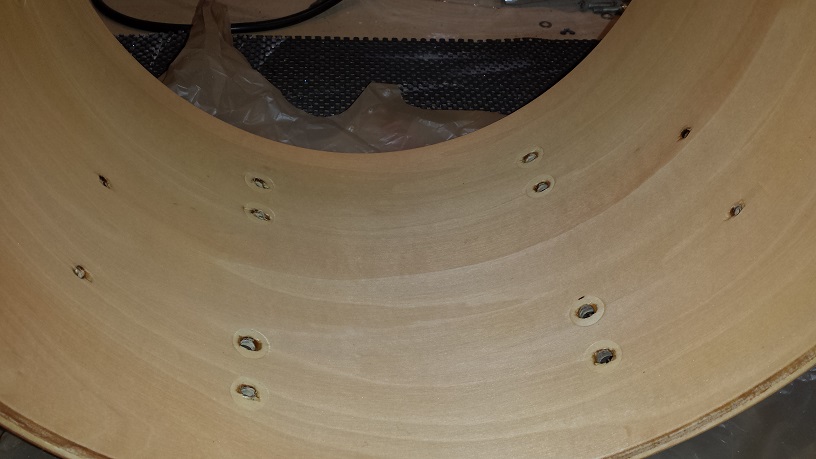
Next we make straight lines, parallel to the lug lines between every second lug making sure to avoid the space containing the air vent hole. I start with making a mark in the middle between the bottom lug holes and then with a square placed on the floor draw a line upward. Next make a mark X distance from the edge of the shell. (7 cm in this case.) Using the gasket for the leg bracket as a template, mark the hole closest to the shell’s center. Proceed with drilling in the same manner as with the tom tom.
After drilling give the shell a quick wipe to remove any residual dust and proceed with sealing the inside. As with the tom tom, I apply an initial coat of wipe-on, clear satin polyurethane using a brush. This is a quite rewarding step in the process. The first coat of clear directly on bare wood really brings out the grain and gives the wood a three-dimensional effect. Another two coats get applied with about 12 hours to dry in between.
One step of prep left. The bearing edges. On the floor tom they were just about perfect to begin with. We just give it a quick dressing with 240-grit to remove some stray polyurethane and give it a uniform smooth finish.

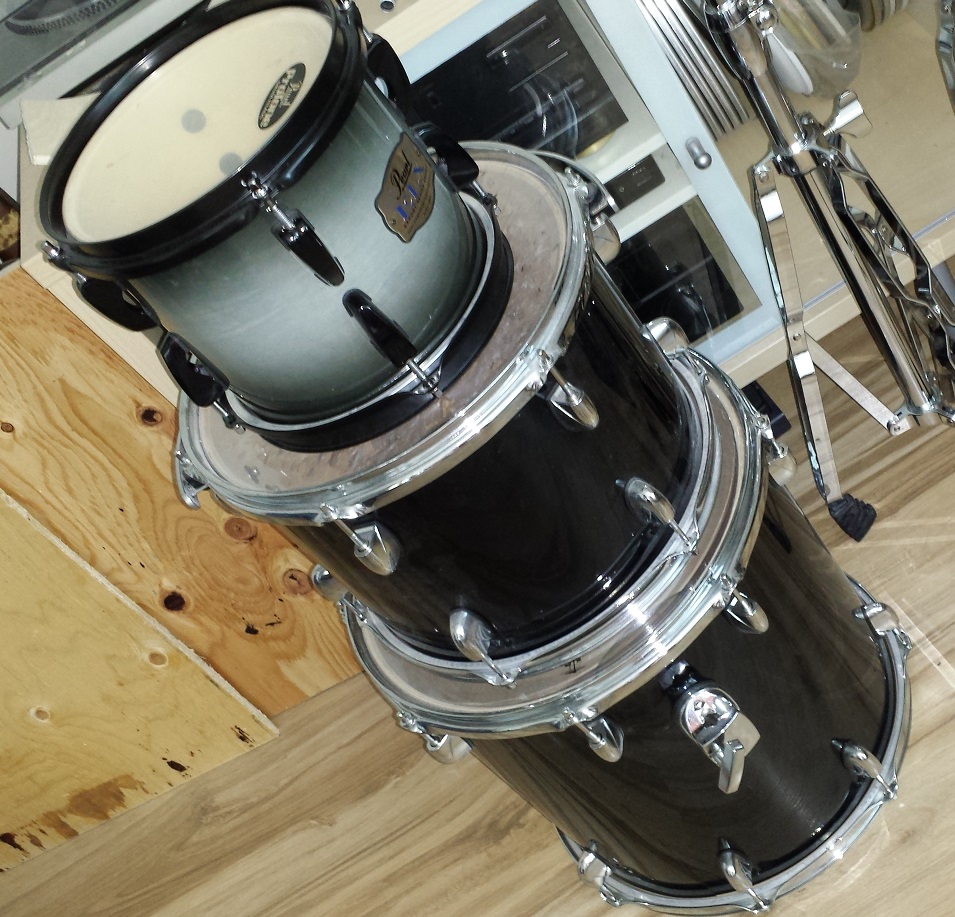
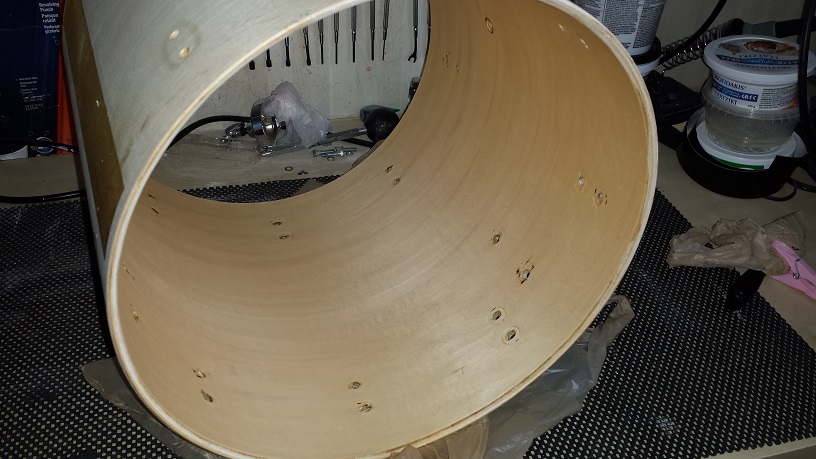
Bass Drum – Our 14″ former floor tom gets disassembled in the same manner as the other drums. The adhesive strip on the black wrap was a bit more stubborn on this one than the other shells so we had to use enough heat to completely deform the wrap. Drum wrap doesn’t not have a pleasant small when heated to that extent.
Since I’m still not sure about mounting and riser options, we start the sealing process before drilling holes. I do know that I want to keep the bass drum “virgin” on this project. We apply the first coat of sealer with a brush and leave to dry for a few hours before applying the next.
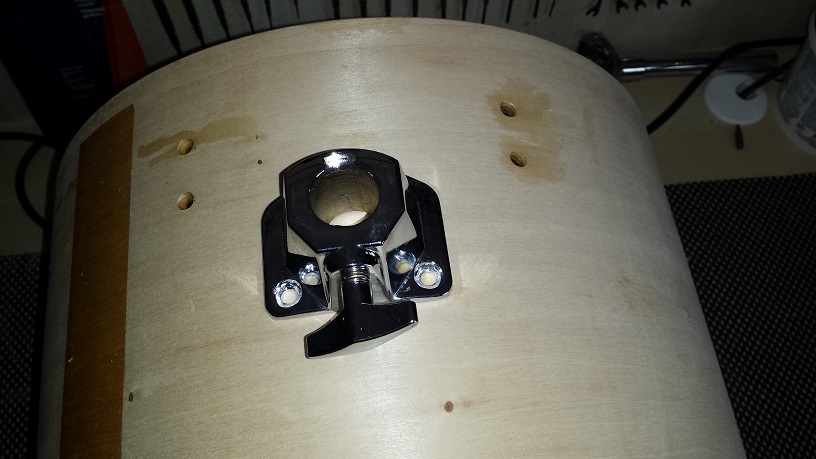
This shell ended up with a total of four coats of Poly and 24 hours of drying after the last coat. As much as I wanted to keep it “virgin” that’s not gonna’ work out with the parts I have available while still maintaining a high level of convenience. Instead we’ll use a tom mounting bracket as the mounting platform and another one will serve as the bracket for the bass drum riser. Folding gull wing spurs will replace the original plan of telescoping Ratchet spurs. For no other reason than that I have them already.
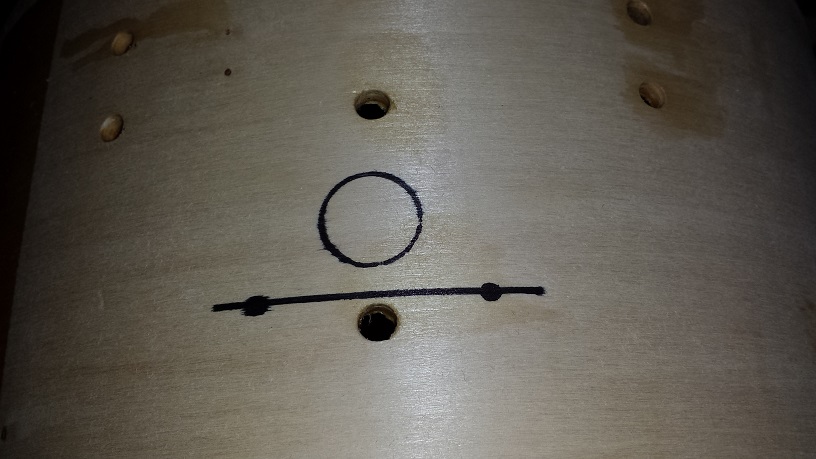

Before drilling for the mounting platform I go through the usual process of measuring and marking out a grid of lines and dots. The mounting platform is going where one of the tom leg brackets used to be and will utilize one of the existing holes for the same. As usual we drill with a corded drill, at the highest speed and with a brad point bit. Once the point pokes through the shell, we drill the remainder of the hole from the other side. I use a 1″ spade bit for the pass through, following the same process of drilling from both sides.
Repeat the same process for the bracket that will serve as the riser mount. Observe that the spine of the seam isn’t centred between the lugs. Good thing I measured to make sure or I would have assumed that it was. That’s it for prepping the bass drum shell of our DIY Nano Bop Drum Kit.

Wrapping the DIY Nano Bop Drum Kit

Snare Drum – As usual the snare drum will be getting the wrap completely adhered to the surface of the shell. This time we’re going to try something new. Instead of the traditional contact cement, we’ll be using vinyl floor adhesive. It’s purpose is to adhere vinyl to wood. Seems it would work well for wrap too then. What’s the point? 1 – It’s way cheaper than contact cement, B – It’s supposedly re-positionable to some degree, which would be easier on my delicate nerves and III – It’s not as stinky.
Walopus Drum Wrap doesn’t come cut to exact size, supposedly to accommodate for trimming it to size after adhering it to the shell. Thus, if you choose the more modern and simple installation method, you would trim it to size prior to installing, but if you want to perform a traditional installation, you have the option of trimming it after adhering it to the shell. The latter is what we’ll do with our snare drum and the “modern” method will be adopted for the remainder of the kit.
The shallowest depth for the 12″ diameter wrap is 6″. Before I install it I first trim it down to just a smidge past the bearing edges on each side. This way I have a strip to analyse and experiment with and also it should be a little more manageable not having too much excess material to contend with. It would seem this stuff is quite durable judging from the effort it takes to cut with scissors. Good thing we didn’t go with the “Thick” variety or I’d have to bring out the garden shears.
For the sake of simplifying the installation I affix a strip of double adhesive tape to the end of the wrap first. From experience I know that is is easier than trying to get a neat job of spreading adhesive right to the edge, without making a mess outside of said edge.
Next I spread a very thin layer of the adhesive onto the shell. Contrary to contact cement this stuff only needs to be applied to one of the surfaces. As with contact cement you are supposed to let it dry until tacky before attempting a bond. An instruction I choose to ignore. With flooring this is more for the sake of the adhesives ability to cure than for a strong bond. Since I’m using such a thin layer and only have a surface width of a few inches it should cure anyway…… eventually….. I hope….
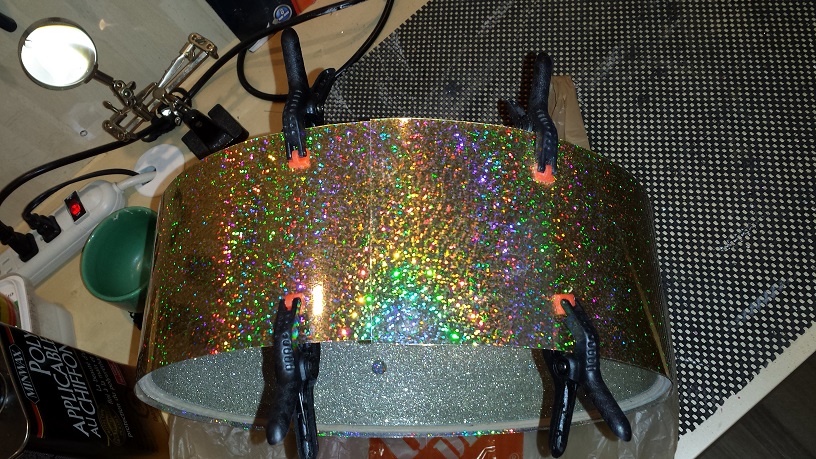
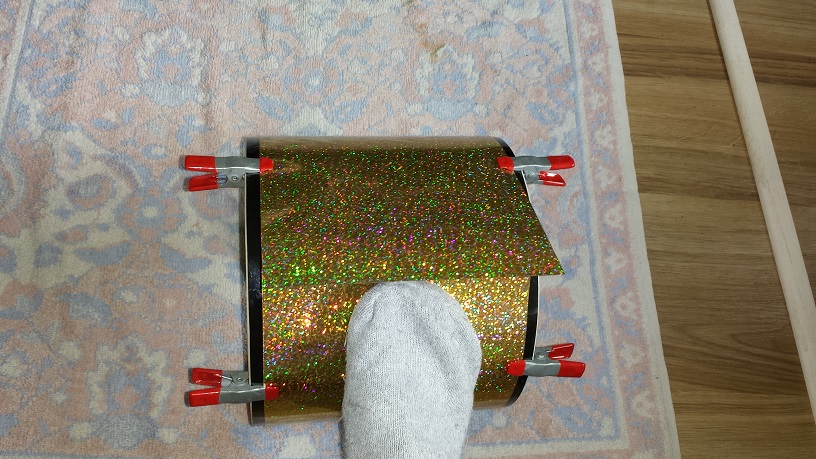
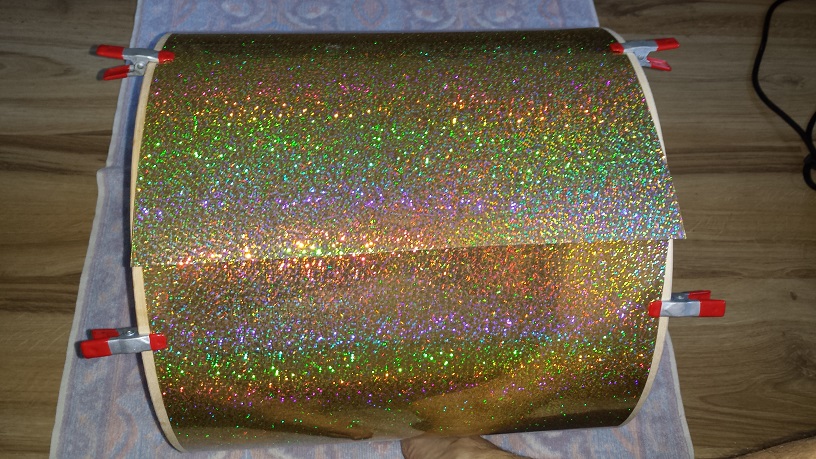
Next we roll up the wrap around the shell, ensure that its straight and clamp with four clamps a couple of inches from either end. (Two clamps per end). Double-check that it’s straight, true, aligned and tight. Remove the backing paper on the double sided tape, pull the wrap taught and press down the seam.
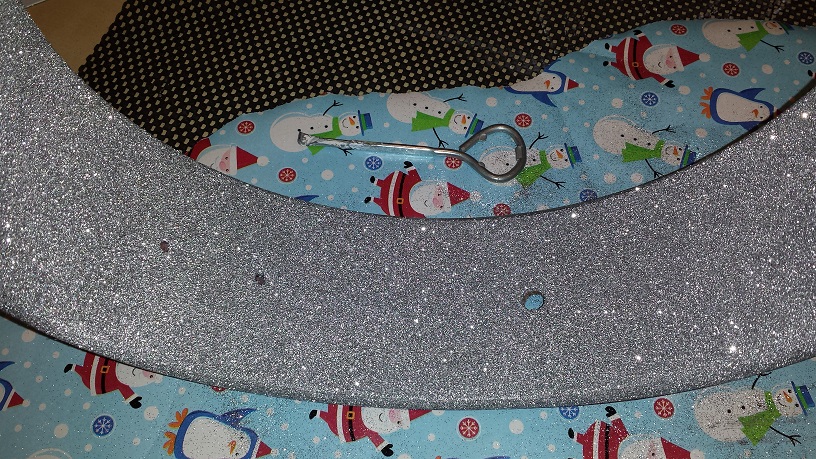
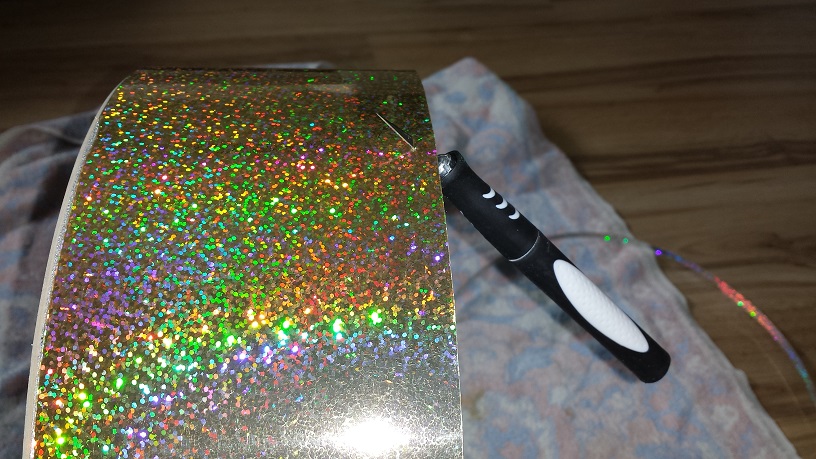
Once the adhesive is dried, which could easily take up to a week since access to air is quite limited, we trim the edges down. I wasn’t sure if an Exacto knife would be up to the task since Walopus wrap was quite tough to cut with scissors. It proved however that with just a little bit of “sawing” motion the exacto knife worked as well as could be expected. Simply insert it parallel with the outside cut of the bearing edge and trail around the shell.
Wrap time
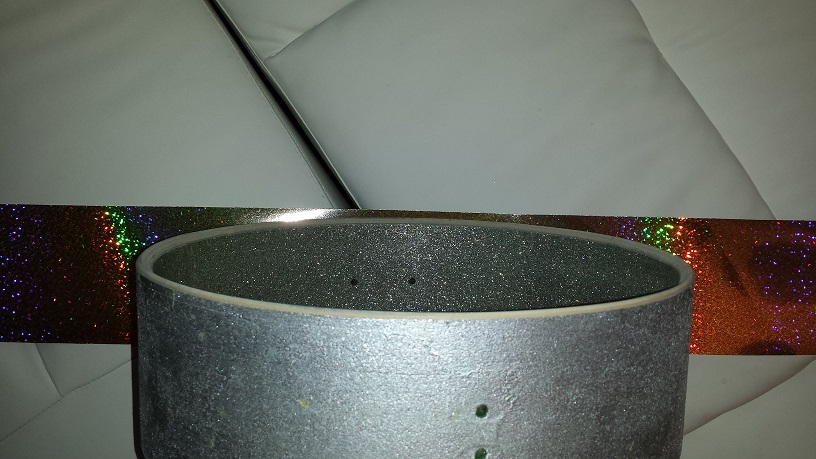
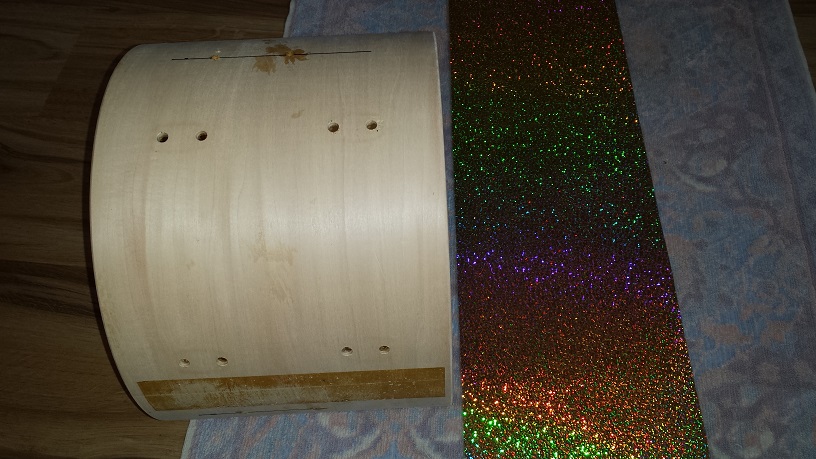
Floor Tom – For the remainder of the kit we’ll be installing the wrap as per Walopus’s “Modern” method instructions, which is just about identical to How we did the wrap install on the Teenie-Weenie Bop Kit and the “Lewd Rhythm Ripper“. The two exceptions being that the Walopus drum wrap doesn’t come trimmed to depth and doesn’t have the “adhesive strip” (double sided tape) applied.
After measuring the net width (depth) of the wrap with 1/4″ “cutback” on each side, I draw a straight line and cut with scissors. Next we apply a strip of double adhesive carpet tape to one of the ends and from here on it’s a repeat of the process on the two preceding DIY projects.
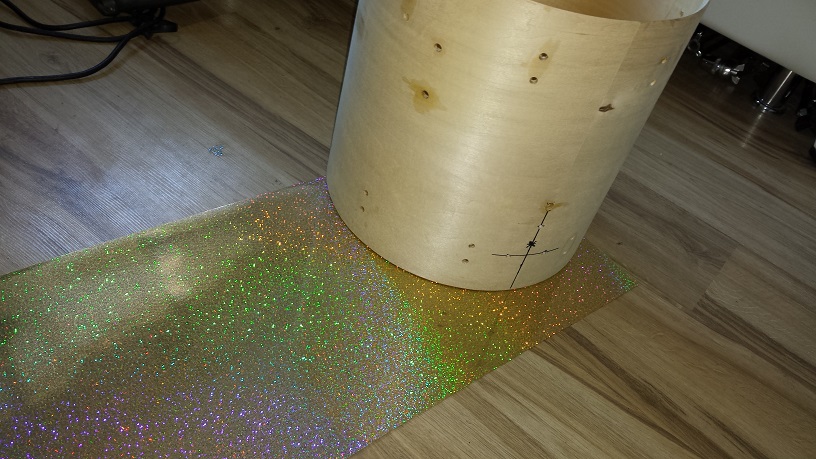
Start with laying the wrap face down on the floor. I lay a towel underneath for protection. Place the shell on the wrap with the section where you want the seam facing up. Align the shell straight in line with the wrap and roll it up to test. keep adjusting until the wrap meets up in line when rolled tight around the shell. Clamp one end with a clamp on each side, pull tight and clamp the other end as well. The clamps should be a few inches from either end. Check to make sure everything is straight and tight. Lift up the top end of the wrap, remove the backing paper on the double sided tape and while pulling the wrap taught, push down and apply pressure along the seam. That’s it! All wrapped up!


Tom Tom – As with the floor tom we cut the wrap down to 1/4″ from the bearing edges and affix a strip of double adhesive carpet tape to one of the ends. The little 8″ is quite easy to get the wrap straight and tight around. Simpy roll it up, align, tighten and place the four clamps as before. Make sure all is straight and tight. Remove the backing paper on the carpet tape strip and press down. This is staring to go faster for each one I wrap up.

Bass Drum – First I use scissors to cut down the width (depth) of the wrap to 13-1/2″ or about a 1/4″ from each edge. Then as before add a strip of double sided carpet tape to the trailing edge of the wrap. Roll the wrap around the shell and adjust/align as needed until it’s straight, even and tightly wrapped. Hold in place with four clamps as before and with ninja-like grace and precision remove the backing paper from the carpet tape and press into place.

Assembling the Drums
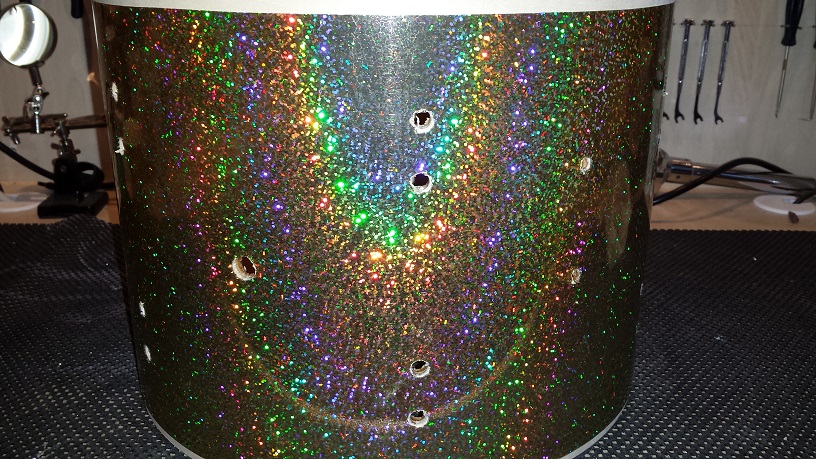

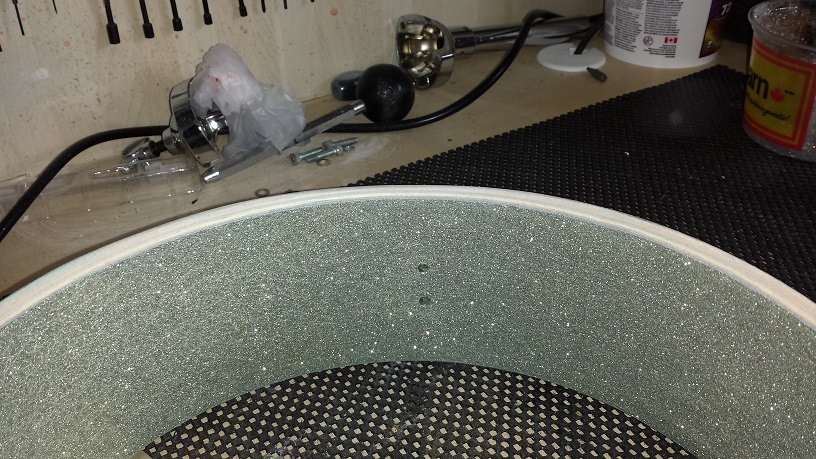
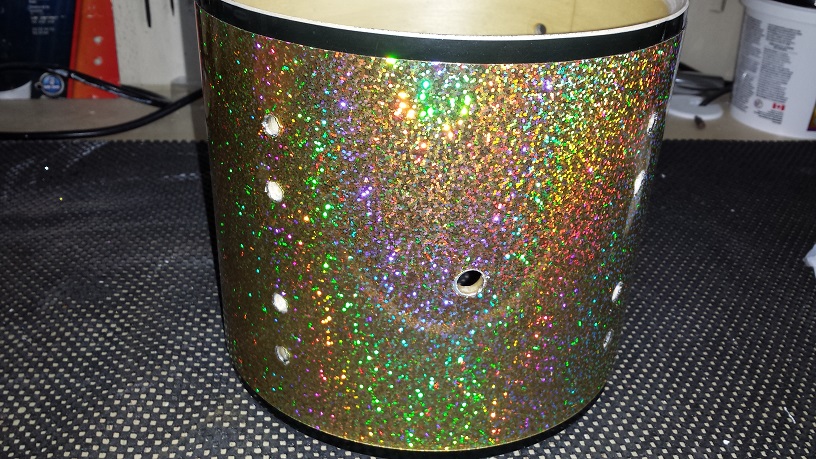
Floor Tom – Just out of curiosity I tried both methods of making the holes through the Walopus wrap. Drilling from the inside and cutting with an Exacto knife from the outside. I can’t say that either has any advantage over the other, although drilling yeilds just a tad neater edges.
The important thing to remember is to ensure that the holes in the wrap are at least as large as the holes in the wood, even if the holes in the shell are excessively large for the posts that will be going through them. If you make the holes in the wrap smaller, the posts will end up pushing against the wrap when under tension, in turn causing the wrap to distort.
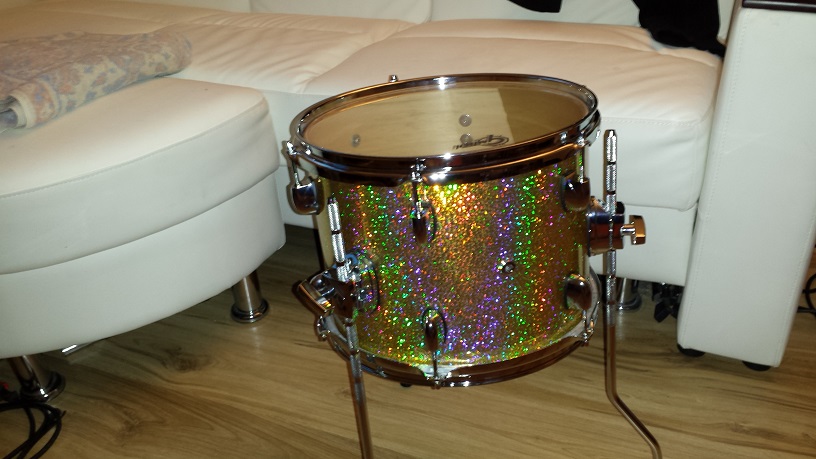
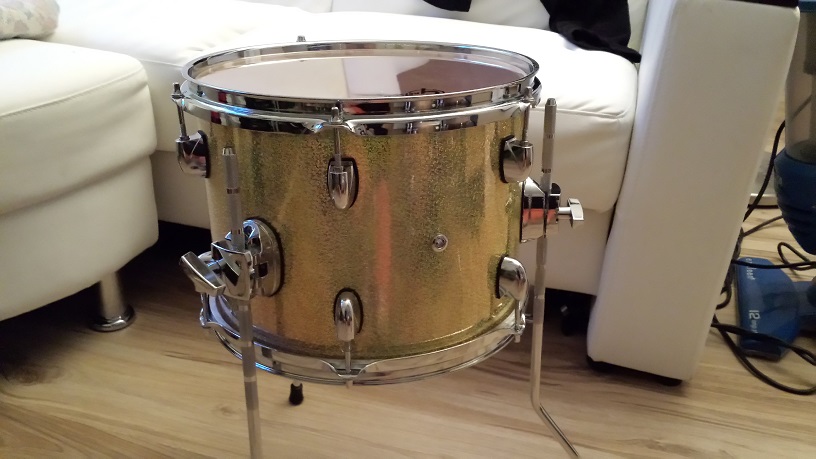
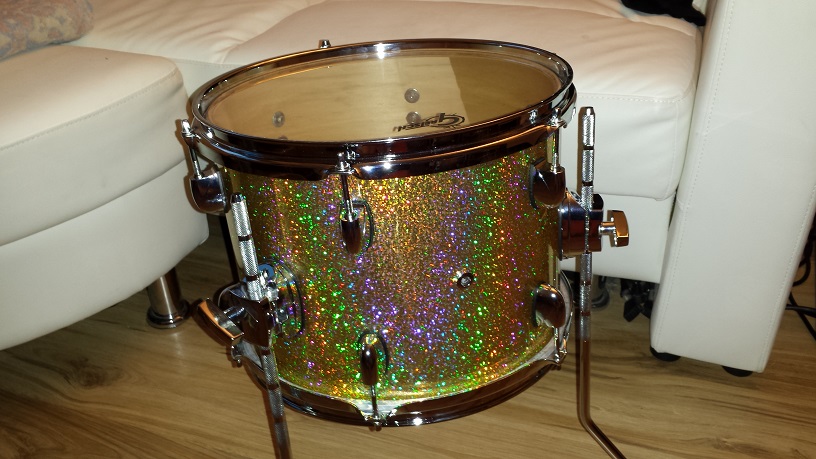
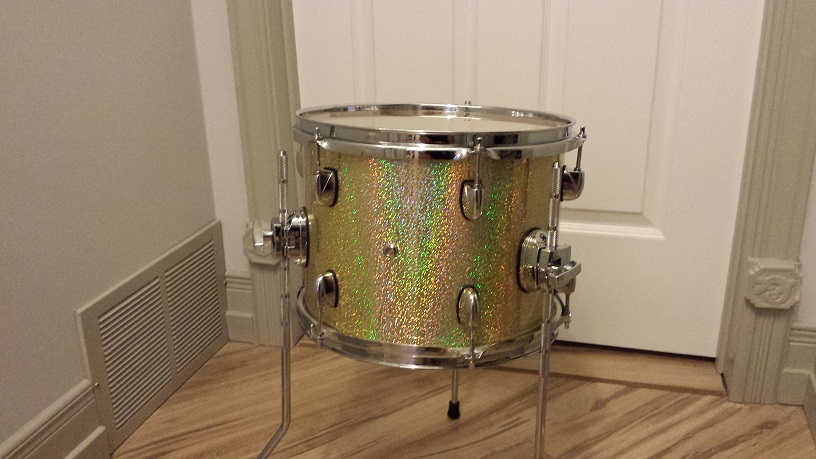
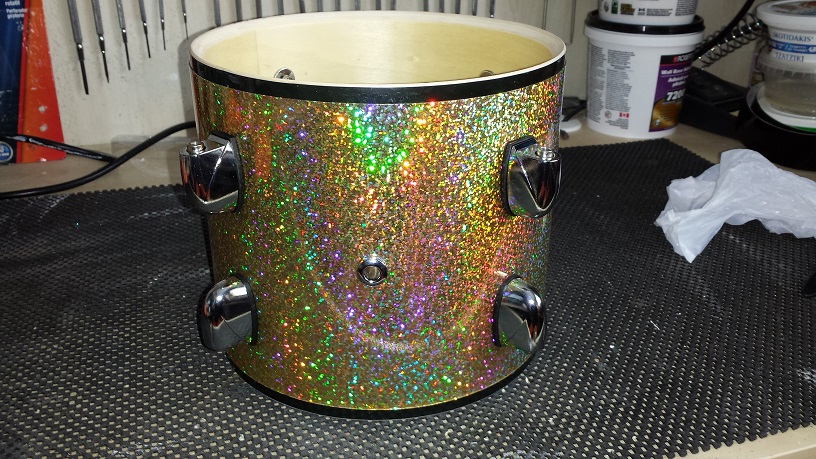
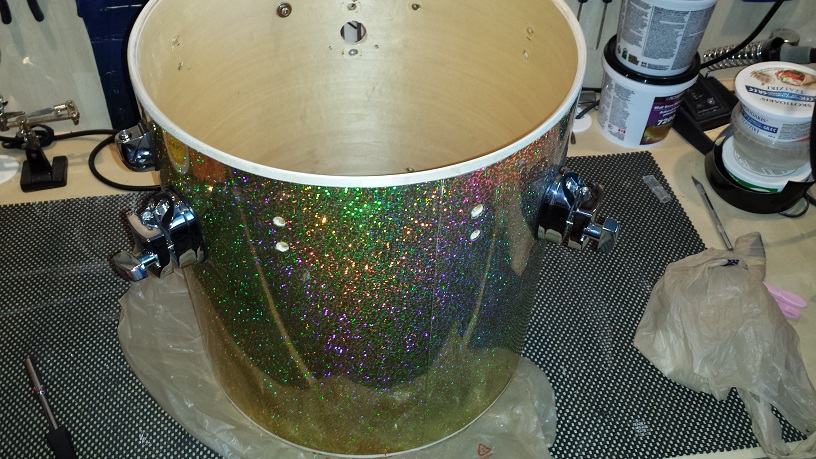
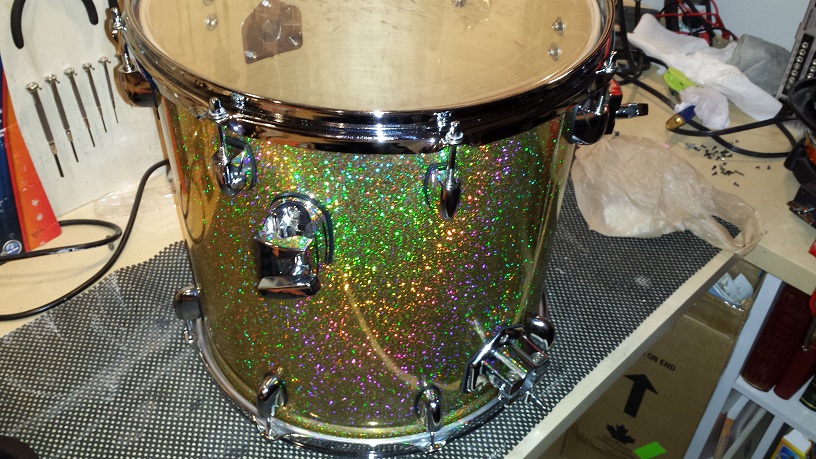
Once all the holes are poked we proceed with installing the threaded air vent grommet and then the lugs. It’s important not to tighten the lugs too tight, just past snug is adequate. Next is the leg brackets and finally the heads and rims. I was delighted with the sound of the floor tom. It has endless sustain even with the stock Gretsch heads that once came with the drum kit and tunes easily both low and high.
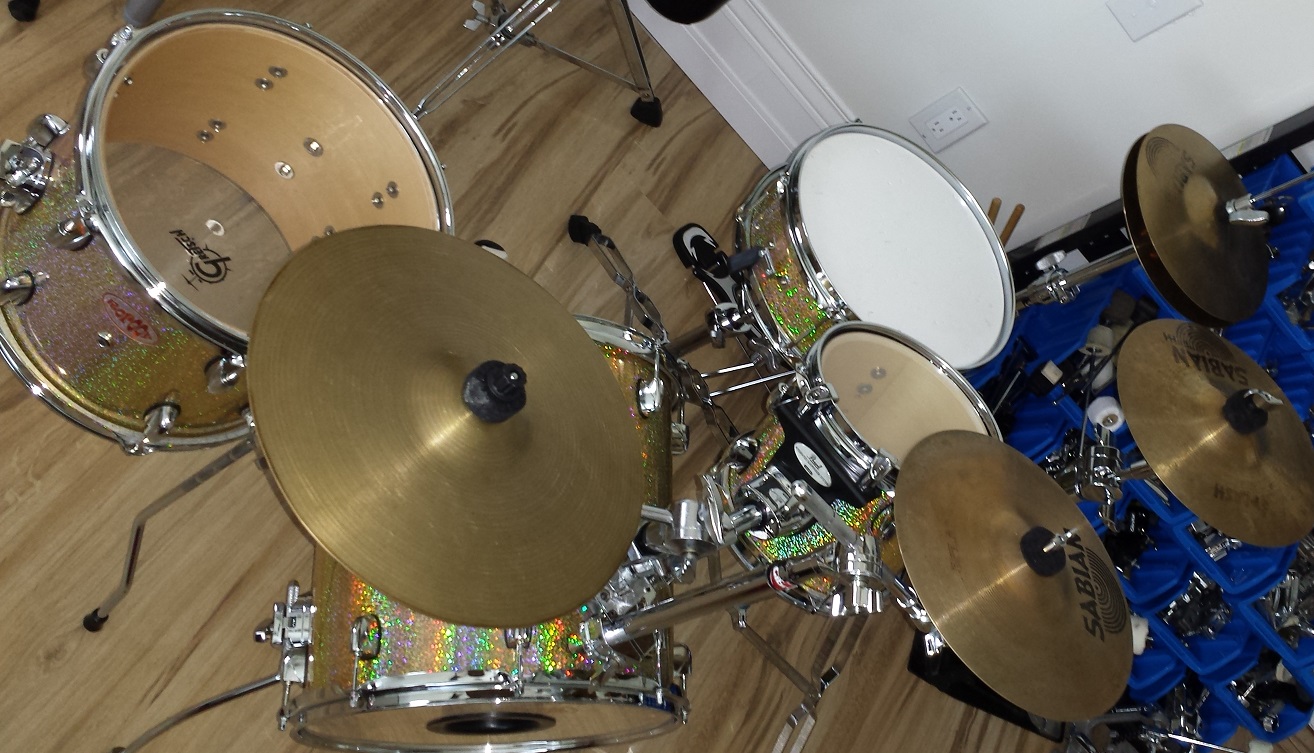
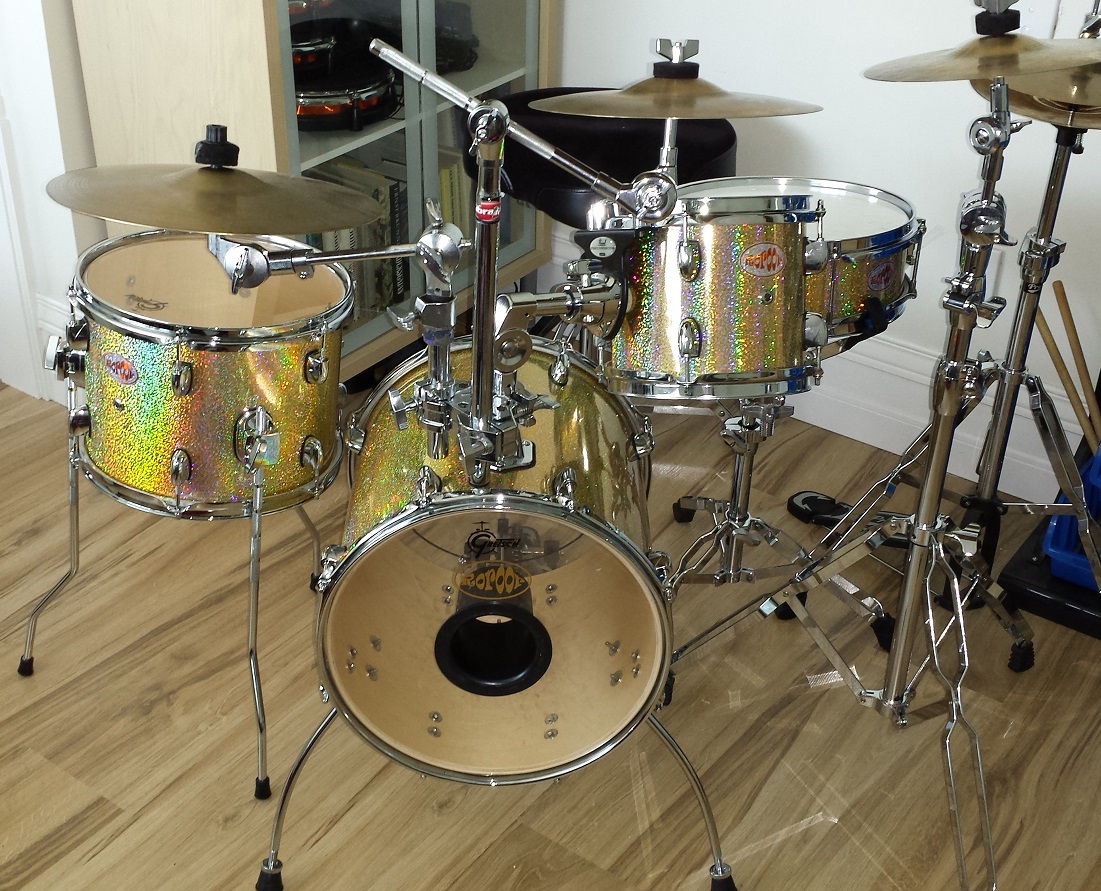
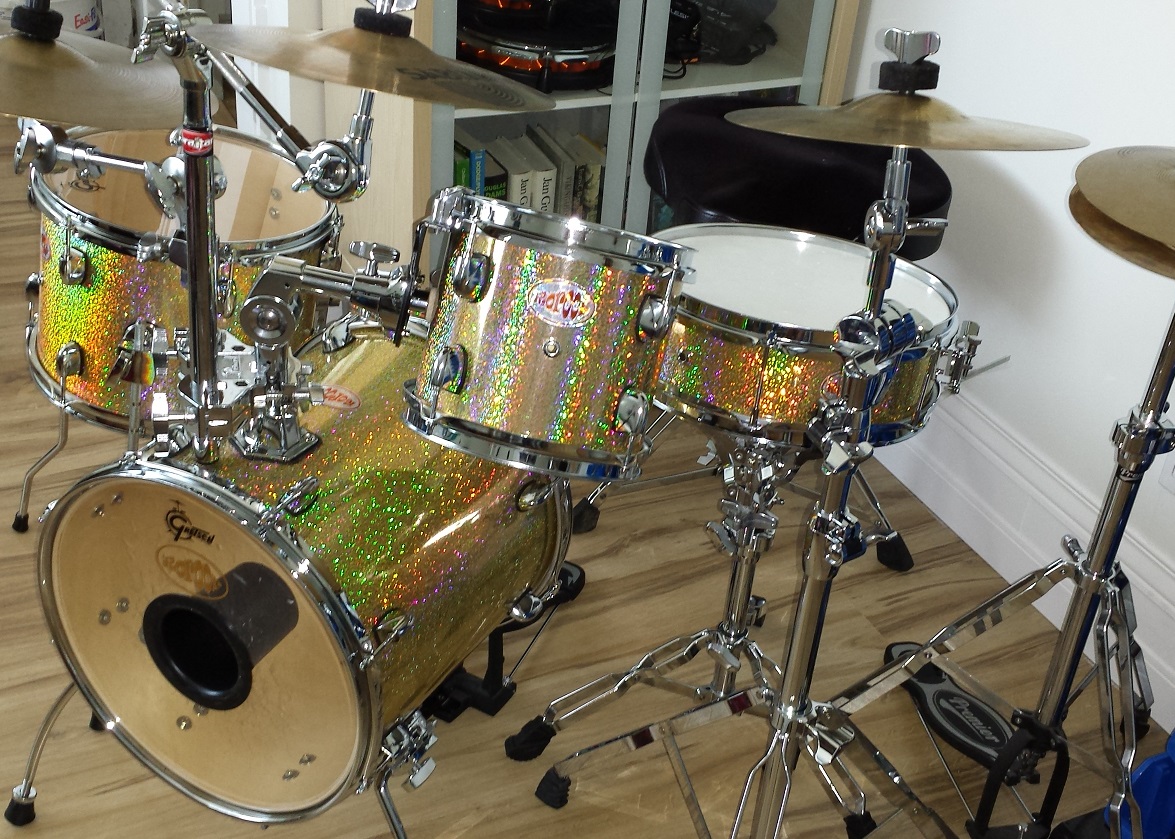
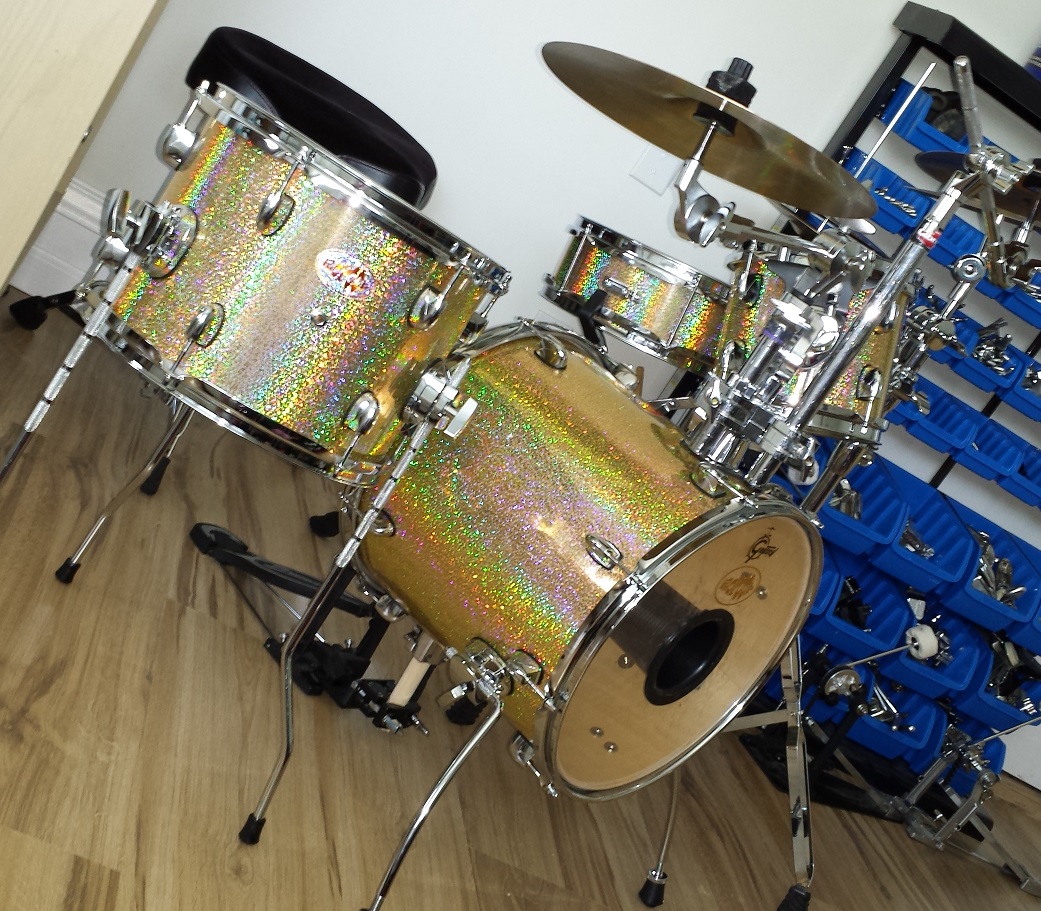
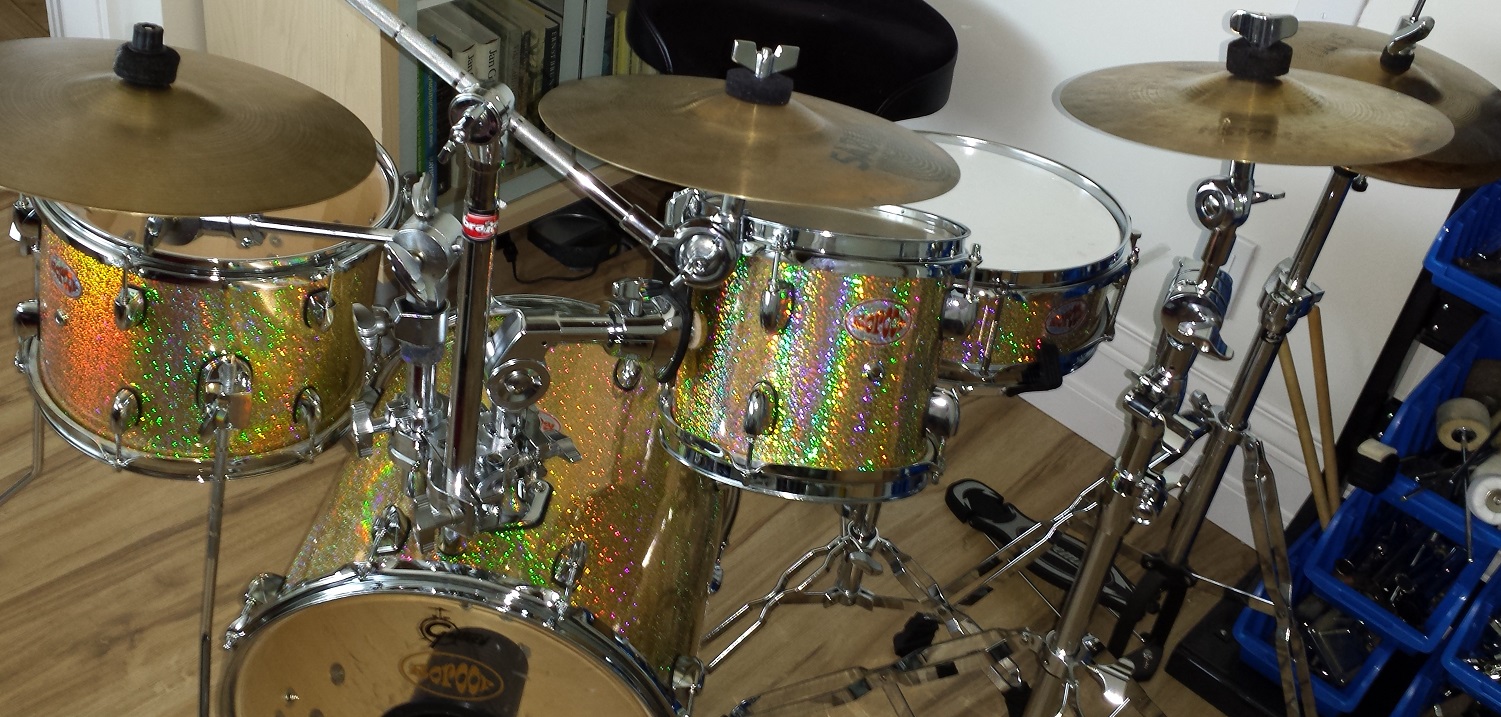
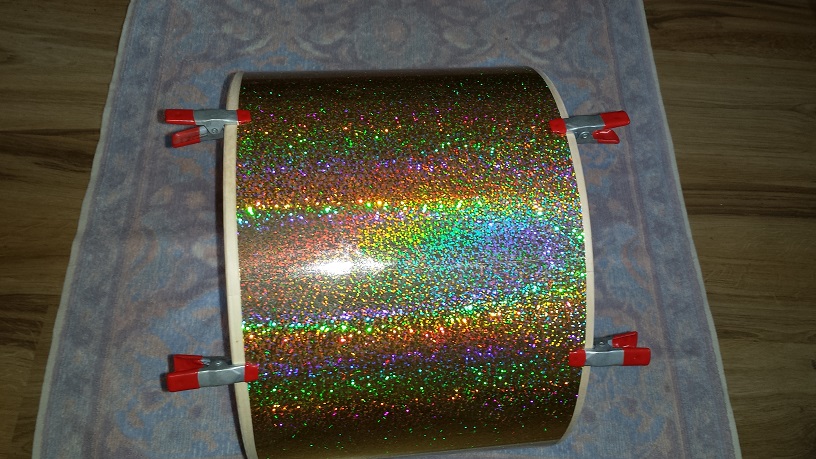
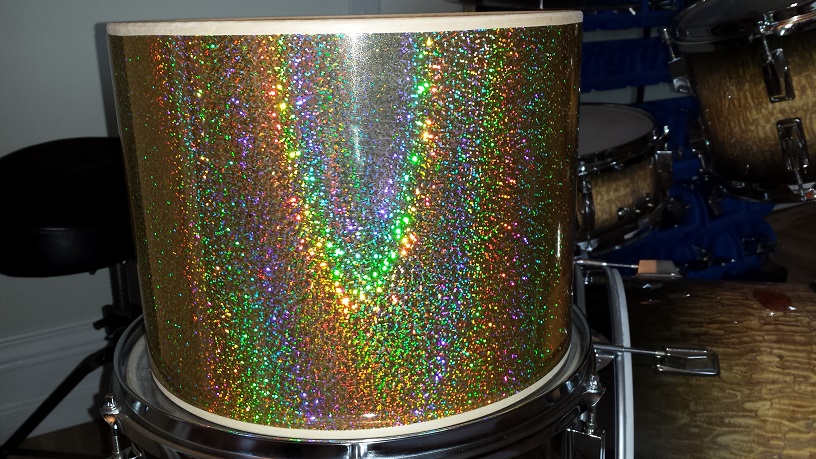
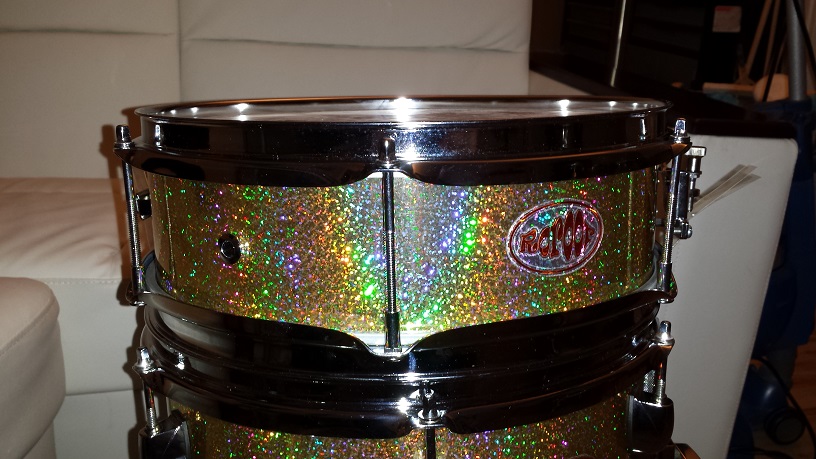
The wrap looks insanely cool. It’s hard to capture the entire spectrum on picture as the flash brings out the “shimmering cascades” in every shot, but I did manage to hold the camera still enough to grab one with just the “calmly displaying it’s prominent colour” and a couple to the right, in an “in-between” stage.

Tom Tom – Drilling the holes in the wrap from the inside isn’t really an option with the little 8″ tom. It’s an easy enough job with the Exacto knife though. I just need to constantly keep in mind to not cut out the additional lug holes left over from the Pearl lug spacing. Remember to make sure your holes in the wrap are at least as large as the holes in the shell.
Next we pop in the threaded air vent and install the lugs. I can’t stress often enough not to over tighten the lugs. In my earlier days of working on drums I snapped my fair share of lug screws as well as stripped a few threads. Neither of these situations are any fun to have to remedy. Also screwing the lugs in too tight may cause distortion of the wrap and even possibly bulging when tightening the tension rods. Just a bit past snug is adequate.
Pop on the heads and rims and lastly I carefully position and stick on another “Roroor” badge.

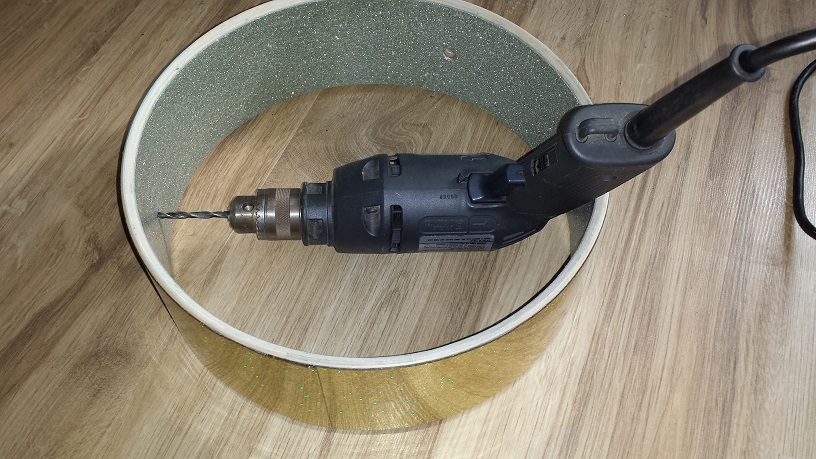
Snare Drum – With the adhesive dry, we can proceed with drilling out the holes through the wrap. It seems the flooring adhesive is holding quite well. All seems solid, but I can’t say for sure since even the un-glued ones seem pretty solid.

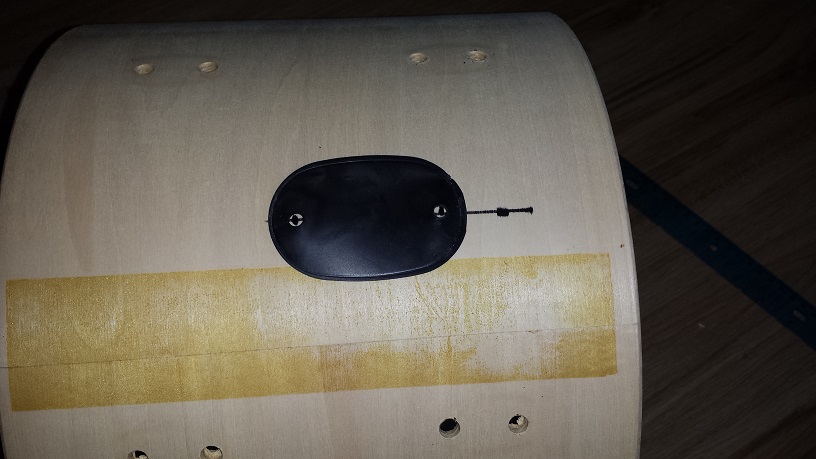
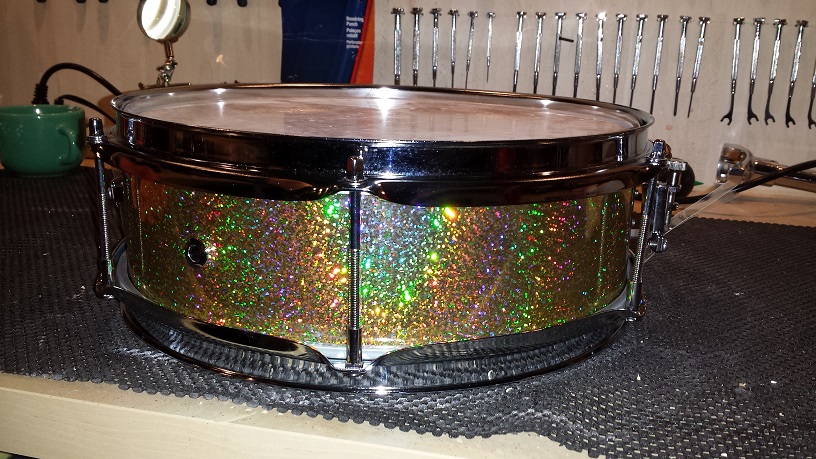
Once drilled we pop in the threaded air vent grommet, then install the strainer and butt plate. This little free floating snare is devoid of lugs so that’s it for shell assembly. Next are heads and rims.
If you’ve never installed snare wires before there’s a real simple process. Start with lining up the snares in the centre of the head with the straps passing through the openings in the rim. Hold the snares still and the strap at the butt plate end taught while fastening the strap to the butt plate. Loosen the tension on the strainer to about 1/3 – 1/4 from the loosest setting. With the strainer engaged pull the strap tight through the strainer and tighten. That’s it, that should provide enough lay to adjust from completely disengaged to way too tight.
Last I carefully align and stick on a fitting “Roroor” badge.
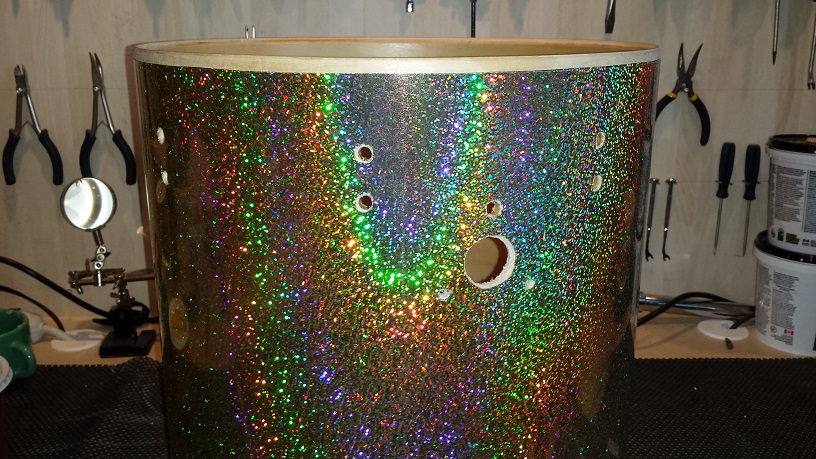
Bass Drum – I mentioned earlier that drilling the holes in the wrap or cutting with an Exacto knife was about the same effort. For the bass drum I decided on the Exacto knife method, mostly cause I wanted to sit comfortable at my workbench but also since there are various hole sizes so with the knife I don’t have to change bits. While cutting the holes out I’m singing “Here I go, cutting holes again, here I go knife in my hand, there I go cutting holes again, there I go-o-o… turn the page”
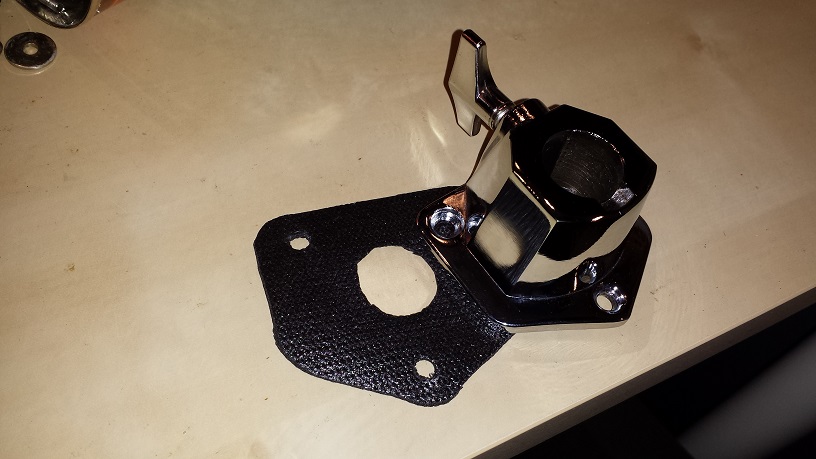
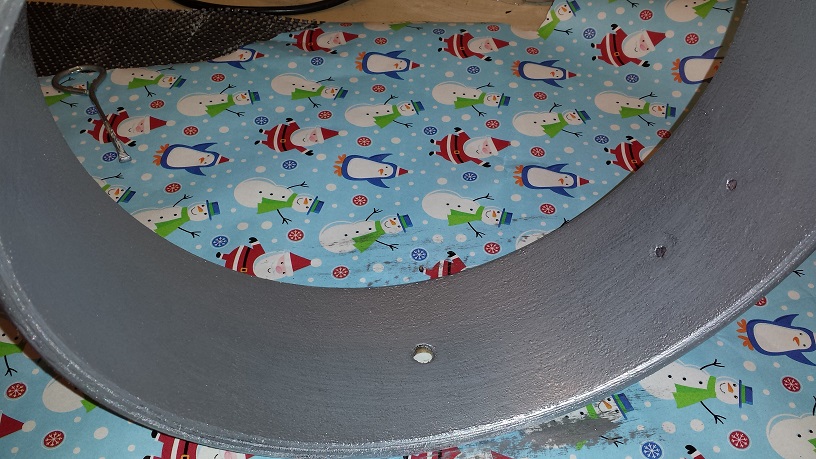
The bass drum also required two ISO gaskets to be manufactured. This time I’m using drawer liner for tool chests. It a bit heavier than the craft foam I’ve used on previous projects and re-enforced with fabric in the center. I trace the bracket with a marker, cut around with scissors and punch the holes with a hole punch.
Since I already used the floor tom leg brackets for the 12″ floor tom, the suspension mounts from the rack toms will have to donate their brackets to serve as the spur brackets.
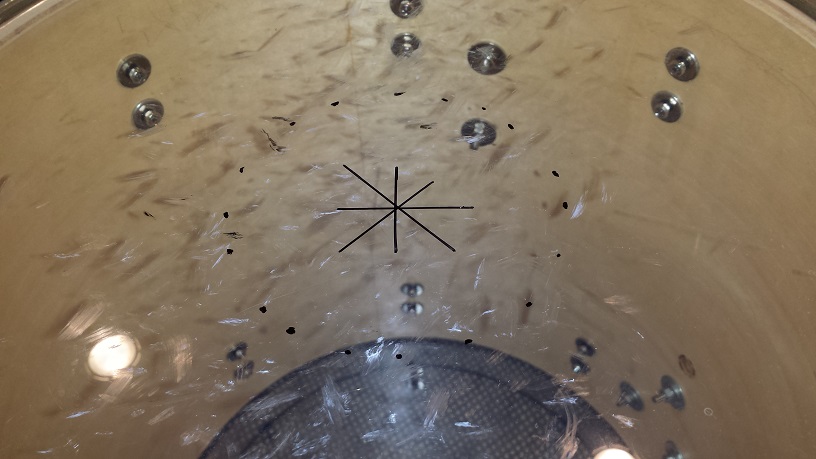
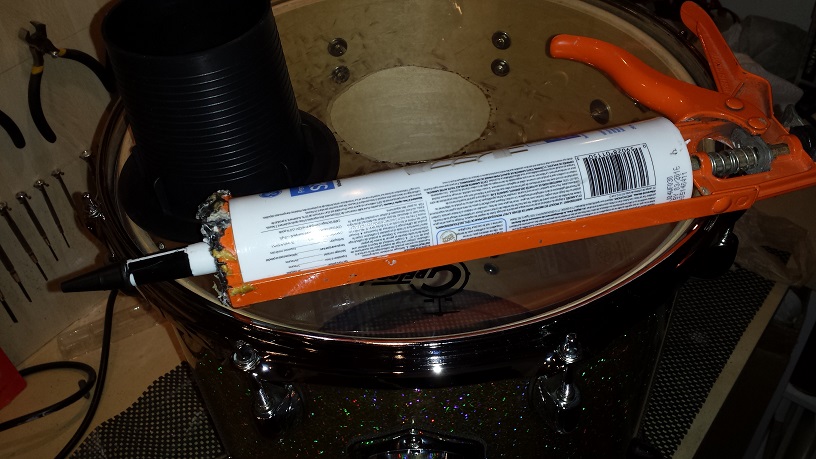
Once the drum is assembled I draw a little star in the center of the resonant side head. Then measure 5 cm in each direction from the center and make a little dot. With the Exacto knife we play “connect the dots” and thus cut out a 10 cm diameter hole in the head. Next squeeze a bead of silicone along the inside of the flange on a plastic port intended for a sub-woofer. drop it in the hole and place a heavy object on top. Leave to dry over night. Note; It’s generally not recommended to center a port the way I do. The added weight of the port when centred causes the head to resonate “out of sync” with the other head which causes distortion. I kinda’ like the growliness of the distortion on a small bass drum but it may not be everyone’s cup of tea.
Setting up the DIY Nano Bop Drum Kit
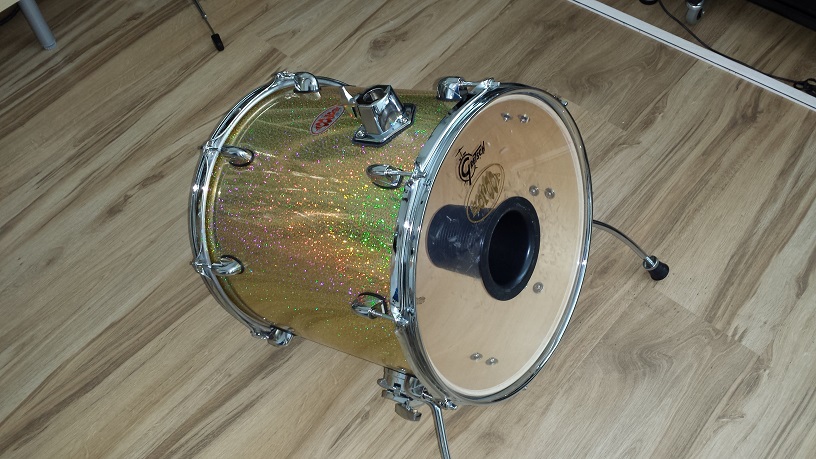
All that’s left is to set the kit up. We’re using the Pearl JG-16 riser for now until I make a dedicated riser for it. If you hadn’t noticed the bracket for the riser did not get a pass-through hole through the shell. For that reason we have limited adjust-ability and thus will need to cut a post close the ideal length. A bit of measuring reveals this length to be about 5-1/2″. Funny enough, this is about the same amount that we need to lop of the ratchet L-arm for the tom tom in order to clear the bass drum port. Life is funny that way.
The rest of the set-up is straight forward and after tuning I couldn’t put the sticks down for a couple of hours. It sounds great and is a blast to play. I hope you enjoyed this article as much as I enjoyed making this nifty little DIY Nano Bop Drum Kit; “Sonny & Beer”. Now I’m gonna’ experiment with some different cymbals and tunings and spend a couple more hours playing.