How to make a cheap drum kit sound and look like a thousand bucks
Introduction
In this article we show you various tips and tricks to improve your drum kit. For simplicity we’ve divided it into sections, with a cost, time and skill level rating for each section. You can pick and choose depending on your skill level and budget. Perform just one or two of our tweaks or execute every section in this article for a total optimization. We promise you will be shocked at how simple some of these steps are.
Can I really make my sub-$300 kit sound as good as a $1000 kit? The answer is (In most cases) Yes! Better yet, if you perform every tweak and trick in this article, it can be done at a cost of less than $150. A new set of heads accounts for most of that cost.
Before you get started though, please take a few minutes to assess these three points.
- Your patience. You’ll see that at least one of these sections is quite major. Make sure you have the patience to see it through before you begin.
- Skills. While none of these tweaks require excessive handy-man skills. many of them will be easier if you have some experience working with your hands.
- Your drum kit. Consider whether what you have to start with is worth the effort. There are big differences between entry level kits. Many of the sections here will work wonders even on the worst kits ever made, but if your drums are excessively out of round, or only have four lugs on some drums, the results won’t be as stellar as if you had a better starting point. As a general rule of thumb, all drums larger than 10″ diameter should have at least six lugs per side.
A great way to determine if your drums are worth the effort is to first perform section 1, Tuning. If the drums can be tuned as per instructions and proper tuning yields a noticeable improvement over half-baked tuning, they are probably good candidates. The sections are listed with the least invasive first. The more invasive surgical procedures with longer recovery times are at the bottom. Please read the entire article before starting any of these sections. Since they are listed in order of difficulty they may not be in the optimal order depending on which sections you intend to perform.
Click any image for a full size view
Section 1 – Tuning
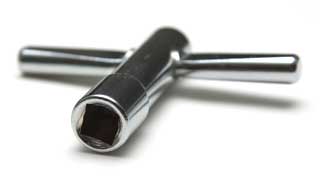
Cost: $0, Skills: Ability to follow instructions and a decent ear, Tools: Drum Tuning Key, Time: 1-2 Hours
Often overlooked, but the single most important factor in how drums sound. Even a $1000 kit won’t sound good with a poor tuning job. In contrast, there are folks that can perform magic with tuning, making the lousiest drums in the world sound awesome. Ever notice that in a nice drum shop all the drums sound great? That’s tuning. Tuning drums is a skill that takes practice to develop, but the better you get at it, the more rewarding it is. Best of all, it’s free! Here are some of the best tuning instructions on the web:
17 seriously useful drum tuning tips – MusicRadar
Prof. Sound’s Drum Tuning Bible
Drum Tuning – Pearl Corporation
Section 2 – Replace the Heads
Cost: $100, Skills: Basic, Tools: Drum Tuning Key, Time: 20 mins (+tuning time.)
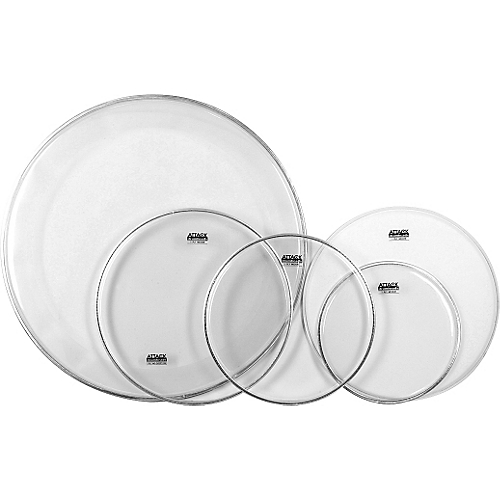
After the drum shells themselves, the heads play the biggest role in the sound of a drum kit. Assuming they are properly tuned of course. Although the costliest of all the tweaks on this page, possibly one of the most rewarding ones. Choose heads that suit your style and sound nice to you. Go to a drum store and ask to hear some different heads. A set of heads that work great for heavy rock with low tuning may not be the best choice for higher tuned jazz and vice versa. Batter side heads have the biggest impact so start there. Chances are the resonant side heads that came with your kit will be adequate for the time being. A pack of five batter heads for a standard size drum kit can be had for under $100. Resist the temptation to spend extra for a bass drum head with built in damping. (Read more about controlling sustain and overtones here.) Besides you can’t un-dampen a pre dampened head, but you can add damping to a standard one. Don’t forget to seat your new heads. See the tuning instructions above. Don’t cut a hole in that bass drum resonant head yet. Wait until you’ve performed all of the steps you intend to. and then decide based on the tone you seek.
Section 3 – Stuff & Shorten your Tubes
Cost: Zero, Skills: Basic, Tools: Hack saw, Time: 40 mins

If your drum kit has hollow ratchet L-arms that insert into the tom shells, those tubes affect the sound of your toms. You may have noticed that higher end drum kits usually have “suspension mounts”, a mounting system that not only lessens the contact between the hardware and shells, but also eliminates any mounting hardware from penetrating the shells.
With hollow tube ratchet arm mounting the rack toms are rarely anywhere near the ends of the tubes. Which is unfortunate because they would sound better if they were. Of course they would also be ridiculously far apart. With a hack saw, cut the tom end of the tube down so they are flush with the inside of the shell. Easiest way to mark the cut at the right spot is to remove one head, mount the tom at its ideal position, then use a marker to trace along the inside of the shell. This is not necessary to do with the longer tube that goes in the bass, and the adjust-ability may actually be useful there. Stuff all tubes with foam, then cap the ends with a wine cork, dowel, or just about anything that fits.
Section 4 – Stuff & Isolate your Lugs
Cost: $10, Skills: Basic, Tools: Phillips Head Screwdriver, Time: 1-3 Hours
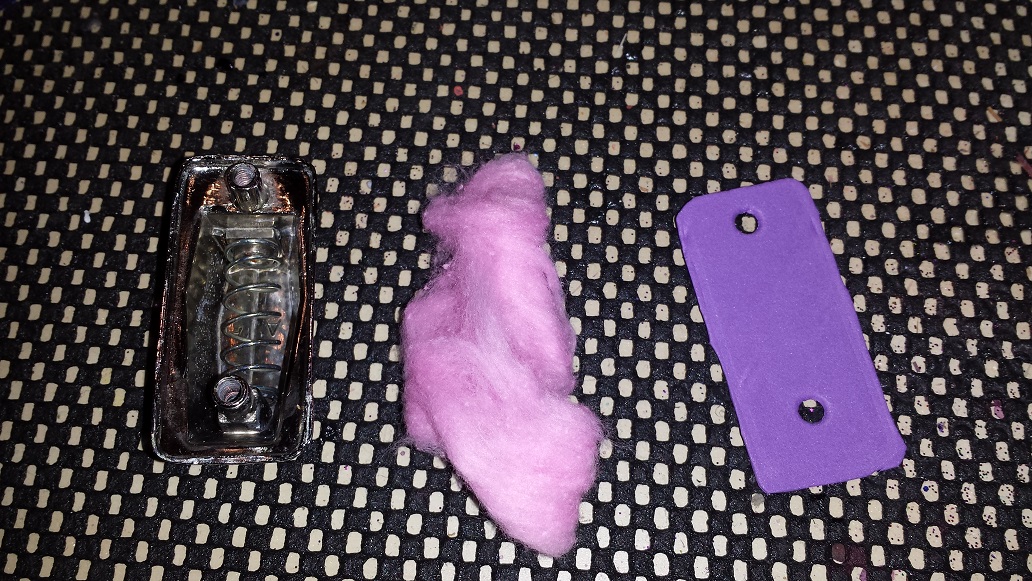
While were on the topic of stuffing, some lugs need to be stuffed too. If your lugs have internal springs, those springs vibrate and introduce resonance of their own. This is not a desired effect. Warning: This section starts to get a little bit invasive.
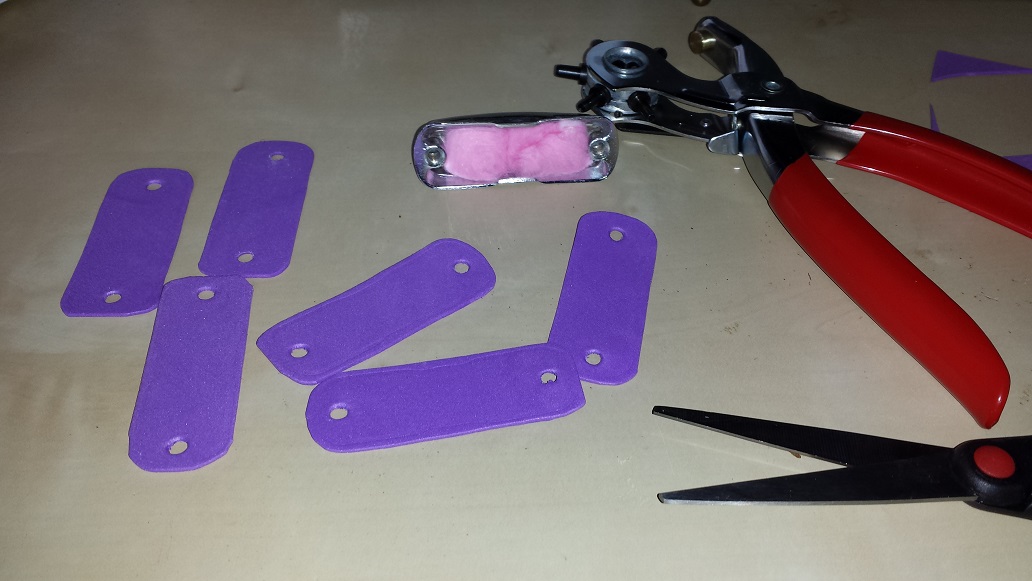
To demonstrate the effect these springs have, remove all but one from the shell. Tap the shell and note the sound. Remove that last remaining lug and tap the shell again. Now you know why they need to be stuffed. A regular cotton ball is perfect sized for most lugs. Just stuff it in before re-installing. You don’t have to use pink cotton balls, but I think it adds mojo.
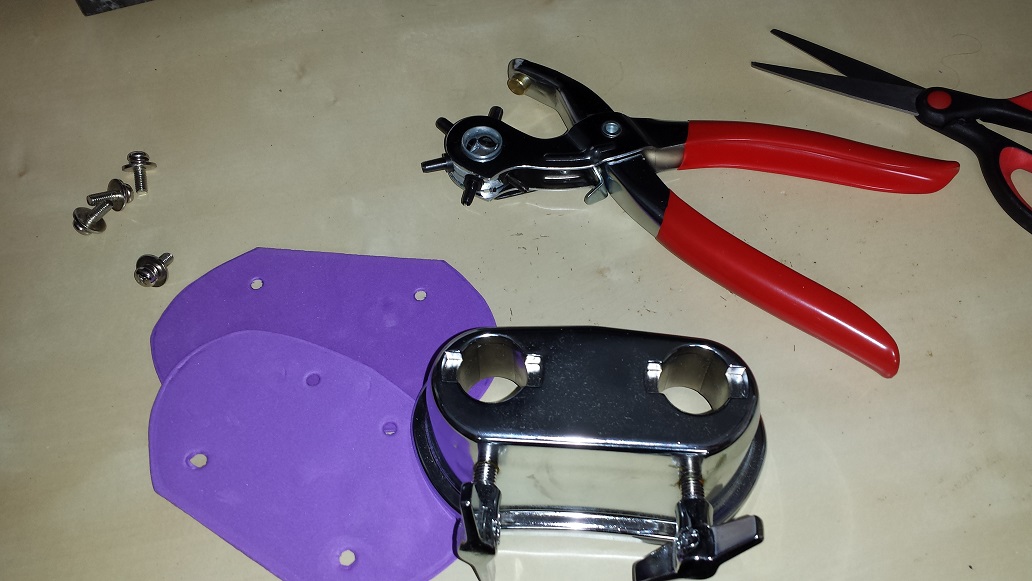
While the lugs are off, you might as well install isolation gaskets as well. Isolation gaskets can be made from craft foam, inner tube, or any other sheet material with some flex. First remove any mounts and other hardware. Use the lug or bracket to make an impression in the foam. Carefully cut out the shape. The holes are easiest to make with a hole punch. This is boring, but worth it. In combination with shortening the tubes in the previous section, an isolation gasket on the mounting bracket gets very close to suspension mounted toms. (Sometimes referred to as “poor man’s suspension mounts”.) Most people will opt for black material for this. I think purple gives the drums more character. 🙂
Section 5 – To Unwrap or not to Unwrap?
Cost: $0, Skills: Patience, Tools: Putty knife, Heat gun or blow dryer Time: 1-3 Hours
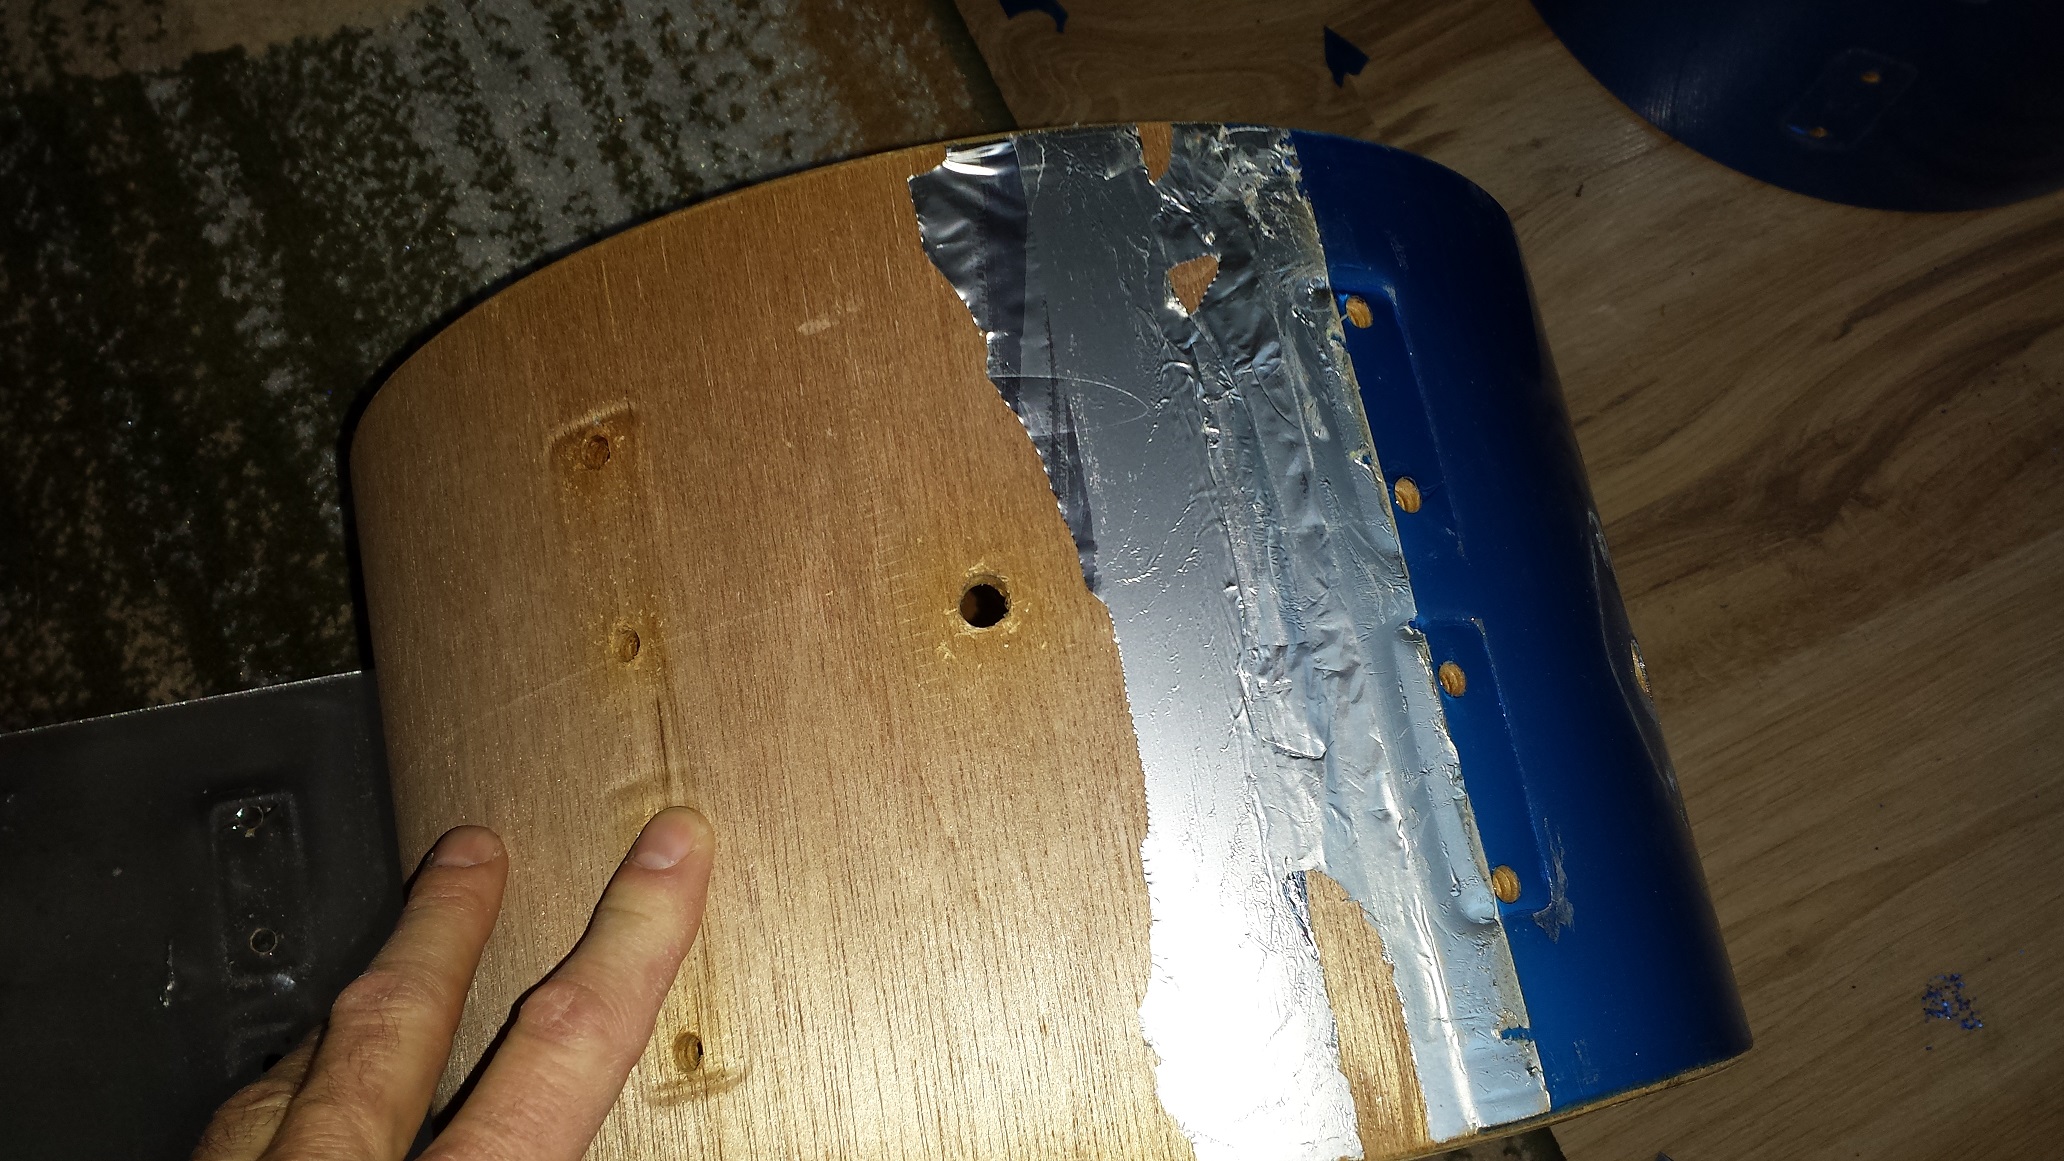
Wrap doesn’t necessarily choke the sound of drums. It depends how the wrap is applied. On a lot of entry level kits the wrap is only adhered at the leading and trailing edge. (Where the seam or overlap is.) If this is the case, removing the wrap will improve the sound of the drums. If the wrap is adhered across the entire surface not only will removing it make little to no difference to improve your drum kit, it’s also a real painful process.
With the hardware removed see if you can insert a thin object between the wrap and the shell. Like a small knife. The holes for the L-arm tubes are a good spot to test. Even if you scratch the wrap a bit, it will be hidden by the bracket. If it’s impossible to insert anything your wrap is properly adhered along the entire surface. The only reason to remove it would be if you really want to change the appearance. On the other hand, if you can insert a thin knife, the wrap is simply just wrapped. Acting like a blanket around the drum, muffling and “choking” it.
Here are some great instructions for wrap removal:
http://www.jamminsam.com/removing-old-drum-finish-wrap/
http://vintagedrumguide.com/refinish_project/precision_complete_project.html
Section 6 – Sealing & Coating the Shell Interiors
Cost: $20, Skills: Patience, Tools: Sand paper, Paint brushes Time: 5-10 Hours
Two of the most significant differences between high end drum shells and entry level drum shells are the finish and the wood species. High end and mid range drum shells are usually sealed. Especially the ones made with slightly softer wood species. Most high end drums are made of hard woods. Maple and birch being the most common. Harder woods resonate without absorbing. Harder, less porous surfaces reflect more and absorb less. (Projection) Obviously we can’t change the wood species of our shells, but we can do a lot to improve the surface, and thus improve your drum kit.
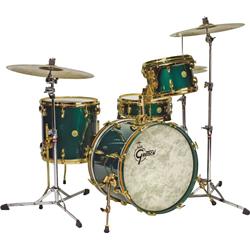
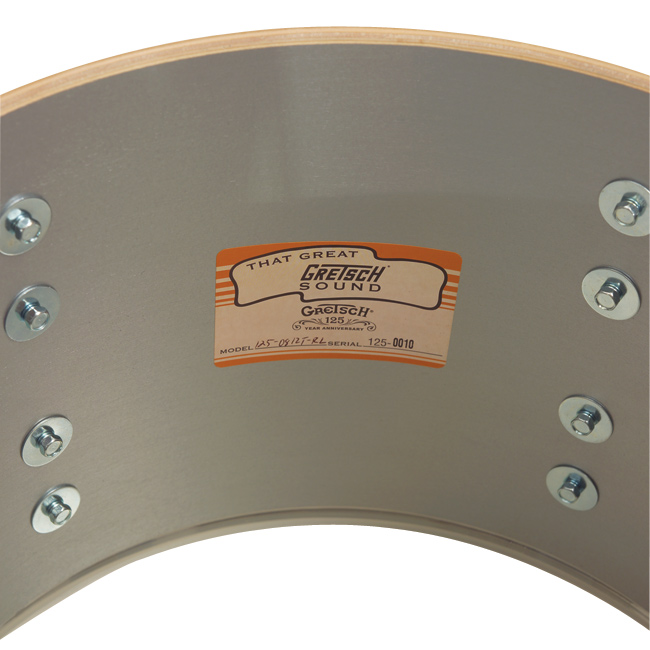
There was a time when just about all drums except the very cheapest were sealed and/or painted on the insides. In this day cost-cutting for competitive purposes doesn’t allow for this. Ludwigs used to be painted grey or white and the silver-metallic paint in Gretsch shells was marketed as a contributing factor to “That great Gretsch sound”. First check how smooth the insides are to start with. Not very? Start sanding. Start with 60 grit paper, then 120 then 240 until you have a smooth surface.
There are a variety of paint finishes to choose from. The easiest way to get great results is to use a Tung Oil Finish. These are readily available at most home improvement centres. The downside is they smell as they are oil based. The pros are that they are a sealer and clear coat in one and very easy to get great results with. Four to five coats with ample drying time in between is sufficient. A water based alternative is to mix three parts water with one part wood glue or carpenter’s glue and use this as the sealer. On most woods, water based sealers will raise the grain of the wood, making another quick round of sanding followed by another coat of sealer necessary. Top coat with three or so coats of water based polyurethane. You can of course always stain the wood before sealing or just paint any colour you want. A cool trick is to paint the insides the same colour as the outside. With clear heads this gives the illusion of transparent drum shells. Like coloured acrylic. Just make sure to use a paint that dries hard, or top coat with a hard clear coat. This way we simulate using a harder wood for the innermost ply, increasing projection and volume. You won’t believe the impact this has on the sound of your drums until you try it for yourself. Personally I seal and clear coat just about every kit I make or purchase with the intention of keeping.
Here’s a great article on various interior coatings:
http://www.vintagedrumguide.com/painting_shell_interiors.html
Section 6 – Finishing
Cost: $10 – $100, Skills: Patience, Tools: Sand paper, Paint brushes Time: 5-10 Hours


If you went ahead and unwrapped your drums you’re probably wondering what to do next. The options are endless. If your shells can be sanded smooth you could just stain and clear-coat. A great trick to really bring out the wood grain is to first stain the whole surface black, then sand it back until only the deepest blacks remain. Then you can go ahead and stain which ever colour suits you. If the shells are less than ideal candidates for staining, which most will be in the entry level range, painting is the next option to explore. Start with filling in the rough spots with wood filler or a mix of drywall compound and white glue. Then sand it smooth and paint. To get a perfect finish whether painting or staining, add a few coats of clear, then wet sand with 600 grit, followed by 1000 grit. Polish with rubbing compound and finally wax.
Painting and staining are both laborious processes. If you wish to take a less daunting approach, wrapping is the way to go. Drum wrap however is pricey and unless adhered across the entire surface will have undesired effects on the sound. Instead, check out our article on Alternative Drum Wrap Materials.
Here is a GREAT article on how to get the most for your drum budget:
http://www.tbrucewittet.com/2010/12/how-to-buy-a-cheap-drum-kit-that-sounds-good-it-is-possible/