This article is in it's infancy. Most recent update November 25, 2015
Introduction
Some say Salvage & Repair of Cracked Cymbals can’t be done. We say: Of course it can be done! The question is: Can it be done with acceptable results? The answer is depending on three factors:
Type, Location and Severity of Damage
Method of Repair
Expectation of Results
The severity will of course have the biggest impact on the end result. Sometimes it’s just simply not worth the effort to repair cracked cymbals. In this article however, we’ll attempt to salvage even the most severe cases, just for the sake of reporting the results.
There are two basic approaches we’ll explore. the first is simply salvaging. This approach simply means removing the entire damaged area or stopping the decay in it’s tracks. The shape of the removed portion plays a huge impact on the end result. The second approach is repairing. We’ll test numerous methods and report back with sound samples and step-by-step instructions. methods include brazing, soldering and other ways of patching.
Regardless of which approach we take it’s important to understand that the cymbal will never sound the way it did before it cracked. Results will vary from sounding like a broken cheap china, to “Wow, that’s cool sounding”.
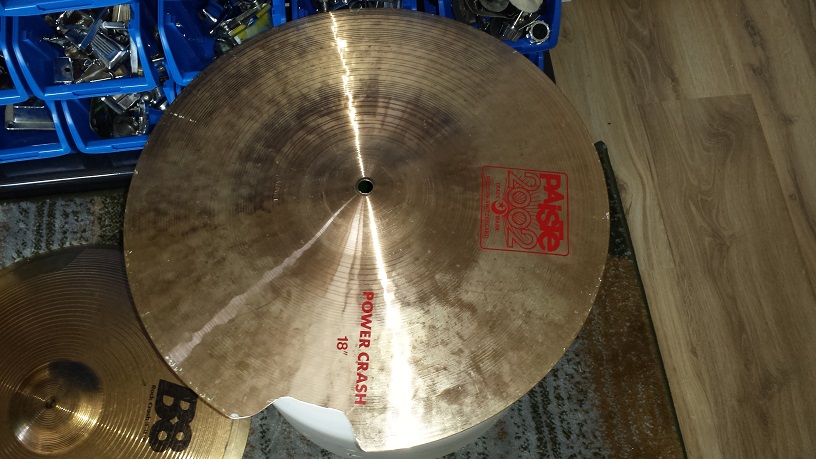
When a cymbal has a small crack at the edge, the easiest and most common fix is to simply remove the crack and surrounding material. The less material removed, the less impact it will have on the sound. Fortunately, the slightly decreased weight also results in the fixed portion naturally rotating towards the highest point, which is the farthest from where we hit. Although it is advisable to remove as little material as possible, it is vital that the entire crack, including any hairlines at the end, is removed. Otherwise it won’t take long until the crack reappears along it’s original path. However we also need to balance minimum material removal with as smooth a “cut” line as possible. Both for the sake of not converting the cymbal into a deadly weapon and to avoid any sharp interior corners as those would be starting points for new cracks.
Many times this salvage method yields quite acceptable results and the cymbal can be used for it’s original purpose, although with a slightly altered sound. Other times, this method results in an obnoxious “Broingy” sound. This is caused by the disrupted balance in the cymbal. The portion of the perimeter that is now interrupted is no longer controlled by it’s own circumference. Lower frequency vibrations are now free to form at the flaps and spread inwards. “Brrrrrrooooiingngngngng”.
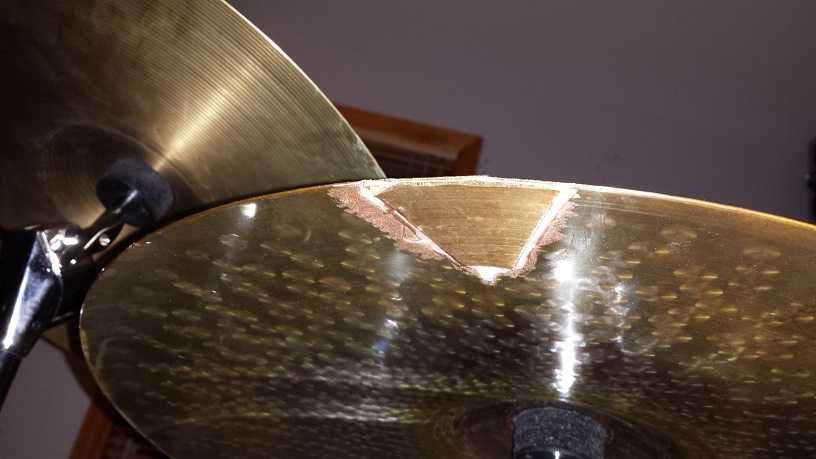
The Paiste Crash to the left exhibits a slight bit of “broingyness” but well within acceptable levels. Removal was done with a Dremel loaded with a high-speed cutting disk. After cutting the edge was ground smooth with an emery cloth “barrel” also loaded in the Dremel.
If the minimum removal method results in above described “broing” we need to remove a wider, but smoother arc spanning up to half the cymbals circumference. Often this is enough to restore the balance to a point that the “broing” is reduced to acceptable levels.
Patch and crack groundClampedPatchedand smoothed
Repair Cracked Cymbals Method 1 – Apply a Patch
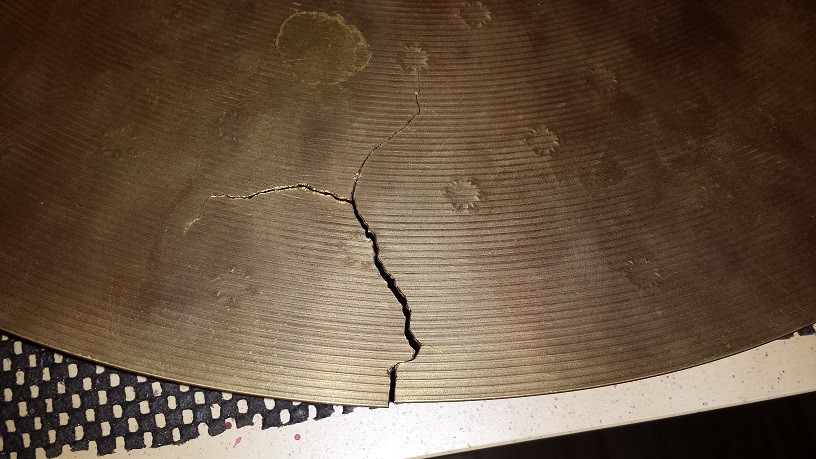
This method is useful when a crack is present in the middle of the bow while the bell and edge are both free of damage. However our first example deals with an edge crack. The process is fairly simple but a bit more time-consuming than simply removing a chunk of the cymbal.
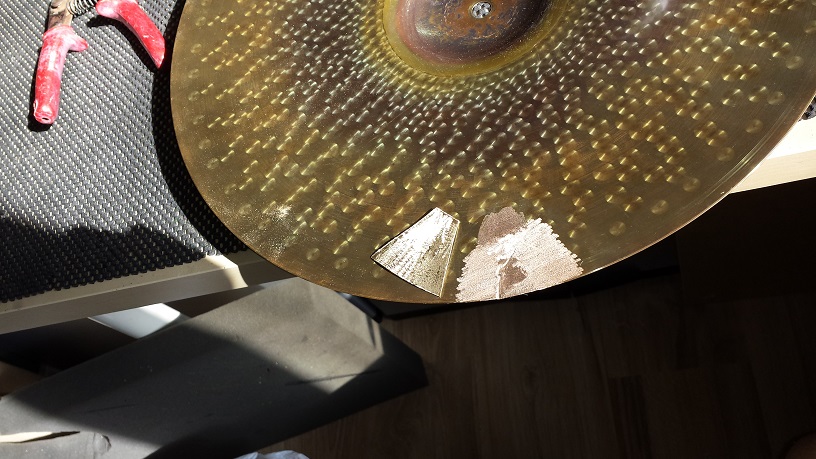
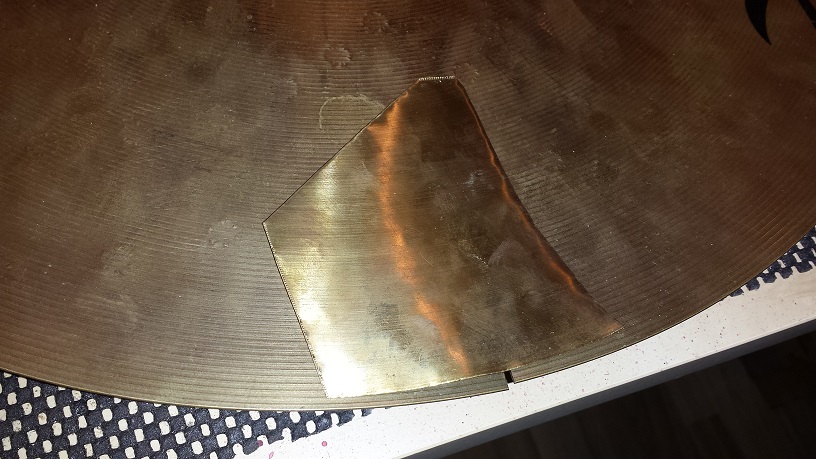
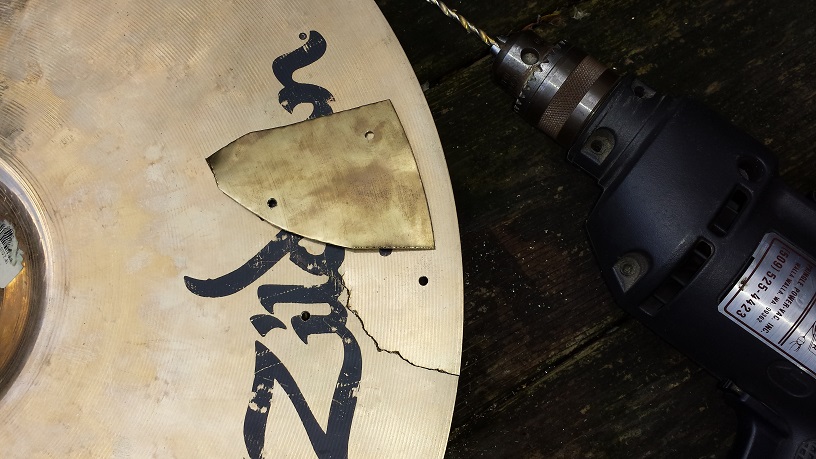
First we need a to fabricate a patch. This is easiest done by cutting a suitably shaped piece out of a “donor” cymbal. In this example I used tin-snips, but a Dremel with a cutting disk works too and causes less warping of the patch.
Next grind down the surface of the area surrounding the crack preferably on the underside of the cymbal. Make sure the ground area exceeds the spread of the patch. I used a grinding stone in the Dremel, followed by a high speed carbide bit to get right into the crevices of the crack. Patching from the underside helps maintain a somewhat visually appealing end result and extends the life of your sticks. We also need to grind right around the crack on the top side.
Grind down the entire surface of the patch that will be applied to the cymbal as well.
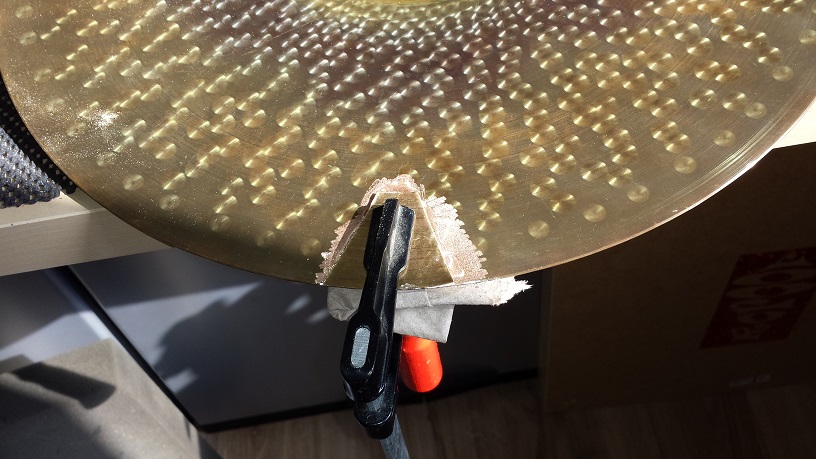
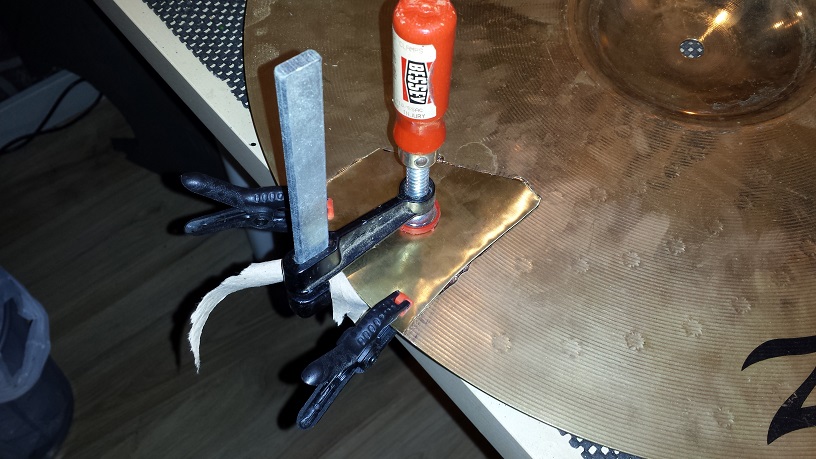
Apply a thin coat of Super-Glue to the entire ground area, position the patch and apply ample pressure. A clamp with a deep enough grab is preferred but a heavy weight will do as well. Make sure to place, cellophane, foil, paper or other protective layer under the topside of the cymbal to avoid glueing it to your workbench or clamp. Leave undisturbed for a few hours.
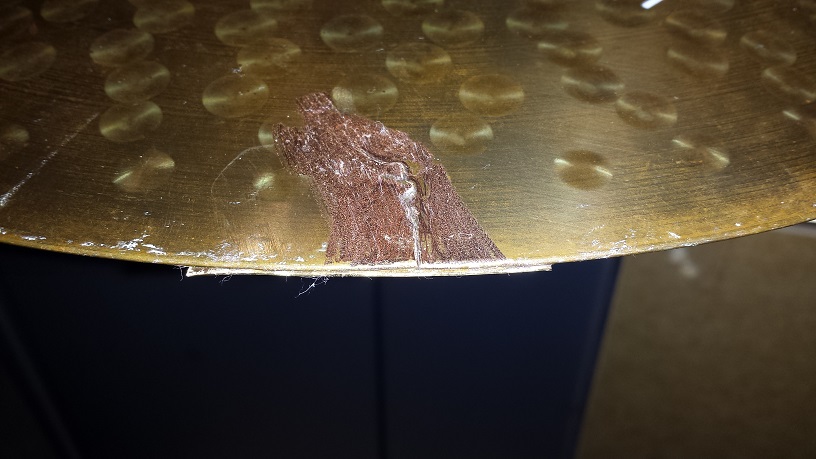
Once fully cured, grind the edges smooth so you don’t end up cutting a deep gouge in your hand one day when you’ve forgotten about the patch.
This Paiste Rude Crash/Ride has lost a bit of it’s volume but makes for a really nice mellow ride and still has a rich and full crash.
Nasty CrackMake a PatchGrind surfacesClamped
Next up for patching is a 19″ Z Custom Rock Crash. As with the previous example we start by cutting a fitting size patch out of a donor cymbal. Trace the outline of the patch on the cymbal to be patched and grind down the surface. We use a dremel type tool for this, loaded with a grinding stone. Also grind down the entire surface of the patch.
To be extra safe I also wipe down both surfaces with acetone prior to bonding. Apply liberal amounts of Super-Glue (CA) and clamp firmly. Leave to dry overnight.
Upon a quick sound test of this one it’s evident it will need to be filed in the “FAIL” category. Although using the same method that was sucessful with the Paiste Crash/Ride above, this one sounds like a slammed car door.
The last whack in the sound clip is when the patch fell off. Odd seeing that the Paiste is rigged up on my kit, gets regular play and is holding up fine. I will have to re-visit this one with a different method.
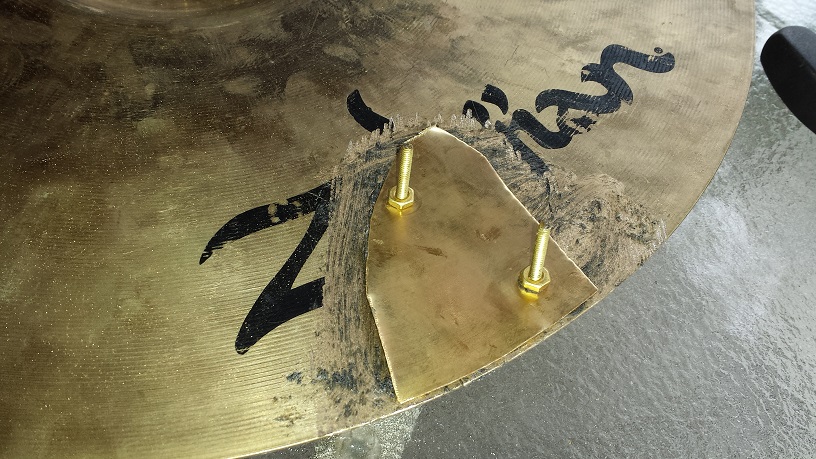
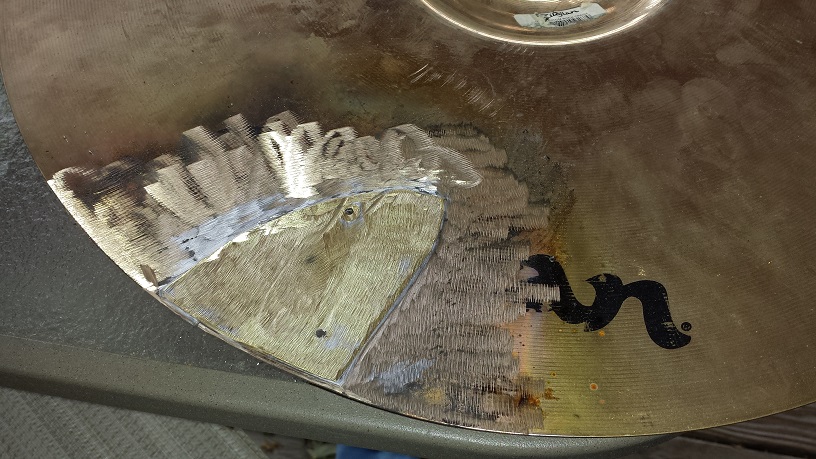
Cut a patchDrill HolesGrindScrew together tightSolderPrettify
Repair Cracked Cymbals Method 2 – Solder a Patch
Compared to Method 1, the super-glue approach, soldering is more work and the outcome isn’t nearly as good. I’m documenting this attempt simply for information purposes. As it turns out, it really is true that applying heat to a cymbal disrupts it original hardening and makes it sound quite odd. This poor subject started it’s life as a 18″ Zildjian Z Custom Rock Crash.
However, here’s how I went about it:
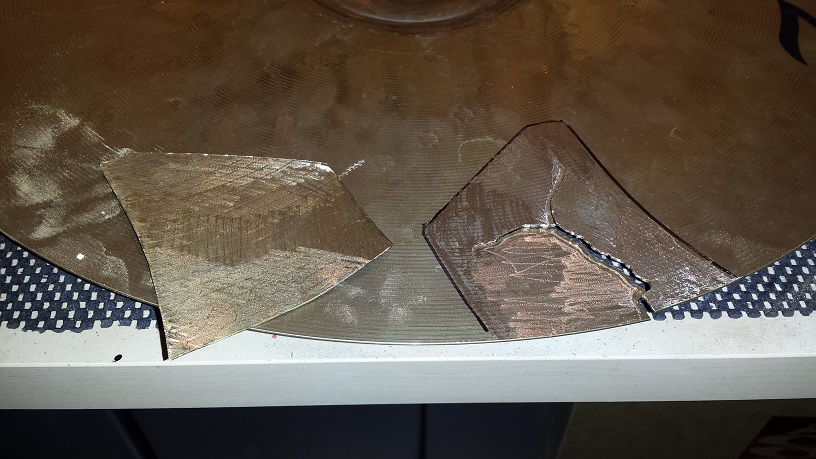
Start with cutting a patch out of a donor cymbal.
Drill holes through the patch and cymbal.
Grind down the surfaces that are to be bonded.
Apply liberal amounts of flux.
Screw together tight. I used brass screws but it wouldn’t have mattered since they came out anyway once I ground off both sides.
Solder ’til it’s dripping out from the other side.
Make the repair as pretty as you want it to be.
The end result is a cymbal that sounds reasonably OK when struck hard, but when struck softly it sounds like slapping a sheet of frozen fish-skin with moose-antlers.
If you want to get serious and learn more about salvaging, repairing or even making cymbals I highly recommend checking out Lance Campeau’s “The Cymbal Project” on Youtube.
Summary
Article Name
Salvage & Repair Cracked Cymbals
Description
A comprehensive guide to numerous approaches to Salvage & Repair Cracked Cymbals. We test various methods including brazing, cutting, patching, soldering,


 The severity will of course have the biggest impact on the end result. Sometimes it’s just simply not worth the effort to repair cracked cymbals. In this article however, we’ll attempt to salvage even the most severe cases, just for the sake of reporting the results.