

Introduction
A lot of CompactDrums.com’s readers have some pretty nice and nifty small drum kits. Breakbeats, Rhythm Travelers, Martinis, GoKits, the list of commercially available compact and portable drum kits is extensive. While myself and regular readers have a passion of sorts for these little kits, most drummers don’t share that same level of enthusiasm. The vast majority of drummers see our tiny little kits as compromises for the sake of size, portability and/or volume. (Which is true). Spending $500 and beyond for one of these compromises would therefore not be an option. However for the sake of having a practical little kit in your back pocket, for small gigs, ad-hoc jams and cramped spaces, $100 is do-able for most of us.
Maybe you do share my passion for the small and practical, but aren’t in a position to spend more than a hundred or two. Maybe you already have all the drum kits you need but would gladly add a Jungle kit if you could get one for $100….
If you belong to one of these groups, this article is for you! I intend to put together a Budget DIY Jungle Kit for $100. I even intend to make it a decent Jungle kit. One that can be used for professional gigging in place of a $500 commercially available product.
In rough terms the target for this Budget DIY Jungle Kit is to follow fairly mainstream Jungle kit dimensions. 16″ bass drum, 10″ tom tom, 13″ floor tom and a 14″ snare drum. Roughly the sizes of Ludwig’s Breakbeats, Sonor’s Safari or Select Force Jungle and a few other popular choices in the 16″ bass drum segment.

Obtaining the Necessary Bits & Pieces
We’re not gonna’ achieve “decent” with a $100 budget without practising a fair amount of thriftiness. The first order of business is obtaining shells and components. We do this by scouring Kijiji, Craigslist, Blocket or whatever advertising market is dominant in your region. The target is to find a complete standard-size 5-piece drum kit for under $100. Luckily standard 5-piece kits in the sizes 22″ bass, 14″ snare, 16″ floor tom and 12″, 13″ rack toms are plentiful and finding one for max $100 shouldn’t take too long.
The next challenge is making good selections among the kits that meet the price criteria. No point in attempting to make a “decent” Jungle kit if we have sub-decent parts. Start with looking carefully at the pictures. While we’re likely going to have to settle for entry-level in our budget range, we still want to avoid some really poorly made excuses for drums. Better wait a few more weeks and keep looking than to settle for something that’ll yield end results we’ll never be happy with.
Start with looking carefully at the pictures and descriptions. If the rack toms have less than five lugs per side, move on. Likewise if the floor tom has less than six. If the kit has that toy-like look to it, move on. We may have to settle for six lugs on the snare, but with patience, eight is obtainable. We may have to settle for those bass drum spurs that insert through the shell, but with patience, folding ratchet spurs are obtainable. The most important thing is that the shells are decent. We won’t know this unless we either have some familiarity with the kit in question, or we make an appointment and go check it out.
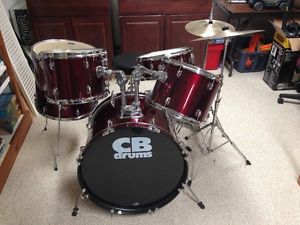
Here in Canada currently 8 out of 10 cheap drum kits on Kijiji are CB. Later model CBs are decent enough to work with, as are the older CB 700s. Avoid the rest of the CBs. The later models are easily identified by the lugs. they are almost identical to Gretsch. Now and then a Premier, Pearl or other name brand kit can also be found in this budget range but you have to be fast to secure a deal.
For this article I scored a late model CB for exactly $100. It’s not the one pictured. The picture is actually from a Kijiji ad I saw today. The one I scored is the same model but wrapped in black. It’s in excellent condition which is not common since usually the teenager who was all excited about learning to play drums lost interest in less than a week when it turned out you actually have to practice in order to get past playing 1 & 3 on the bass, 2 & 4 on the snare and 8s on the hats.
Wondering where the 10″ tom is coming from? Take a look at all the stuff that came with the kit we just purchased. Likely you’ll have no interest in any of the hardware or the “cymbals” that came with it. Also, as much as we don’t need the bass drum, we do need some of the parts from it. We may need the lugs from the 12″ tom depending on if we can migrate the lugs from the bass drum to the 16″ and from the 16″ to the future 10″.
The point is, depending on which kit you ended up finding for $100, the parts that aren’t needed for our Jungle kit can be traded for a 10″ tom. Of course the very simplest is if we get lucky enough to find a 10″ tom with (somewhat) matching lugs.
Thus in our case we can run an ad on Kijiji to trade either the 12″ tom for a 10″ ,some of the hardware/cymbals or the bass drum without spurs. I’m going to post all of the above and see which one gets a response first.
After three days, my ad on Kijiji resulted in trading the Hi-Hat stand for a black wrapped, Pearl Export 10″ tom with some missing lugs. We now have all the pieces required to proceed with the project.
$100 Budget DIY Jungle Kit
To truly stay within the $100 budget, you’ll be faced with these finish options:
- Keep the existing finish. Not a bad option if you manage to find a 10″ tom that somewhat matches the rest of the kit.
- Paint / Lacquer, Requires more patience but would make for a killer $100 Budget DIY Jungle Kit
- Wrap with one of the low-cost options from our Alternative Drum Wrap Materials
- Sell off all the non-required parts and use the proceeds to purchase actual drum wrap.
The first option will result in a hole in the 13″ floor tom where the tom mounting bracket used to be. The last option is the one we’ll be going with for our sample kit. As such the first order of business in our case is complete disassembly and unwrapping of all the shells. (Instructions can be found in our Drum Wrap Instructions.)
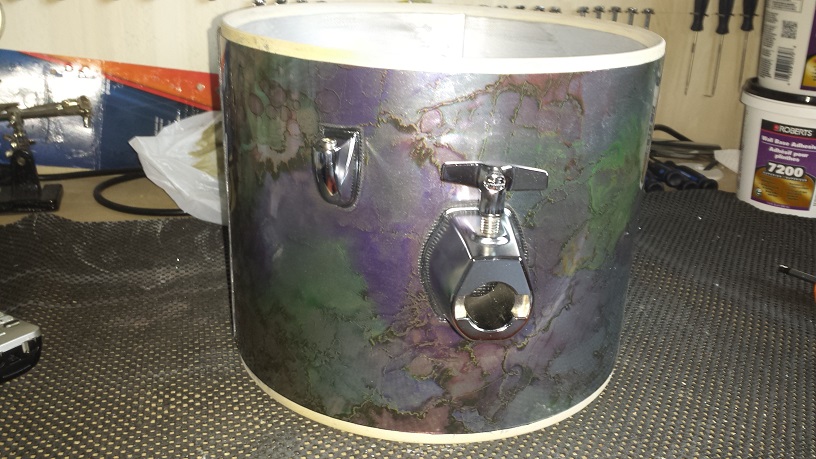
Converting the Floor Tom to a Bass Drum
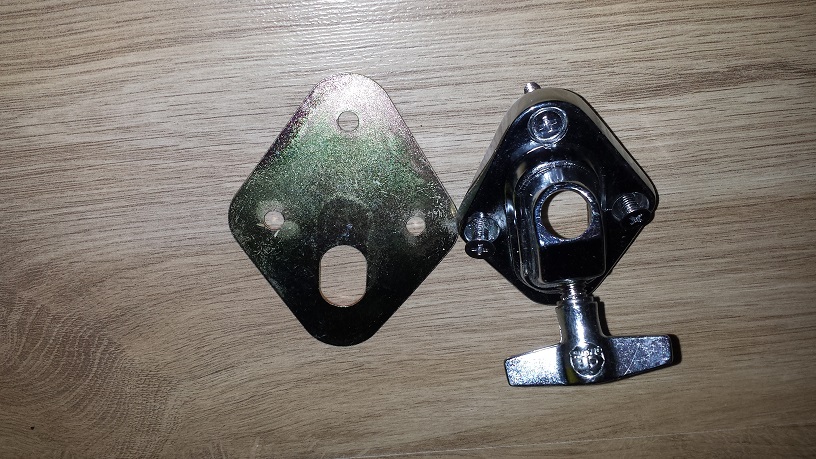
Before we can start converting the floor tom to a bass drum, we need to remove the spurs and brackets from the 22″ donor bass. We will also have to decide what we will be using as a tom mounting platform for the bass drum. We can use the 2-post platform from the 22″ bass, or take the single tom mounting bracket from one of the toms and use that as a single post mount. The double would be more practical but isn’t what we’re used to seeing on a Jungle kit. In addition, there will be gaps between the mount and the shell at the edges since the arch of the mount is 22″ radius. After some consideration I decided on the single tom mount.
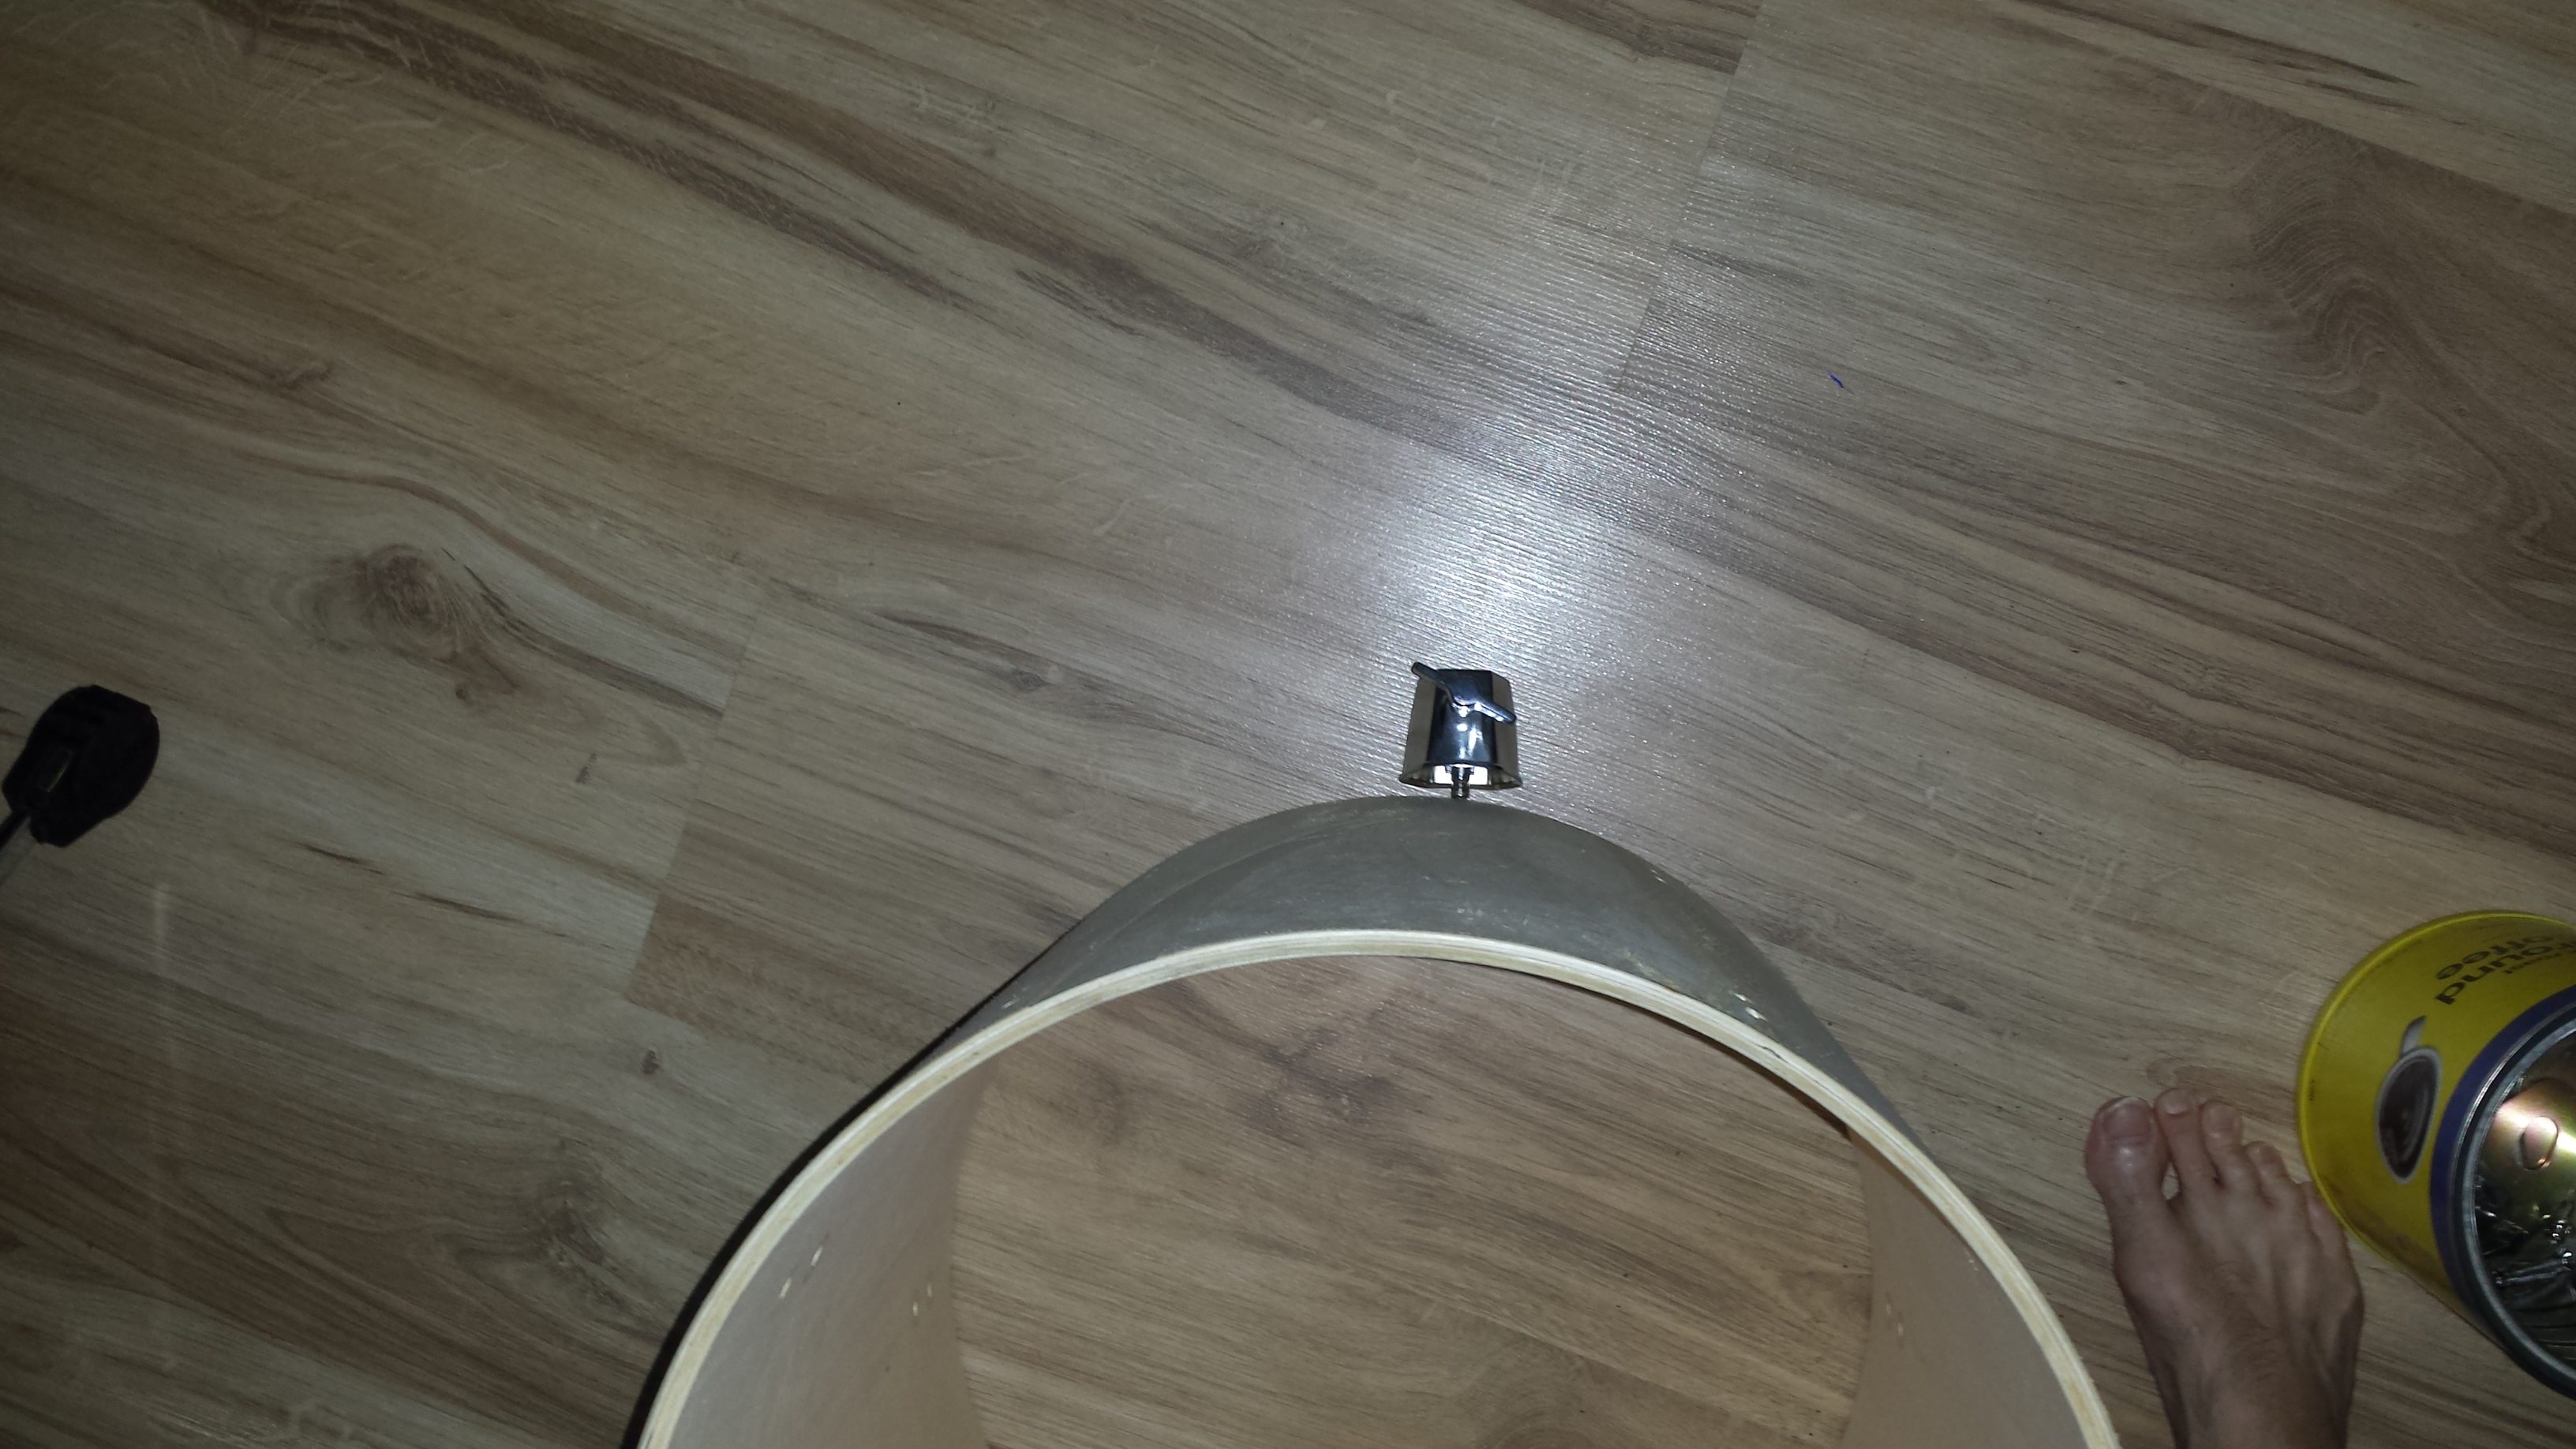
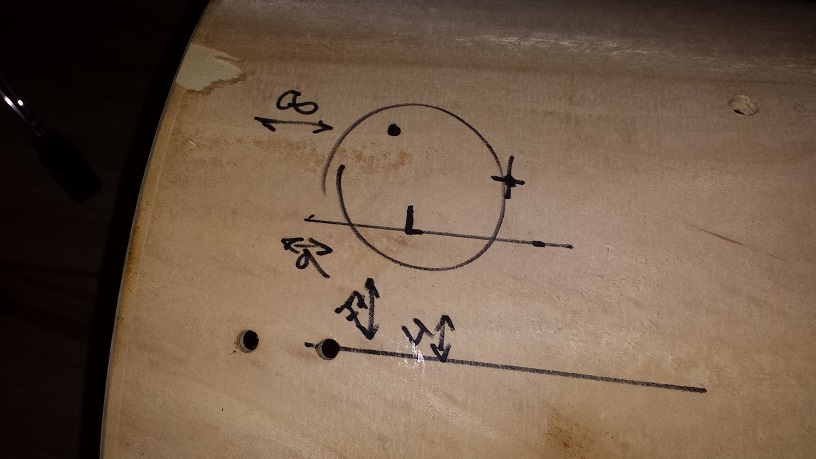
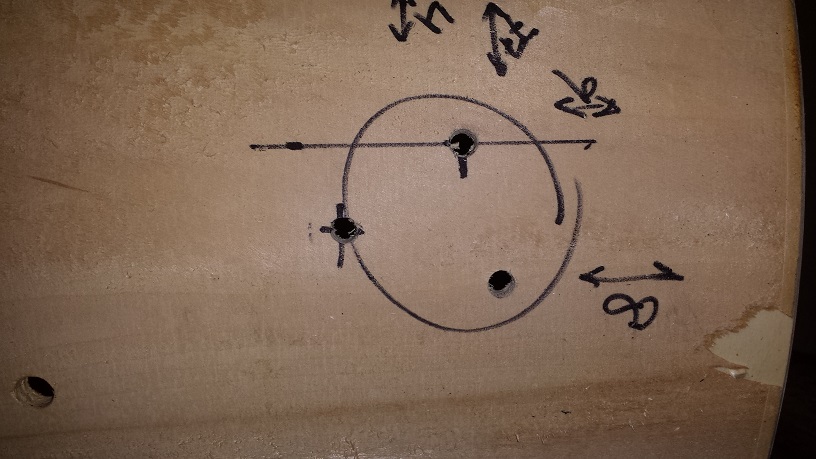
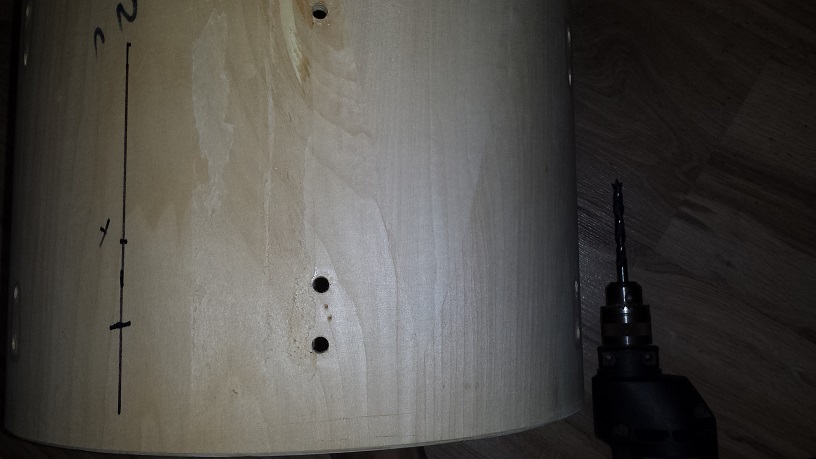
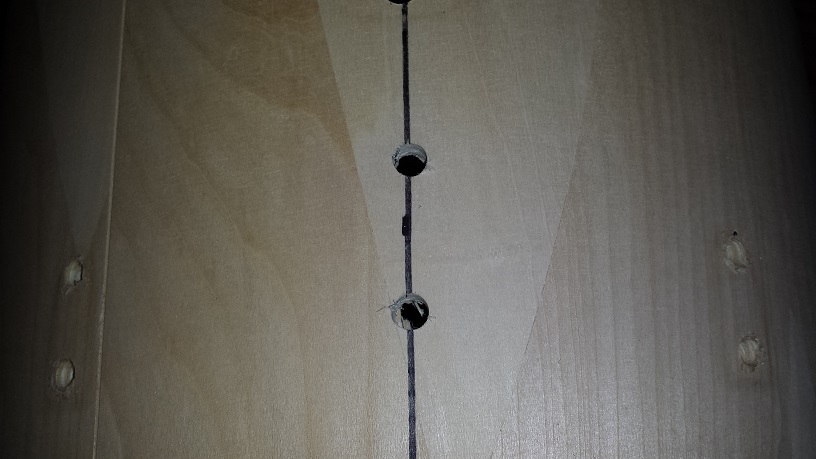
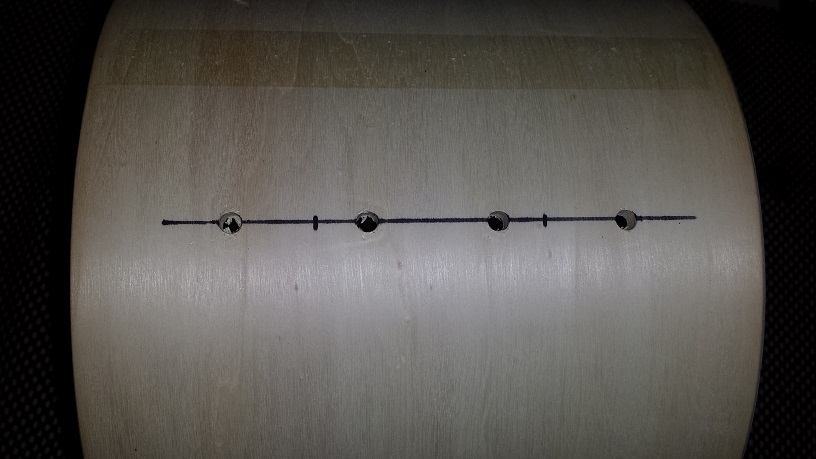
Next we test place the spurs and tom mount in order to determine their respective positions. make some rough marks on the shell as place markers. To mark the holes for the tom mount we first draw a centreline using the lug holes as reference. Then simply make two marks at the distance of the threaded posts on the mounting bracket. Using a corded drill, (Cordless drills are too slow to produce a clean edge.) loaded with a brad point bit, drill from the outside at the highest speed with very little pressure until the point pokes through to the inside. Drill the rest of the hole from the inside out. This way we don’t risk tearing out a piece of the inner ply when the drill breaks through.
Now we can test fit the mounting bracket and use it as a template to mark the 7/8″ centre hole. Drill the centre hole with a 7/8″ spade bit following the same procedure as before.

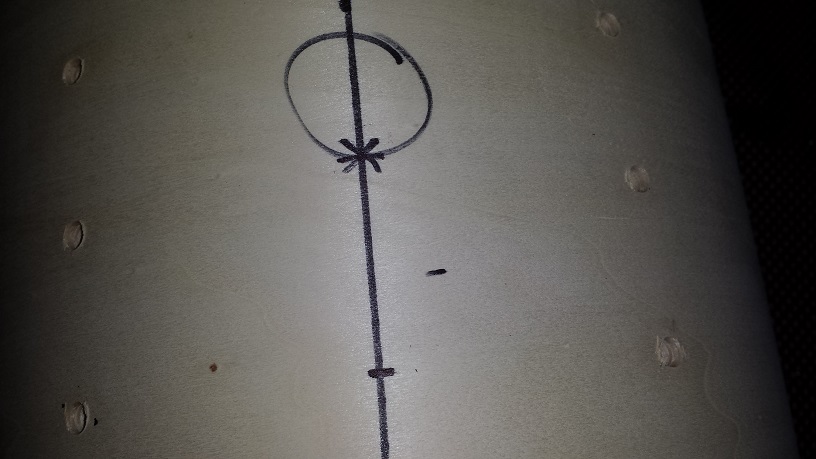
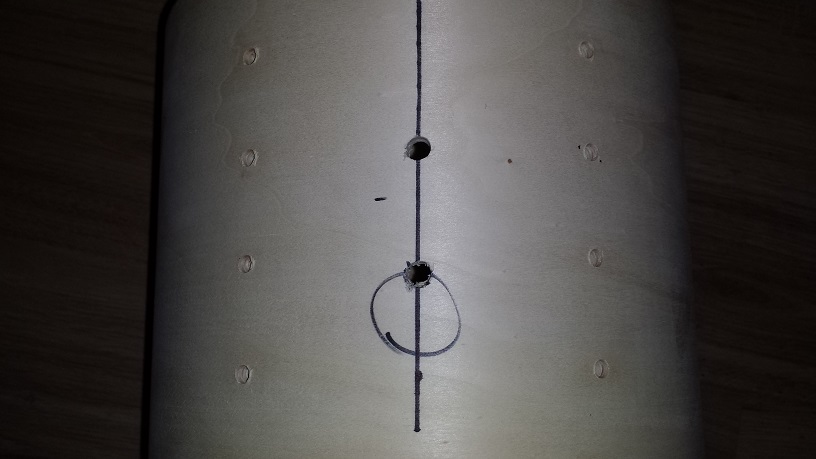
Once we’ve determined the position for the the spurs, mark the approximate area, then fine-tune the spot and angle for the spur-bracket and mark the holes. In order to duplicate the position on the opposite side we mark some reference measurements from the shell’s edge and the closest lug-line. This way we can duplicate two of the hole’s positions and mark the third one using the bracket as a template. Drill the holes with a brad point bit using the same process as the tom mount holes.
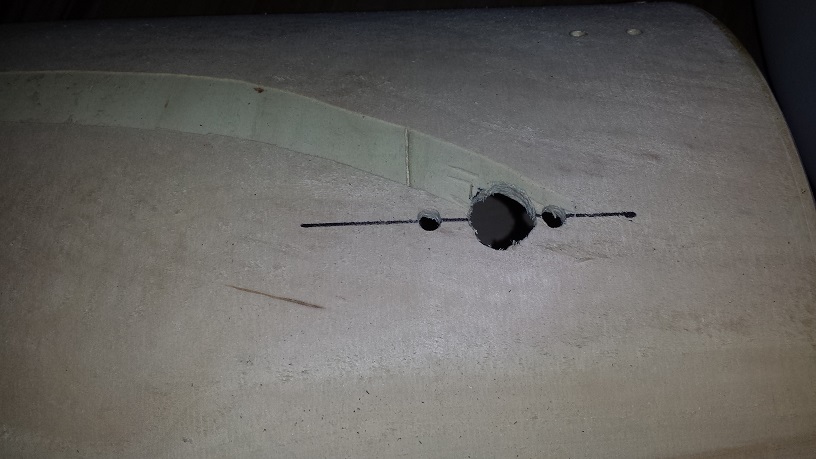
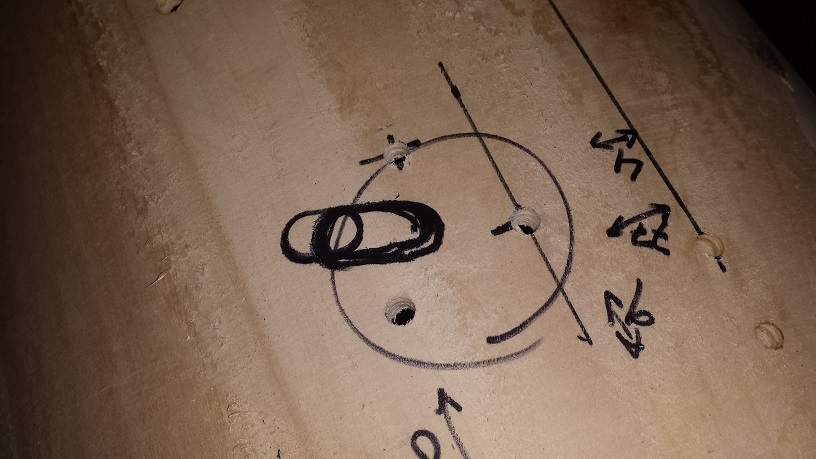
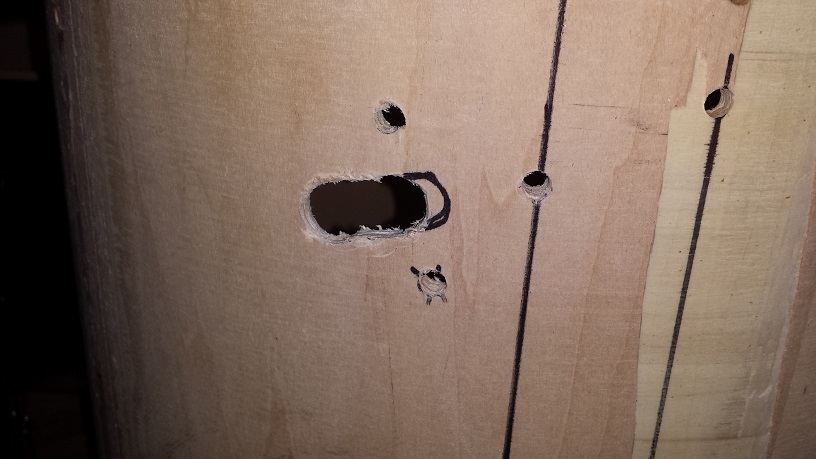
A larger hole for the spur to pass through the shell will also need to be drilled. Using the inside plate as a template, mark the pass through hole. Since the spur comes through at an angle this mark then needs to be elongated to meet where the spur will enter on the outside. I just mark this extension roughly by freehand since this hole neither needs be neat nor tight. Drill a hole at each end of the elongated mark using a spade bit and then simply “harass” the remaining wood between the holes until it’s removed. Test fit the entire spur assembly and remove more wood as required.
Our 16″ Bass Drum is now ready to seal.
Budget DIY Jungle Kit


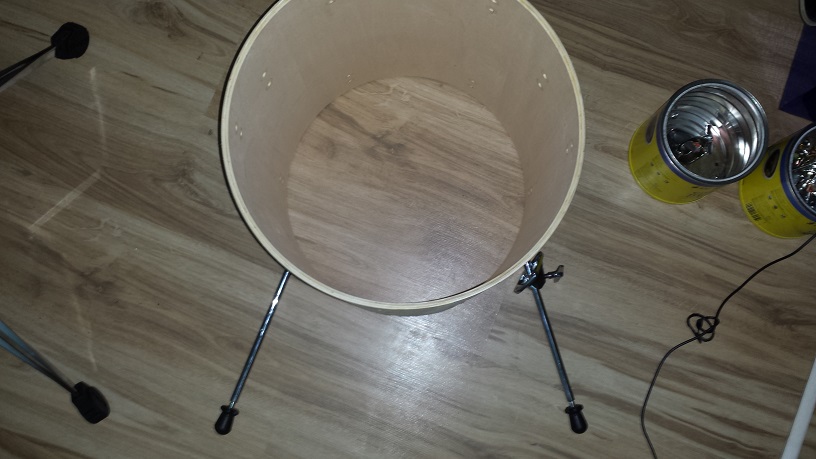
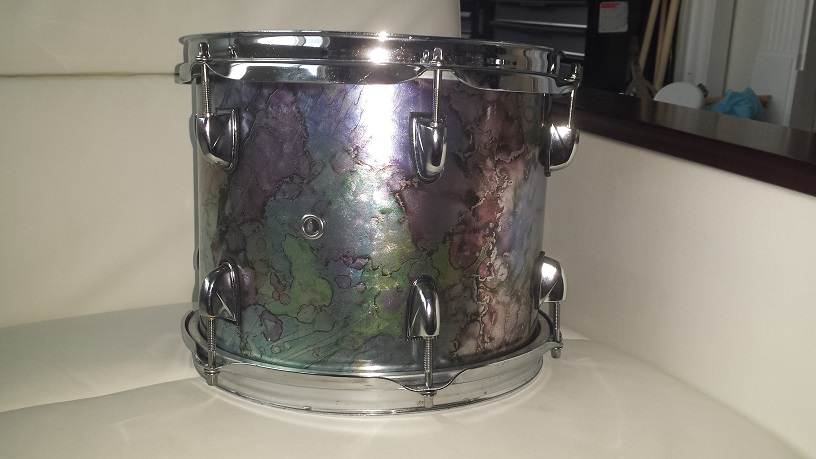
Converting the 13″ Rack Tom to a Floor Tom

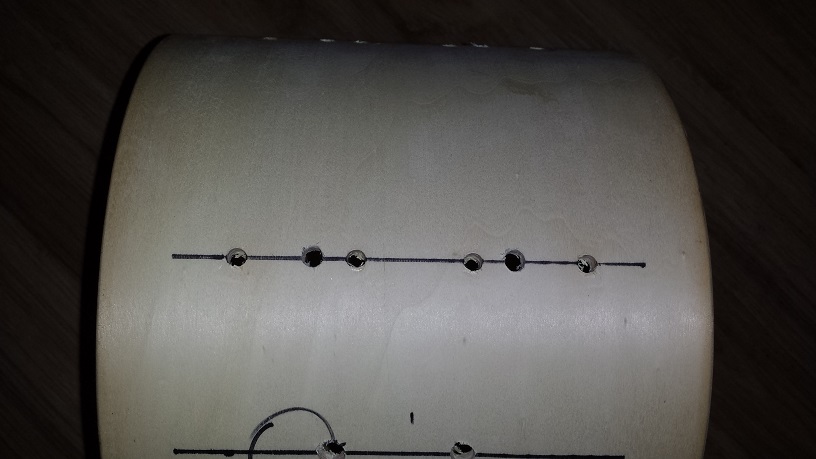
Turning a rack tom into a floor tom is as simple as drilling for the leg brackets and plugging the holes for the mounting bracket. To mark the holes for the leg brackets, start with making a line centred between two lug lines. Determine a distance from the shell’s edge to the first screw hole, (In our case 5 cm) and mark. Make an additional mark along the same line with the distance of the screw posts on the leg bracket. (3.5 cm in our case.)
Repeat for all three tom leg brackets and drill the holes according to the same procedure as with the bass drum.
Budget DIY Jungle Kit
Prepping the 10″ Tom Tom
Since this Export tom used to be I.S.S. mounted it has no tom mounting bracket. The bracket we’ll be installing is from the 12″ tom that came with the kit. It’s identical to the one we’re installing as a mounting platform on the bass drum. Determine the position of your bracket and draw a straight line in between two lug lines. Mark the position of the first screw hole at the height desired. Mark the second hole corresponding to the distance between the screw posts on the bracket. Drill following the same method as before. On my project, I’m gonna’ skip the large centre hole and instead shorten the L-arm post if required.
We also need to drill additional holes for the lug screws as the lugs we’re using have shorter hole spacing than the Pearl lugs we removed. Simply run a straight line through the centre of all the four lug holes. Place a drill mark the same distance from the hole closest to the shell, as the spacing of the screw posts on the lugs. Drill in the same manner as previously.
Our 10″ tom tom is now ready for sealing.
Sealing the Shell Interiors
On some of our projects of this type we take the time to fill any holes not required. On this one we’re skipping that step and just covering them with the wrap. If you want to fill yours then the time to perform that step is before proceeding with sealing. Check some of our other DIY projects for tips on filling holes. I’ve used bondo or construction adhesive with very good results. Drywall compound mixed with white glue is a viable alternative too.
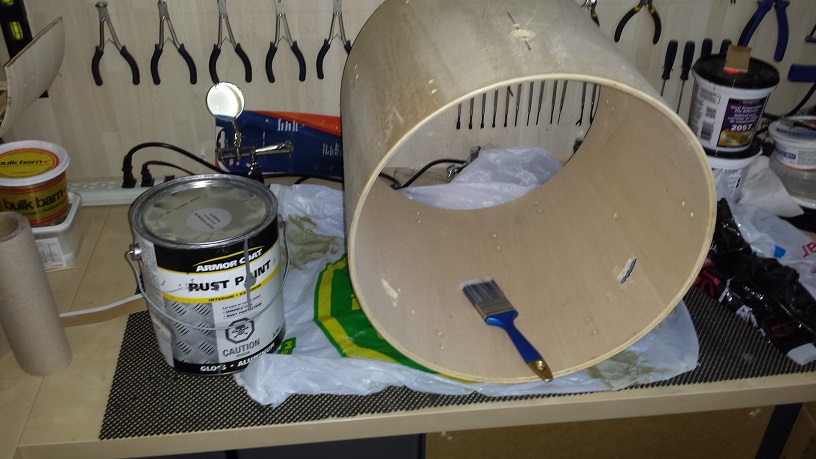
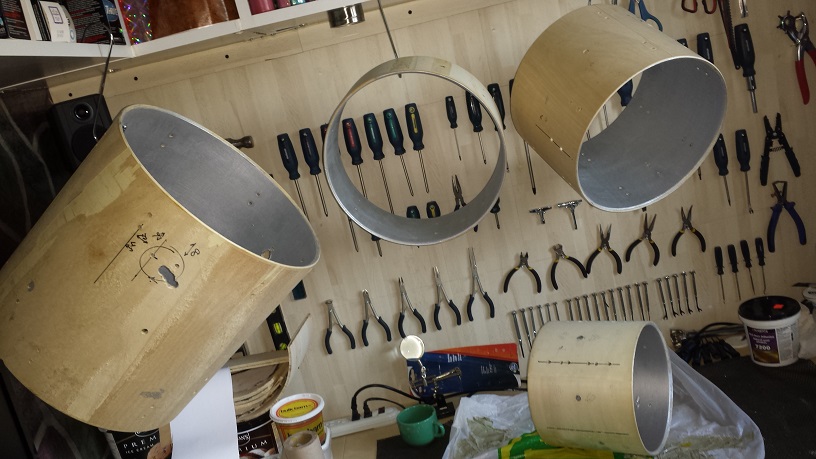
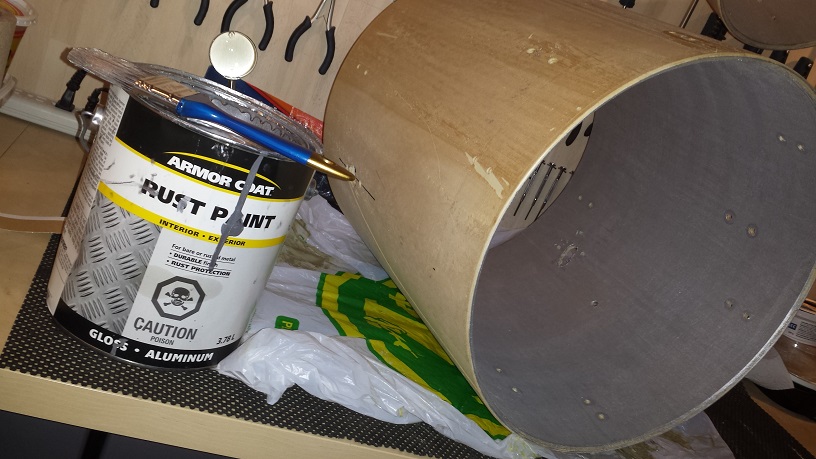
For this Budget DIY Jungle Kit we’ll be sealing the shell insides with aluminum coloured gloss rust paint. We’ve used this paint on quite a few of our projects with excellent results. The finished insides have a close resemblance to “Gretsch Silver Sealer”.
After shaking the can until my arms ache, I apply the first coat with a paintbrush. However I don’t really “paint it on” as much as I “rub it in”. I just like the paintbrush as an applicator as it has a handle. After a few hours of dry-time a second coat is painted on in a more common manner.
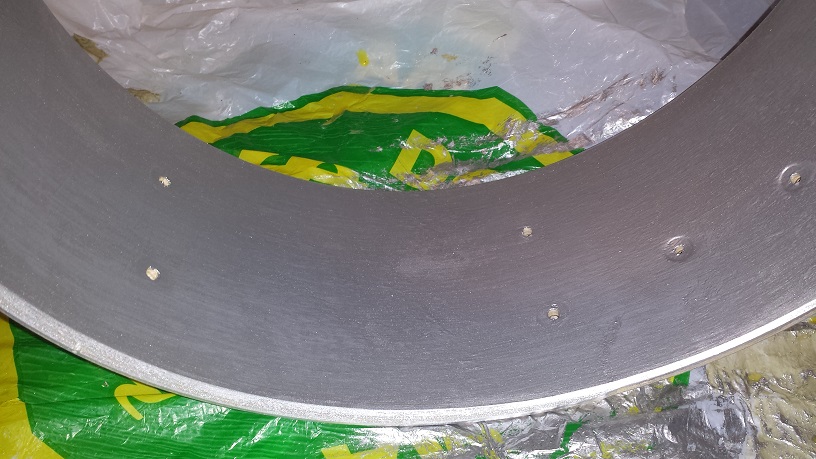
I’ve made a habit out of sanding the bearing edges after sealing. Sometimes even re-cutting them if they are in poor shape or of a different style than I would prefer on the project at hand. This way I don’t need to mask them before applying the interior sealer. If you don’t intend on sanding your bearing edges, make sure to mask them prior to painting.
To sand the bearing edges, I use one of those little “mouse” shaped detail sanders. Somewhere around 100 grit is suitable to start until all the paint is gone. Once down to the bare wood again, I switch to around 200 grit and sand it all smooth and proceed to rounding over the peak just a smidge.
Budget DIY Jungle Kit
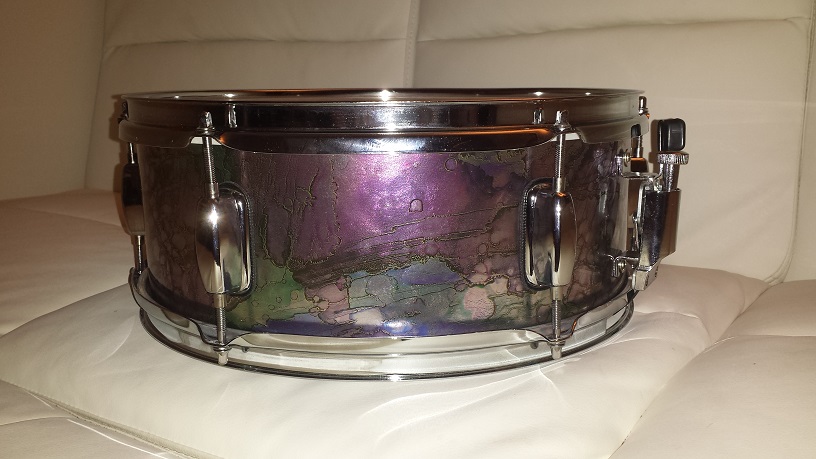
Wrapping the Drums
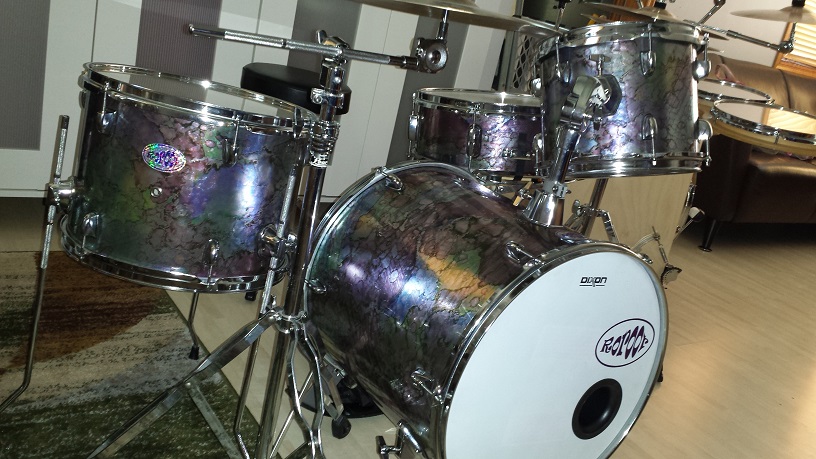
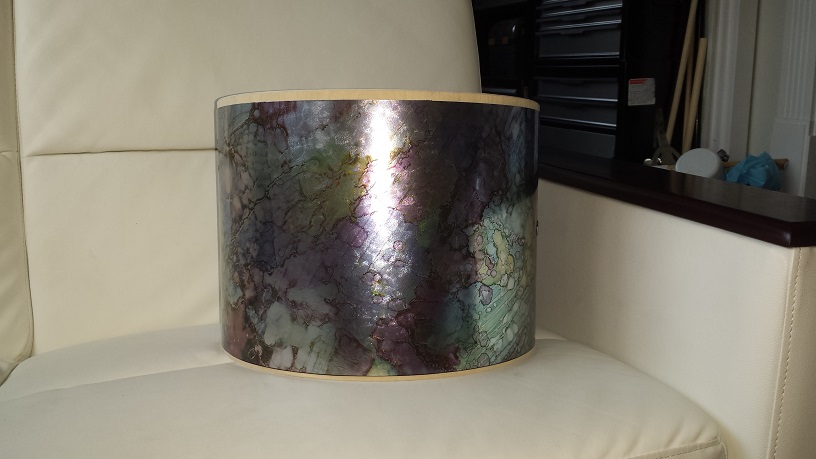
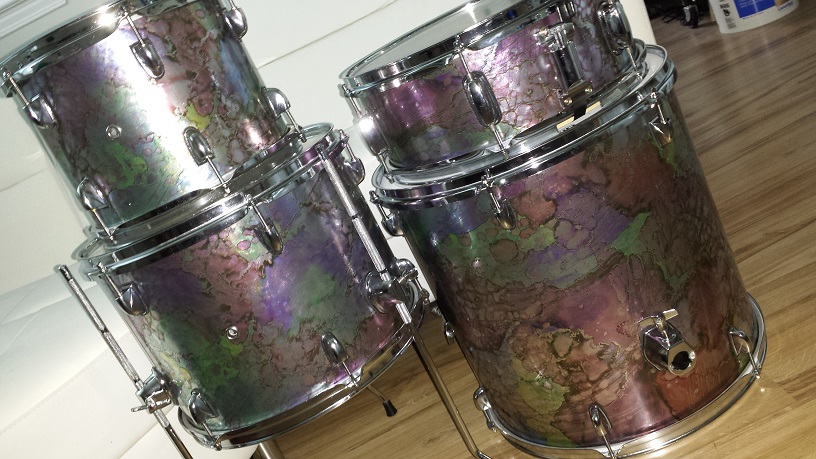
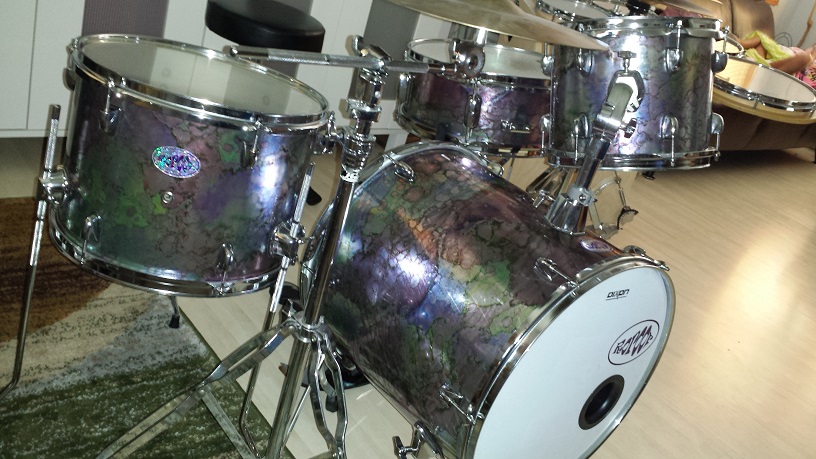
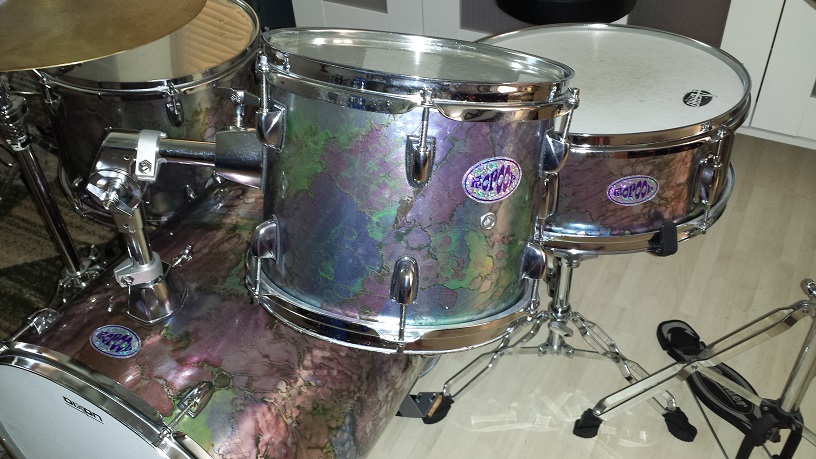
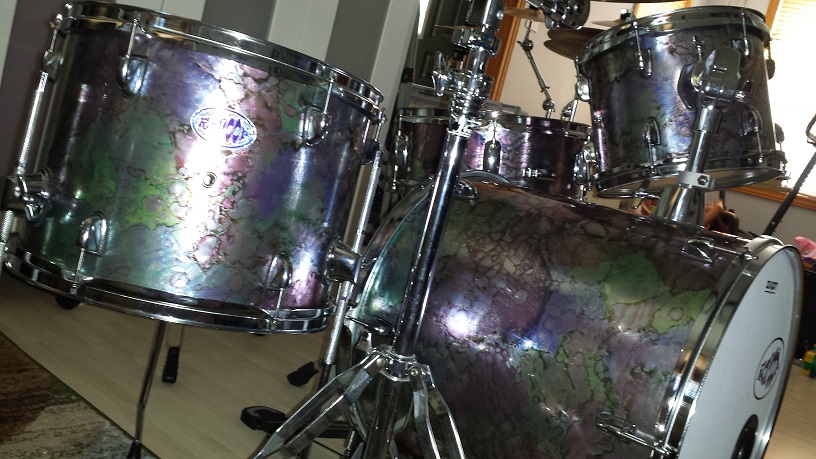
For this kit I ordered a really wild wrap from Walopus Drum Wrap. They call it “Altered States Dreamscape”. To me it looks like it should be called “Alien-vomit” or maybe “Alien-breath”. It’s just about the most unusual drum wrap I’ve seen so far. The pictures do not do this wrap justice at all. In real life it’s incredibly deep, glossy and just awesome. (Walopus Drum Wrap Review)
Starting with the 10″ tom tom. I wrap this according to “Method 4” in our Drum Wrap instructions. After trimming it down to about 1/2″ narrower than the shell’s depth we simply wrap it around and affix with adhesive strip. Check the aforementioned instructions for details.

Assembling the Drums
We’re on the home-stretch. All that remains of this $100 Budget DIY Jungle Kit is drum assembly, construction of a bass drum riser and setting up the kit. As usual I make Isolation gaskets for all the metal parts following our DIY Isolation Gaskets article. Since these lugs are of the type with an internal spring they also get a half cotton ball stuffed into each lug. The screws that hold the brackets in place get tightened quite tight, while the lug screws are tightened to somewhere between snug and tight.
Finishing Touches
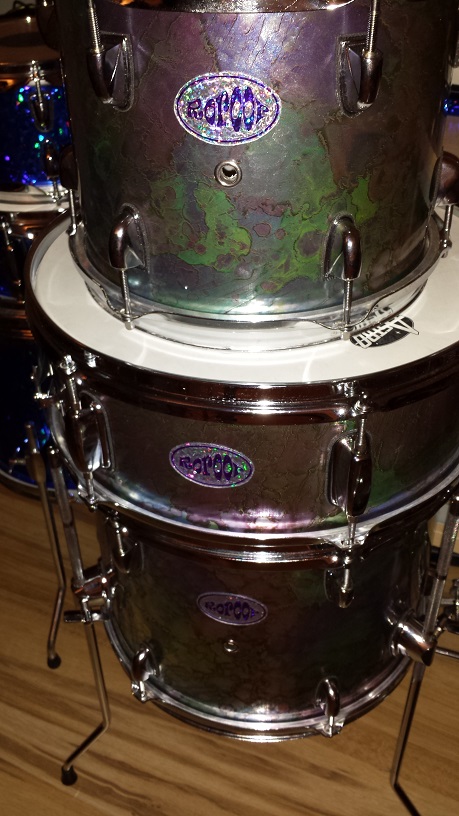

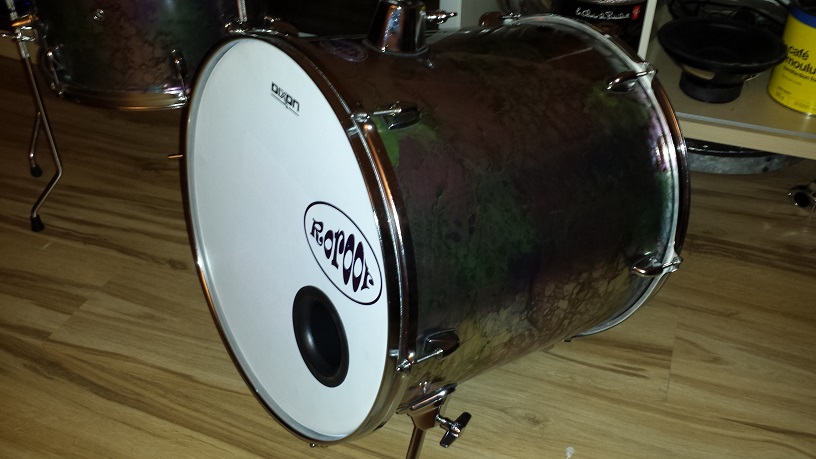
Apart from fabricating a bass drum riser, there are a few finishing touches required for optimal results. From a cosmetic viewpoint a few “Roroor” badges give the kit that goofy yet professional image. A vent port from a subwoofer gives the bass drum some visual attitude, but also, believe it or not, enhances a little bit of bottom end. These subwoofer ports can be taken from a broken speaker or purchased just about anywhere they sell audio/electronics stuff. Install with contact cement.
If you’ve ever done a tom-to-bass conversion you probably already know that simply placing a floor tom on it’s side and striking it with a beater instead of a stick, doesn’t do much to make it sound like a bass drum. It sounds just like a floor tom, laying on it’s side, being struck with a beater. To get a bass drum “punch” we’ll need bass drum heads. Unfortunately there’s no room for such extravagances in our $100 budget.
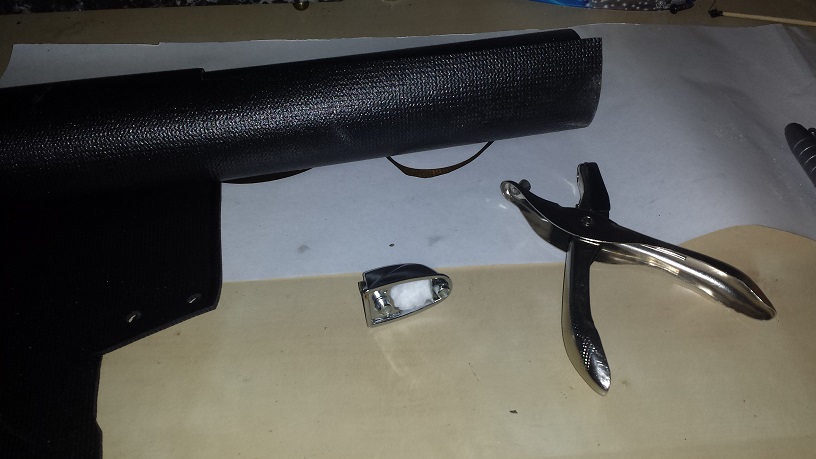
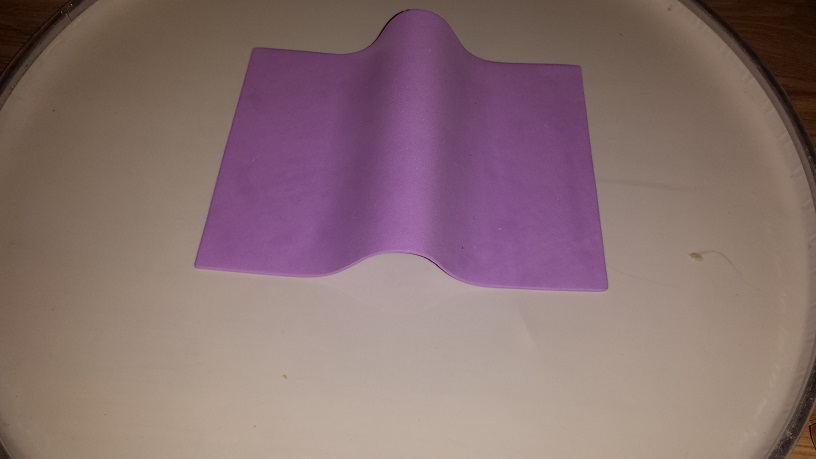
Fear not. I have a proven trick up my sleeve. Get two rectangular pieces of craft foam. (See pics). Any colour but black lends extra “mojo”. Attach a strip of double sided tape on both sides of the foam. I use the same carpet tape used for wrapping. Apply a piece of foam to the inside of both heads. Don’t lay it down flat though, but rather in the shape of a tunnel as illustrated.


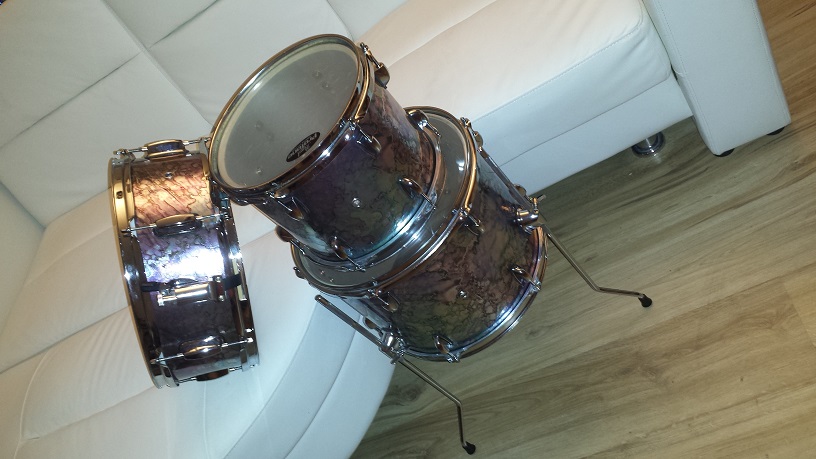
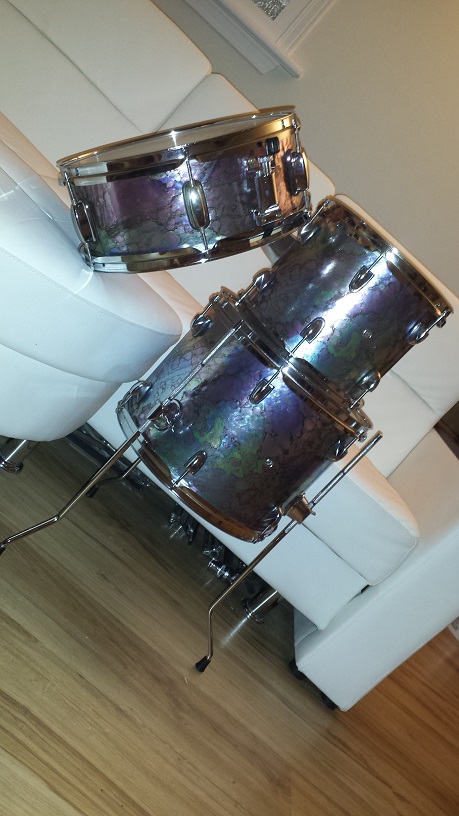
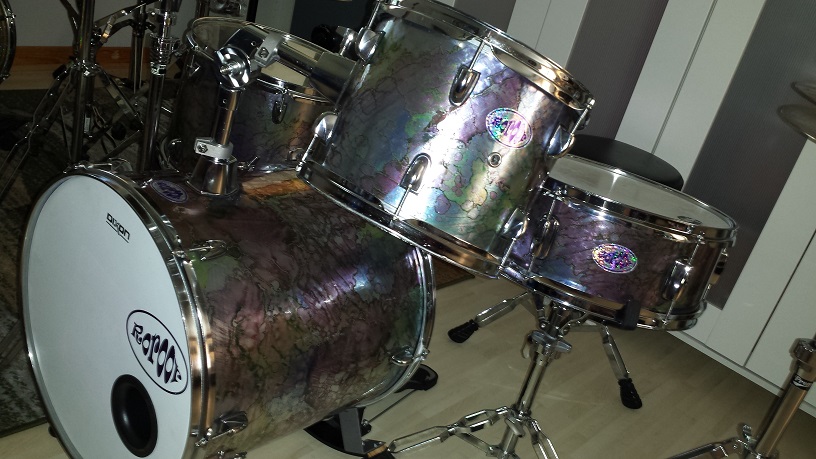
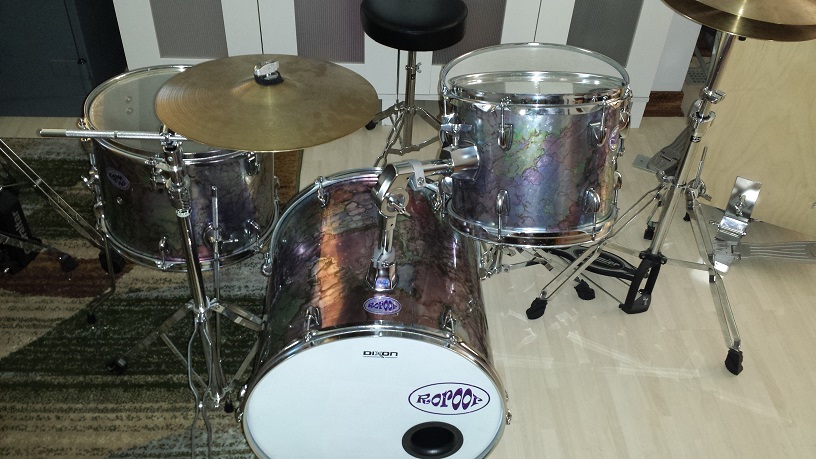
The Finished Budget DIY Jungle Kit for $100


The Budget
So, just how well are we doing with the $100 budget so far? The CB drum kit was purchased for $100 and the Walopus drum wrap was $130. So far I’ve spent $230. The Hi Hat stand was traded for the 10″ tom. The challenge will be to sell the incomplete 12″ tom, incomplete bass drum, cymbals, stand, throne and pedal for $130. Might not be do-able. To truly remain within the $100 budget actual drum wrap is probably out of the question. I’ll post the ad on Kijiji for the bits and pieces and see how well I can do.
Update: After the ad has been up for 48 hours, I have sold the hoops and heads from the bass drum for $30 and the cymbals for $30.. $70 to go. This might be do-able after all.
Another 48 hours have passed and I have managed to sell the pedal and throne for $40. $30 to go.
Getting close now. The snare stand fetched $20 on Kijiji.