Introduction
Function and low cost usually take priority over form and beauty here at CompactDrums.com. In this article we’re attempting to combine some nifty features, classy appearance and kick-ass sound while still maintaining serious affordability. Although we’re still shooting at a moving target, so far the following have been defined:
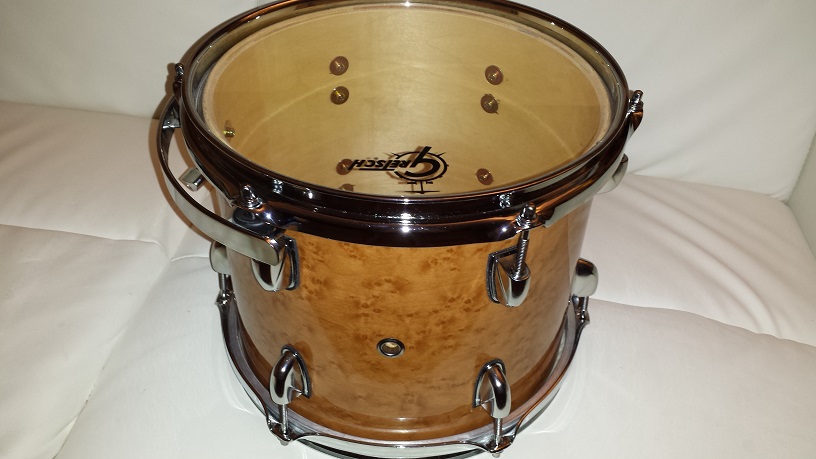
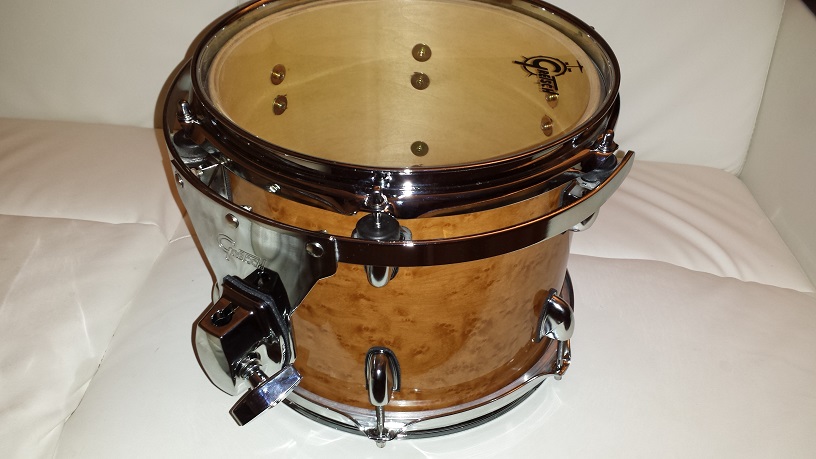
- Tom tom: 10″ X 8″ Poplar donated from a Gretsch Blackhawk with accompanying Gretsch chunky Suspension Mount
- Floor tom: 12″ X 9″ Poplar of unknown origin
- Bass Drum: 16″ X 11″ “Select Hardwoods” (Looks like birch outer and inner plies.) Unknown Origin
- Lugs: Gretsch-style with DIY Isolation Gaskets
- Spurs: Unusual Bent Hex Rod Spurs
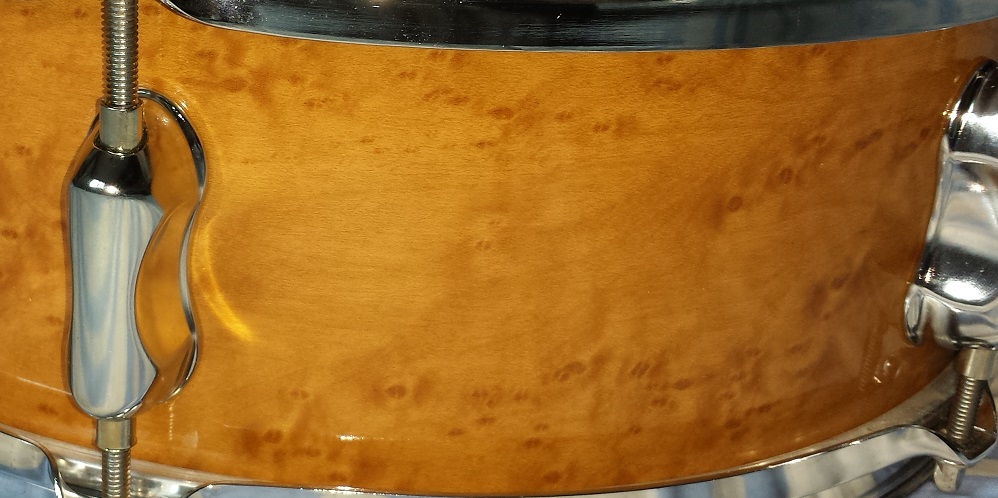
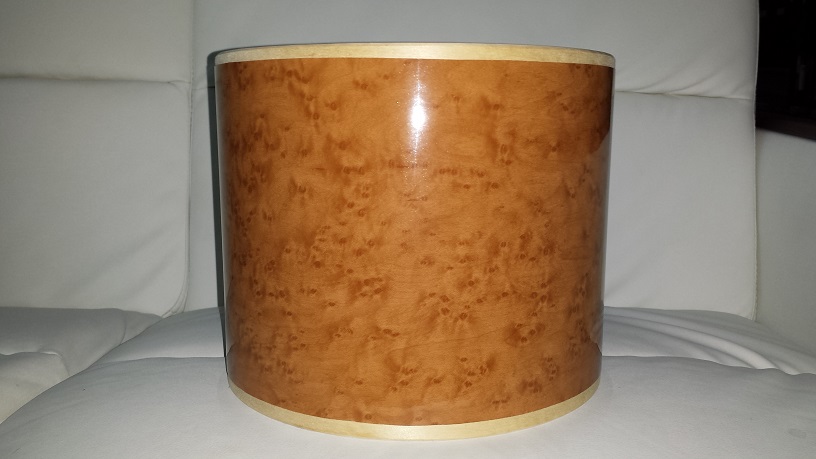
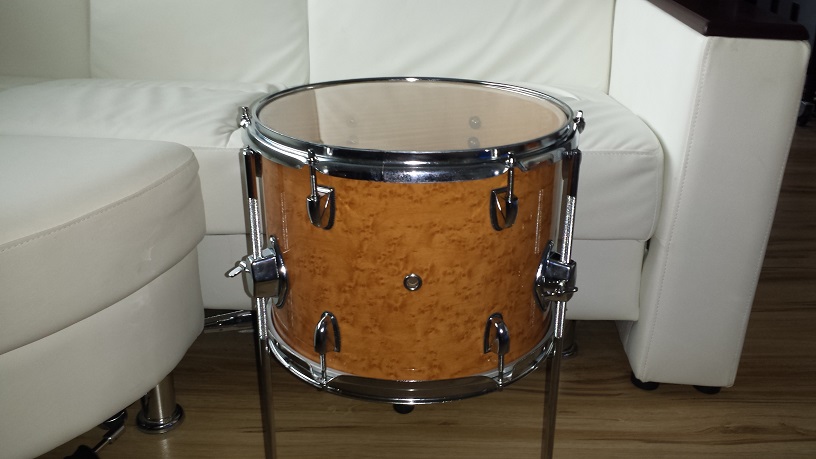
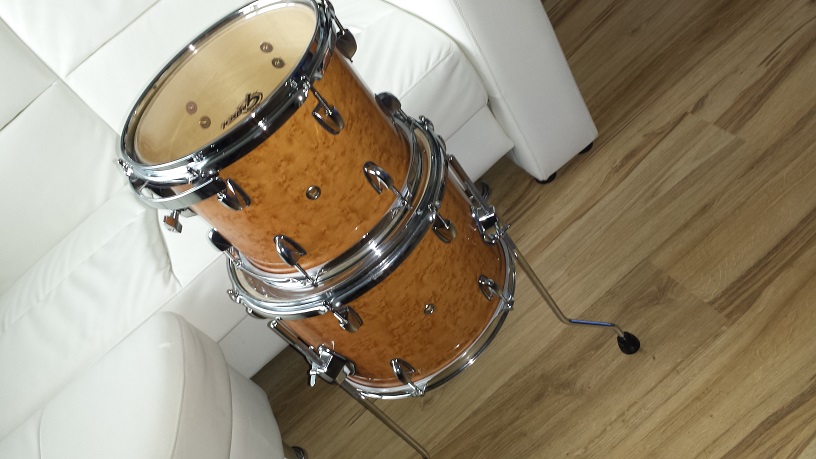
- Wrap: Birds-eye Maple (faux wood grain wrap) from Walopus
- Riser: Either “Drum Monger’s” style or some new contraption.
- Snare Drum: TBD
- Tom Holder: TBD
The intention is to seal the shell interiors with a clear satin polyurethane. The bearing edges will get re-cut or just sanded depending on their original state. Bearing edges will be modelled more or less after Taye’s bearing edges. (Standard 45 degree with 45 degree bevel, but sanded to a more rounded over profile for a little bit of increased head to shell contact.) Mounts, brackets, etc. will get sorted out as we go along.
Gathering the Components
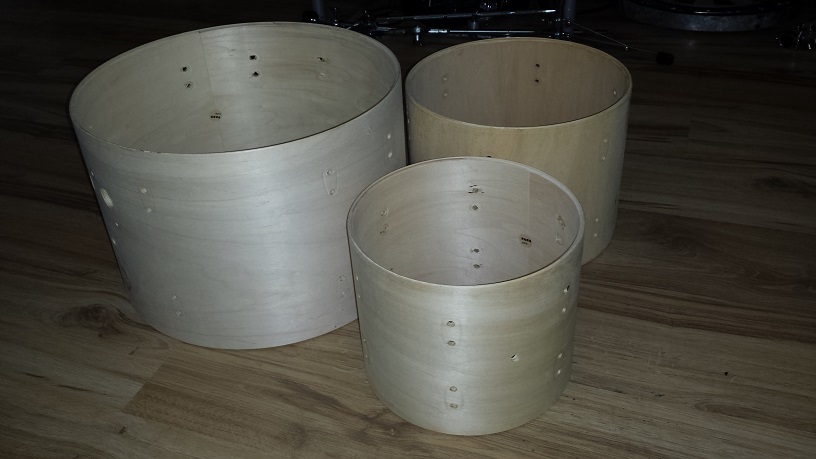
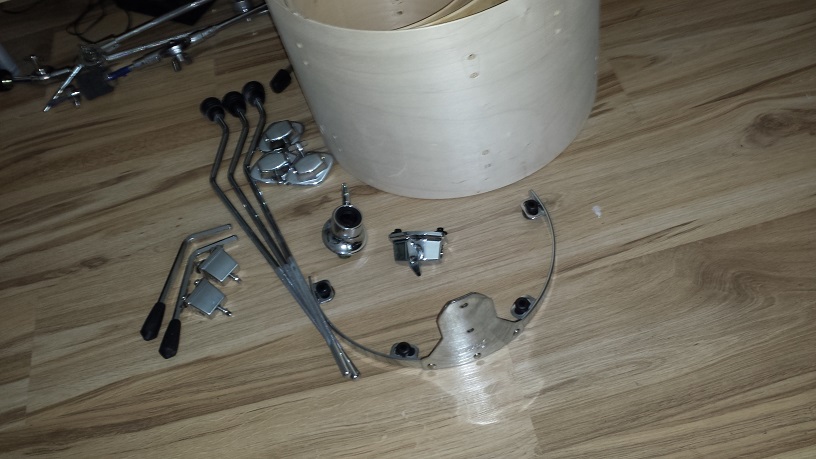
So far the shells and suspension mount are gathered. Also, the shells have been stripped to the bare wood. See this article for stripping and wrap removal instructions.
A partial “Astro” drum kit gathering dust in the corner donate the floor tom legs and brackets, as well as the vintage looking tom mounting bracket that will serve as the mounting platform for the bass drum. The spurs came from one of the treasure boxes. I believe they were once scavenged from a “Baioja” bass drum. A Gretsch 10″ Energy tom donated the tom tom mounting bracket to be installed on the suspension mount.
I’m fairly pleased with how the components look visually. Especially the round mount, chunky feet on the floor tom legs and the unusual looking spurs.
Prepping the Shells
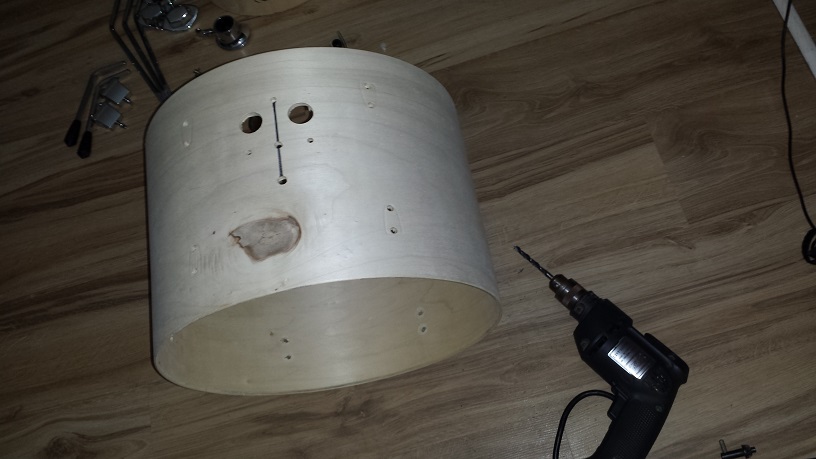
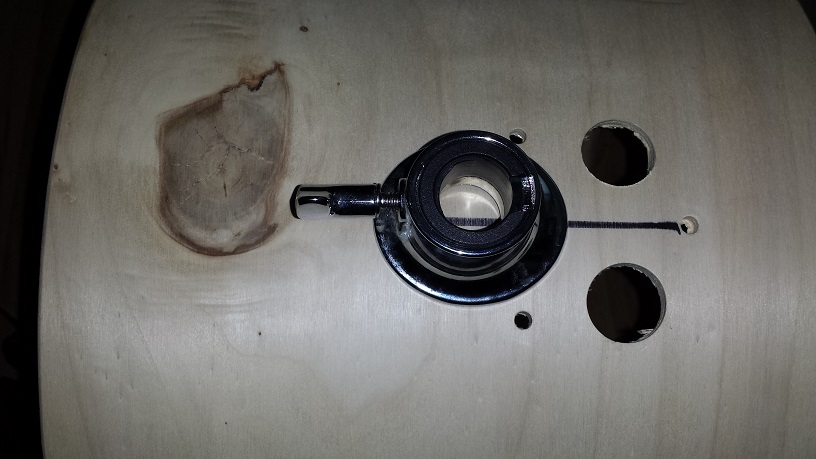
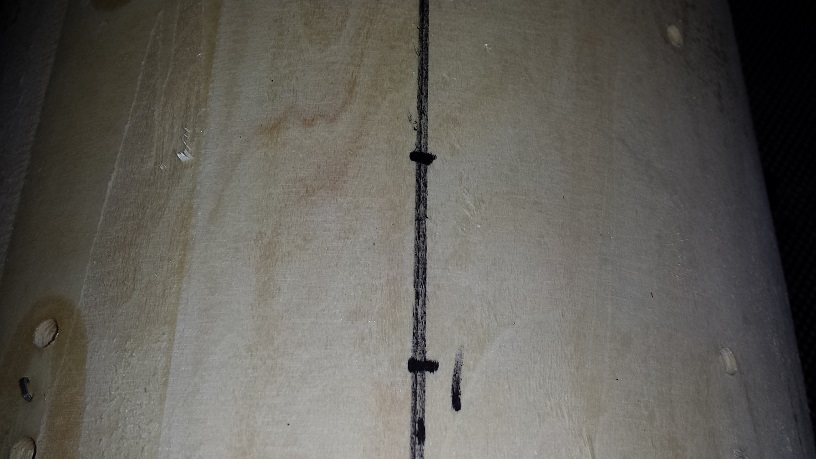
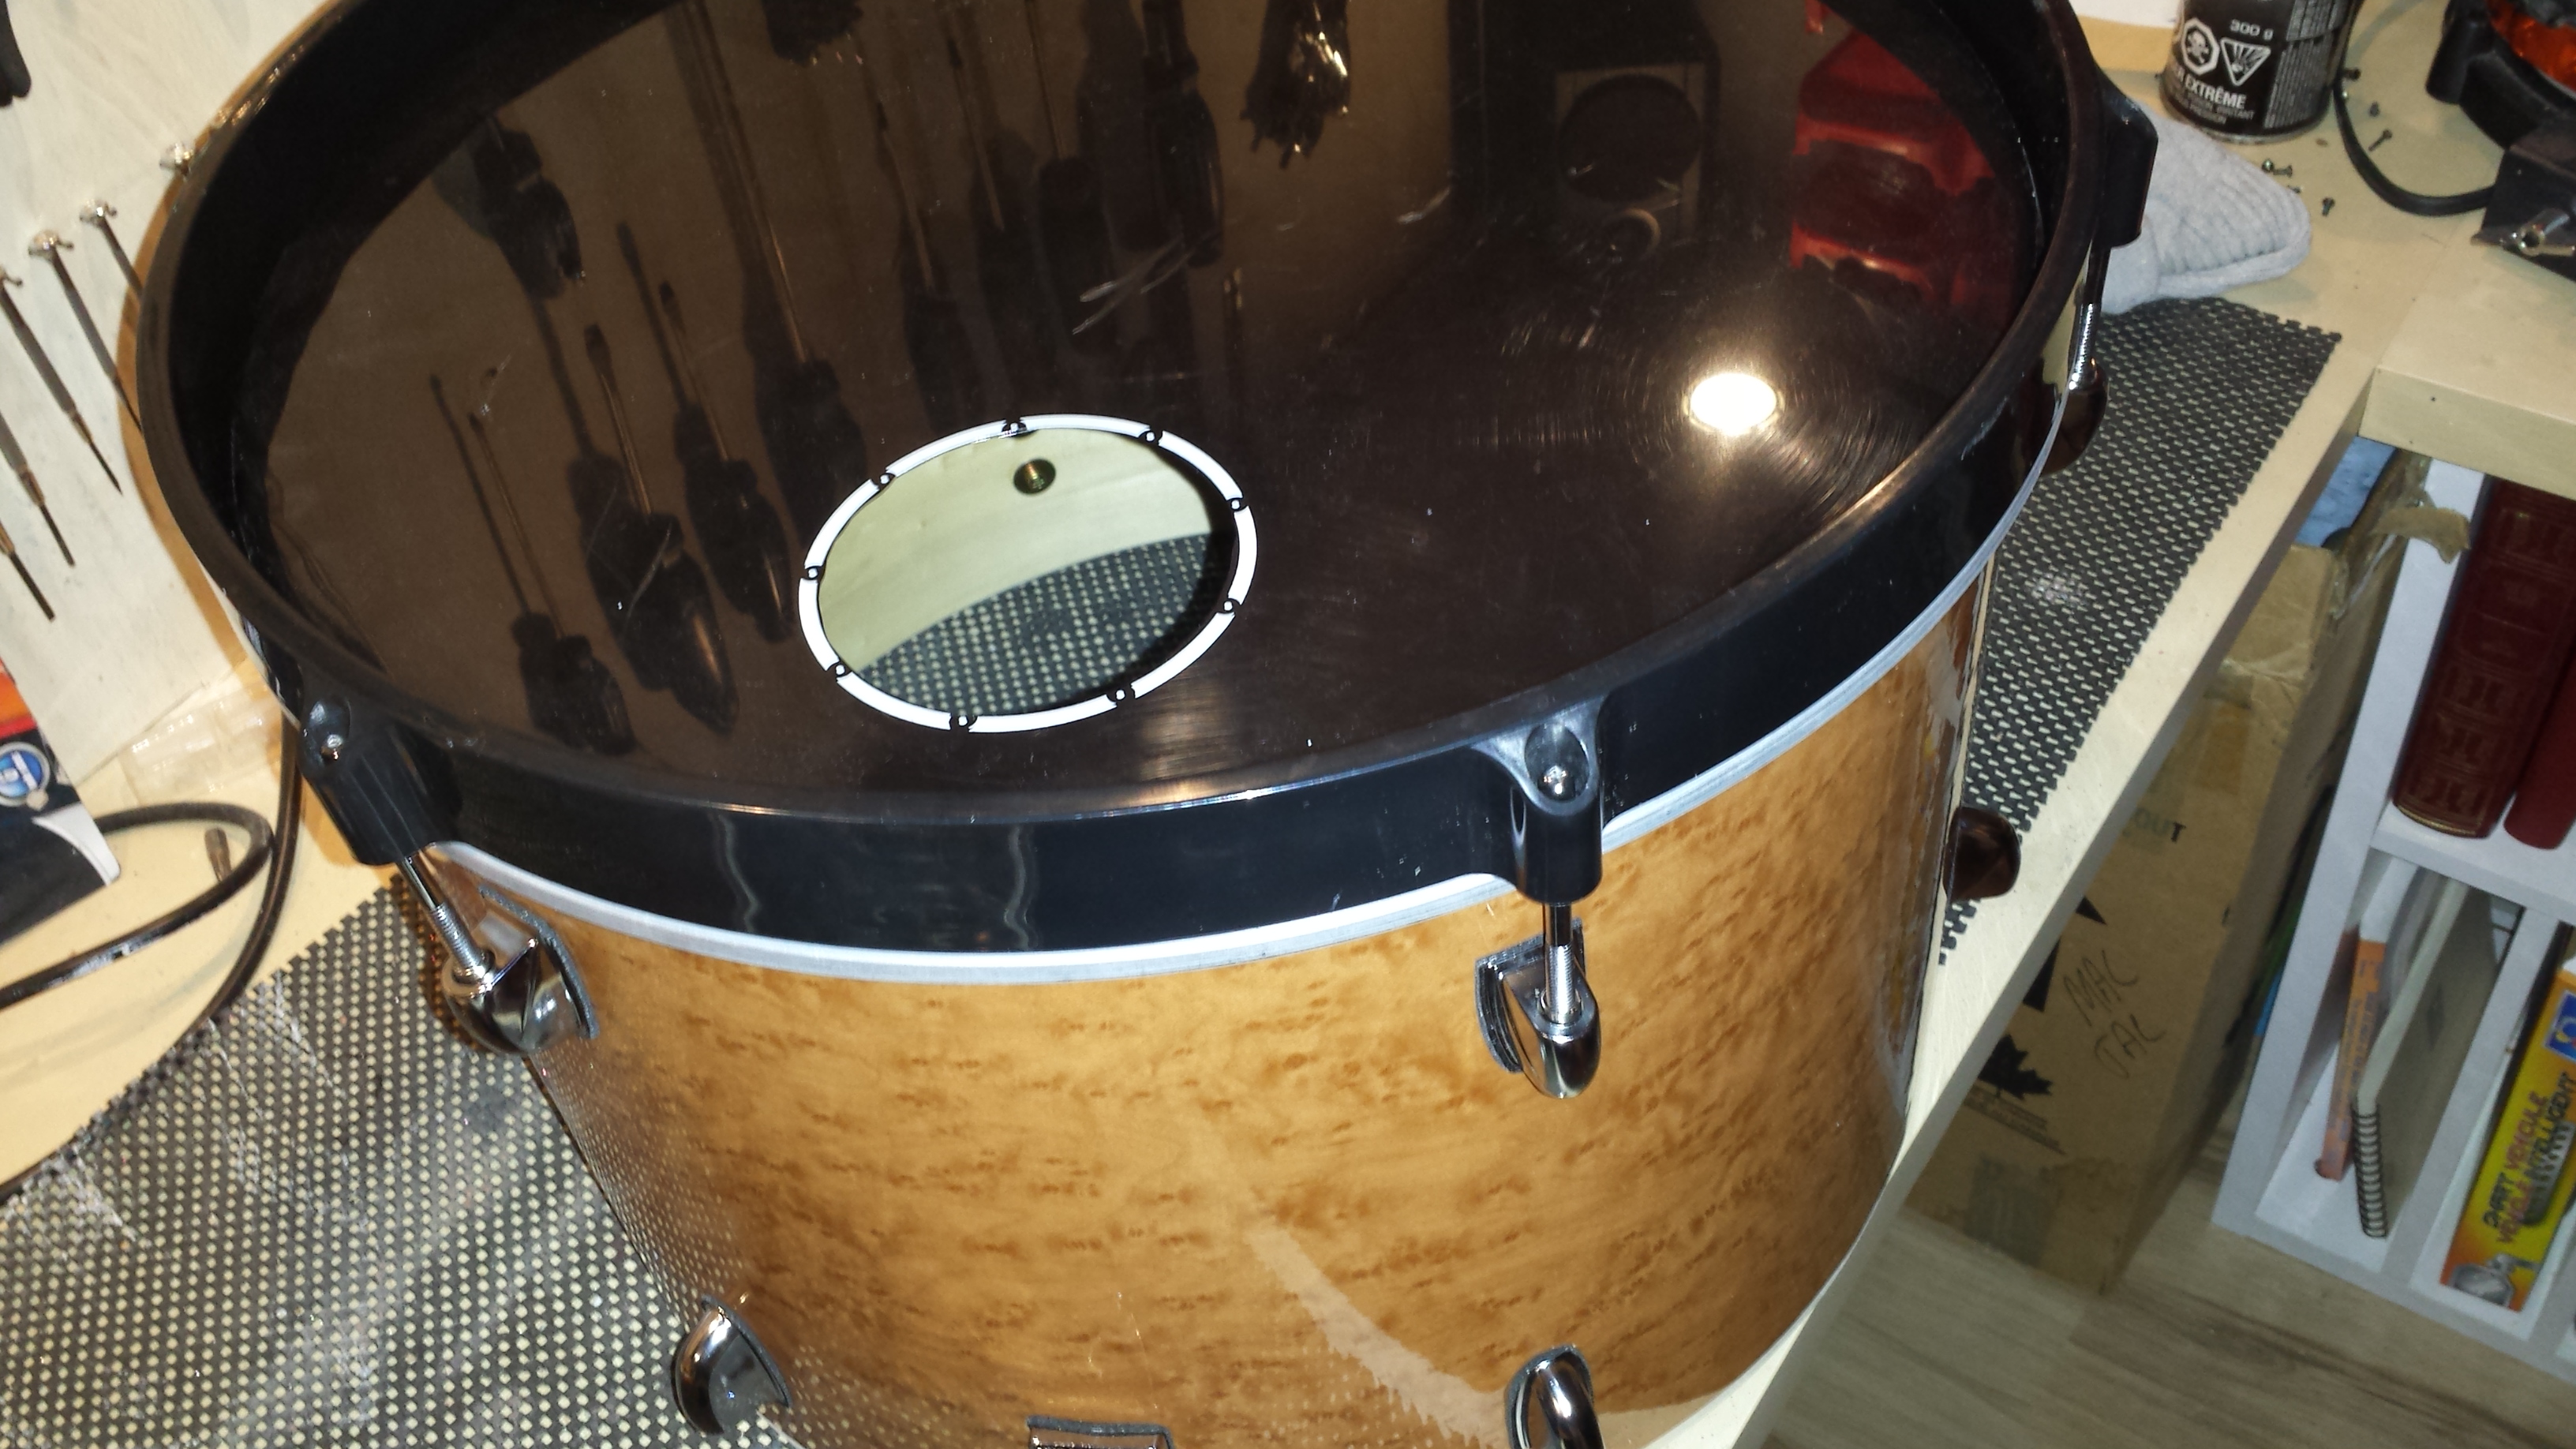
Let’s get all necessary holes drilled before sealing the insides. The bass drum will need holes to mount the platform and pass through the tom holder rod as well as mounting holes for the spur brackets. Screw holes for the floor tom legs will also need to be drilled in the 12″ shell.
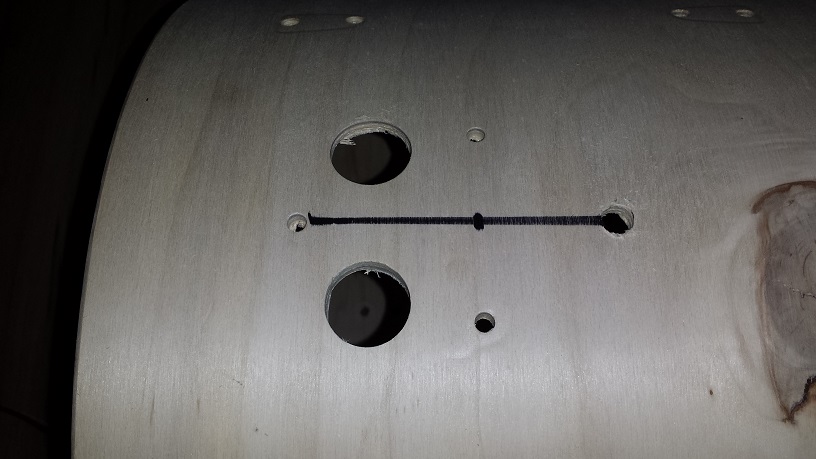
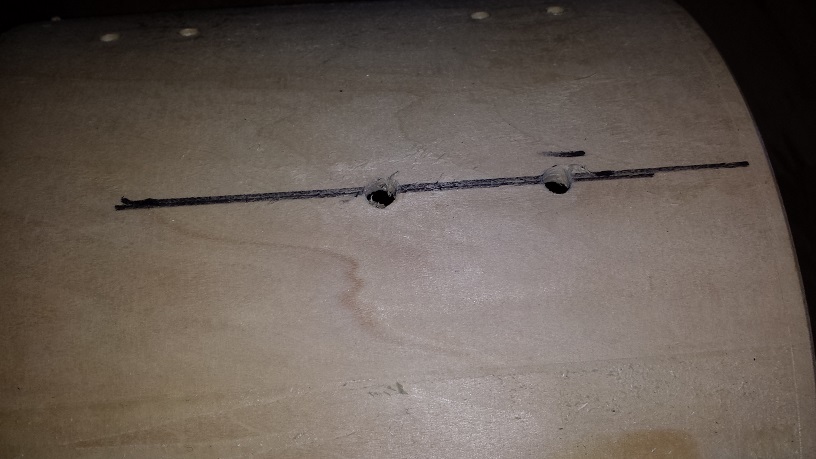
I begin all holes with marking a centre line parallel with the existing lug hole lines. Then mark the hole positions by copying the distance between the screw posts in the hardware. For the tom mount platform on the bass drum, I use the bracket as a template to mark the large pass through hole once the screw holes are drilled. To drill the holes I use a brad point bit in a corded drill. Most cordless drills are too slow to drill a clean hole. If your drill fits inside the drum shell, start drilling from the outside until the brad point pokes through, then continue the rest of the hole from the inside. Use the highest speed and very little force for best results.
The pass through is drilled in the same manner, only with a 7/8″ spade bit and much slower speed. For the floor tom leg brackets, I draw a centre line between the lug hole lines, then mark the lowest hole a determined distance from the edge, then the other hole according to the distance between the screw-posts on the brackets.
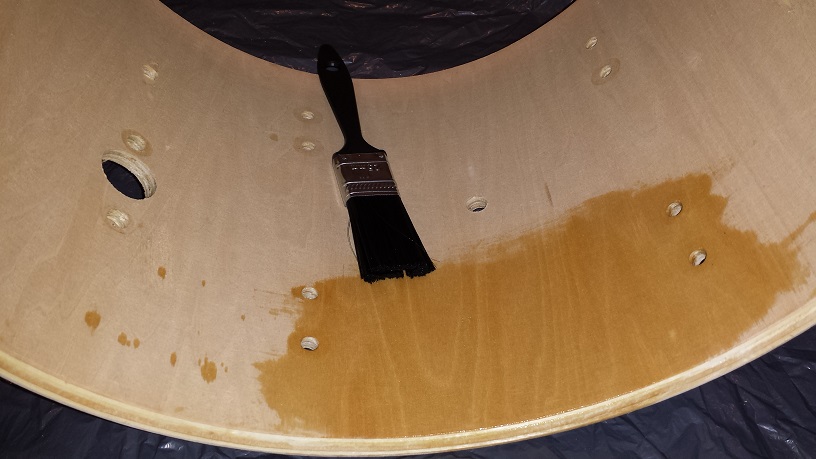

With the holes drilled we can move on to sealing. I use wipe-on, satin finish polyurethane, although I apply it with a brush. All kinds of sealers can be used depending on preference. Aluminum rust paint makes a great substitute for Gretsch silver sealer and gloss clear coat looks great too. I do like the satin finish mostly because it resembles the finish Taye use in their shells.
The first coat is applied fairly liberally and rubbed into the wood with the brush. Leave to dry overnight. Unless you intend to sand or cut the bearing edges, make sure to mask them before sealing. The bearing edges need to be bare wood to avoid the heads sticking to them, making tuning far more difficult than necessary.
After the first coat is fully dry we can apply the second coat. Since this coat doesn’t soak into the wood it needs to be applied thinner and with more attention to spreading it out evenly.
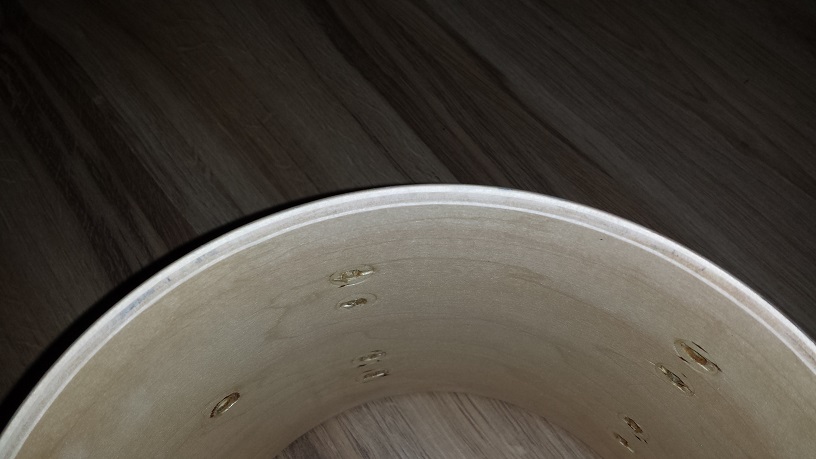
Once the sealer is fully dried we can sand the edges. I take my time and patiently shape them until they are as perfect as can be. Starting with somewhere around 100-grit to remove any sealer and then switching to around 200-240 grit to shape the outside bevel a bit rounder and make the entire bearing edge butter soft.

This is a step where patience pays off. One of the biggest differences between entry level drums and high end drums are the bearing edges. If you can get them perfectly level and to the desired shape it will have a noticeable impact on the drum’s sound. I do my best to copy the edges on Taye drums, both the surface smoothness and the shape of the bevel. It helps to have a particular shape and texture in mind when sanding, so that there is a goal. I haven’t come across a Taye drum i didn’t like the sound of, so I copy their edge shape, edge texture and the inside texture of their shells. If you have a favourite drum you really like the sound of, it doesn’t hurt to use that as your mental template.
My go to sander is one of those mouse-shaped detail sanders. When sanding inside edges or shell interiors the edge of the paper gets worn quite fast. Every now and then I switch the orientation of the paper and also the position, to spread the wear a bit more evenly.
Wrapping the DIY Mini Bop Drum Kit

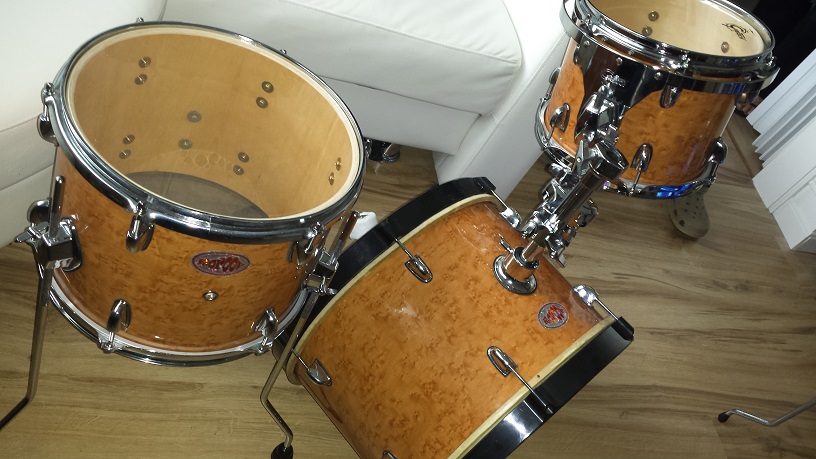
Starting with the 10″ tom, wrapping is done according to Method 4 of our Drum Wrap Instructions Article.
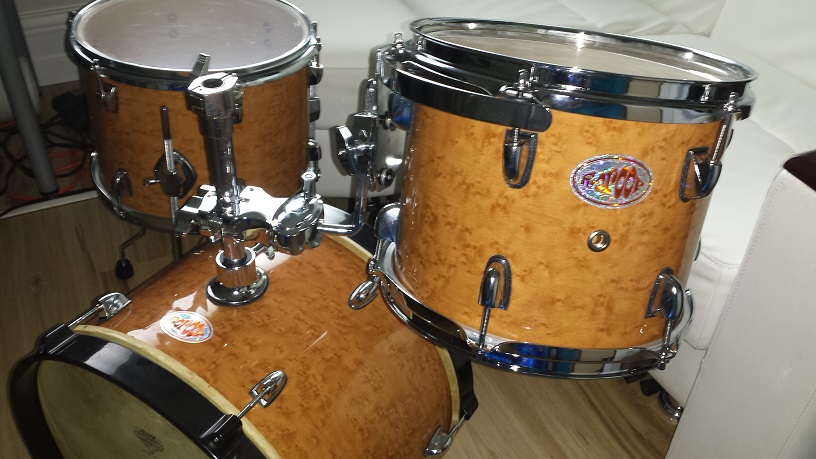
We’re using Walopus Standard thickness wrap, which is roughly 20 mil thick or about the thickness of a credit card. The design is fitting for our Classy DIY Mini Bop Drum Kit.
Since my drill won’t fit inside the tom tom shell I make the holes in the wrap with an Exacto-knife.
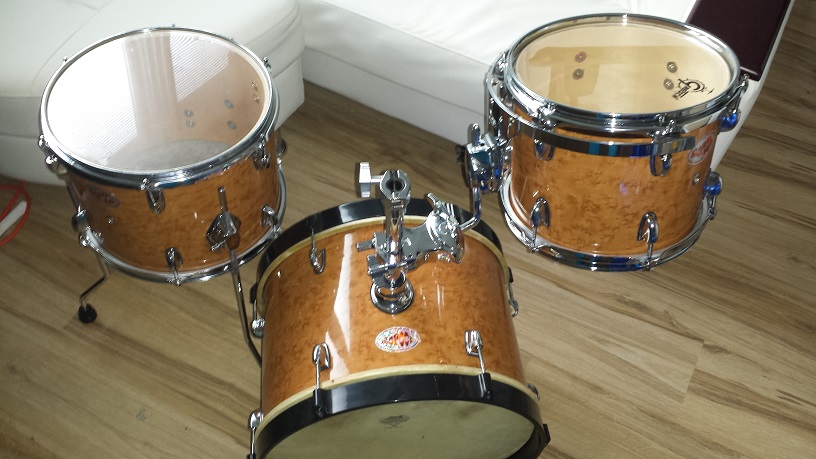
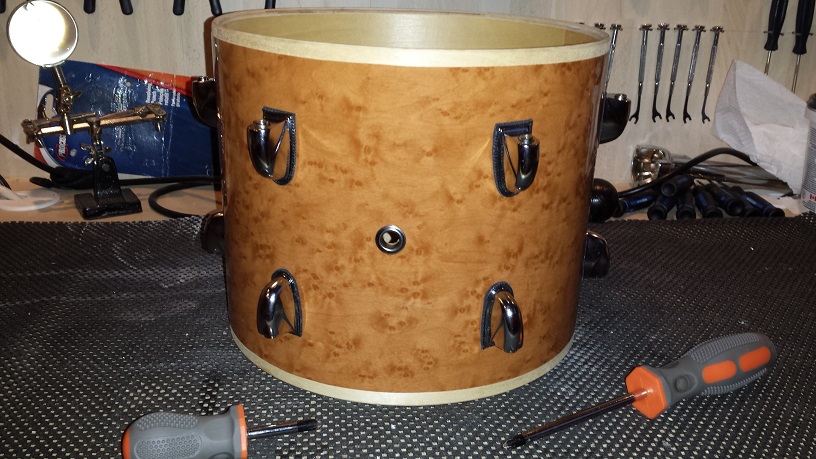
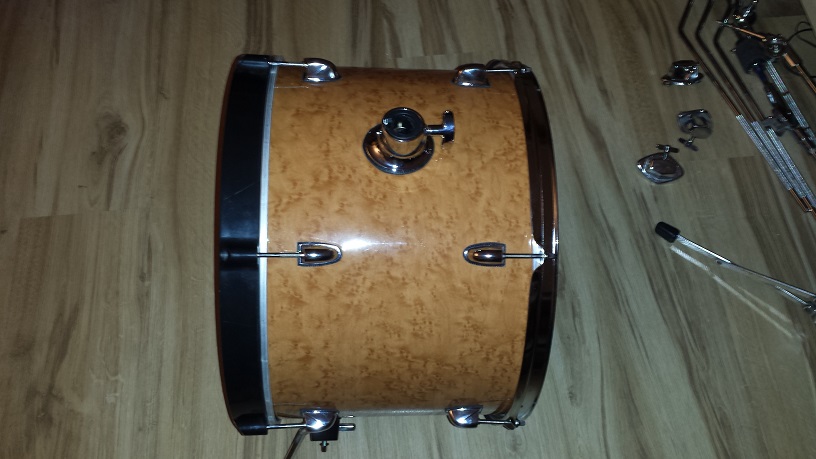
The bass drum and floor tom get wrapped up in the same manner, except I use a drill to make the holes through the wrap, drilling from the inside of the shell at high speed. The only exception being the 7/8″ pass through hole in the bass drum, for the tom tom holder. This hole gets done with the exacto knife.
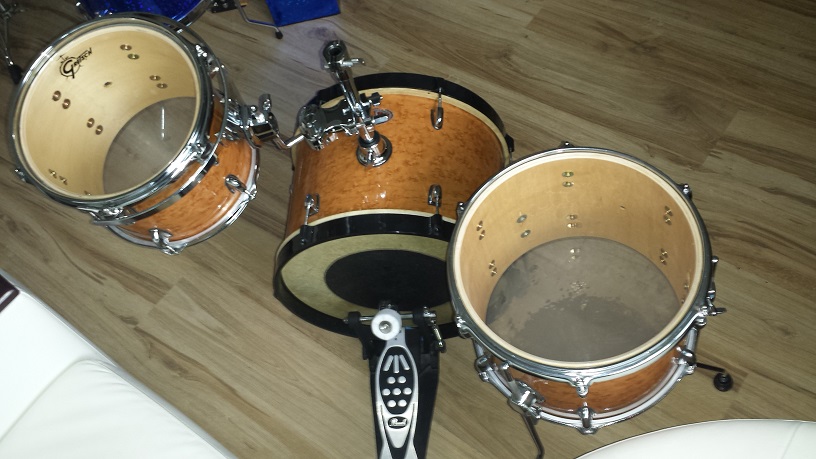
DIY Mini Bop Drum Kit
Assembling the Individual Drums
First up for assembly is the tom tom. Before we can start putting it together though, we need to perform the tedious and boring task of making ISO Gaskets. Check our separate DIY Isolation Gaskets Article for instructions. Pop in the air vent and then install the lugs. I take the time to give each lug a quick buffing with a micro fibre cloth before installing. Don’t forget to stuff your lugs with cotton balls if the have springs. Take care not to over-tighten the lug screws. Somewhere just past “snug” but not real tight is just about right. It takes a while to figure out the position of the suspension mount depending on which way you want the vent hole facing and where a badge may be positioned.

The bass drum gets assembled in the same manner as the tom tom. Don’t forget to cut a pass through hole in the ISO Gasket for the mounting platform. I did but I managed to cut it from the inside without removing it again.
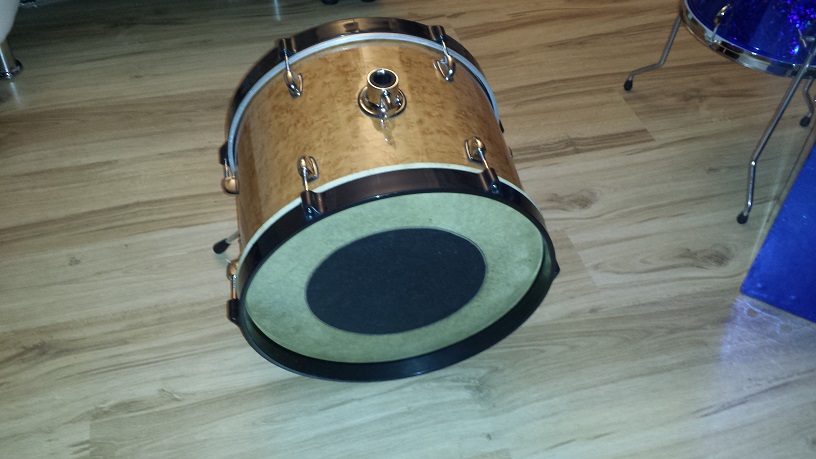
To make the little 16″ sound like a bass drum, I adhere an arched piece of craft foam to the inside of the resonant side head. Simply attach with double sided tape. A hole also gets cut out with the exacto knife after installing the head and tuning it up.
For the batter side I dig up an old actual animal hide head from the deepest depths of the storage area in the cruddiest, dampest and dustiest corner of the basement. These old hides are a real PITA to tune but provide a great bass drum sound once you get it tuned up.
The oddball fibreglass hoops give the whole thing a bit of a cartoon-ish look. At first I was going to use a regular steel rim on the batter side but that looked lop-sided. I haven’t decided 100% on these hoops. We’ll see if they get replaced or if they end up growing on me.


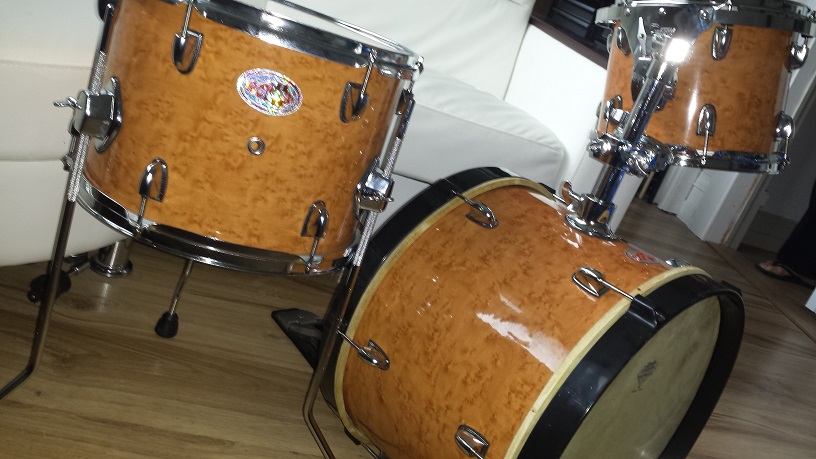
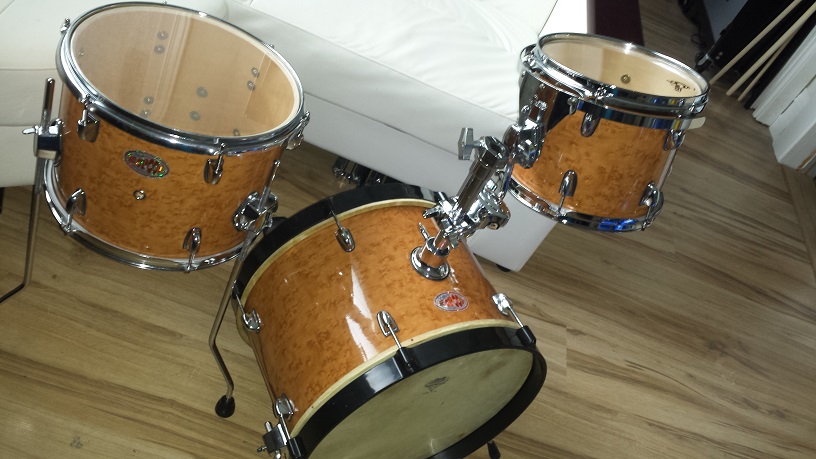
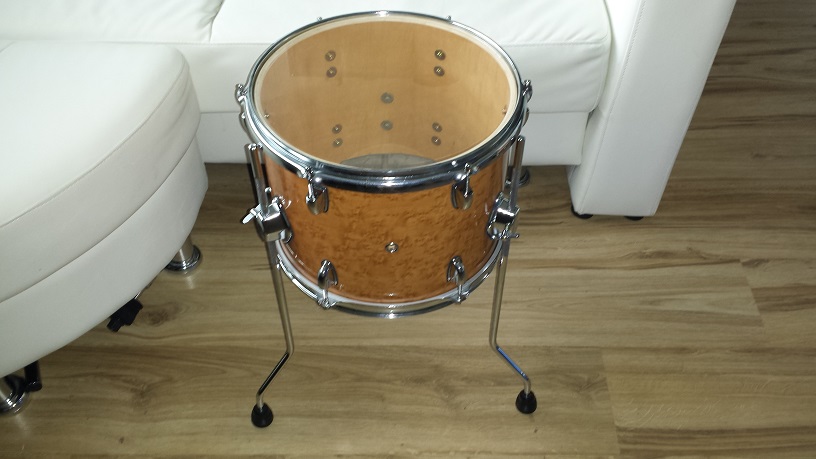
Bada-boom, bada-bing, the floor tom comes together without drama. Left to solve is how to mount the tom tom to the bass drum. I have a couple of Mapex L-rod ball mounts but the posts are thicker than the regular 7/8″ receiver used on the bass drum. I’ll have a look at the various odds and ends in the treasure box and see what I can come up with. Meanwhile, here are the toms all done except badges.

Assembling the Classy DIY Mini Bop Drum Kit

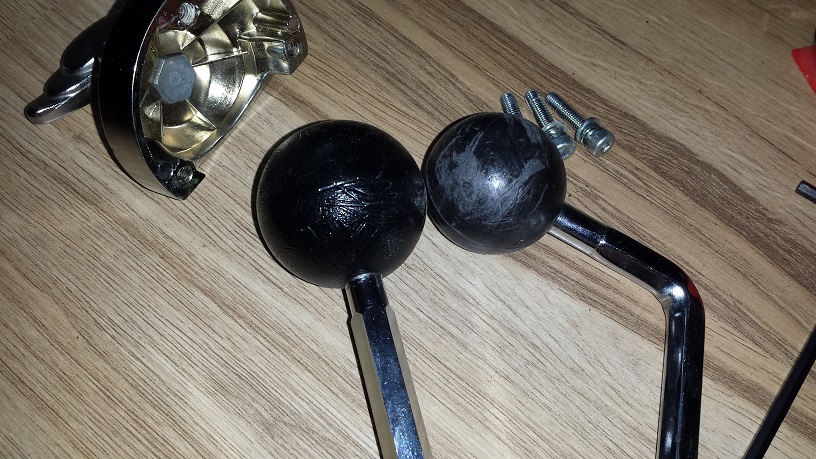
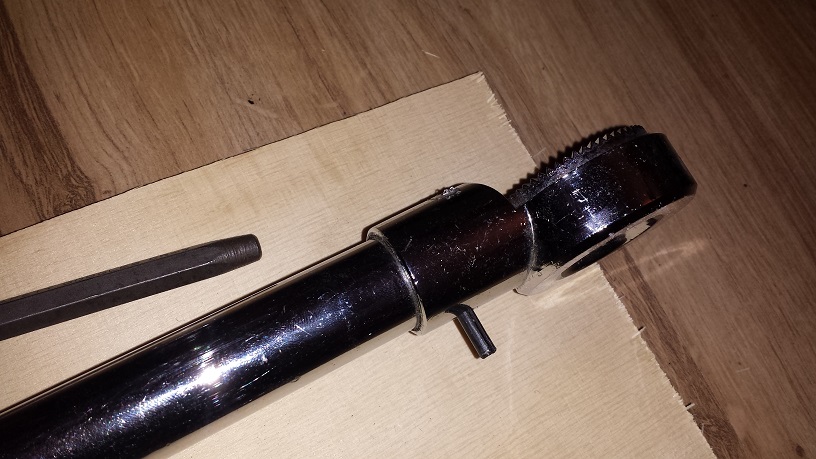
Before the kit can be set up, I need to figure out how to mount the tom tom to the bass drum. I found a Yamaha tom holder with a straight ball rod in the treasure box. Maybe I can just interchange the ball with the L-rod from the Mapex with the one in the yamaha? As it turns out, Mapex don’t have as big balls as Yamaha. In the treasure box there was also a Premier clamp style double tom holder. Unfortunately, Premier don’t have as big balls as Yamaha either. OK, what about my DW single tom clamp? Yamaha’s balls are bigger than DW’s as well. Looks like Yamaha has the biggest balls in the industry. I’ll have to come up with another plan.
Next I attempt mating the Mapex top with a 7/8″ post from a Pearl L-arm. Should be simple enough. Knock the pin out from the pearl arm and disconnect the ratchet joint from the arm. Then I knocked the pin out of the Mapex holder but it still would not separate no matter what I did…..
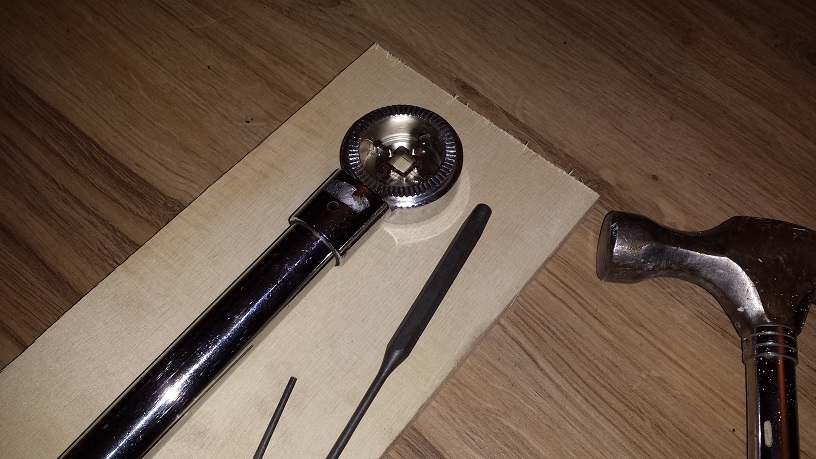

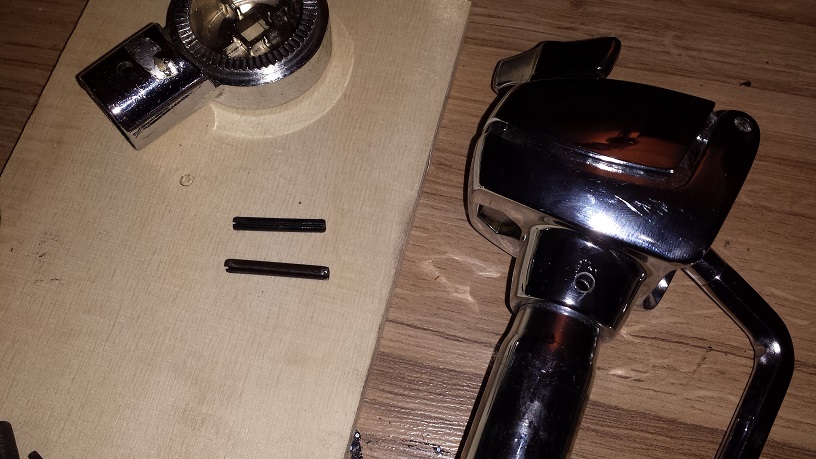
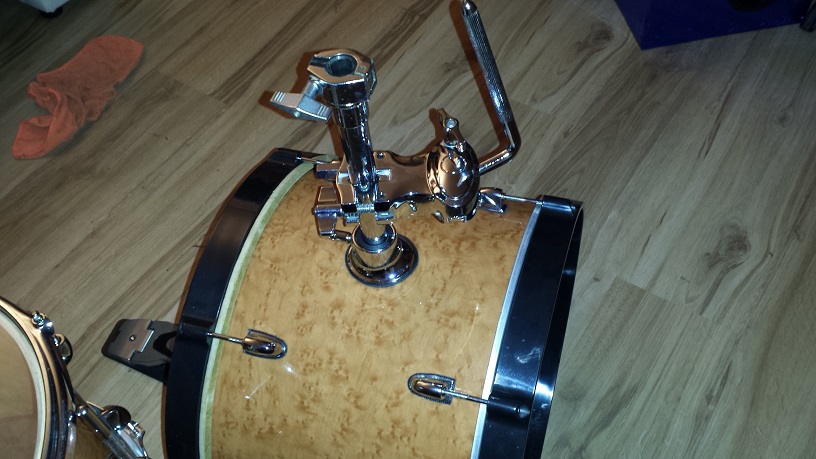
If this is ever going to become a Classy DIY Mini Bop Drum Kit, I’m gonna’ have to simplify my approach. I grab the middle post from an old cymbal stand and clamp on the aforementioned DW single tom holder. Bada-boom bada-bing. Why didn’t I just do that to start with?
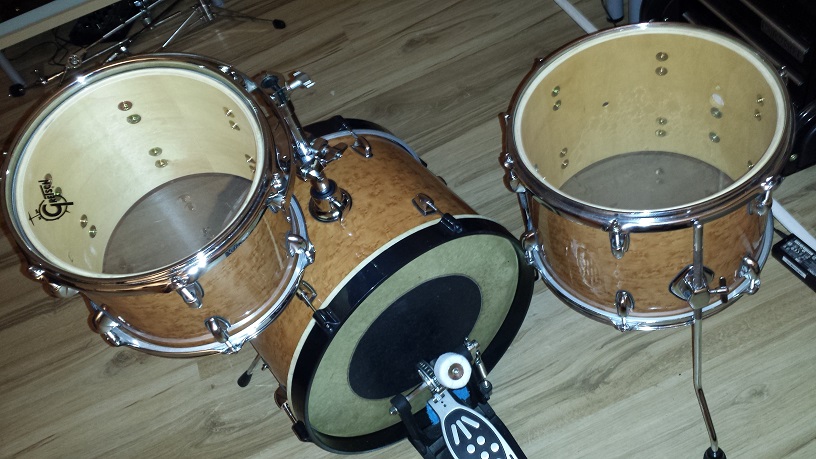
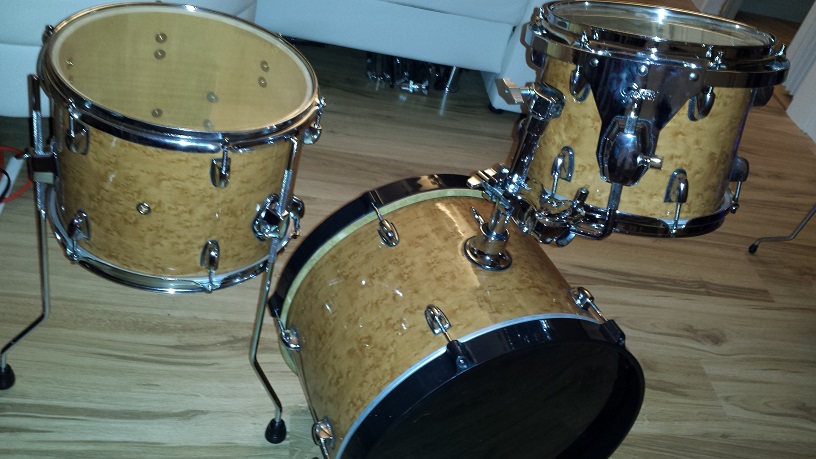
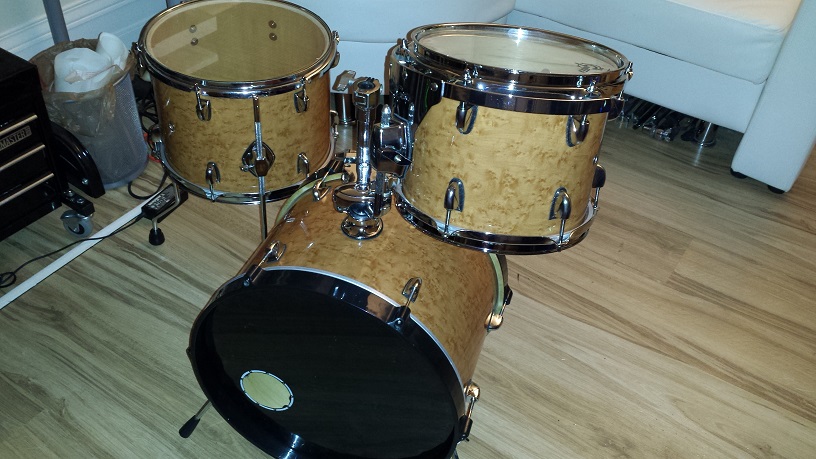
Now I just have to tune them up and find a snare that will sound right with them. I also ended up exchanging the resonant head for animal hide as well. This one originally came on the floor tom of a Leedy Drum Kit from 1958. here’s the finished 3-piece. For now I’m just gonna’ play it with a 13″ Dixon steel piccolo snare that sounds “right” with it.