

Introduction
Since we call a bop kit with a 16″ bass drum “Mini” and a 14″ bass drum “Nano”, then this Tiny DIY Drum Kit with a 13″ bass drum will go by “Pico-Bop”. This project won’t simply be a tiny little bop kit with a 13″ bass drum though. Employing some acoustic resonance engineering, the little 13″ bass drum should sound more like an 18″.

Don’t believe me? We’ve consulted with some folks that are considerably smarter and more knowledgeable than myself. According to their calculations, the bass drum design we’ll be using will have the frequency range of a regular 18″ bass drum, as well as providing a characteristic bass drum sound. Still sceptical? I have to admit that so am I. We’ll know for sure once this tiny DIY drum kit project is completed.
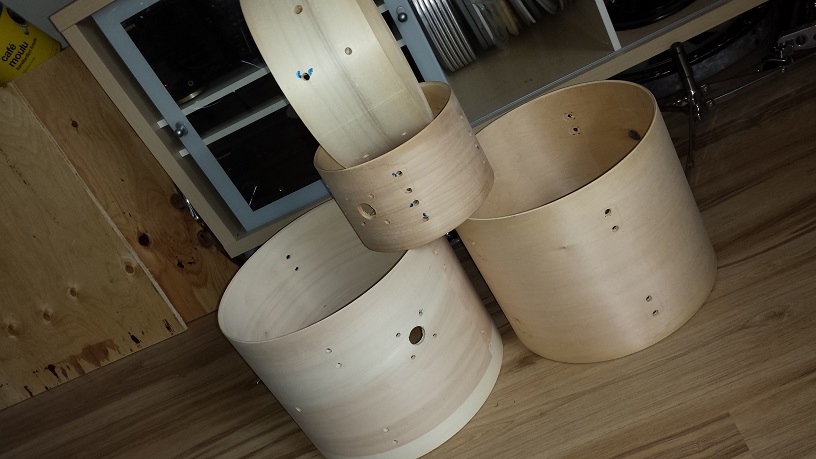
Obviously the whole idea of making a smaller size drum kit is to reduce the footprint on stage, in the living room/jam room/bedroom, or for portability. As such we aim to make the 13″ bass drum as compact as possible, even with an additional acoustic chamber. Said chamber will also double as a cradle and feature an integrated pedal mount. The rest of the drum kit will be of “Pico” proportions too. As fate and luck may have it, I came across some perfect candidate birch shells in the sizes: 13″ X 10″ for the bass, 12″ X 10″ for the floor tom, 8″ X 5″ for the tom tom and 10″ X 4.5″ for the snare.
In broad strokes, the plan is to seal the shell interiors with a satin finish clear coat. The exteriors, including the cradle-chamber for the bass drum, will once again get wrapped with one of Walopus‘ funky drum wraps. Bearing edges will get re-cut and sanded as required. For these small birch shells I think we’ll go with 45 degree inside edges and round-over outside edges. All the lugs, brackets and mounts will be secured with DIY Isolation gaskets. The bass drum batter head will be receiving some tweaking treatments and the other details will have to get ironed out as we go.
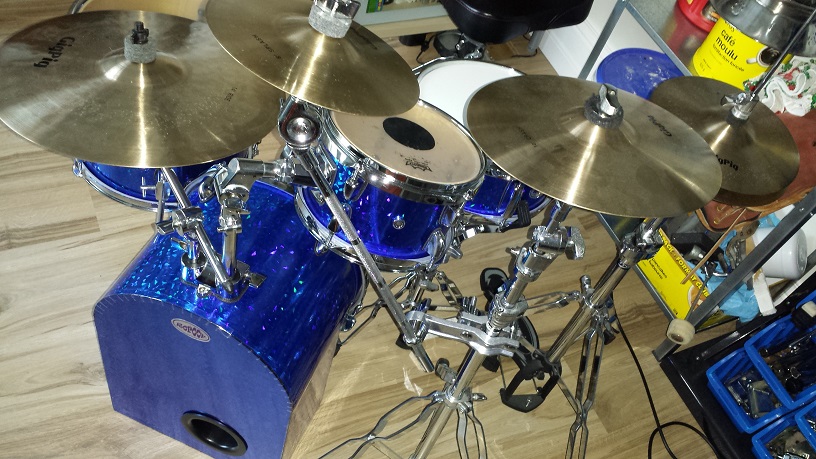
The “Pico-Bop” Optimized, Tiny DIY Drum Kit
Prepping the Shells
The shells we have collected for this project are all from the same kit, except the floor tom. From the identical “Passed” decals and the very similar birch grain as well as hole spacing, I’m guessing it comes from the same factory. If not it’s still a close a match as I could hope for.
Step 1 – Strip the shells to the bare wood. If required, instructions can be found here.
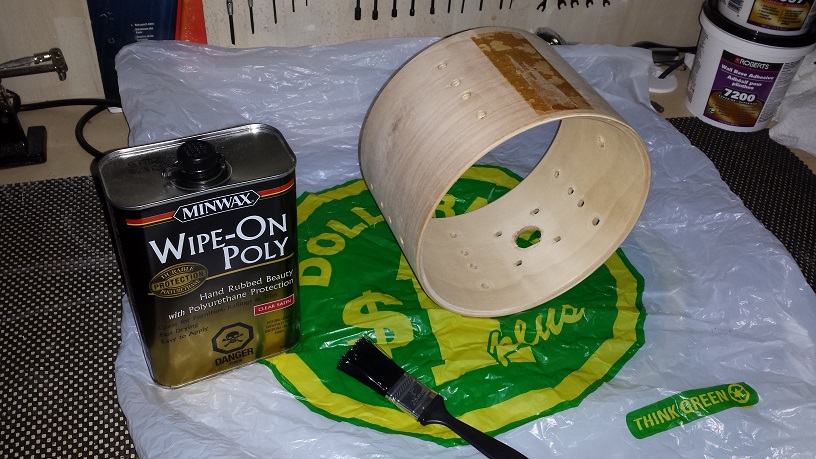
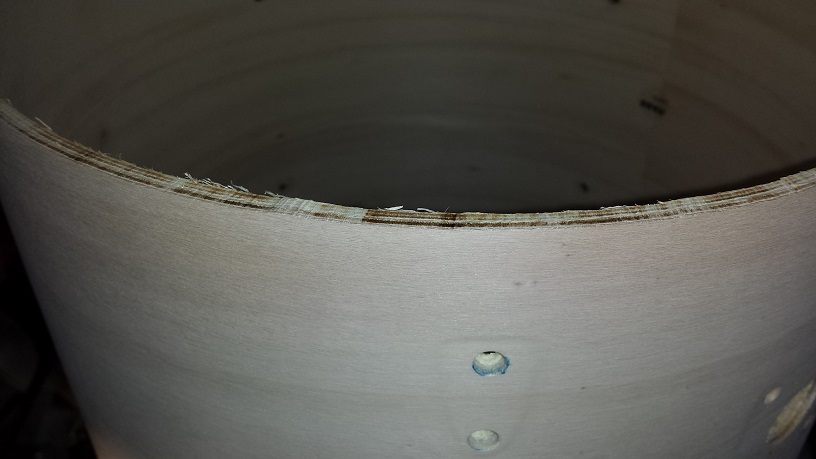
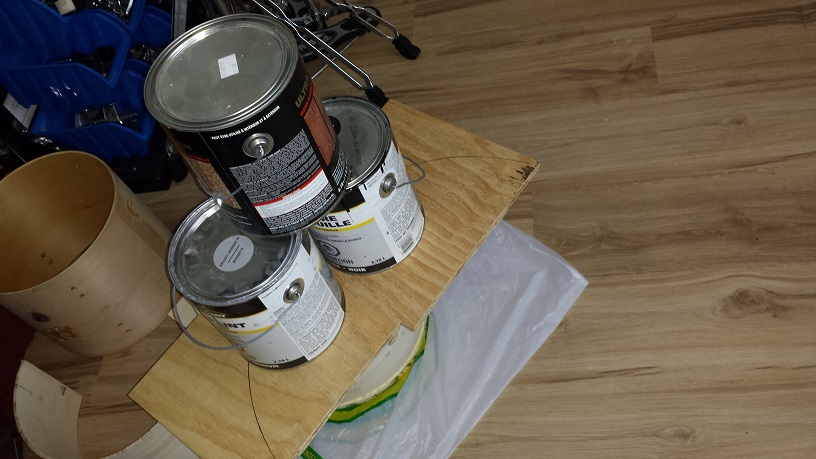
Step 2 – Seal the shell interiors. The 13″ shell for the bass drum is exempt from sealing at this stage. Unless you plan on cutting or sanding the bearing edges, make sure to mask them thoroughly before sealing. On this kit we’ll be sealing with Satin finish Wipe-on Polyurethane. I usually apply two coats with a brush, allowing about 12-24 hours to dry in between. If the first coat raises the wood grain excessively, I sand it down again and apply two additional coats.
The first coat of clear on bare wood is incredibly rewarding in that it brings out the wood grain and gives it depth.
The reason I choose this particular sealer is the final result is very similar to the insides of the shells on the Taye GoKit. If you read my review on the GoKit, you’ll know why I want to copy the interior. This is also the reason for the bearing edge choice.
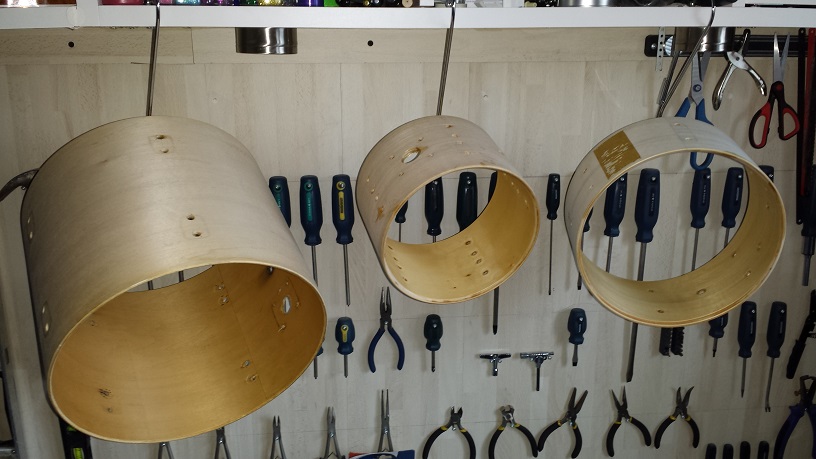
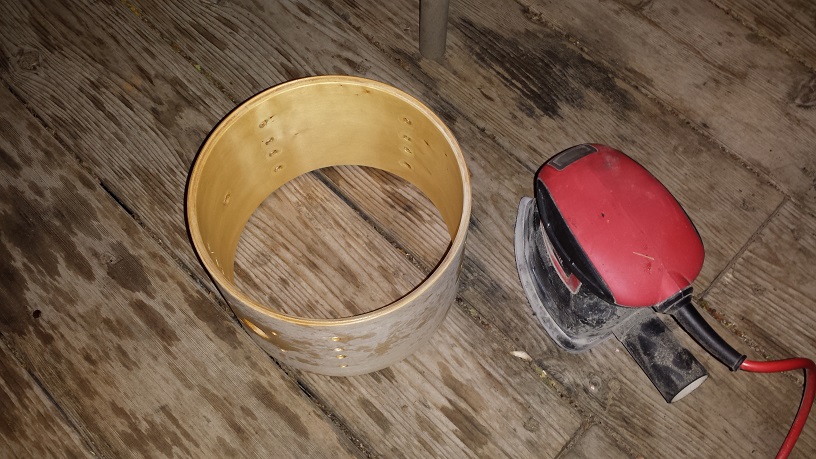
Step 3 – Sand the Bearing Edges. The fundamental shape of the edges on the 8″ tom were just about perfect. The biggest reason for sanding being to remove the stray polyurethane and give the outside 45 degree edge a wee bit of a roundover for increased head-to-shell contact. I give it a quick hit with 120-grit and then spend some time with 240-grit.
Constructing the Bass Drum
This is the fun part. This is no ordinary bass drum. A 13″ shell morphed with a combination of cradle and additional resonance chamber is the “Secret Sauce” of this project. The resonance chamber will incorporate some additional tricks to shape the frequency response.
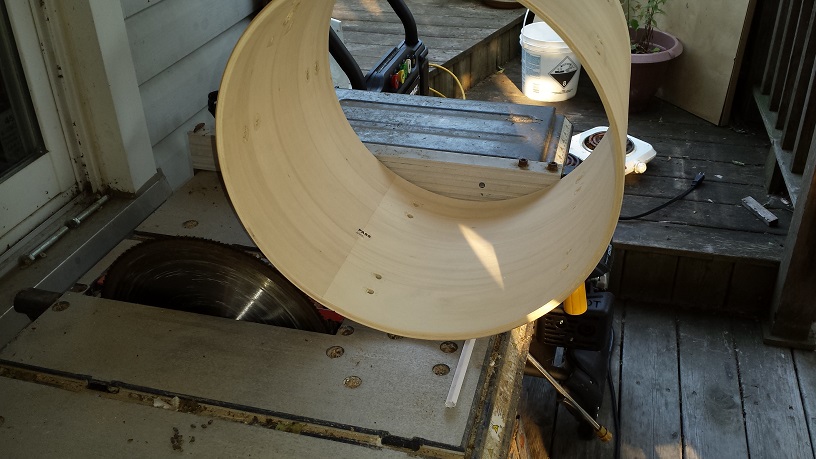
First we need to lop off the batter side bearing edge. What was the resonant side will become the batter side when the drum is done. We lop it off in the table saw using the fence as a guide to make a straight cut. Simply roll the shell into the blade and then rotate it taking care to hold it flush with the fence.
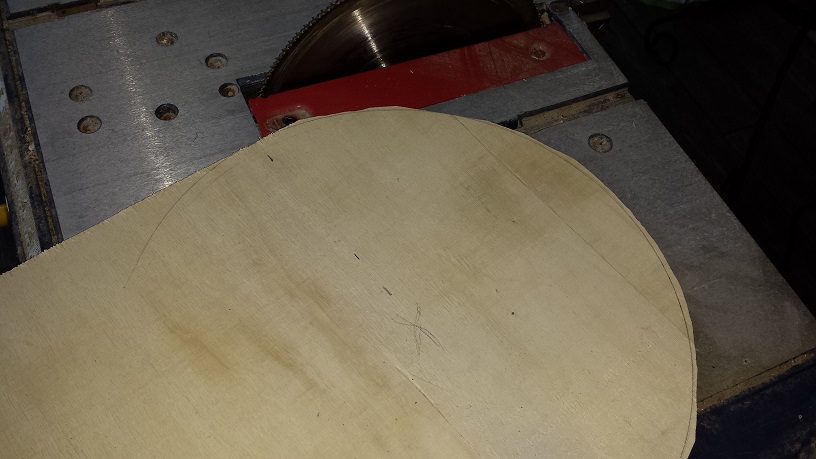
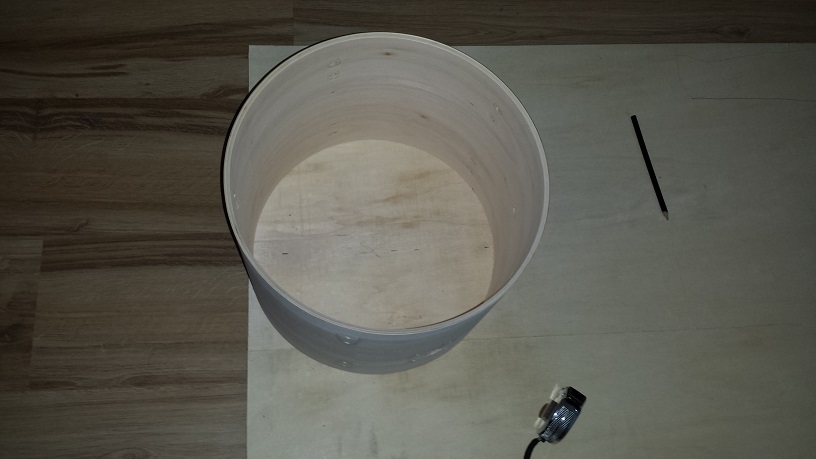
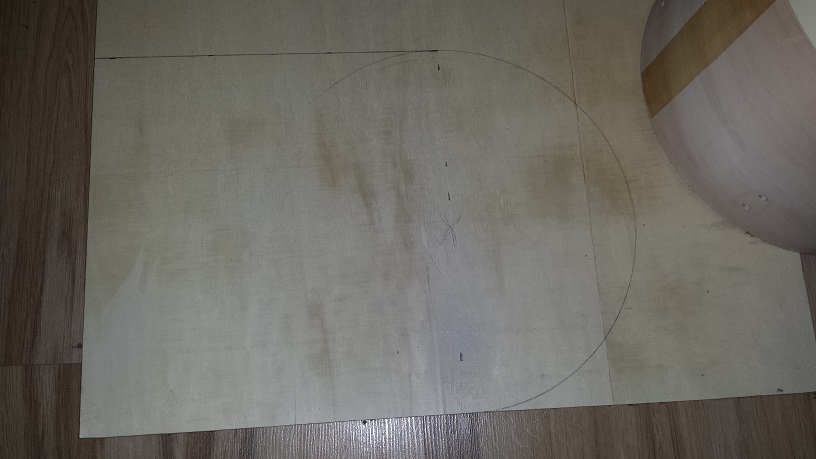
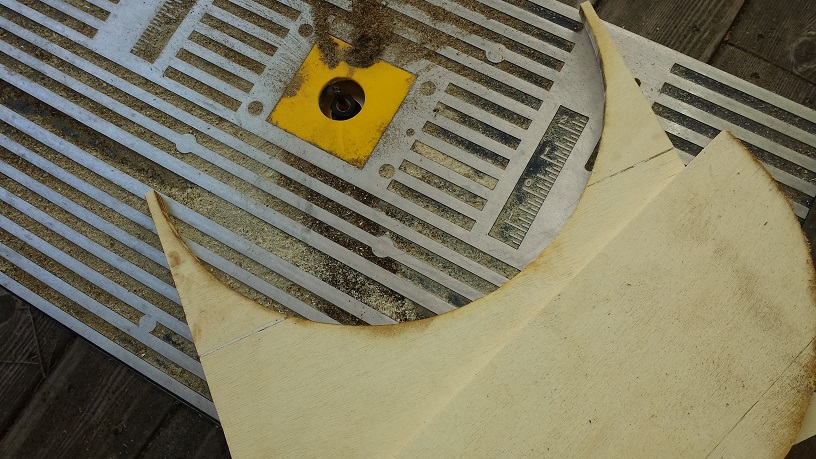
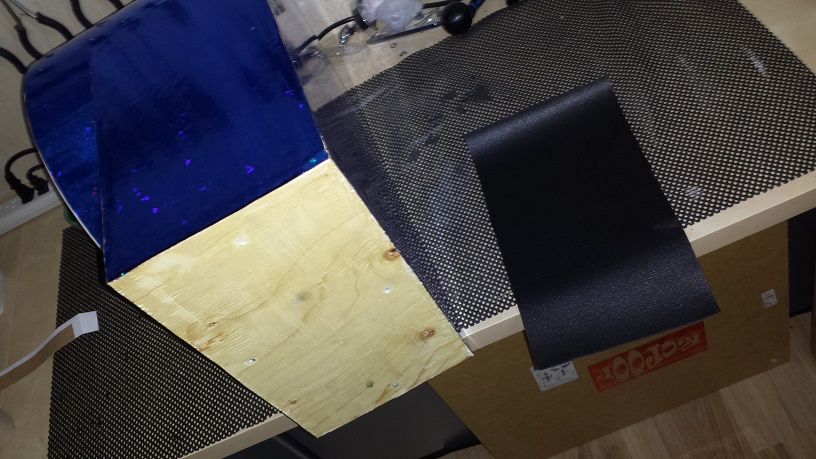
Next make a mark 12″ from the edge on a piece of wood. We’re using a sheet of 1/4 (I think) Poplar plywood. place the shell on the plywood so the center of the shell corresponds to the 12″ mark. (12″ is roughly the ideal height of the beater on the pedal.) align the edge of the shell with the edge of the wood sheet and mark the perimeter circle as per the illustration.
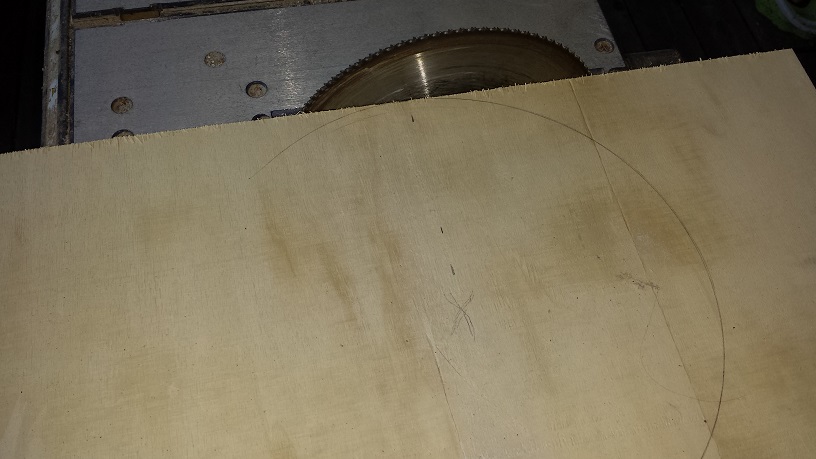
Next mark a cut line parallel to the edge of the plywood at the same width as the outside edge of the drum shell. I find the table saw to be the best tool for cutting the straight cut we just marked. I set the fence so I have a couple mm margin for a first rough cut. After that it’s easy to see how much you need to move the fence toward the blade for the “real” cut. Once the straight cut is done, I remove a bunch of excess wood around the perimeter of the semi circle. This step doesn’t need to be precise at all. It will be properly cut later using the router.
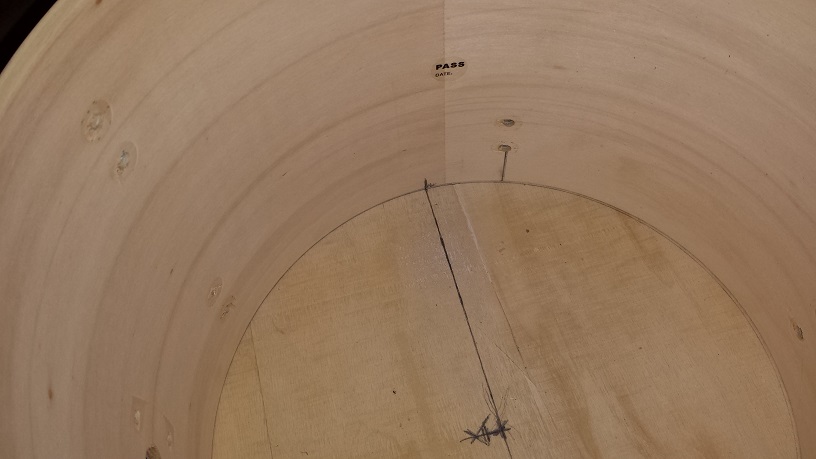
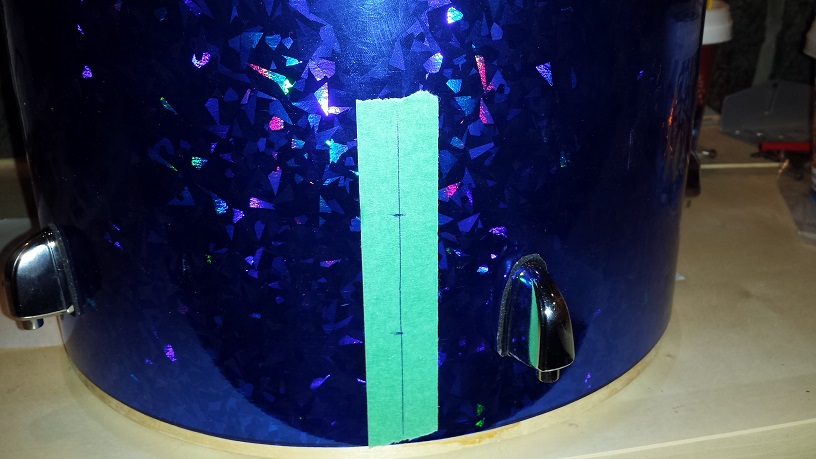
Once the plywood is cut, I perform a quick test fit of the shell on the plywood. Then we proceed with marking a centre-line on the shell. This would have been very simple if I had used a 6-lug drum, but since it’s a 5-lug, I start with making marks at the lug-hole lines and then splitting the difference between those lines and an estimated centreline, rotating the shell, until they come out equal. This should ensure that the tom mount bracket hole ends up pointing upward when the whole contraption is assembled.
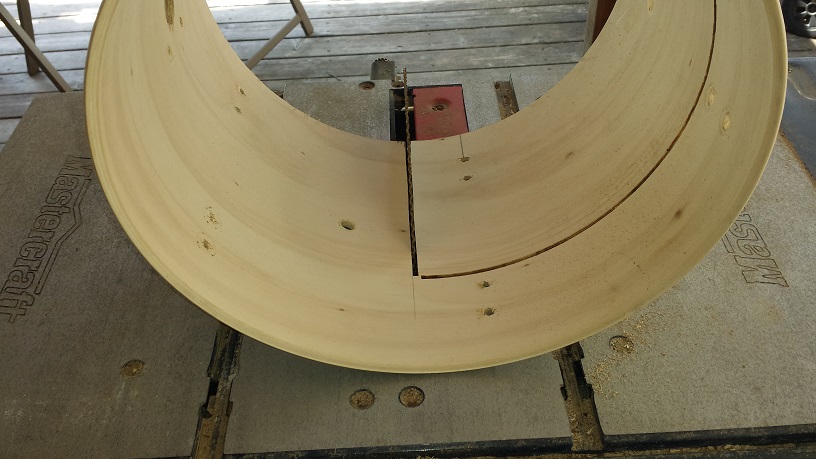
Continue the two centre-line marks through the inside of the shell. Next we set the fence on the table saw from the bearing edge to a bit past the lugs. See the pics and you’ll understand what I’m trying to explain in words. Using the fence as a guide we cut almost to each of the lines on the “bottom” side of the shell. Remove the fence and use the two centre lines as guides to freehand-cut almost to the first cut.


Gently re-insert the shell over the blade at an angle so that the blade’s edge is at 90 degrees to the wood surface and finish the cuts until they meet. Again, refer to the pictures for clarification. Take your time and make sure everything is aligned before cutting.
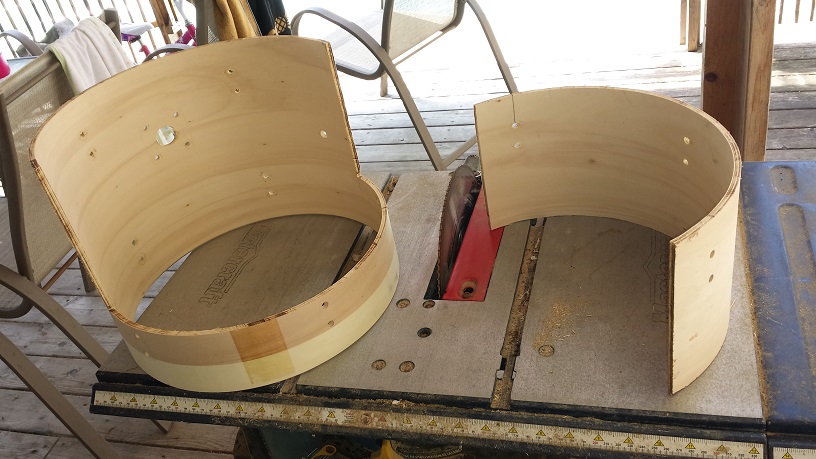
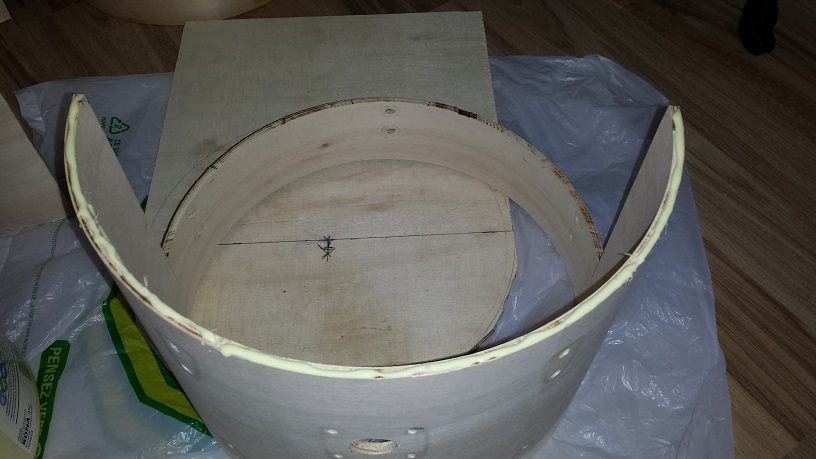
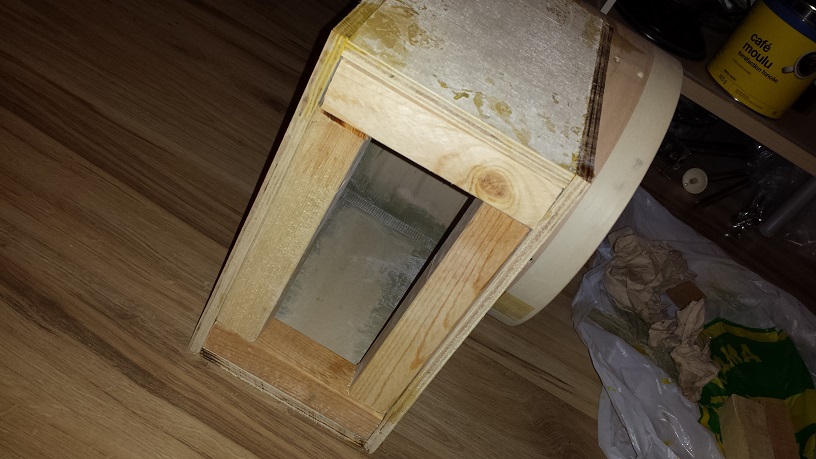
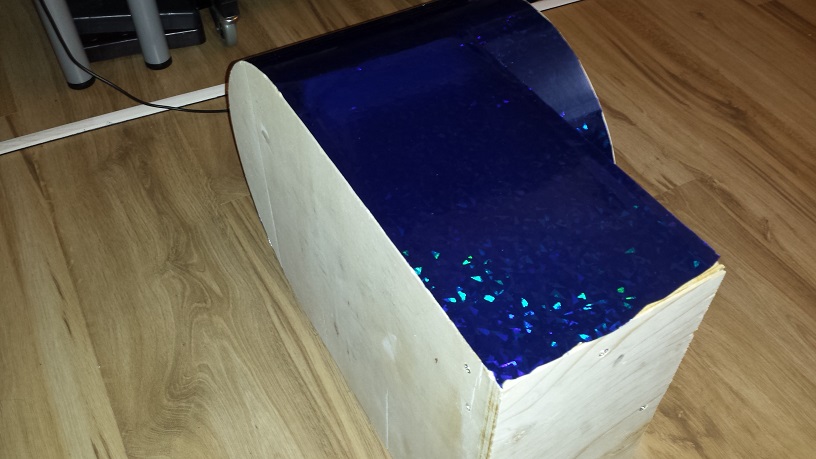
When done we end up with a bizarre-looking partial drum shell. Test fit the bizarre partial shell on the plywood sheet and as long as it fits, apply carpenter’s glue along the half edge. Then place the bizarre partial shell in position and weigh down with a piece of wood and suitable heavy objects. Wipe off excess glue and leave undisturbed to dry for minimum 24 hours.

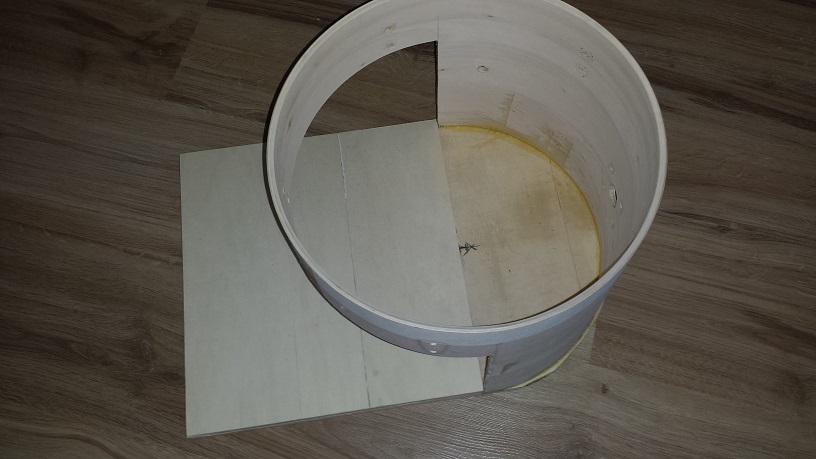
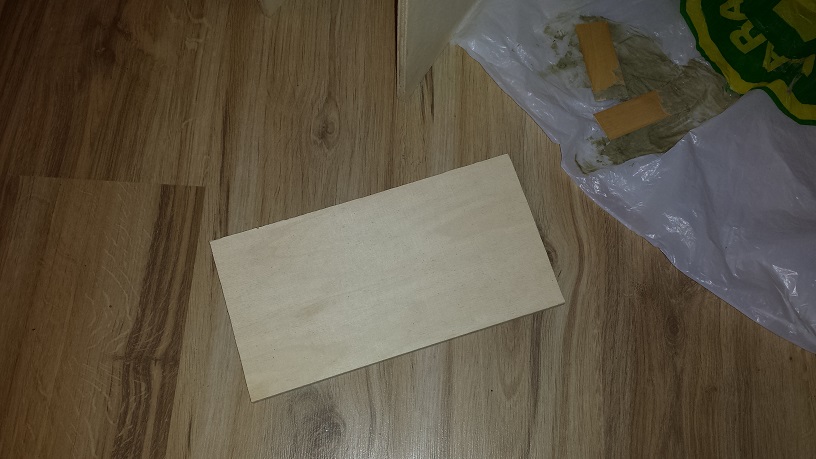
For the opposing “wall” (Batter side) we start with marking a rectangle on a piece of plywood, using the “resonant side wall” as a template. Cut out the rectangle in the table saw. Next mark an arc in the rectangle using the bizarre partial shell as a template. If I had a band saw that’s what I would use to cut the arc, but since I don’t I’m using my router table.
Test fit to ensure that the newly made “batter side wall” is a good fit. Apply carpenter’s glue to the semi circle shell, place the “batter side wall” on top. Make sure to align everything properly. Wipe off the excess glue on the inside while holding the pieces together in position. Place a flat piece of wood over the “wall” and a few heavy items on top. Leave to dry for a minimum of 24 hours.
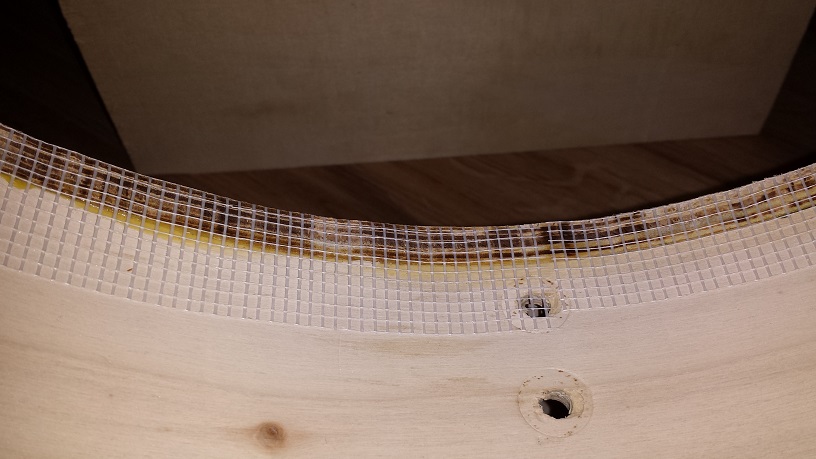
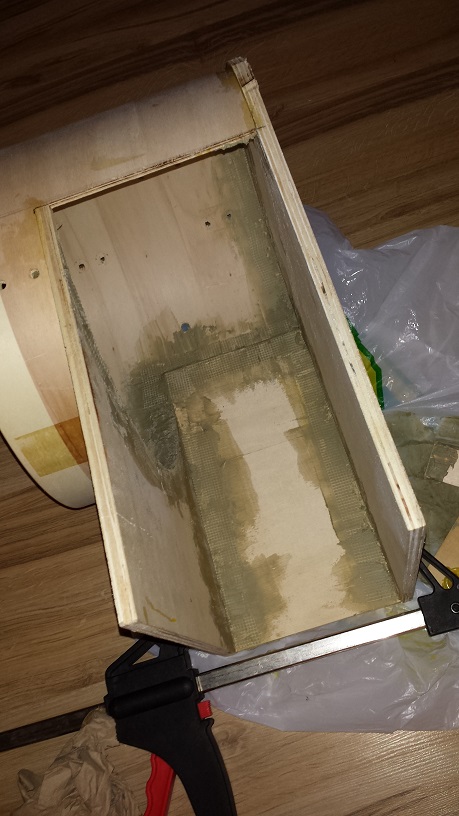
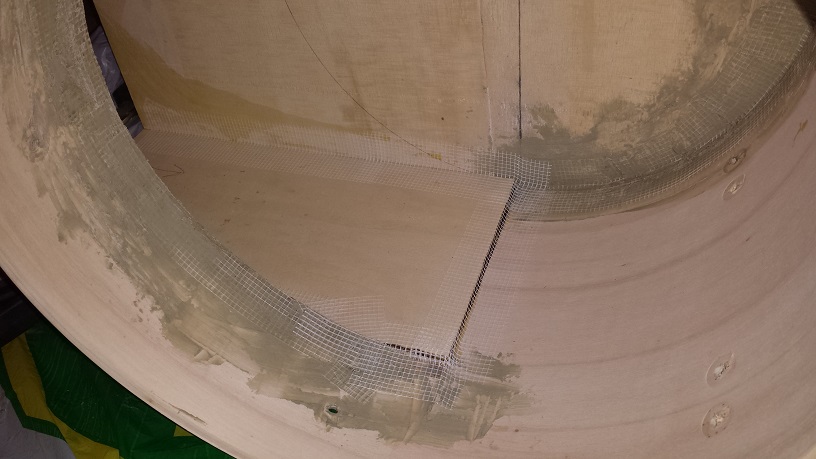
Before making the sides we’ll reinforce the dried glue bonds. If you’ve ever done auto body repair with fiberglass and bondo, this will be a familiar process. If not, don’t worry. There’s nothing to it.
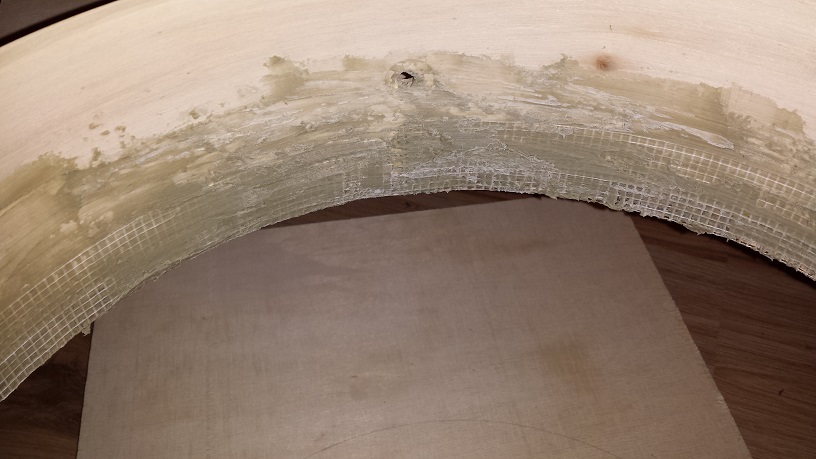
Start with applying fiberglass tape over all the glue bonded seams as per illustrations. If possible use the fiberglass tape from the cement-board section, rather than the drywalling section. Before laying the fiberglass tape on the inside seams make cuts about halfway into the depth of the tape about 1″ apart to aid in conforming to the curve and fold.

Once the fiberglass tape is neatly applied, simply smear bondo all over it. You can use a putty knife, or just about any flat object. I use a scrap piece of wood. Instead of buying a whole can of bondo and mixing, you can also use construction adhesive. It’d just about the same stuff but comes in a handy tube, already mixed. The working time is a bit shorter though so you have to smear it out swiftly once it’s squeezed out of the tube. Try to smear it on thin. It dries extremely hard and is a bear to sand once fully cured. Leave to dry according to manufacturer’s instructions. I would say no less than 24 hours.
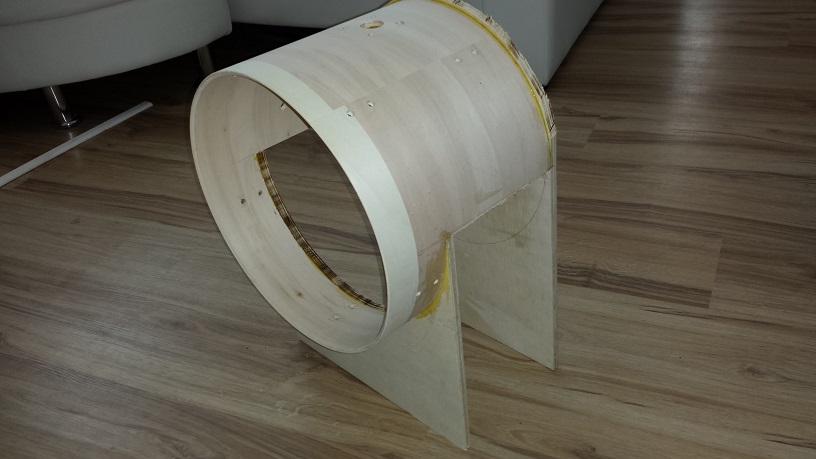
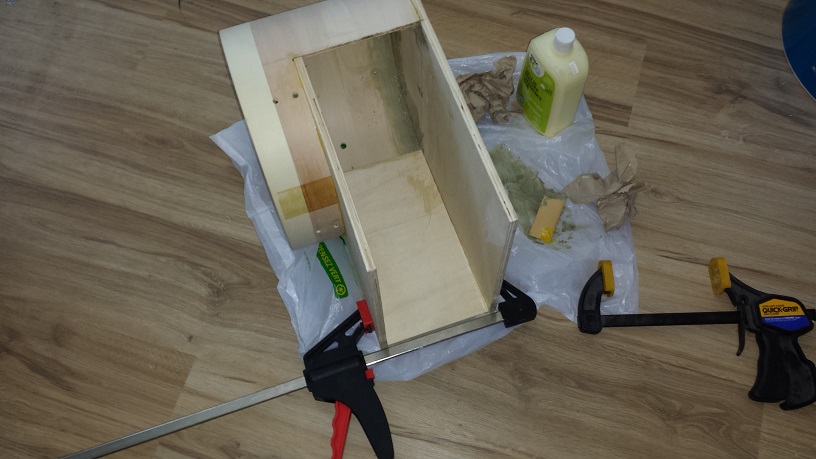
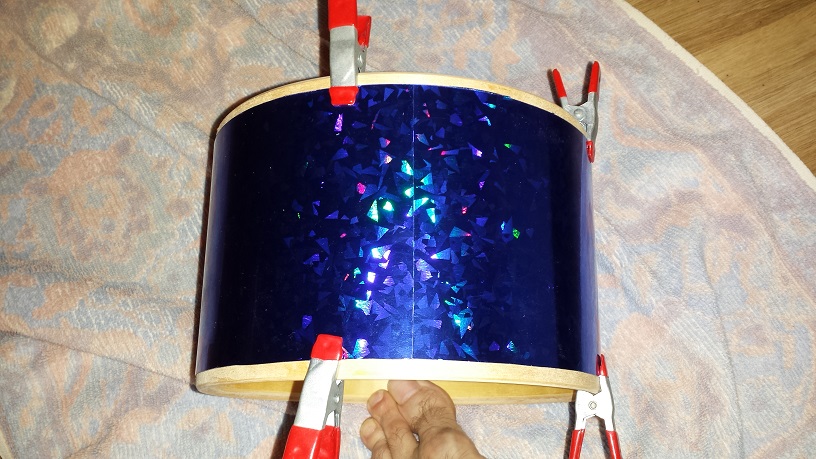
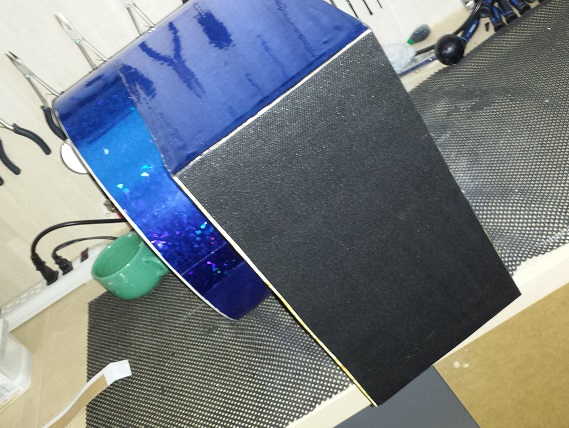
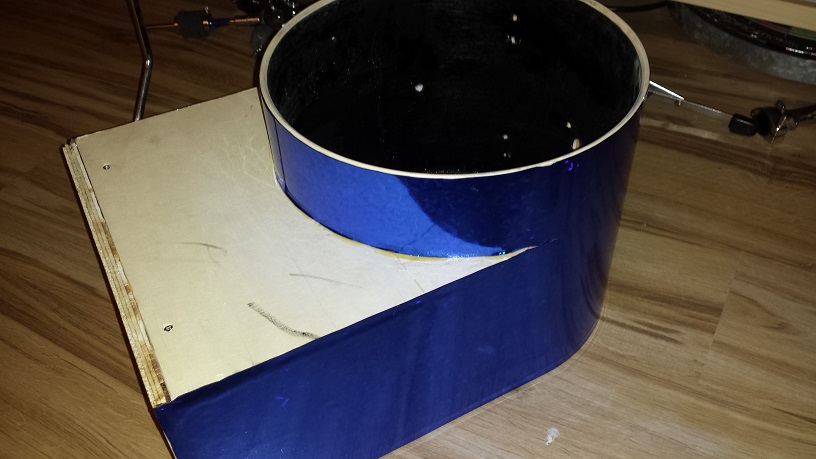
Moving on to the sides. Using the now even more bizarre contraption as a template, place the whole thing on a sheet of plywood and mark the outline for one side. Cut out the rectangle in the table saw and test fit to ensure it’s neither too loose, nor too large as to not flare out the front and back.
Apply the glue to three sides like pouring mustard on a hot-dog. With the bizarre contraption laying with the side we are adding down, simply place the side panel in position and while pressing down both the side and the shell simultaneously against the floor, clamp the whole thing tight. This ensures that all is aligned and flush on the outside.
Since there’s no deadline involved in this project I’m going to leave this side to dry for 24 hours before moving on to the next step.
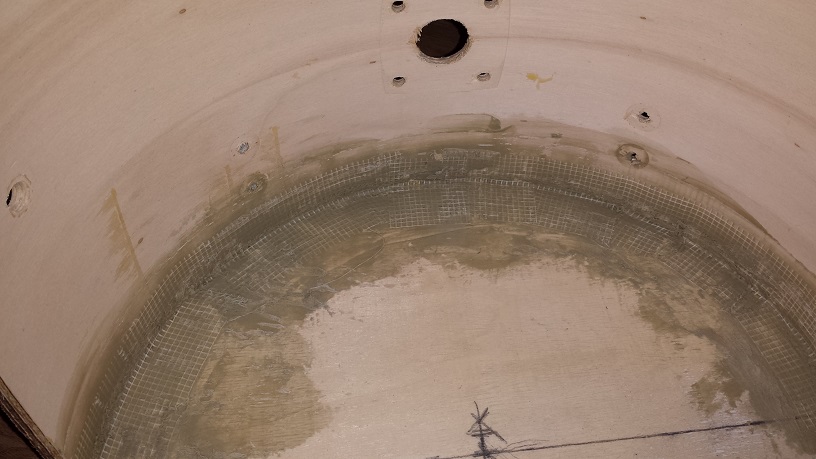
Once the glue joint is dry we move on to fibreglass reinforcement. This is done before I even remove the clamp. You may be wondering if all his reinforcing is really necessary. I mean, does a compact drum kit need to be rugged enough to meet military specs? Well, not really, but since it is intended to be portable it is prone to get dropped and dinged. I wouldn’t want the bass drum to develop a rattle down the road. Also it needs to be stiff and very solid so as to project, resonate and amplify the sound coming from the little 13″ head.
The opposite side is marked, cut and glued in place exactly in the same manner as the first side. Leave the glue to dry overnight.
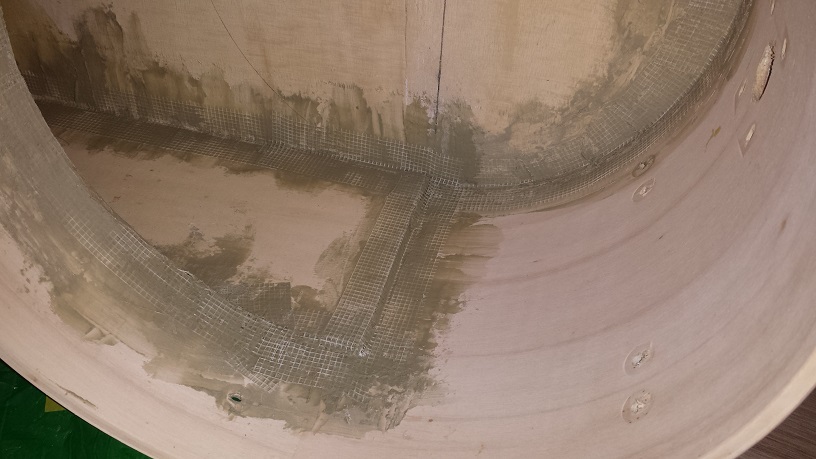
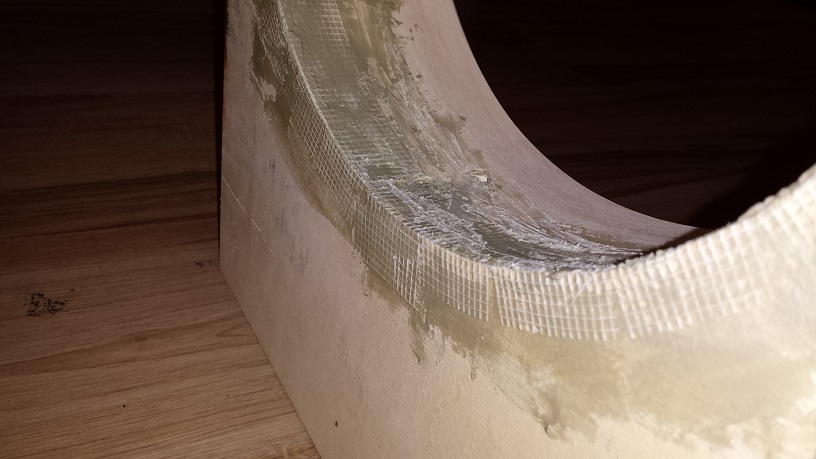
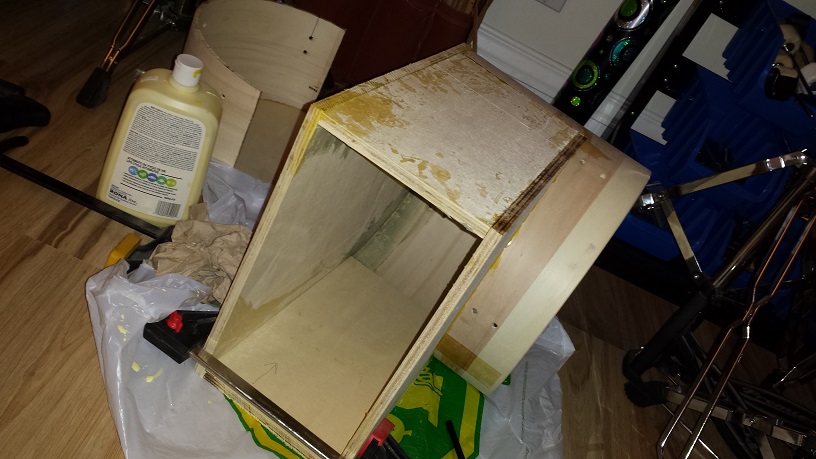
Reinforcing with fibreglass is also done in the exact same way as before except it’s a bit trickier to reach all the corners since we’ve restricted the access to the inside a bit. Even though all four sides line up at the bottom of the “box”, I have a sneaky suspicion that it’s not entirely square. Once the bondo is dry we’ll confirm by standing it up on the slab of granite I use to check bearing edges on. If it’s uneven I’ll have to either do some shaving down of the sides or compensate with the bottom.
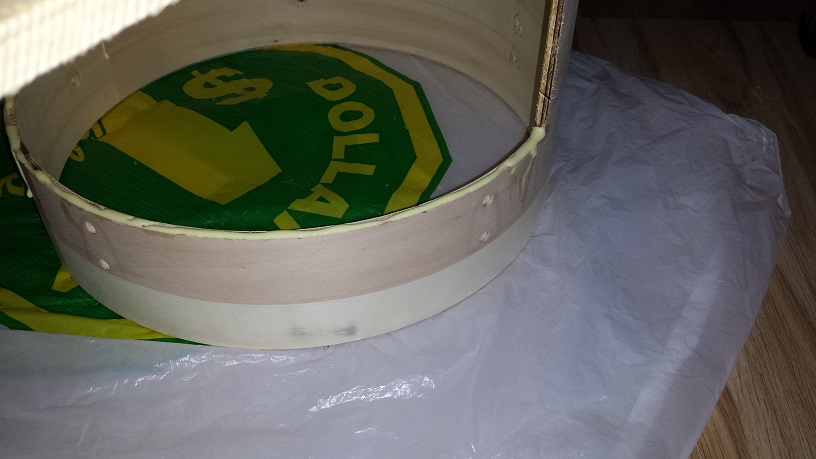
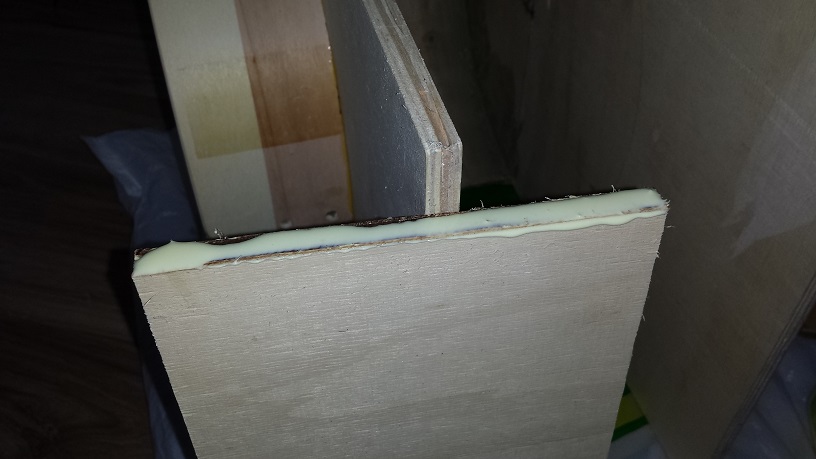
As it turns out the unevenness of the bottom edges are negligible enough that it will be even enough with a bottom installed. Before adding the bottom piece though we give the bondo a quick sanding with 90 grit, just to take the roughest parts down and smooth it a bit.
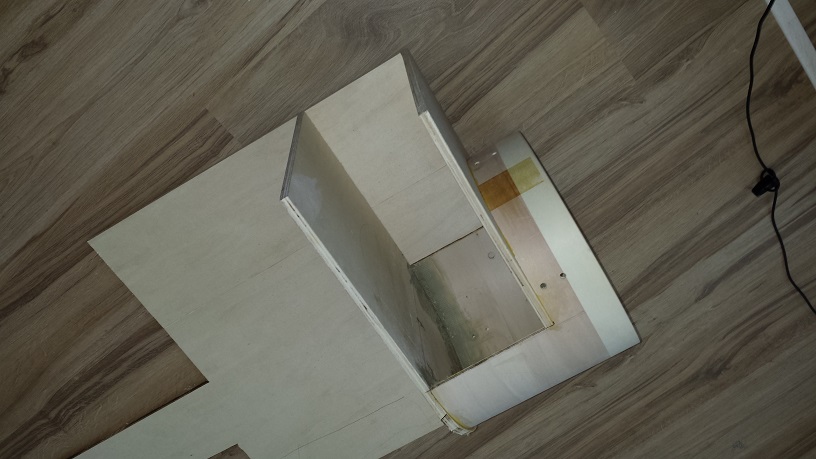
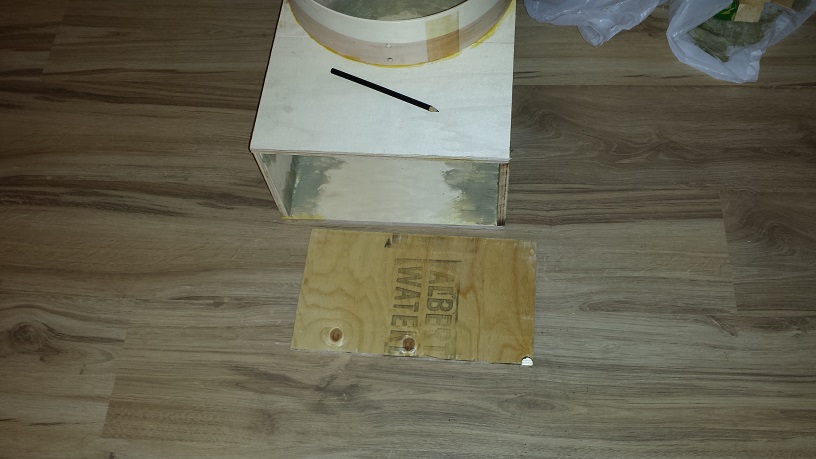
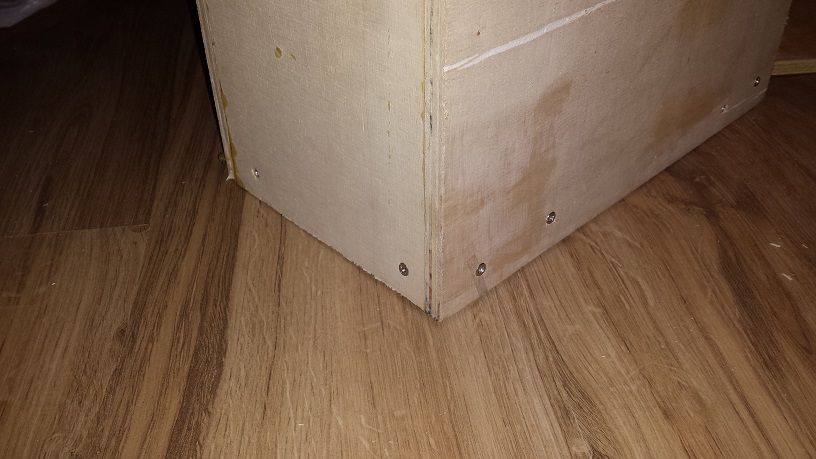
Next we use the bizarre shell as a template to mark a rectangle on the plywood and cut out the bottom. We also cut four pieces of 2″ X 2″ lumber as shown in the pic. Stack the four pieces as pictured and flip up the “drum” on top of the bottom piece.
Run a few screws threw the sides into the 2X2 pieces while holding the whole contraption straight and square. Flip the bass drum over on it’s back, (audience facing side) and run a few screws through the bottom into the four 2X2s.
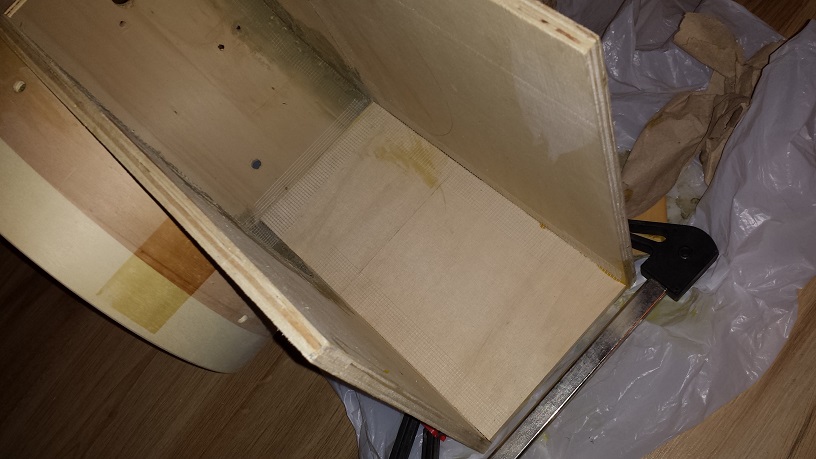
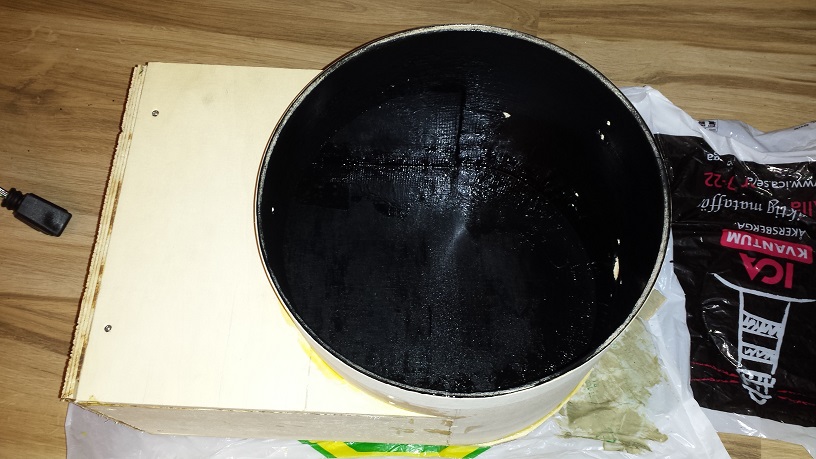
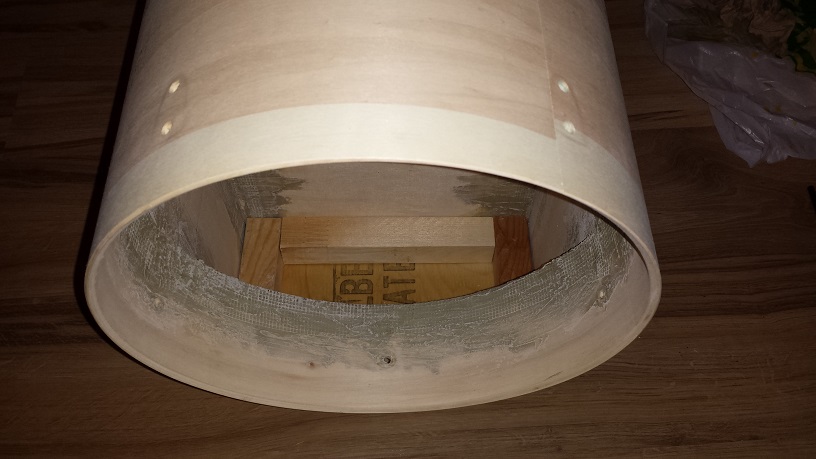
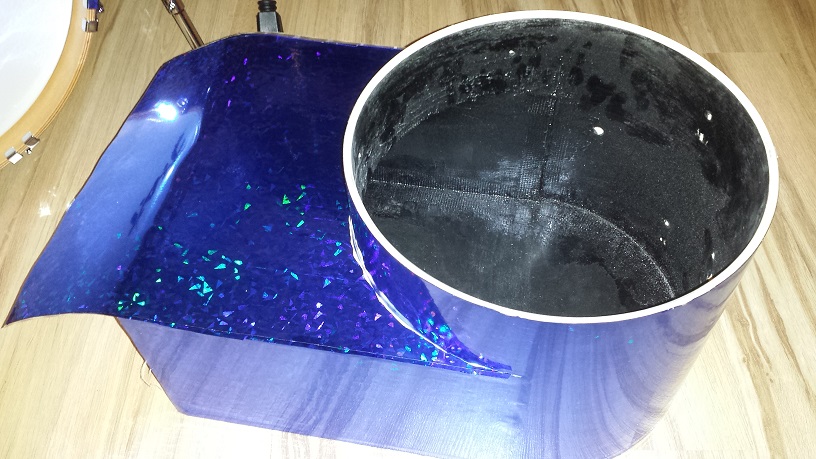
Obviously our fibreglass and bondo reinforced bass drum isn’t nearly pretty enough on the inside to pull off a clear finish like the rest of the kit. Instead I slop on a generous coat of black rust paint with a brush. This not only hides the ugly but also seals the wood and gives a harder surface layer which increases projection and “liveliness” just a smidge.
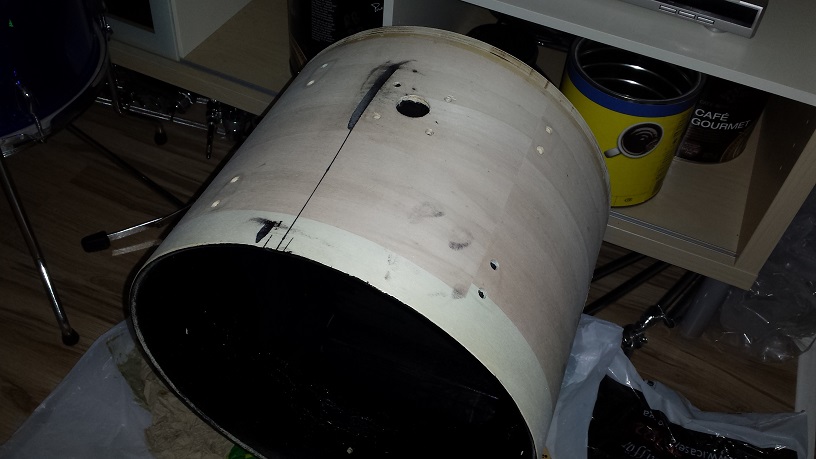
Remember the rough cut on the half-round portion of the audience facing side? Now that the whole contraption is firmly assembled into one piece we can address this with the router. Using a straight router bit with a bearing set at the height of the drum-shell, simply trim down the rough using the drum-shell part of the contraption as the router template.
At this time we also sand the entire outside of the bass drum with 60 grit paper just to remove stray paint, glue and smooth everything out a bit. I would have sanded the bearing edge at the same time, but the black paint still has a slight tackiness to it. Sanding tacky enamel is a great way to make a mess so that will have to wait until tomorrow.
Only one step remains before moving on to wrapping the bass drum and now that the black paint is finally dry we can sand the bearing edges. I start with 60 grit to remove the black paint, then 120 to smooth it over and finally 240 for creating a smooth, slick surface.


Wrapping and Assembling the Toms and Snare Drum
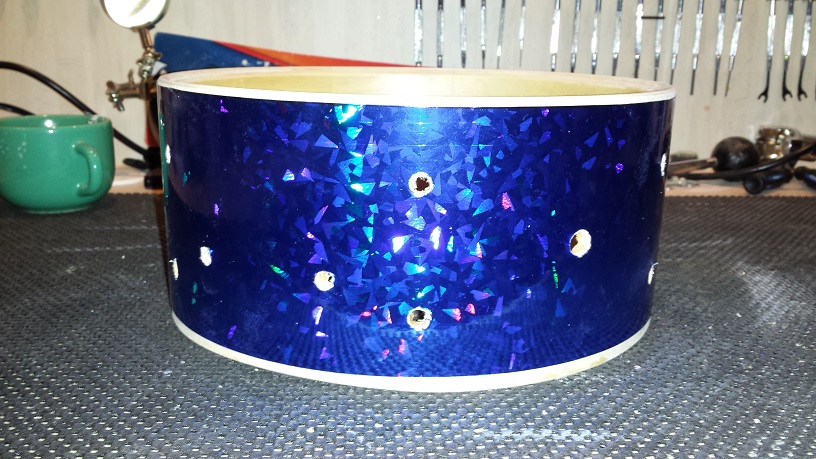
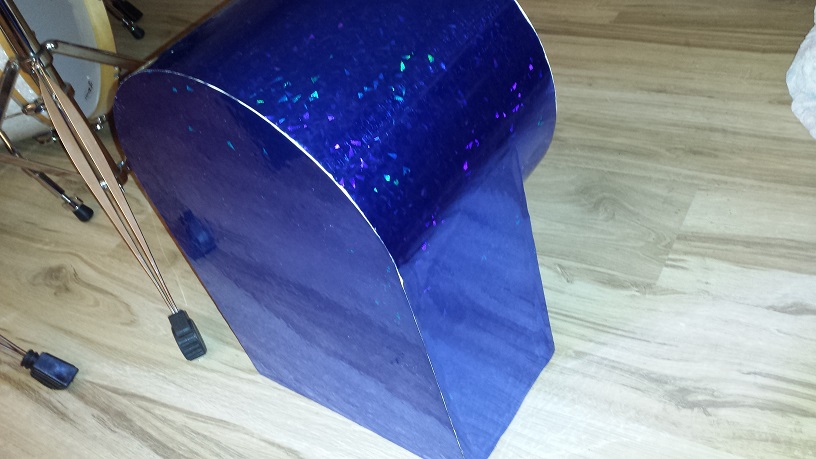
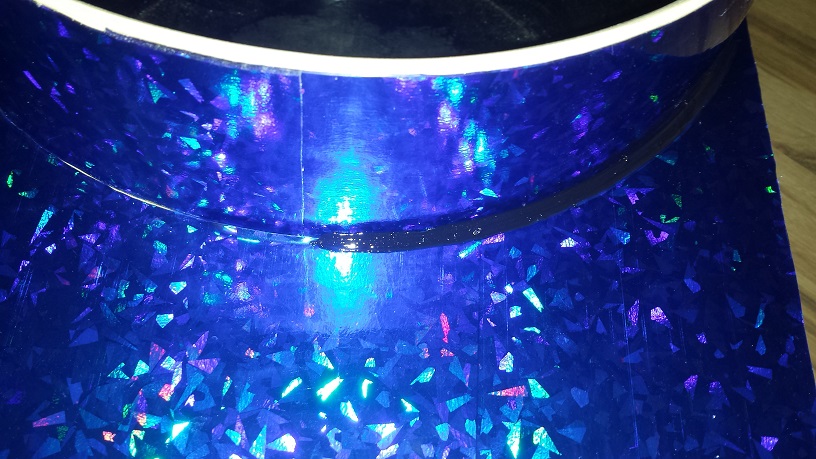
The wrap for this “Tiny DIY Drum Kit” is Walopus “Reflusions Blue Glacier Pearl“. Wrapping of the tom-tom is performed according to “Method 4” on this page; “Drum Wrap Instructions“. We make the holes using the Exacto-knife method described on the same page.
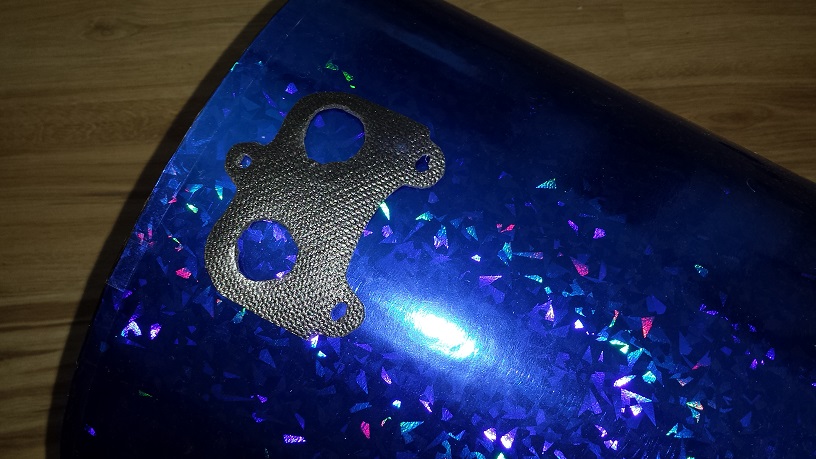
Before re-installing all the parts, the Isolation Gaskets need to be made. There are detailed instructions for the process on our “DIY Isolation Gaskets” page.
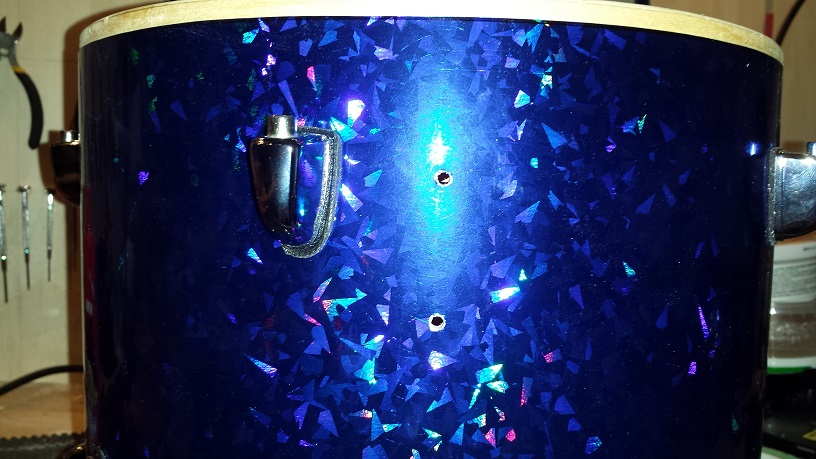
With the gaskets made we can proceed with assembly of the tom-tom. Just keep in mind not to over-tighten the lugs. The threads in the lug posts are easily stripped and sometimes even snap right off. Somewhere a bit past snug, but not quite tight is about right.
The little 10″ snare drum is next in line for the same procedure. Other than the additional strainer and butt plate the process is identical to that of the 8″ tom tom.
Wrapping the floor tom is performed in the same manner as well. Once the lugs and air vent grommet are assembled, it’s time to drill for the floor tom leg brackets.
Start with determining the positions for the brackets. Since this is a 5-lug it’s a bit more tweaking than with a 6-lug where you can just centre the leg brackets between lugs. I place these fairly low on the shell as I want to be able to use shorter than standard legs.

Once you have your positions determined, place a strip of tape at each location. Using a square draw a straight line parallel to the lug lines. Determine a distance fro the shells bottom for the lower hole and mark. Then mark the upper hole according to the distance between the holes on the bracket. Drill using a corded drill and a brad-point bit. Start from the outside and once the point pokes through on the inside, drill the remaining hole from the inside. This ensures a clean edge on both sides.
We finish up by making isolation gaskets for the leg brackets as well and installing them accordingly. Then on to the last finishing touch; Groovy Roroor badges for that goofy, yet professional and elegant snazz factor.


Wrapping the Bass Drum
Fundamentally we follow the instructions according to “Method 2” in our Drum Wrap Instructions Article. However the unorthodox shape calls for some creative solutions along the way.
After applying contact cement both to the wrap and to the “shell” we simply wrap the whole contraption from bottom of one side and all the way over to the bottom of the other side. Next we trim the excess along the back. Place it on one side and make a cut in the wrap following the edge of front corner. This leaves us with a “flap” that after cutting about an inch off, can then be wrapped around the bottom of the protruding round shell. Repeat on the other side allowing an overlap of about an inch.
Continue with the back (audience facing) side in the same manner. We attempt to trim the edge around the arched top portion as clean as possible since we then end up with a piece that fits perfectly over the last side. (Batter side). In our case the cut wasn’t as perfect as I’d like it to be, but I believe a bead of silicone caulk along the bottom edge of the shell will be in order anyway. lastly we slop on the contact cement on the remaining surface as well as the back of the wrap. and apply the last piece after allowing to dry for some 20 minutes or so. By the way I’ve been using a small paintbrush for applying the contact cement. Today the paintbrush has become the perfect tool for the job. The dried contact cement from yesterday has turned the brush into a “rubbery” spatula-like applicator which actually works better to spread the goo thin than the brush did originally.
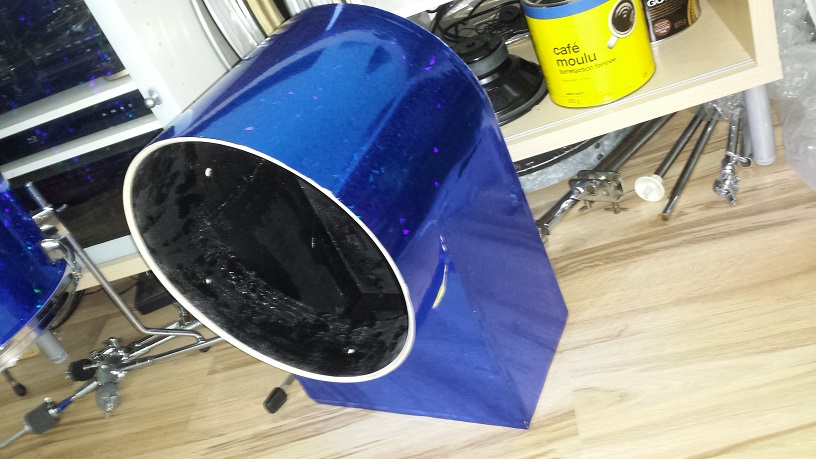
Once the batter side is trimmed the wrapping part is all wrapped-up so to speak. Well almost. Applying a sheet of non-slip drawer liner to the bottom is a bit like wrapping as well. Using the same non-slip drawer liner intended for tool chests as we use to make isolation gaskets, cut a rectangle the size of the bottom and attach with contact cement.
Since we ended up with a bit of an irregular gap between the bottom half of the drum shell arc and the flat portion beneath it we need to figure out a cosmetic fix. Black silicone caulking seems a good an idea s any. Simply apply with the caulking gun and smooth the bead over with a finger.


Assembling the Bass Drum
Once we’ve selected a suitable tom mounting platform and made an ISO gasket for it, we can use this gasket as a template to mark for drilling. The smaller holes are drilled as before with a brad point bit, the larger holes are drilled in the same manner but at substantially slower speed and with a 7/8″ spade bit.
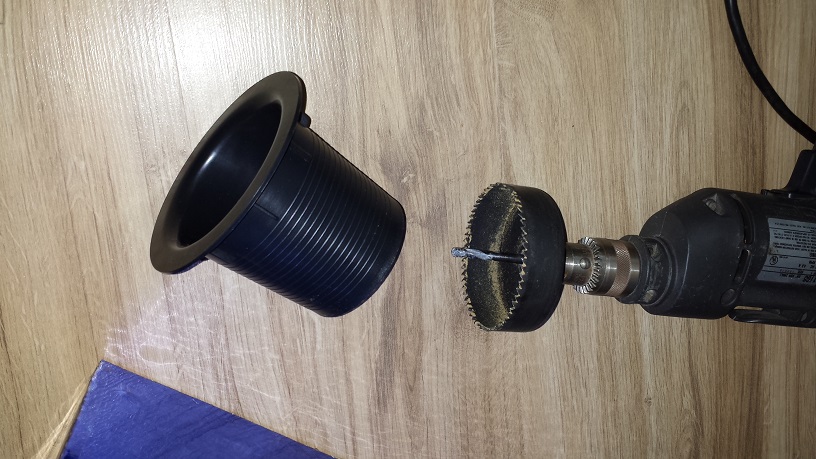
We also need to make a large hole for the sub-woofer vent port. The one we’re using is 3.5″ diameter X 4″ deep. I have been advised to use this size in order to get as close to a 18″ diameter bass drum sound as possible. The diameter of the port, as well as the depth, volume of enclosure and diameter of drum head are all tied together. Other dimensions of vent ports can be used too but will produce different results. With our enclosure and head size this port is supposed to enhance the sound around the 50 Hz frequency range. This is lower than the fundamental pitch of an 18″ but when blended with the fundamental pitch of the 13″ head should get close. I’m anxious to find out and am sceptical myself.
I just use one of those hole-saw kits to make the hole. Once bored out I make little marks around the perimeter for the little “flanges” on the port.
Using a small hack-saw I cut little slots for the aforementioned flanges. Test-fit to ensure that the pieces go together, then slop some “gel” type super glue on both parts and then press together and leave to dry for a couple of hours. I use the gel type super glue so it doesn’t stat drying before I get everything in place. A multitude of adhesives could be used for this purpose though. I just happened to have the super glue handy.
Looks like I’ll have to go back and paint a bit more black on the inside. I didn’t think about the vent port when I was painting before. Oops.
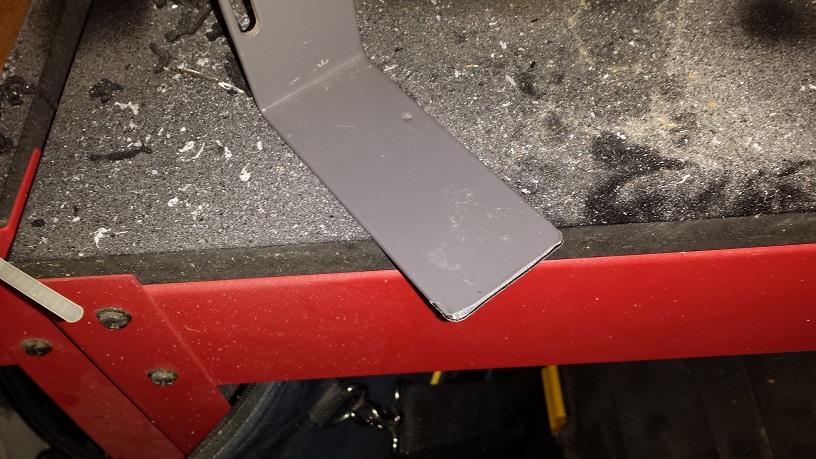
Next we need to construct a way to attach the pedal. Any L-bracket with one side long enough to reach about the same distance from the bearing edge as a hoop would end up will suffice. I’m using a bracket that’s way too long, which is easily rectified with the angle grinder. Simply place the bracket at the edge of the shell and mark about where a hoop’s edge wood be. Lop it off and then smooth the edges. I used the bench grinder but a file would do the job too.
Mount the bracket to a pedal in order to mark the cradle at the right height. Then I use a ruler to make sure to make marks that are centred. Screw the bracket in place.
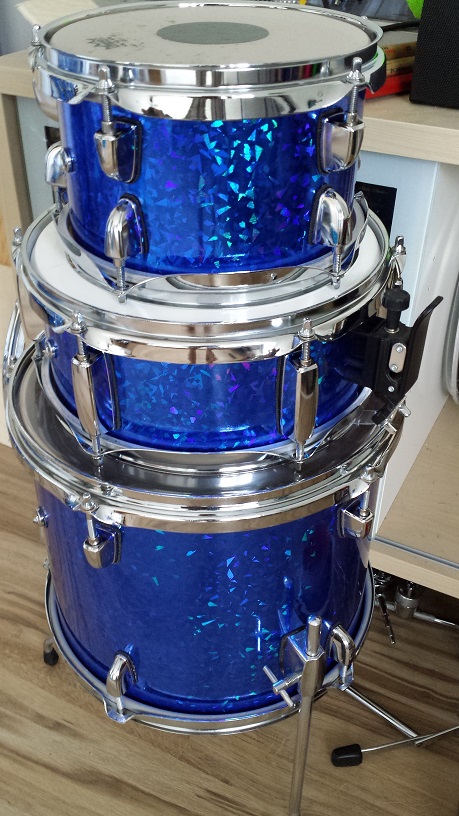
Tiny DIY Drum Kit


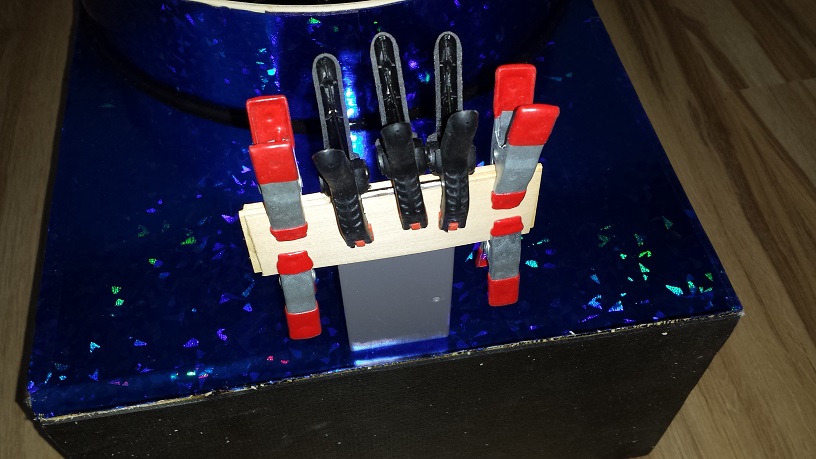
With the aid of contact cement, an addition to the pedal mount is installed. The bracket is too narrow by itself for most pedals to clamp on securely. The addition is composed of a few slats of wooden horizontal blinds strategically cut. A piece of metal, or other wood could also be used.
Simply apply the contact cement, allow to dry for 15 minutes or so, then assemble and clamp. Leave undisturbed for a few hours to fully cure.
We’re on the homestretch. After making a few more ISO gaskets and installing the lugs all that remains is finding a suitable head. I’ll try a Pinstripe first. You can’t exactly buy 13″ bass drum heads. It should work out OK with the addition of a piece of craft foam in the strike-zone.

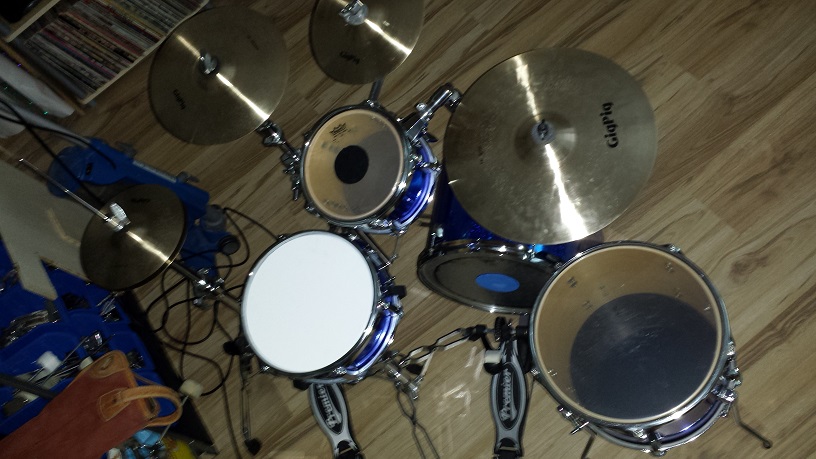

Well if you suffered through this entire article with me, you’re probably wondering how that weird little bass-drum contraption sounds. Does it really resemble an 18″? The short answer is…. no, it doesn’t. It does sound surprisingly deep for it’s size, maybe even with the frequency range of an 18″ but not with the depth and fullness. The easiest way to describe it is too small a subwoofer being cranked too loud with hip-hop. I’ll try some other heads and tweaks with padding and see what can be done.
I rigged it up with the GigPig small Cymbal Pack. (Reviewed here) and gave it a whirl. It’s a lot of fun to pay and actually sounds way better than the oddball looks suggest. I had an opportunity to hear it from the audience side as well and the bass drum sounds a whole lot better than it does from the driver’s seat. A few tweaks with tuning and maybe a different head with some felt and it might pass for a “real” bass drum. Right now it has too much sharp attack and not enough bOoOoOm.