Introduction
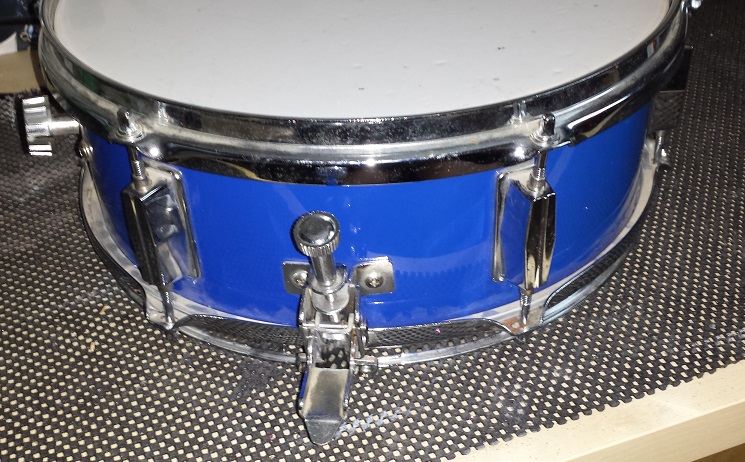

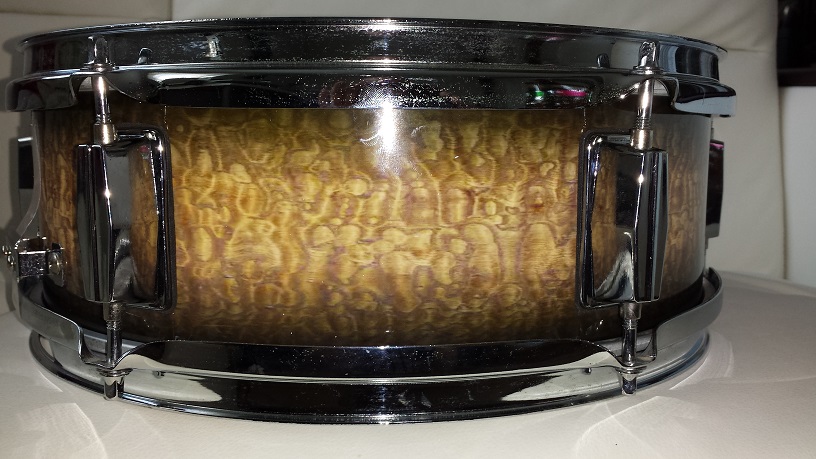
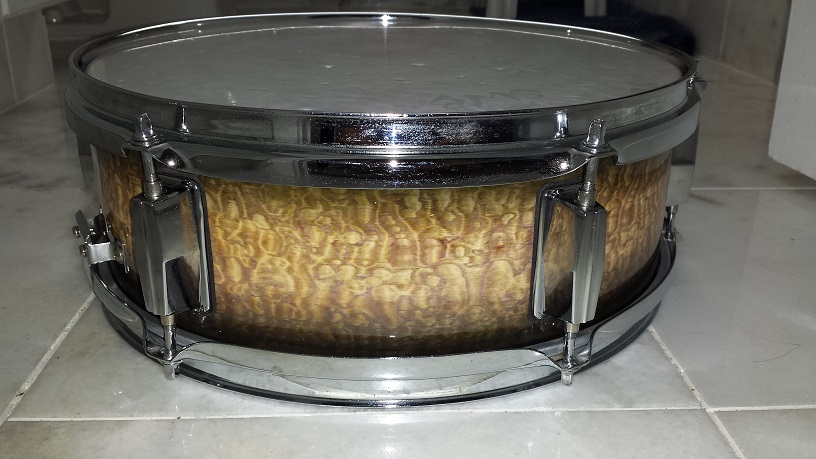
The “Lewd Rhythm Ripper”, an upcoming DIY Jungle-kit project is going to require a snare drum. An expedition through the challenging obstacle course in the deepest, most remote corner of the basement yielded the perfect candidate for this DIY Snare Drum “Restomization”. The 13″ X 4-3/4″ shell is wrapped in plain blue, with traditional Pearl-style “coffin” lugs, nice, heavy rims and a neat, kind of unusual throw-off.
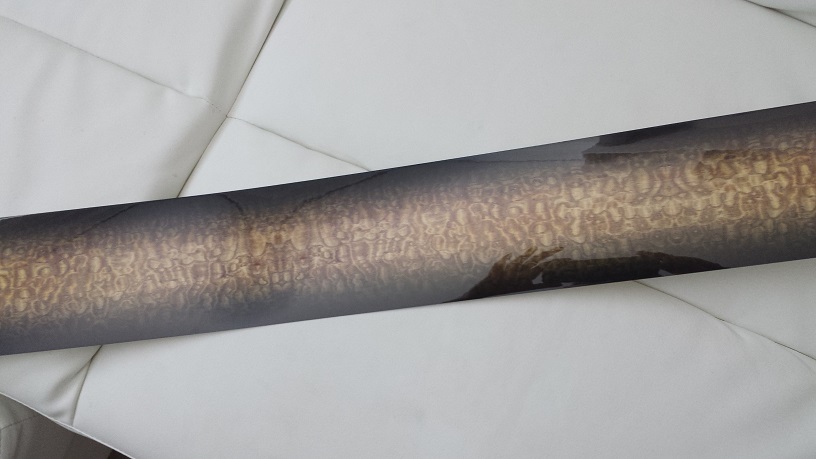
The plan is to strip it down to the bare shell, seal, paint and clear coat the inside, shorten the depth by 1/4″, and cut new bearing edges. The throw-off is more or less stuck, requiring some servicing or a complete rebuild. Whether to clean up and use the lugs or replace them is undecided. Before final assembly we’ll wrap it with a real nifty wood fade wrap from Bum Wrap Drum Co.
Goal: A Restored, Customized and Optimized DIY snare drum worthy of the “Lewd Rhythm Ripper”.
– Click any image for a full-size view –
Step 1 – Stripping the Shell
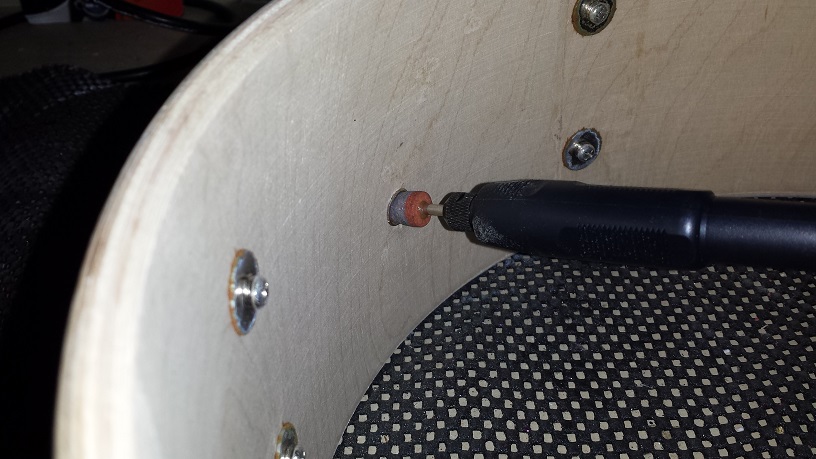
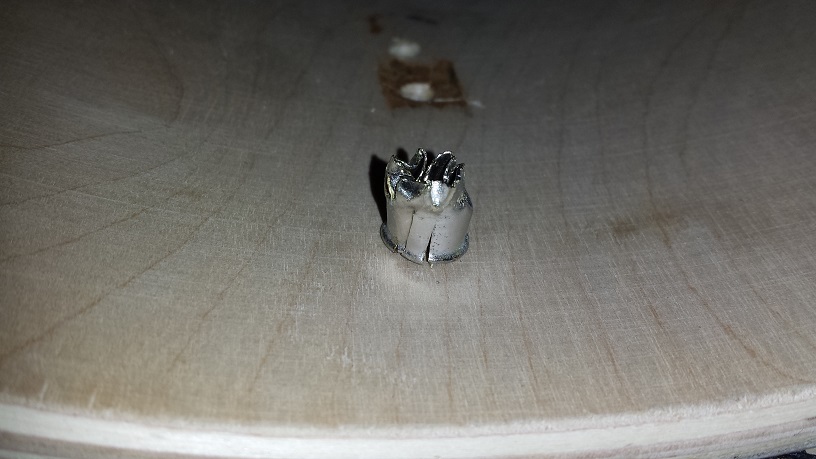
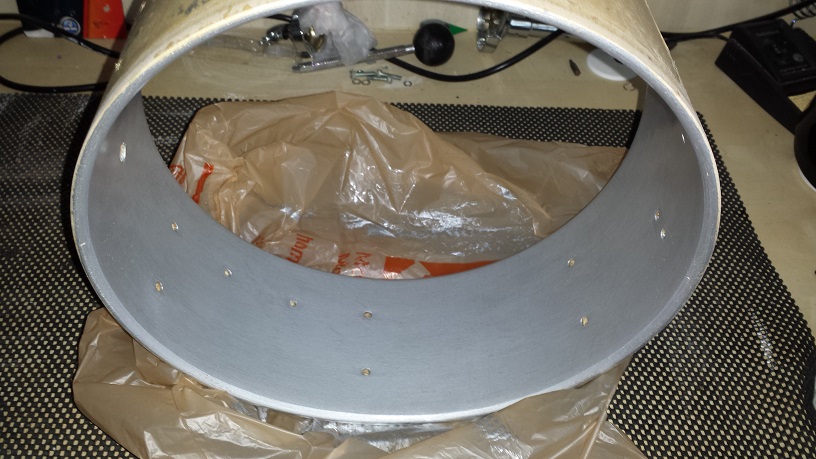
Usually I start with removing the snare wires and tucking them away in a drawer. Depending on how long the project takes, I may or may not remember where they are when assembly time comes around. Next I mark an old coffee can with a suitable label. The pieces come off the drum and into the can in this order: T-rods, (rims go on a hook on the wall, damper goes in the trash can.), butt-plate, strainer, lugs. For what seems like an entry-level snare, the air-vent grommet is quite sturdy and of the inside-flare type. After grinding down the flair with a dremel-type tool, the grommet usually pops right out with the aid of a 6 mm socket. This one however is glued as well and required complete and utter mutilation to remove.
Another expectation of entry level drums is the wrap is usually only adhered at the leading and trailing edge. After prying up the edge at the seam and giving it a good tug, this proved not to be the case. Instead I use the heat gun to heat up a section of a few inches at a time, then pulling it off. Heat, pull, heat, pull, heat pull. The shell is now naked.
Step 2 – Sealing and Coating
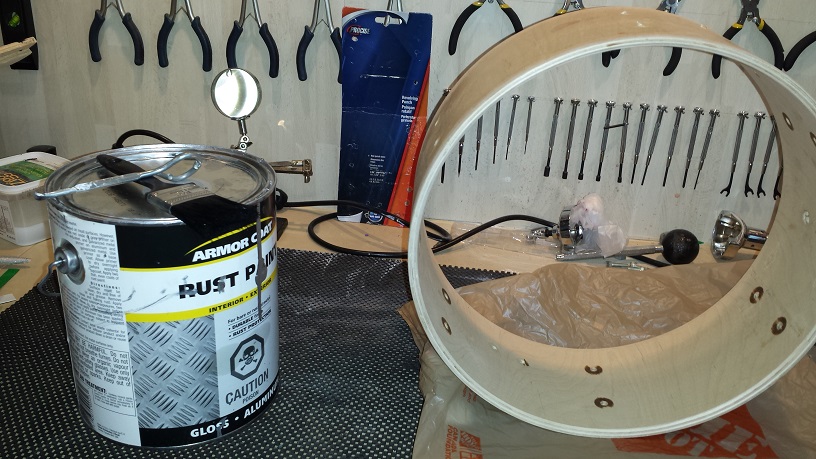
After a quick wipe-down with Naphtha the shell is ready for interior coating. In the spirit of Gretsch we’ll go with a silver inside. I use aluminum gloss rust paint for the sealer. A brush is the chosen weapon, although I don’t really paint it on, but rather use the brush to rub it into the wood. Since the first coat soaks into the wood it dries pretty fast and we can apply a second coat after only a couple of hours. Let the second coat dry over night. Last we apply two-three coats of gloss water based polyurethane.
Step 3 – Bearing Edges
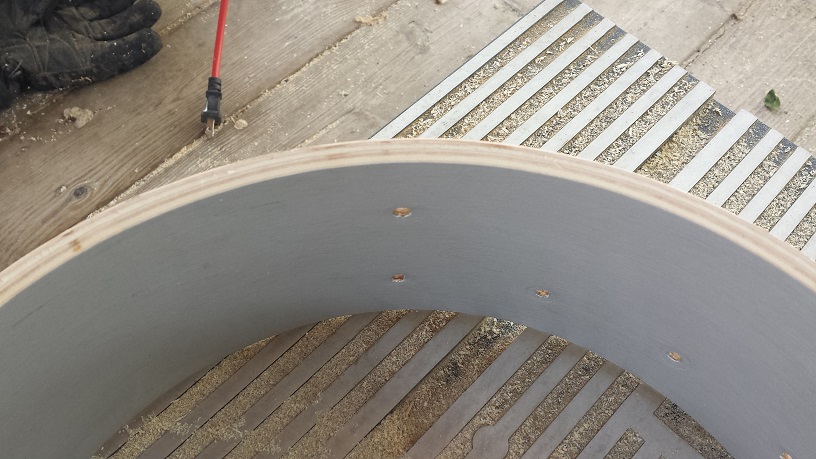
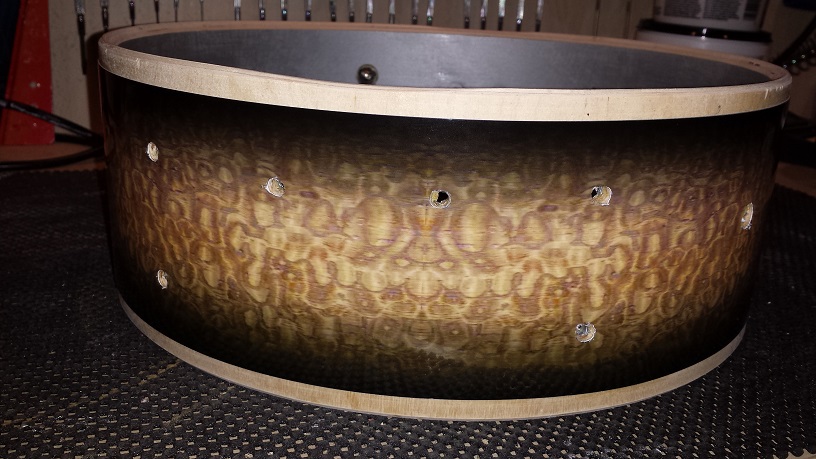
This snare drum came with quite rounded over bearing edges. These are destined to get replaced with standard 45/45 edges. Since we also plan on trimming the shell down closer to 4.5″ we’ll simply get a bit aggressive when cutting new edges. I start with setting the router bit just a “tad” higher than would be normally required. (1 “tad” = 2 “smidgeons”) Cut the inside edge on both sides, lower the bit for the outside cut, again a “tad” high and cut both outside cuts. Repeat this process until desired shell depth remains. Making these cuts incrementally is necessary to maintain the true squareness of the shell. Too much at a time and the downward spiral would produce a slope followed by a “step” at one position.
Once satisfied with the cut I follow up with 240 grit paper in a “mouse” detail sander. Start with smoothing the inside, then the outside and last take the sharpness off the peak of the bearing edge. Once you have a clean uniform and smooth bearing edge, a new snare bed will also be required since the old one was removed. I simply use the same grit paper in the sander to gently sand down a subtle depression on each side and then round over just a bit.
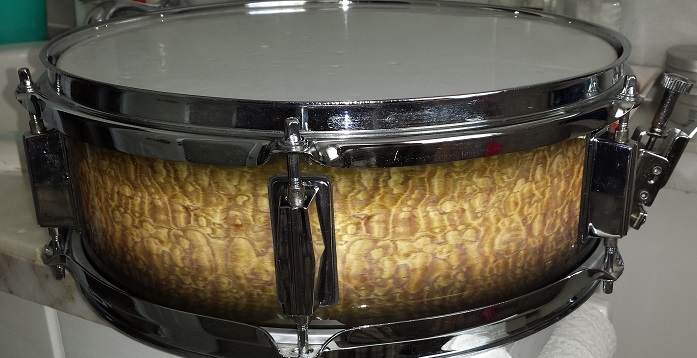
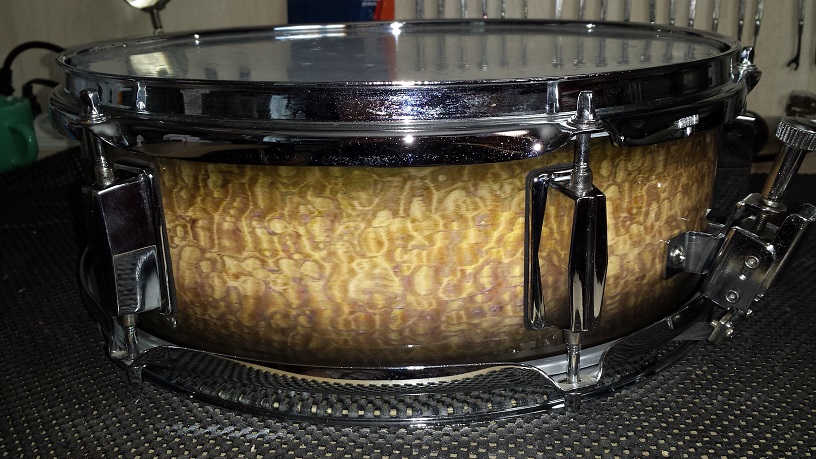
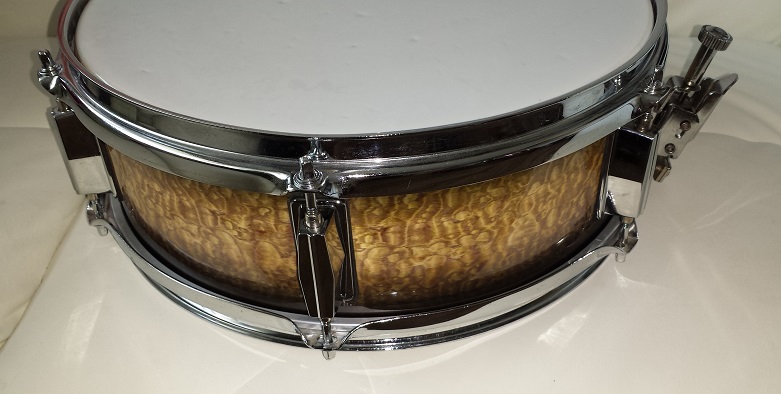
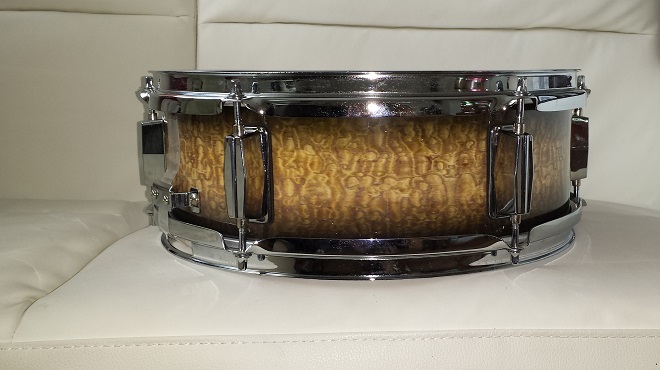
Step 4 – Wrapping up the DIY Snare Drum “Restomization”

My ears aren’t sensitive enough to make out any difference between the wrap adhered at the leading and trailing edge only, or adhered throughout the entire surface. None the less, for the snare drum at least, I feel it’s prudent to follow “best practice” and slap some glue all over the outside of the shell before wrapping.
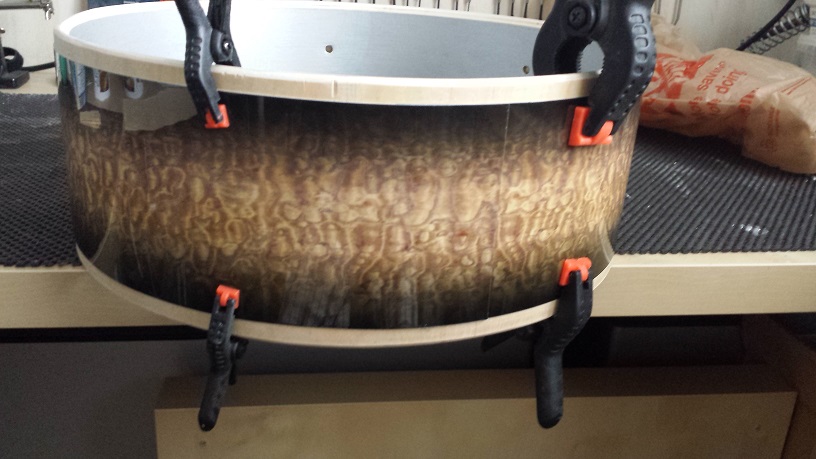
Traditionally this is done with contact cement which leaves no room for error since once the surfaces make contact, that’s it! No turning back. That scares me too much so I simply use all-purpose adhesive that can be applied wet, so as to have the ability to reposition until perfectly straight. With the glue on the shell, I clamp on the “leading edge” and wrap tight all around the shell, reposition as needed, clamp the “trailing edge” a few inches from the end, remove the liner on the adhesive strip, stretch tight and stick together. Apart from slapping on glue first, I’m following the instructions on Bum Wrap’s site, found here: http://www.bumwrapdrumco.com/install-videos/ Leave to fully cure overnight.
Step 5 – Assembly
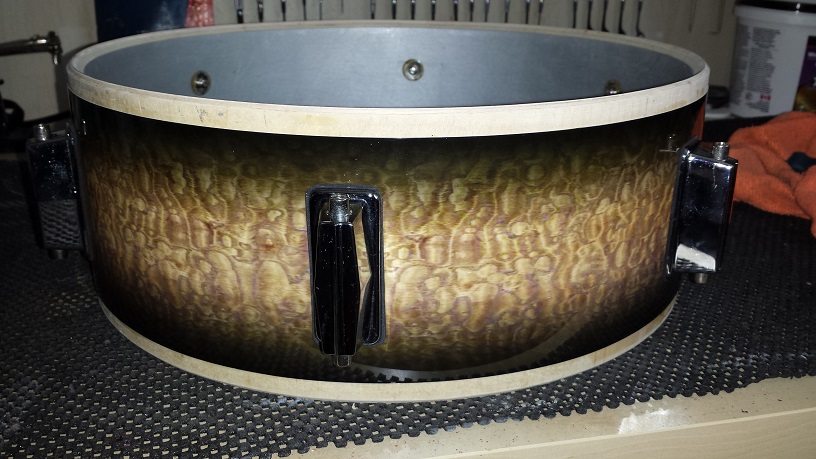
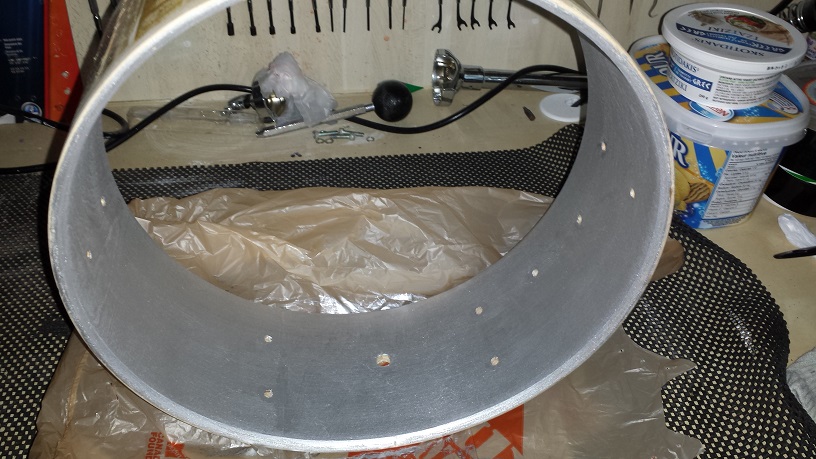
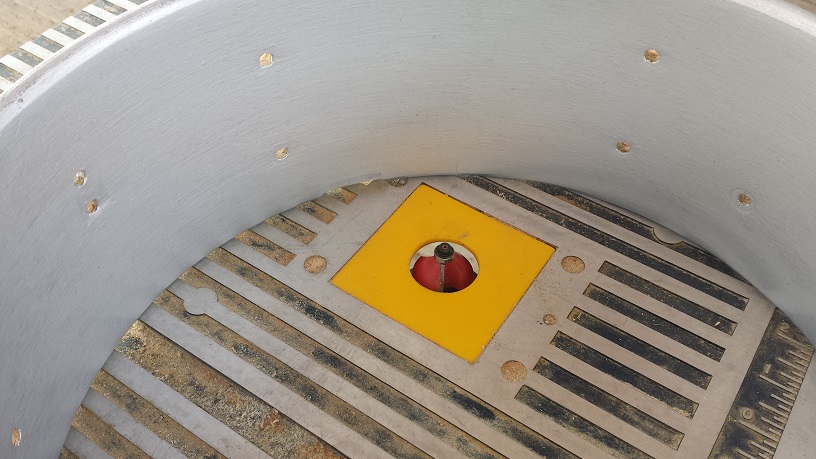
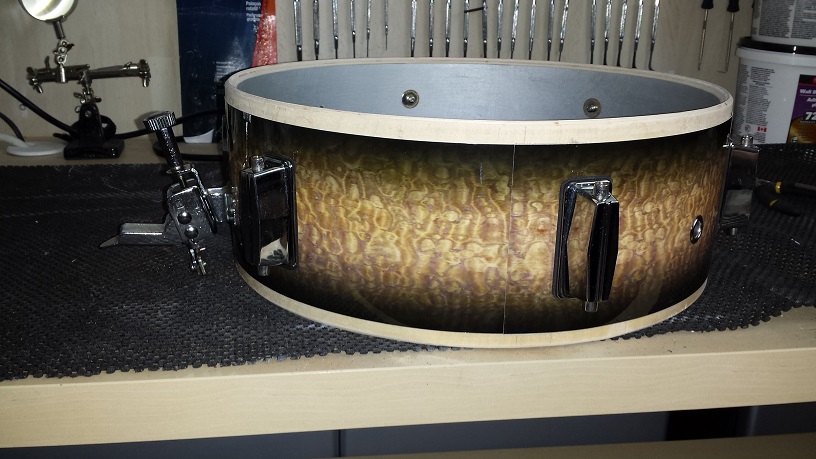
Once the adhesive holding the wrap in place is fully cured we can drill out the holes. An advantage of adhering the wrap throughout the entire surface is that it’s rock solid and firmly in place making drilling from the inside a simple process. As usual I use a corded drill at full speed to ensure clean edges of the holes. Take care to match the drill bit exactly to the size of the hole in the shell. Even if the lug posts are smaller, we don’t want the lug posts to push against the wrap.

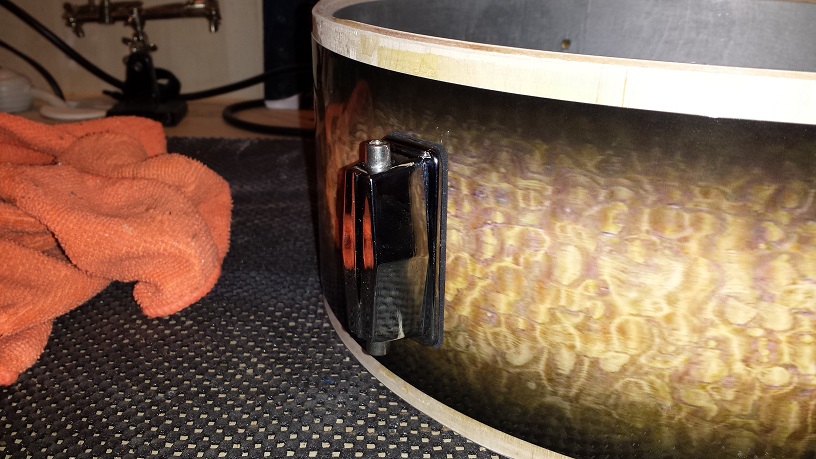
In the end we settled on traditional Pearl-style coffin lugs. Before installing the lugs, I give each one a polish with a micro-fibre cloth and stuff it with a cotton ball. To make an isolation gasket, press the lug down on a piece of craft foam. With the post indentations as guide, punch out the post holes. Slip the craft foam on the lug and cut around the edge with scissors.
When installing the lugs take care not to over-tighten. Somewhere between snug and tight is adequate. (I should find out an actual recommended torque value.)
As mentioned before the strainer was sticking and not moving smoothly. We gave it a bath in WD-40 and it’s now operating satisfactorily.
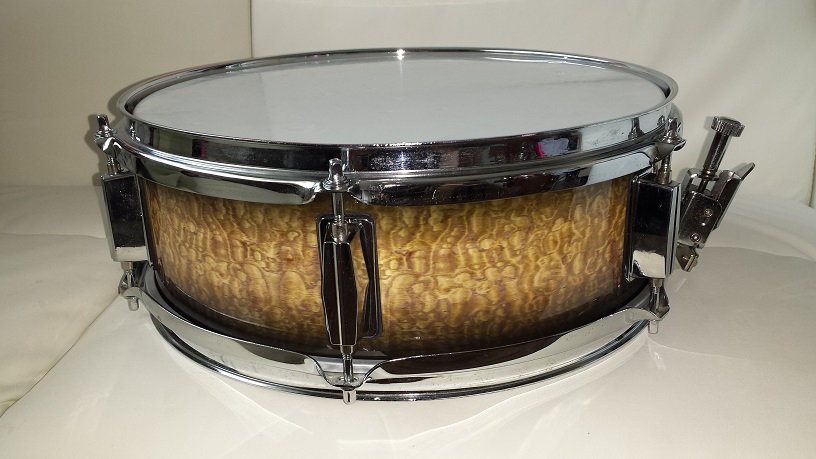
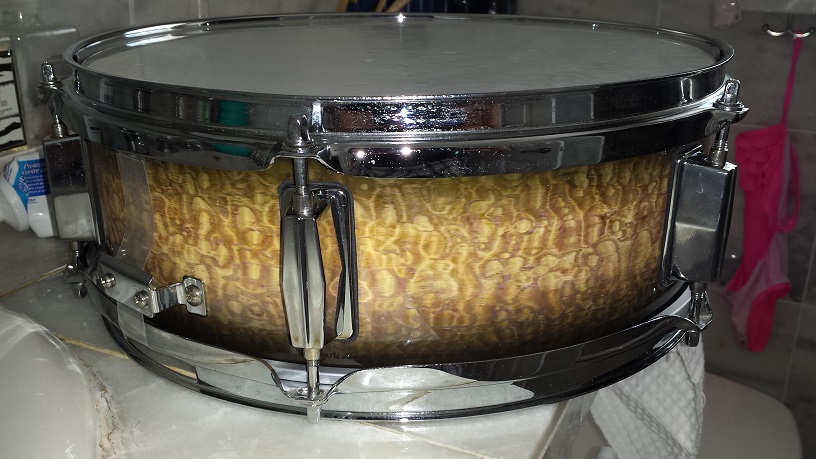
A new air vent grommet gets popped in and the strainer and butt plate installed. After giving the rims a quick spit and polish as well, the heads rims, and snare wires all get installed as well. Stand back and admire the work before a quick tuning and photo session. I’m really happy with the wrap choice. Picking one from Bum Wrap’s assortment isn’t easy. If it was feasible I’d make a drum kit with just about every design they offer.
DIY Snare Drum “Restomization”